Panasonic EY7442 Service Manual
Hide thumbs
Also See for EY7442:
- Operating instructions manual (120 pages) ,
- Operating instructions manual (113 pages) ,
- Operating instructions manual (14 pages)
Advertisement
Quick Links
Cordless Drill & Driver / Cordless Hammer Drill & Driver
TABLE OF CONTENTS
1 Warning -------------------------------------------------------------- 2
2 Specifications ----------------------------------------------------- 2
3 Troubleshooting Guide ----------------------------------------- 3
4 Disassembly and Assembly Instructions ---------------- 8
5 Wiring Connection Diagram ---------------------------------16
6 Schematic Diagram ---------------------------------------------17
7 Exploded View and Replacement Parts List -----------18
Model No.
Model No.
Europe and Oceania
PAGE
© Panasonic Electric Works Co., Ltd. 2011.
All rights reserved. Unauthorized copying and distri-
bution is a violation of law.
Order Number PTD1103X35CE
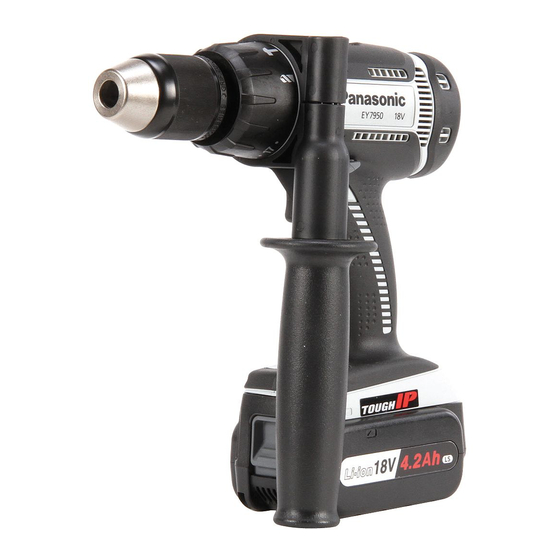
EY7442
EY7450
(Cordless Drill & Driver)
EY7950
(Cordless Hammer Drill
& Driver)
PAGE
Advertisement

Related Manuals for Panasonic EY7442


Summary of Contents for Panasonic EY7442
-
Page 1: Table Of Contents
4 Disassembly and Assembly Instructions ---------------- 8 5 Wiring Connection Diagram ---------------------------------16 6 Schematic Diagram ---------------------------------------------17 7 Exploded View and Replacement Parts List -----------18 © Panasonic Electric Works Co., Ltd. 2011. All rights reserved. Unauthorized copying and distri- bution is a violation of law. -
Page 2: Warning
1 Warning Caution: • Pb free solder has a higher melting point that standard solder; Typical the melting point is 50 - 70°F (30 - 40°C) higher. Please use a soldering iron with temperature control and adjust it to 750 ± 20°F (400 ± 10°C). In case of using high temperature solder- ing iron, please be careful not to heat too long. -
Page 3: Troubleshooting Guide
3 Troubleshooting Guide (Refer to Wiring Connection Diagram) - Page 7 3.1. Trial Operation (after checking Troubleshooting Guide.) 3.1.1. ASSEMBLY 1. Confirm if there is NO gap between Housing A and B by pinching the lead wires. 2. Confirm all screws are tightened firmly. 3. There should be no metallic sound and abnormal sound. 4.
-
Page 8: Disassembly And Assembly Instructions
4 Disassembly and Assembly Instructions Ref. No. 1A Procedure 1A Removal of Keyless chuck. NOTE: When attaching or removing a bit, disconnect battery pack from tool. 1. Set the clutch handle to position and select “LOW” position. 2. Turn the lock collar counterclockwise (looking from the front) to open the chuck jaws. - Page 9 Procedure 2A → 2B→ 2C Ref. No. 2C Removal of Motor screw. 1. Remove 2 screws. Procedure 2A → 2B → 2C → 2D Ref. No. 2D Removal of Switch and Driving block. 1. Take out the switch assembly. 2. Take out the driving block. 3.
- Page 10 Procedure 2A → 2B → 2C→ 2D → 2E Ref. No. 2E Removal of Motor brush assembly. 1. Hitch the brush spring to the groove of holder by something like forceps and separate the motor brush assembly from commutator. 2. Take out the motor brush assembly from the motor case. Procedure 2A →...
- Page 11 Procedure 2A → 2B → 2C→ 2D → 2E → 2F → Ref. No. 2G Removal or attachment of Gear box block. (Removal) 1. Turn the thrust plate to remove. 2. The internal parts of gear box block can be removed one after another.
- Page 12 Assembly of Adjusting screw and Clutch handle. 2G → 2H for EY7442 and EY7450 1. Hold the driving block with the click spring on top, and align the smallest projection of adjusting screw with 45° right side of the clutch case.
- Page 13 Ref. No. 2H-2 Procedure 2A → 2B → 2C → 2D → 2E → 2F→ Assembly of Adjusting screw and Clutch handle. 2G → 2H for EY7950 1. Hold the driving block with the click spring on top, and align the mark of adjusting screw with the bottom of the clutch case.
- Page 14 Ref. No. 2J-1 Procedure 2A → 2B → 2C → 2D → 2E → 2F→ Assembly of Driving block. 2G → 2H→ 2I→ 2J (for EY7442 and EY7450)
- Page 15 Ref. No. 2J-2 Procedure 2A → 2B → 2C → 2D → 2E → 2F→ Assembly of Driving block. 2G → 2H→ 2I→ 2J (for EY7950)
-
Page 16: Wiring Connection Diagram
5 Wiring Connection Diagram... -
Page 17: Schematic Diagram
6 Schematic Diagram 6.1. EY7442 6.2. EY7450 6.3. EY7950... -
Page 18: Exploded View And Replacement Parts List
7 Exploded View and Replacement Parts List Model No. : EY7442 Exploded View for EY7442... - Page 19 Model No. : EY7442 Parts List Ref. Safety Part No. Part Name & Description Q'ty Remarks EY7442 WEY7442K3078 HOUSING AB SET 1 (for Europe) WEY7442K3079 HOUSING AB SET 1 (for Oceania) WEY6450L6806 CHUCK FASTENING SCREW WEY7441K7917 KEYLESS CHUCK WEY7442H3227 CLUTCH HANDLE...
- Page 20 Model No. : EY7450 Exploded View for EY7450...
- Page 21 Model No. : EY7450 Parts List Ref. Safety Part No. Part Name & Description Q'ty Remarks EY7450 WEY7450K3079 HOUSING AB SET 1 (for Europe) WEY7450K3070 HOUSING AB SET 1 (for Oceania) WEY6450L6806 CHUCK FASTENING SCREW WEY7441K7917 KEYLESS CHUCK WEY7442H3227 CLUTCH HANDLE WEY7460L0637 ADJUSTING SCREW WEY7442L0177...
- Page 22 Model No. : EY7950 Exploded View for EY7950...
- Page 23 Model No. : EY7950 Parts List Ref. Safety Part No. Part Name & Description Q'ty Remarks EY7950 WEY7950K3079 HOUSING AB SET 1 (for Europe) WEY7950K3070 HOUSING AB SET 1 (for Oceania) WEY7950L6808 CHUCK FASTENING SCREW WEY7950K7918 KEYLESS CHUCK WEY7950K3227 CLUTCH HANDLE WEY7442L1427 RING GEAR WEY7442L1117...