Table of Contents
Advertisement
Advertisement
Table of Contents

Related Manuals for Yamaha AVX-S30


Summary of Contents for Yamaha AVX-S30
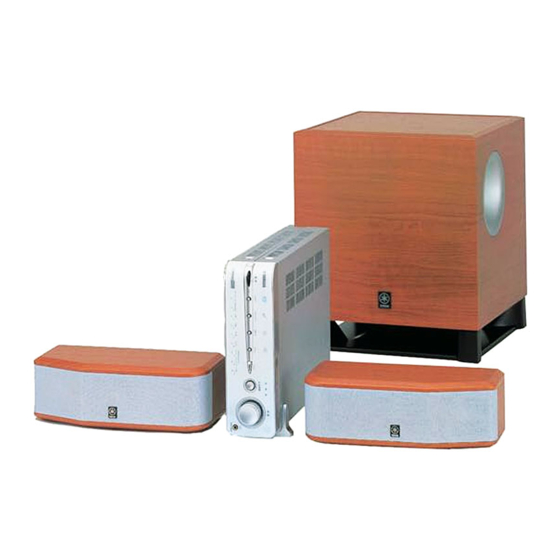
- Page 1 HOME THEATER SOUND SYSTEM AVX-S30 (AVC-S30 + NX-S30 + NX-SW30) OWNER’S MANUAL...
- Page 2 The plug severed from the mains lead must be destroyed, as a fire, damage to this unit, and/or personal injury. YAMAHA will plug with bared flexible cord is hazardous if engaged in a live not be held responsible for any damage resulting from use of this socket outlet.
-
Page 3: Table Of Contents
■ About this manual • This manual provides information relevant only to the YAMAHA Home Theater Sound System “AVX-S30”. For information on the DVD player “DVD-S30”, refer to the “DVD-S30 OWNER’S MANUAL”. For information on other AV components, refer to the manual for that product. -
Page 4: Preparation
1 set (4 pieces) x 2 sets (8 pieces) HOME THEATER SOUND SYSTEM AVX-S30 (AVC-S30 + NX-S30 + NX-SW30) OWNER’S MANUAL You can place the amplifier vertically (STANDBY/ON becomes the top and VOLUME becomes the bottom as the diagram below) using the supplied amplifier stands. -
Page 5: Controls And Functions
PREPARATION Controls and Functions ■ Front panel VOLUME INPUT STANDBY/ON MOVIE MUSIC SPORTS GAME MODE Pro Logic II qDigital NIGHT AUTO MOVIE MUSIC SILENT CINEMA STANDBY/ON Input indicator Turn this unit on or set it to the standby mode. Lights up the input number currently selected. VOLUME While the unit is in the standby mode, the unit consumes a small Adjusts the overall volume level. -
Page 6: Remote Control
PREPARATION ■ Remote control You can control both the AV amplifier (AVC-S30) and DVD player (DVD-S30) with the supplied remote control. Read the following for the function of each button. (The buttons shaded in the illustration below are used to control the DVD- S30. - Page 7 PREPARATION SUBTITLE NIGHT Selects the subtitle language of the DVD video while Turns on/off the Night Listening mode. (page 14) operating the DVD-S30. INPUT buttons AUDIO Select an input source. Selects the audio language of the DVD video or the audio L/R buttons channel setting of the VCD and SVCD while operating the While a test tone is output, press L to set the orientation of...
-
Page 8: Placing The Speakers
Main roles: Produces front channel (stereo) sounds. Also produces center channel sounds (dialogues or vocal sounds) and surround channel sounds effectively using the Yamaha Air Surround system. Subwoofer (NX-SW30) Place the subwoofer near a front speaker and turn it slightly toward the center of the room to reduce wall reflections. -
Page 9: Placing The Satellite Speakers
• When connecting the speakers, fix the speaker cables in place so that cables do not loosen. If your foot or hand accidentally gets caught on a loose speaker cable, the speaker may fall. • After attaching each speaker, check that the speaker is fixed securely. YAMAHA will bear no responsibility for any accidents caused by improper installations. -
Page 10: Connecting The Speakers
PREPARATION Connecting the Speakers Follow the procedure below to connect the satellite speakers (NX-S30) and subwoofer (NX-SW30) to the AV amplifier (AVC-S30). Notes • Do not connect the power cables of the AV amplifier and subwoofer until all cable connections are completed. •... -
Page 11: Connecting External Components
PREPARATION Connecting External Components The AV amplifier “AVC-S30” has four input jacks (optical digital x 2, coaxial digital x 1, analog x 1). Before connecting your external components to the AV amplifier, check the output jacks of the components and be sure to use correct connection cables. -
Page 12: Analog Connection
PREPARATION ■ Analog connection Note Do not connect the power cables of the AV amplifier and external components until all cable connections are completed. TV (monitor) VIDEO INPUT Video pin cable (commercially To AC outlet available) VCR etc. INPUT SPEAKERS SPEAKER IMPEDANCE:6ΩMIN. -
Page 13: Using The Remote Control
PREPARATION Using the Remote Control Use the remote control within 6 m (20 feet) of the AV amplifier and point it toward the remote control sensor. Notes VOLUME INPUT STANDBY/ON MOVIE MUSIC SPORTS GAME MODE • Be careful not to spill liquid on the remote control. Pro Logic II qDigital Within 6 m... -
Page 14: Operation
OPERATION OPERATION Basic Operation Once you have finished all cable connections (pages 8-10) and remote control preparation (page 11), follow the procedure below to start from basic playback operation. Press STANDBY/ON ( This unit turns on and the indicators on the front panel light up. -
Page 15: Enjoying Sounds With Specific Speaker Channels
OPERATION Enjoying Sounds with Specific Speaker Channels The sound program features allow you to enjoy various kinds of audio such as movie or music. Please choose a program based on your listening preference, and not purely on the name of the program. This unit automatically memorizes the settings assigned to each input (1 to 4). -
Page 16: Enjoying Sounds In A Variety Of Ways
CINEMA jack on the unit, the Night Listening functions is not available. (“SILENT CINEMA”) “SILENT CINEMA” allows you to enjoy multi-speaker simulation sounds with headphones. “SILENT CINEMA” is a registered trademark of YAMAHA CORPORATION. Connect the headphones to the SILENT CINEMA jack on the unit. -
Page 17: Adjusting The Speaker Balance
CONFIGURATIONS CONFIGURATIONS Adjusting the Speaker Balance The initial speaker settings are suitable for most conditions. However, depending on room conditions or listening position, you may need to adjust the speaker balance manually. In this case, adjust the speaker balance using test tones at first. -
Page 18: Adjusting The Speaker Balance During Playback
If you feel the speaker balance is not proper during playback, follow the procedure below. This unit employs the Yamaha Air Surround system that enables the surround sound field using six speaker units built in two satellite speakers. To create better acoustic... - Page 19 CONFIGURATIONS While the Status indicator is blinking, press L Satellite speaker (L) Satellite speaker (R) repeatedly to select an orientation of the virtual left surround speaker, or press R repeatedly to select an orientation of the Press L to Press R to virtual right surround speaker.
-
Page 20: Additional Information
ADDITIONAL INFORMATION ADDITIONAL INFORMATION Status Indicator You can check the volume level or audio input signal types on the Status indicator. ■ Volume level Volume level of each speaker channel (difference based on the system volume, unit: dB) Status indicator (green) Front (L, R) –6... -
Page 21: Troubleshooting
If there is any problem with this unit, check the following items. If you cannot solve your problem with the following remedies or if your problem is not listed below, turn off and unplug this unit, then consult the nearest authorized YAMAHA dealer or service center. Problem... -
Page 22: Recommended Virtual Surround Speaker Settings
ADDITIONAL INFORMATION Recommended Virtual Surround Speaker Settings If you cannot adjust the orientation of the virtual surround speakers well (page 16), use the following information for reference. Note To create better acoustic field, you may need to change the arrangement of the satellite speakers or furniture. Satellite speaker (L) Satellite speaker (R) 0.6 m... -
Page 23: Glossary
Front surround sound system which is developed by It is an improved matrix decoding technology that Yamaha enables the surround sound field using six provides better spatiality and directionality on Dolby speaker units built in two satellite speakers. In comparison Surround programmed material;... -
Page 24: Specifications
YAMAHA ELECTRONICS (UK) LTD. YAMAHA HOUSE, 200 RICKMANSWORTH ROAD WATFORD, HERTS WD18 7GQ, ENGLAND YAMAHA SCANDINAVIA A.B. J A WETTERGRENS GATA 1, BOX 30053, 400 43 VÄSTRA FRÖLUNDA, SWEDEN YAMAHA MUSIC AUSTRALIA PTY, LTD. 17-33 MARKET ST., SOUTH MELBOURNE, 3205 VIC., AUSTRALIA...