Table of Contents
Advertisement
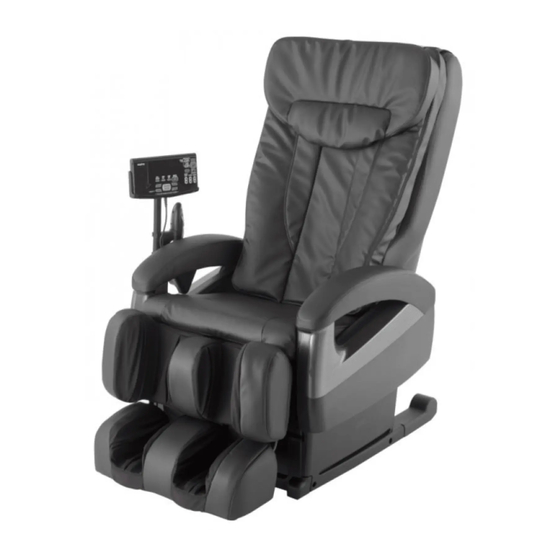
INSTRUCTION MANUAL
Chair Type Massager
Be sure to read this manual thoroughly in order to ensure
proper use. In particular, make certain to read the section
"IMPORTANT SAFETY INSTRUCTIONS."
Keep this manual in a safe place so that it can be found easily.
HEC - DR5700
CONTENTS
IMPORTANT SAFETY INSTRUCTIONS ......... 1〜4
NAME/FUNCTION OF EACH PART ......... 5〜7
HOW TO INSTALL THE STAND ..................... 9
HOW TO USE ............................................. 10
PRIOR TO USE .......................................... 11
ADJUSTMENT OF CHAIR ..................... 12〜14
MASSAGING .................................... 15〜24
WHOLE BODY SENSOR AUTOMATIC COURSES ...... 15〜17
AUTOMATIC COURSES ..................... 18〜19
MANUAL COURSES ........................... 20〜24
ADJUSTING MASSAGE INTENSITY ............ 25
AFTER USE ................................................ 26
MAINTENANCE PROCEDURES ..................... 26
CONTENTS OF MASSAGING ............... 27〜28
SPECIFICATIONS ....................................... 30
PAGE
Advertisement
Table of Contents

Related Manuals for Sanyo HEC-DR5700


Summary of Contents for Sanyo HEC-DR5700
-
Page 1: Table Of Contents
HEC - DR5700 INSTRUCTION MANUAL Chair Type Massager CONTENTS PAGE IMPORTANT SAFETY INSTRUCTIONS ……… 1〜4 NAME/FUNCTION OF EACH PART ……… 5〜7 HOW TO PLACE THE MASSAGER …………… 8 HOW TO INSTALL THE STAND ………………… 9 HOW TO USE ……………………………………… 10 PRIOR TO USE ……………………………………... -
Page 2: Important Safety Instructions
IMPORTANT SAFETY INSTRUCTIONS When using an electrical appliance, basic precautions should always be followed, including the following: Read all instructions before using this appliance. DANGER To reduce the risk of electric shock: Always unplug this appliance from the electrical outlet immediately after using and before cleaning. Improper connection of the equipment-grounding conductor can result in a risk of electric shock. - Page 3 All of the following information is important. Be sure to follow the instructions carefully. Do not allow persons in the following categories to use massager. If this is not done, they may be burned. Those who have a diminished sense of temperature or pain ●...
- Page 4 IMPORTANT SAFETY INSTRUCTIONS (continued) WARNING To reduce the risk of burns, fire, electric shock, or injury to persons: Do not suddenly release your hand while raising the foot rest manually. To ensure safety, release your hand gently from the foot rest. Do not raise or lower the foot rest while your feet are enclosed in it for an air massage.
- Page 5 Be careful not to fall asleep during massaging. If this is not observed, injury may occur. Place the massager main unit on a level floor surface. If it is placed on an unstable surface, it may fall over and injury may occur. Do not hang anything from the back pad or head rest, or pull the back pad or head rest forcibly.
-
Page 6: Name/Function Of Each Part
NAME/FUNCTION OF EACH PART Head rest Seat Sensor controller Back rest Remote control Massaging rollers Stand Back pad Arm rest Foot rest Cord Power plug Check for the accessories first. Remote power switch Used to turn on the power source. Casters *The remote power switch Used when moving... -
Page 7: Remote Control
Remote control HOME POSITION button Used to return the back rest, foot rest and seat to their home positions. All display icons are shown here * for explanation. BEST POSITION button Used to adjust the back rest, foot rest and seat to the two preset best positions. -
Page 8: Name/Function Of Each Part
NAME/FUNCTION OF EACH PART (continued) Body areas that can be massaged. STIFFNESS display Areas where stiffness has been detected. The right side of the lamp indicates the degree of stiffness, and the left side of the lamp indicates Shoulder position measurement / the degree of relaxation. -
Page 9: How To Place The Massager
HOW TO PLACE THE MASSAGER How to move the massager When carried by two people. When moving using the casters. Hold by the back rest and foot rest when moving. Lift up the front and move using the casters. ● ●... -
Page 10: How To Install The Stand
HOW TO INSTALL THE STAND Tools needed: Phillips (crosshead) screwdriver (*screwdrivers are not included) Secure the stand on the right-hand Place the sensor cable into the hook on the left side of the sensor side of the arm rest, using the stand. -
Page 11: How To Use
HOW TO USE The procedure for use of the massager is explained here. See the indicated pages for details. Prior to use, make certain to read the “IMPORTANT SAFETY INSTRUCTIONS”. (Page 1 - 4) Turn on the power switch. (See page 11) Turn on the remote power switch. -
Page 12: Prior To Use
PRIOR TO USE WARNING Check the upholstery of the chair. Prior to use, be sure to raise the back pad in order The following persons are requested to consult a doctor ● ● prior to use. Otherwise, the user may feel sick or an to check that the upholstery is not torn. -
Page 13: Adjustment Of Chair
ADJUSTMENT OF CHAIR Before sitting on the massage chair Bring all parts of the massage chair to Foot rest their home position by pressing the HOME POSITION button. Sitting on the massage chair while the foot rest is being raised is ●... - Page 14 ADJUSTMENT OF CHAIR (continued) Adjust the angle of back rest, foot rest, and the seat. Pre-set Angles Press Press the BEST POSITION button. Reclining positions change automatically at each press of the button. ● (Button illuminates while reclining and flickers when in position) BEST POSITION 1 BEST POSITION 2 (Slow flickering)
- Page 15 Adjust the angle of the foot rest. WARNING Foot rest can be adjusted independently. Do not suddenly release your hand while raising the Keep the FOOT REST button pressed until the desired angle is ● ● foot rest manually. achieved. For safety, be sure to lower the foot rest slowly using When massaging the soles or calves, adjust the angle so that the ●...
- Page 16 MASSAGING (WHOLE BODY SENSOR AUTOMATIC COURSES) Press the OPERATION ON/OFF button. When the button is pressed, the lamps of the sole warmer and remote ● control will illuminate, and the sole warmer will turn on. When the foot rest is fully lowered, the foot rest will rise a little. Press ●...
- Page 17 Starts massaging automatically. Measure the position of shoulder. ① Check if the position of shoulder is correct. If not, adjust the position using the POSITION ADJUST buttons. ● (The POSITION ADJUST buttons can also be used while massaging is in progress.) (See page17) Sensor massaging will start.
- Page 18 MASSAGING (WHOLE BODY SENSOR AUTOMATIC COURSES) (continued) Measurement of shoulder position Massaging operation and display of remote control Massaging rollers move up and down Displays the aim of massaging positions, the type of ● to measure the position of shoulder. massaging, the stiffness, body pressure and the remaining massaging time on the remote control.
-
Page 19: Massaging
MASSAGING (AUTOMATIC COURSES) Press the OPERATION ON/OFF button. 6 When the button is pressed, the lamps of the sole warmer ● and remote control will illuminate, and the sole warmer will turn on. When the foot rest is fully lowered, the foot rest will rise a little. ●... - Page 20 MASSAGING (AUTOMATIC COURSES) (continued) Measurement of shoulder position Massaging operation and display of remote control Massaging rollers move up and down Displays the aim of massaging positions, the ● type of massaging and the remaining to measure the position of shoulder. massaging time on the remote control.
- Page 21 MASSAGING (MANUAL COURSES) Massaging of upper body Press the OPERATION ON/OFF button. When the button is pressed, the lamps of the sole warmer and remote control will illuminate, and the sole ● warmer will turn on. When the foot rest is fully lowered, the foot rest will rise a little. ●...
- Page 22 MASSAGING (MANUAL COURSES) (continued) Press the MANUAL button. MANUAL button Press the desired MANUAL (UPPER BODY) MASSAGING button. Refer to pages 22 - 23 for details of the contents of massage. ● For spine stretching (full), the shoulder position is first measured. ●...
- Page 23 Types of massage and adjustments of massaging rollers 27 types of desired massage can be selected. It is possible to adjust the movement speed, height position and width of massaging rollers and the strength of massage. (There are some adjustments that are not possible, depending on the type of massaging. Refer to the tables below.) 〈Individual massages〉...
- Page 24 MASSAGING (MANUAL COURSES) (continued) 〈Combined massages〉 Type of massage Operation Adjustment of massaging rollers Massaging by spine stretching Vertical position and speed are (full) with tapping and + adjustable. kneading operations. Massaging by spine stretching Vertical position and speed are (partial) with tapping and +...
- Page 25 Massaging of lower body Simultaneous massaging of any part of “upper body” and “lower body (air)” is possible. ● Independent massaging of “upper body” and “lower body (air)” is possible. 1 to 5 are the same operation for massaging the upper body. When massaging the upper body, start from ●...
-
Page 26: Adjusting Massage Intensity
ADJUSTING MASSAGE INTENSITY When the massage is too strong Use the massager after placing a towel, etc., on the back pad. Towel When the massage is too weak Flip the back pad to the rear. Head rest Back pad Remove the head rest from ①... -
Page 27: After Use
AFTER USE CAUTION After use, be sure to set the POWER switch to the [OFF] position, and be sure to disconnect the power ● plug from the outlet. Bring all parts of the massage chair to their home position by pressing the HOME POSITION button. -
Page 28: Contents Of Massaging
CONTENTS OF MASSAGING *The drawing of the massage for each course is omitted in part, in order to describe the operation in a simplified manner. Also, the drawings of air massage operation for lower body are all omitted. 〈WHOLE BODY SENSOR AUTOMATIC COURSES〉 Standard massage in RECOVERY Course Sensor massage Tapping/Kneading... - Page 29 〈WHOLE BODY SENSOR AUTOMATIC COURSES〉 Standard massage in FINE Course Tapping/Kneading Sensor massage Kneading Tapping (Shoulder, Tapping/Kneading (Shoulder, Back, (Shoulder) Back, Waist) and and Spine stretching Waist) and Spine stretching (full) Spine stretching (focus) (full) Tapping/Kneading, Kneading Kneading Tapping/Kneading Kneading (Shoulder, (Shoulder) (Shoulder, Back, and Spine stretching...
-
Page 30: Trouble - Shooting
TROUBLE-SHOOTING WARNING If the trouble still persists even after the following proper countermeasures have been taken, stop using the ● massager to avoid possible accidents. Disconnect the power plug from the outlet and consult an authorized service center. Do not attempt to repair the equipment at home by yourself, as it is very dangerous. Sounds and sensations during operation Sounds and sensations such as the following may occur while the massager is operating, but these occur as part of the normal mechanism of the massager and are not the signs of... -
Page 31: Specifications
SPECIFICATIONS Power consumption 230 W Power dissipation of electric heating equipment 33 W Rated time 30 min. WHOLE BODY SENSOR AUTOMATIC COURSES・・・Approx. 15 minutes (Maximum of approx. 20 minutes due to stiffness detection) Timer *FINE Course is Approx. 8 minutes AUTOMATIC COURSES・・・・・・・・・・・・・・Approx. - Page 32 9BF - 6 - P111 - 336DG - 0 0210 SANYO Electric Co., Ltd.