Table of Contents
Advertisement
Available languages
Available languages
Quick Links
Download this manual
See also:
User Manual
Advertisement
Chapters
Table of Contents

Related Manuals for GE 25833


Summary of Contents for GE 25833
- Page 1 25833 5.8 GHz Digital Cordless Handset Call Waiting Caller ID Phone/ Answering System...
-
Page 2: Equipment Approval Information
Equipment Approval Information Your telephone equipment is approved for connection to the Public SwitchedTelephone Network and is in compliance with parts 15 and 68, FCC Rules and Regulations and theTechnical Requirements forTelephoneTerminal Equipment published by ACTA. 1 Notification to the Local Telephone Company On the bottom of this equipment is a label indicating, among other information, the US number and Ringer Equivalence Number (REN) for the equipment.You must, upon request, provide this information to your telephone company. -
Page 3: Interference Information
2 Rights of the Telephone Company Should your equipment cause trouble on your line which may harm the telephone network, the telephone company shall, where practicable, notify you that temporary discontinuance of service may be required. Where prior notice is not practicable and the circumstances warrant such action, the telephone company may temporarily discontinue service immediately. -
Page 4: L Icensing
Licensing Licensed under US Patent 6,427,009 Hearing Aid Compatibility (HAC) This telephone system meets FCC standards for Hearing Aid Compatibility. US NUMBER IS LOCATED ONTHE CABINET BOTTOM REN NUMBER IS LOCATED ONTHE CABINET BOTTOM CAUTION: RISK OF ELECTRIC SHOCK DO NOT OPEN THE EXCLAMATION THE LIGHTNING CAUTION: TO REDUCE THE... -
Page 5: Table Of Contents
Table of Contents ....19 ....2 QUIPMENT PPROVAL NFORMATION ROGRAMMING THE ELEPHONE ......3 ........19 TANDBY CREEN NTERFERENCE NFORMATION ........... 4 .......19 ICENSING ROGRAMMING UNCTIONS (HAC) ....4 ........19 EARING OMPATIBILITY ONITOR ........20 ........5 ABLE OF ONTENTS ANDSET ETUP FCC RF R .. -
Page 6: Save These Instructions
........30 CID R ......37 UMBER EDIAL ECEIVING ECORDS ............. 30 CID R TORING ECORDS ALLER ............ 30 )..........37 EMORY .... 30 CID R ......38 ANDSET TO ANDSET AGING EVIEWING ECORDS ... 31 CID R AGING FROM THE ROUP TORING ECORDS IN... -
Page 7: Fcc Rf Radiation Exposure
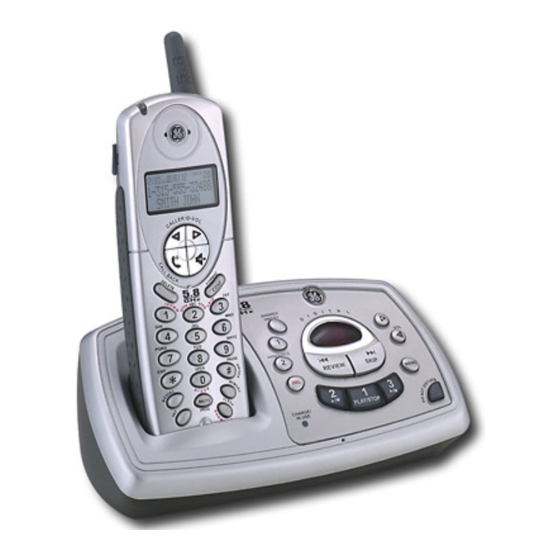
SAFETY INSTRUCTIONS provided with this product and save them for future reference. Congratulations on purchasing the GE Dual Cordless Handset Telephone System. This system operates in the 5.8 GHz frequency range, and is unique to conventional cordless telephones. When the base is connected to electrical power and a telephone line, you can place a fully-featured cordless handset anywhere electrical power is available. - Page 8 Your Caller ID Call Waiting phone allows you to: • View the name and telephone number of a caller (Call Waiting Caller ID) while you are on the phone. • Identify callers before you answer the phone. • View the time and date of each incoming call. •...
-
Page 9: Handset Layout
Handset Layout display SPEAKER CALLER ID-VOL SPEAKER (caller ID/volume button) (speaker button) TALK•CALL BACK (button) FORMAT/CONF (format/conference button) DELETE (button) skip (button) review (button) # PAUSE/ RINGER (button) play/stop (button) erase (button) * EXIT (button) MEMORY (button) REDIAL (button) FLASH/answerer (button) (intercom button) MUTE/PROG (mute/program button) -
Page 10: Base Layout
Base Layout DAY/CHECK SPEAKER (button) HOUR (minute button) (button) Message counter LANGUAGE (button) ANSWER ON/ (volume buttons) OFF (button) PAGE (button) SKIP (button) MEMO ANNOUNCE 1 (button) (button) DO NOT DISTURB (button) ANNOUNCE 2 (button) PLAY/STOP 3 Microphone (button/indicator) (delete button) PLAY/STOP 2 REVIEW PLAY/STOP 1... -
Page 11: Telephone Jackr
Telephone Jack Requirements Wall plate To use this phone, you need an RJ11C type modular phone telephone jack, which might look like the one pictured here, installed in your home. If you don’t have a modular jack, call your Modular local phone company to find out how to get one installed. -
Page 12: Power
Installing the Phone Choose the best location to install your base.Your base should be placed on a level surface such as a desk or table top. Installing the Handset Battery NOTE: You must connect the handset battery before use. 1. Locate battery and battery door which are packaged together inside a plastic bag and are separate from the handset. -
Page 13: Connecting The Telephone Line
Allow handset to charge for 16 hours prior to first use. If you don’t properly charge the handset, battery performance is compromised. CAUTION: Use only the ATLINKS USA, Inc. power adaptor 5-2605 that came with this unit. Using other power adaptors may damage the unit. Connecting the Telephone Line On the base, plug the one end of the telephone line cord into the jack on the back of the base and the other end into a modular wall phone jack. -
Page 14: Time Clock
Setting the Voice Prompt Language The default voice prompt language is English. To change the answering system’s voice prompt language, • Press the LANGUAGE button on back of base to change to the FRENCH voice prompt. The unit announces “OPTION FRANCAISE “ and “Fr “ shows in the message counter. •... -
Page 15: Voice Instruction
Voice Instruction If you need additional assistance, press the REVIEW button in standby mode and follow the voice instructions. Recording the Outgoing Announcement For best results when recording, you should be about nine inches from the microphone, and eliminate as much background noise as possible. You may record 2 outgoing announcements in the answerer or choose the default for your current outgoing announcement. -
Page 16: Answering System Operation
Answering System Operation This section discusses the buttons and features on the answering system. Message Counter The message counter gives you a numeric display of how many messages you have. See below for the details. a) Message counter has a number displayed without flashing - No new messages. Shows total number of old messages. -
Page 17: Leaving A Message
Leaving a Message 1. After the answerer gets the line and plays the outgoing announcement, the caller can enter the mailbox number (1, 2 or 3) during the play of outgoing announcement or within the 2 seconds after the end of outgoing announcement and then leave a message in that specific mailbox. -
Page 18: Memory Full
Memory Full When the answering system memory is full, the system answers after 10 rings.You should erase some messages so the answering system may record new messages. Erasing Messages You may erase messages in the following three ways: To erase a message while it is playing 1. -
Page 19: Telephone Set Up
Telephone Set Up Programming the Telephone Standby Screen The handset displays the handset number and user name. 11:30 RAYMOND HANDSET 1 Programming Functions The system uses a menu structure to give you access to all of the built-in features.You may program the following items in main menu: Room Monitor and Handset Setup. Room Monitor (This is only applicable with addition of Model 25832 optional handset) 1. -
Page 20: Handset Setup
NOTE: If handsets have been named, then the name will be displayed on LCD instead of handset numbers. NOTE: During the room monitoring, it will emit a beep tone if there are incoming calls. You may press TALK•CALL BACK button to answer the call and quit the room monitor mode. -
Page 21: Ringer Tone
4. Press MUTE/PROG button to confirm. 5. Press the CALLER ID-VOL ( or ) button to scroll to the HANDSET NAME menu. 6. Press MUTE/PROG button to enter the menu. HANDSET NAME shows in the display. 7. Use the touch-tone pad to enter a name (up to 15 characters). More than one letter is stored in each of the number keys. -
Page 22: Vip Melody
4. Press MUTE/PROG button to confirm. 5. Press the CALLER ID-VOL (or) button to scroll to the RINGERVOLUME menu. 6. Press MUTE/PROG button to enter the menu. SET RINGER 1HI 2LOW 3OFF shows in the display. 7. Use the touch tone pad on the handset to select 1, 2 or 3, or use the CALLER ID-VOL (or) button to scroll to your selection. -
Page 23: Key Tone
NOTE: If the memory dialing storage is empty, “NO USER MEMORY” shows in the display. 9. Press the CALLER ID-VOL (or) button to select the desired memory record. 10. Press the MUTE/PROG button to confirm your selection.The display shows VIP MELODY. -
Page 24: Message Alert
7. Use the touch tone pad on the handset to select 1 or 2, or use the CALLER ID-VOL (or) button to scroll to your selection. 1ON is the default setting. 8. Press the MUTE/PROG button to confirm.You will hear a confirmation tone and the key tone setting shows in the display. -
Page 25: Registration
Security Code (for answering system) You can access the answering system from a tone dialing telephone in another (remote) location.The security code is required for remote access, and it prevents unauthorized access to your answering system. 1. Make sure your phone is OFF (not in talk mode). 2. -
Page 26: De-Registration
1. Make sure your phone is OFF (not in talk mode). 2. Press the MUTE/PROG button to go to the main menu. 3. Press CALLER ID-VOL (or) button to scroll to HANDSET SETUP. 4. Press MUTE/PROG button to confirm. 5. If necessary, press the CALLER ID-VOL (or) button to scroll to the REGISTRATION menu.Then, press MUTE/PROG button to enter the menu. -
Page 27: Global De-Registration
9. Press the touch-tone pad to select 1YES or 2NO, or use the CALLER ID-VOL (or) button to scroll to 1YES or 2NO. 10. If you select YES, press the MUTE/PROG button to confirm. REGISTER ..shows in the display followed by a confirmation tone.Then HANDSET X DEREGISTERED shows in the display to confirm the handset is deregistered. -
Page 28: Elephone Peration
NOTE: If you choose “YES” all the settings in the programmable menu are returned to factory default setting. 8. Press the MUTE/PROG button to save your selection.You will hear a confirmation tone. Telephone Operation Charge Indicator When the CHARGE/IN USE indicator on the base is lit, the handset is correctly seated in the cradle and is charging. -
Page 29: Call Timer
Call Timer After you press the TALK•CALL BACK button on the handset, the built-in call timer shows on the display and counts the length of time of the call in minutes and seconds. Pre-Dialing 1. Make sure the phone is OFF (not in talk mode). 2. -
Page 30: Number Redial
• To connect to the waiting call, press the FLASH/answerer button on the handset, and your original call is put on hold. • To switch between the two calls, press the FLASH/answerer button. TIP: Don’t press the TALK•CALL BACK button on the handset to activate a custom calling service, such as call waiting, or you’ll hang up the phone. -
Page 31: Mute
NOTE: If more than 2 handsets have been registered, you can page all handsets by pressing 5. 4. To cancel the page, press the *EXIT button, or press the INT button. Or you may press TALK•CALL BACK on the receiving handset to enter intercom mode. Paging from the Base/Group Page (This is ONLY applicable with addition of Model 25832A optional handset) Use the base-only to page one or all registered handsets at the same time. -
Page 32: Calls
Intercom Operation (This is ONLY applicable with addition of Model 25832A optional handset) The intercom feature allows you to have a conversation with another registered handset without tying up the telephone line. And since the telephone line is not in use, you may still receive incoming calls. -
Page 33: Two-Way Calling
Two-Way Calling 1. During an external call, press the INT button, and use the touch-tone pad to enter the handset number (1 or 4) you want to call. NOTE: The receiving handset presses the INT button to answer the intercom call. -
Page 34: Memory
Memory You may store fifty 15-character names and 20-digit telephone numbers in the handset memory. Storing a Name and Number in Memory 1. Make sure the phone is OFF (not in talk mode). 2. Press the MEMORY button to display SELECT MEMORY 01-50. 3. -
Page 35: Andsets
3. Press MEMORY button again to confirm.You will hear a confirmation tone. -OR- 1. Press the REDIAL button on the handset. 2. Use the CALLER ID-VOL (or) to select the desired redial number. 3. Repeat steps 1 through 5 in Storing a Name and Number in Memory. 4. -
Page 36: Dialing A Number From Memory
5. Press the DELETE button to delete the record. DELETED shows in the display. NOTE: If you don’t want to change or delete a record, simply press the *EXIT button, or wait for one minute to exit the review mode automatically. Dialing a Number from Memory 1. -
Page 37: All
Caller ID (CID) Caller ID (CID) is a service available from your local telephone company. For Caller ID to work on this system, you must subscribe to Caller ID service.To receive Caller ID information for a Call Waiting call, you must subscribe to the combined Call Waiting Caller ID service. -
Page 38: Reviewing Cid Records
Reviewing CID Records As calls are received and stored, the display is updated to let you know how many calls have been received.To scroll CID records: 1. Make sure the phone is OFF (not in talk mode). 2. Press the CALLER ID-VOL () button to review the newest CID record. 3. -
Page 39: Dialing Acid Number
Dialing a CID Number While reviewing CID records, you may dial the phone number showing in the display. 1. Make sure the phone is OFF (not in talk mode). 2. Press CALLER ID-VOL ( or ) button until the desired CID record shows in the display. -
Page 40: Deleting All Cid Records
Deleting All CID Records 1. Make sure the phone is OFF (not in talk mode). 2. Use the CALLER ID-VOL( or ) button to scroll to any CID record. 3. Press and hold the DELETE button until DELETE ALL? shows in the display. 4. -
Page 41: Changing The Battery
Accessing the Answering System from Another Location You can access your answering system from any touch-tone phone by entering your 3-digit security code during the playing of outgoing announcement or after you hear the outgoing announcement. 1. Dial the telephone number to which the answering system is connected. 2. -
Page 42: Battery Safety Precautions
3. Disconnect the cord attached to the battery pack from the jack inside the battery compartment and remove the battery pack from the handset. Battery 4. Insert the new battery pack and reconnect the battery compartment plug. 5. Put the battery compartment cover back on. Battery pack 6. -
Page 43: Display Messages
Display Messages The following messages shows the status of the phone, provides Caller ID information, or helps you set up and use your phone. INCOMPLETE DATA CID information is interrupted during transmission or the phone line is excessively noisy. HANDSET NAME Prompt telling you to enter the user name for the registered handset. -
Page 44: Handset Sound Signals
SEARCHING Indicates handset is searching for the base. OUT OF RANGE Indicates handset is too far away from the base. Move closer to the base. PAGING or Someone pressed the INT button on the handset PAGING FROM or the PAGE button on the base. BLOCKED NUMBER Indicates the person is calling from a number which is blocked from transmission. -
Page 45: Troubleshooting Guide
Troubleshooting Guide Telephone Solutions No dial tone • Check or repeat installation steps: Make sure the base power cord is connected to a working electrical outlet. Make sure the telephone line cord is connected to the base and the wall jack. •... -
Page 46: Caller Id Solutions
Memory dialing doesn’t work • Did you program the memory location keys correctly? • Did you follow proper dialing sequence? Unit locks up and no communication between the base and cordless handset • Unplug the power adaptor from the electrical outlet and the back of the base. Remove the handset battery. -
Page 47: General Product Care
Battery If you experience any of the following problems, even after recharging the battery, you may need to replace the battery pack: • Short talk time • Poor sound quality • Limited range • CHARGE/IN USE indicator of the base fails to turn on. General Product Care To keep your unit working and looking good, follow these guidelines: •... -
Page 48: Service
Service If trouble is experienced with this equipment, for repair or warranty information, please contact customer service at 1-800-448-0329. If the equipment is causing harm to the telephone network, the telephone company may request that you disconnect the equipment until the problem is resolved. This product may be serviced only by the manufacturer or its authorized service agents. -
Page 49: Limited Warranty
Limited Warranty What your warranty covers: • Defects in materials or workmanship. For how long after your purchase: • One year, from date of purchase. (The warranty period for rental units begins with the first rental or 45 days from date of shipment to the rental firm, whichever comes first.) What we will do: •... -
Page 50: Index
Index Deleting Records Stored in Memory 35 Dialing a CID Number 39 Accessing the Answering System from Dialing a Number from Memory 36 Another Location 41 Display Messages 43 Accessory Order Form 52 Do Not Disturb (DND) 31 Advanced Intercom Features 32 Answering a Call with Speakerphone 28 Answering Calls 28 Equipment Approval Information 2... - Page 51 Leaving Message 17 Ringer HI/LOW/OFF Shortcut 29 Licensing 4 RingerTone 21 Limited Warranty 49 Ringer Volume 21 Rings to Answer 24 Room Monitor 19 Mailbox Indicator 17 Making an Intercom Call 32 Making a Call with Speakerphone 28 Security Code 25 Making Calls 28 Service 48 Memory 34...
-
Page 52: Accessory Information
We are required by law to collect appropriate sales tax for each individual state, country, and locality to which the merchandise is being sent. *Prices are subject to change without notice. ATLINKS USA, Inc. 101 West 103rd Street Model 25833 Indianapolis, IN 46290 00003415 (Rev 0 E/S ) © 2005 ATLINKS USA, Inc. 05-08 Trademark(s) ®... - Page 53 25833 Sistema de Teléfono/Contestadora con Auricular Digital Inalámbrico de 5.8 GHz Llamada en Espera Identificador de Llamada...
- Page 54 Información sobre la Aprobación de Equipo Your telephone equipment is approved for connection to the Public SwitchedTelephone Network and is in compliance with parts 15 requisitos establecidos en las secciones 15 y 68 de las Reglas y Regulaciones de la FCC y con los RequerimientosTécnicos para Equipos deTerminalesTelefónicas (Technical Requirements forTelephoneTerminal Equipment), publicado por ACTA.
- Page 55 La compañía telefónica puede hacer los cambios en sus instalaciones de comunicación, en equipos, en sus funcionamientos o procedimientos que digne necesarios para el manejo de sus negocios y que no sean incompatibles con las Reglas y Regulaciones de l a FCC. Si estos cambios pudieran alterar el uso o el funcionamiento de su equipo telefónico, la compañía telefónica deberá...
-
Page 56: Tabla De Contenido
Tabla de Contenido ..2 ........17 NFORMACIÓN SOBRE LA PROBACIÓN DE QUIPO ORRAR ENSAJES ......3 ........17 NFORMACIÓN DE NTERFERENCIAS EJAR UN ECADO ............3 ......18 ICENSING ROGRAMACIÓN DEL ELÉFONO ........18 (CCA)....3 OMPATIBILIDAD CON UDÍFONOS ANTALLA DE LERTA ........ - Page 57 ..27 ..35 ACER LAMADA CON EL LTOVOZ ARCADO EN ADENA DESDE LA EMORIA ....... 28 . 36 EMPORIZADOR DE LAMADAS UNCIONES DEL DENTIFICADOR DE LAMADAS ........... 28 ARCADO LAVES DE RROR DEL DENTIFICADOR DE ..........28 ......... 36 LERTA LAMADAS HI/LOW/OFF ....
-
Page 58: Estatuto Sobre La Exposición A La
Estatuto sobre la Exposición a la Radiación de la FCC RF Este equipo cumple con los límites expresos por la FCC RF para la exposición de radiación en un ambiente no controlado. Este equipo debe ser instalado y operado a una distancia mínima de 20 centímetros entre el radiador y su cuerpo. - Page 59 Este teléfono ha sido está diseñado para ser de fácil operación; sin embargo, usted puede aprovechar al máximo su potencial más rápidamente si se toma unos minutos para leer esta Guía del Usuario. Este teléfono es un producto de múltiples funciones para ser usado junto con los servicios de Identificador de Llamadas y Llamada en Espera que le son disponibles a través de su compañía telefónica local.
-
Page 60: Formato Del Auricular
Formato del Auricular Pantalla Altavoz CALLER ID-VOL botones del identificador/ SPEAKER volumen) (botón de altavoz) TALK/CALLBACK (botón llamar/ FORMAT/CONF regresar llamada) (botón de formato/ conferencia) DELETE (botón borrar) skip (botón para saltar mensajes) review (botón volver) # PAUSE/RINGER (botón para pausa/ play/stop timbre) (botón reproducir/... -
Page 61: Formato De La Base
Formato de la Base DAY/CHECK Bocina (botón minuto) (botón dia/checar) HOUR Indicador de conteo LANGUAGE (botón hora) de mensajes (botón idioma) ANSWER ON/OFF (botón activar la (botónes función contestar) volumen) PAGE SKIP (botón buscar) (botón saltar) MEMO (botón) ANNOUNCE 1 (botón de DO NOT anuncio 1) -
Page 62: Requerimientos Parae
Requerimientos Para Enchufe Telefónico Placa de pared Para utilizar este teléfono, usted puede necesitar un enchufe modular telefónico tipo RJ11C como el ilustrado aquí, instalado en su hogar. Si usted no tiene este tipo de enchufe, llame a su compañía telefónica local Enchufe para preguntar cómo conseguirlo. -
Page 63: Instalación Del Teléfono
Instalación del Teléfono Escoja la mejor localización para instalar la base del aparato y la base para cargar el auricular. Tanto la base como la base para cargar el auricular deben estar colocados sobre una superficie plana y nivelada como una mesa o un escritorio. Para Instalar la Batería del Auricular NOTA: Usted debe conectar la batería del auricular antes de utilizar el aparato. -
Page 64: Para Seleccionar El Idioma De Instrucciones De Voz
Permita que el auricular cargue por 16 horas antes del primer uso. Si usted no carga apropiadamente el teléfono, la batería puede funcionar mal. CUIDADO: Utilice únicamente el cable de corriente ATLINKS USA , Inc. 5-2605 que es compatible con esta unidad. El uso de otros cables de corriente puede resultar en daño al aparato. -
Page 65: Operación Del Sistemac
• Presione el botón LANGUAGE en la parte posterior de la base para cambiar a voice prompt en FRANCES. La unidad anuncia “OPTION FRANCAISE” y Fr se muestra en el contador de mensajes. • Presione el botón LANGUAGE otra vez para cambiar el voice prompt a ESPAÑOL. La unidad anuncia “SELECCION ESPANOL ”... -
Page 66: Instrucciones De Voz
Instrucciones de Voz Si Ud. necesita ayuda adicional, presione el botón REVIEW en el modo standby y siga las instrucciones de voz. Para Grabar el Anuncio Saliente Para mejores resultados cuando grabe su anuncio personal, usted debe estar a aproximadamente 9 pulgadas del micrófono y debe tratar de eliminar tanto ruido de fondo como le sea posible. - Page 67 El Contador de Mensajes El contador de mensajes le proporciona una visualización numérica de cuántos mensajes tiene usted. Vea a continuación los detalles. a) El contador de mensajes tiene un número que se muestra sin parpadear -No hay mensajes nuevos. Muestra el número total de mensaje anteriores. b) El contador de mensajes tiene un número que parpadea y se muestra -hay mensajes nuevos.
-
Page 68: Indicador De Buzón
Para Dejar Mensaje 1. Después de que la contestadora esté en línea y reproduzca el mensaje de saludo, el que llama puede ingresar el número de buzón (1, 2 ó 3) durante la reproducción del mensaje de saludo o en 2 segundos posteriores al fin del mensaje de saludo y luego dejar un mensaje en ese buzón específico. -
Page 69: Para Dejar Un Recado
Para Borrar Mensajes Usted puede borrar mensajes en las tres formas siguientes: Para borrar un mensaje mientras está en reproducción 1. Presione y suelte el botón de buzón respectivo (PLAY/STOP 1 o PLAY/STOP 2 o PLAY/STOP 3) 2. Presione el botón REVIEW y SKIP para seleccionar y reproducir el mensaje que usted quien borrar. -
Page 70: Pantalla De Alerta
Programación del Teléfono Pantalla de Alerta El auricular muestra el número de auricular y el nombre del usuario. 11:30 CARLOS AURICULAR 1 Funciones de Programación El sistema usa una estructura de menú para darle acceso a todas las opciones integradas. Usted puede programar los siguientes elementos en el menú... -
Page 71: Idioma
NOTA: Si los teléfonos han sido nombrados, entonces el nombre será mostrado en el LCD en lugar de los números del teléfono. NOTA: Durante el monitoreo de la habitación, emitirá un tono de bip si hay llamadas entrantes, usted puede presionar el botón TALK•CALL BACK para responder la llamada y salir del modo monitoreo de habitación. -
Page 72: Tono De Timbre
3. Presione CALLER ID-VOL (o) para desplazarse a PROG ARICULAR. 4. Presione el botón MUTE/PROG para confirmar. 5. Presione el botón CALLER ID-VOL (o) para moverse al menú NOMBR AURICULR. 6. Presione el botón MUTE/PROG para entrar al menú. NOMBR AURICULR se muestra en la pantalla. -
Page 73: Melodía Vip
2. Presione el botón MUTE/PROG para ir al menú principal. 3. Presione CALLER ID-VOL (o) para desplazarse a PROG ARICULAR. 4. Presione el botón MUTE/PROG para confirmar. 5. Presione el botón CALLER ID-VOL (o) para desplazarse al menú VOLUMENTIMBRE. 6. Presione el botón MUTE/PROG para ingresar al menú. PROGTIMBRE 1ALT 2BAJ 3APG se muestra en la pantalla. -
Page 74: Cambio De Un Registro De
8. Presione el botón MUTE/PROG. SELEC MEMORIA se muestra en la pantalla por 2 segundos y luego visualiza el registro en memoria del usuario para que el usuario seleccione NOTA: Si el almacenamiento de marcación en memoria está vacío, “NO MEMO USUARIO”... -
Page 75: Alerta De Mensaje (Para Máquina Contestadora)
7. Use el teclado de marcación en el teléfono para seleccionar 1 ó 2, o use el botón CALLER ID- VOL (o) para desplazarse a su selección. 1ENC es la selección de fábrica. 8. Presione el botón MUTE/PROG para confirmar. Usted escuchará un tono de confirmación y la selección de tono de tecla se muestra en la pantalla. -
Page 76: Código De Seguridad
Código de Seguridad (para máquina contestadora) Usted puede accesar el sistema de la contestadora desde un teléfono de marcación por tonos en otra ubicación (remota). El código de seguridad es requerido para acceso remoto, y evita el acceso no autorizado a su sistema de contestadora. 1. -
Page 77: Para Cancelar El Registro
3. Presione CALLER ID-VOL (o) para desplazarse a PROG ARICULAR. 4. Presione el botón MUTE/PROG para confirmar. 5. Si es necesario, presione el botón CALLER ID-VOL (o) para desplazarse al menú REGISTRAR. Luego, presione el botón MUTE/PROG para entrar al menú. REGISTRO 1SI 2NO se muestra en la pantalla. -
Page 78: Programación De Fábrica
9. Oprima el teclado numérico para seleccionar 1 para SI o 2 para NO, o utilice los botones CALLER ID-VOL (o) para seleccionar 1SI o 2NO. 10.Si usted selecciona SI, oprima el botón de programa para confirmar. La indicación de cancelación de registro DES-REGISTRAR.. -
Page 79: Peración Ásica Del Eléfono
7. Utilice el teclado de tono en el auricular para seleccionar 1SI o 2NO, o utilice los botones CALLER ID-VOL (o) para mover el cursor a 1SI o 2NO. La programación de fábrica es 2NO. NOTA: Si usted escoge SI, todas las programaciones en el menú regresan a las programaciones originales de fábrica. -
Page 80: Temporizador De Llamadas Pre -Marcado
Temporizador de Llamadas Después de que usted oprime el botón TALK•CALL BACK en el auricular, el temporizador integrado aparece en la pantalla y cuenta la duración de la llamada en minutos y segundos. Pre-Marcado 1. Asegúrese de que su teléfono esté en OFF (no en modo hablar). 2. -
Page 81: Salida
Número Marcado Ud. puede volber a marcar un número de hasta 32 dígitos de longitud. Para volver a marcar rápidamente el último número que usted marcó: 1. Presione los botonesTALK•CALL BACK o SPEAKER. 2. Presione el botón REDIAL. Para elegir entre los últimos tres números que Ud. marcó: 1. -
Page 82: Enmudecedor
4. Para cancelar el localizador, oprima el botón *EXIT, u oprima el botón del localizador. O puede presionar TALK•CALL BACK en el teléfono receptor para entrar al modo de intercomunicación. Para Localizar desde la Base/Localizador de Grupo (Esta función será efectiva solamente si añade el auricular adicional del Modelo 2-5832A) Use la base solamente para usar uno o todos los teléfonos registrados al mismo tiempo. -
Page 83: Peración Del Nterfono
Operación del Interfono (Esta función será efectiva solamente si añade el auricular adicional del Modelo 2-5832A) El DND habilitado apagará también el tono de alerta de mensaje nuevo de la máquina contestadora si éste está programado en ON en el menú del auricular. Para Hacer una Llamada desde el Interfono 1. -
Page 84: Otros Auriculares
Conversación Entre Dos Personas 1. Durante una llamada externa, oprima el botón INT, y utilice el teclado numérico para inscribir el número del auricular (1 o 4) que usted quiera llamar NOTA: El auricular que recibe oprime el botón INT para contestar la llamada del interfono. -
Page 85: Memoria
Memoria Usted puede almacenar cincuenta nombres de 15 letras y números telefónicos de 20 dígitos en la memoria del auricular. Para Almacenar un Nombre y Número en la Memoria 1. Asegúrese de que su teléfono esté en OFF (no en modo hablar). 2. - Page 86 1. Repita el Paso 1 al 6 para Almacenar un Nombre y un Número en la Memoria 2. Presione el botón REDIAL. 3. Presione otra vez el botón MEMORY para confirmar. Usted escuchará un tono de confirmación. 1. Presione el botón REDIAL en el auricular. 2.
-
Page 87: Marcado En Cadena Desde La Memoria
3. Oprima los botones CALLER ID-VOL ( or ) para recorrer los archivos que usted quiera borrar o utilice el teclado del auricular para inscribir el número de la localización de memoria. 4. Oprima el botón DELETE para marcar archivos que serán borrados. La pantalla pregunta si borra BORRAR?. -
Page 88: Archivos Del Identificador De Llamadas
Funciones del Identificador de Llamadas (Caller ID) El Identificador de Llamadas (Caller ID) es un servicio disponible a través de su compañía telefónica local. Para que el identificador funcione en este sistema, usted debe suscribirse al servicio de Identificador de Llamadas. Para recibir servicio de Identificador en llamadas en espera, usted debe suscribirse al servicio combinado de Identificador de Llamada en Espera. -
Page 89: Llamadas En La Memoria Interna
Para Revisar los Archivos del Identificador (CID) A medida que se reciben y se almacenan archivos del Identificador de Llamadas, la pantalla se actualiza para hacerle saber cuántas llamadas se han recibido. Para recorrer los archivos del identificador de Llamadas: 1. - Page 90 NOTA: Si esa localización de memoria está ocupada, el aparato le pregunta si reemplaza el archivo (“REMPLAZAR MEMO?”), y usted debe confirmar el reemplazo oprimiendo el botón MEMORY. NOTA: Oprima el botón *EXIT una vez para mantener la programación previa y volver al otro menú.
-
Page 91: Llamadas
Para Borrar un Archivo del Identificador de Llamadas 1. Asegúrese de que su teléfono esté en OFF (no en modo hablar). 2. Utilice el botón CALLER ID-VOL ( or ) para mostrar el archivo deseado. 3. Oprima el botón DELETE. La pantalla pregunta si borra el archivo BORR LLAMADA ID? 4. -
Page 92: Para Filtrar Llamadas Desde El Auricular
Para Filtrar Llamadas desde el Auricular Utilice el auricular para filtrar llamadas, incluso cuando usted no pueda escuchar el sistema contestador. Cuando el sistema contestador contesta: 1. Oprima el botón FLASH/answerer para tener acceso al sistema contestador. 2. Escuche a la persona que llama dejar un mensaje. 3. -
Page 93: Emoria Llena
Memoria Llena Cuando la memoria del sistema contestador está llena, el sistema contesta después de 10 timbres, emite un tono y espera a que usted inscriba su código de seguridad de 3 dígitos. Usted tiene 8 segundos para inscribir su código de seguridad antes de que el teléfono le desconecte. -
Page 94: Audífonos Opcionales
Precauciones de Seguridad para la Batería • No queme, desarme, mutile, o agujere. Igual que otras baterías de este tipo, materiales tóxicos pueden escaparse y causarle daño. • Mantenga las baterías fuera del alcance de los niños. • Quite las baterías si va a guardar el aparato durante más de 30 días. Para Conectar el Gancho del Cinturón y Audífonos Opcionales Ranura para el... -
Page 95: Indicadores De Mensajes
Indicadores de Mensajes Los siguientes mensajes muestran el estado del teléfono, proveen la información del Identificador de Llamadas, o le ayudan a programar y a utilizar su teléfono. INCOMPLETE DATA La información sobre la persona que llama ha sido (INFO INCOMPLETA) interrumpida durante la transmisión o el teléfono es excesivamente ruidoso. - Page 96 HANDSET NEEDS Indica que usted debe registrar un auricular no registrado REGISTRATION antes de usarlo. (AURICUL NECESIT REGISTRAR) Indica que el auricular está buscando a la base. SEARCHING (BUSCANDO) OUT OF RANGE El auricular está demasiado lejos de la base. Acérquelo a (FUERA DE RANGO) la base.
-
Page 97: Sonoras Del Auricular
Señales Sonoras del Auricular Señal Significado Un tono de gorgeo largo (con timbre encendido) Señala que una llamada está entrando Tres ton cortos Señal del localizador Un bip largo Tono de confirmación para terminar una función Un “bip” corto (cada 7 segundos) Advertencia de baja batería Un corto sonido de bip Tono de alerta de timbre. - Page 98 • Usted puede tener demasiados aparatos o extensiones en su línea. Intente desconectar algunos teléfonos. • Verifique que haya tono de marcar. Usted experimenta estática, ruido, o debilitamiento del sonido entrante • El auricular puede estar fuera del rango de la base. Acérquese a la base. •...
-
Page 99: Cuidado General Del Producto
Soluciones para el Identificador de Llamadas Nada aparece en la pantalla • Cargue la batería (durante 16 horas). O Cámbiela. • Asegúrese que el aparato esté conectado en un enchufe que no pueda desactivarse con un apagador. Desconecte el cable de corriente de la base y vuelva a conectarlo. Error en el Mensaje del Identificador de Llamadas (Caller ID) •... - Page 100 Causas de una Mala Recepción • Recubrimiento externo de la casa con aluminio. • Aislación con revestimiento de papel de aluminio. • Conductos de calefacción y otras construcciones de metal que paran las señales de radio. • Está demasiado cerca de los aparatos eléctricos como microondas, cocina, computadoras, etc.
- Page 101 Garantía Limitada Lo que cubre su garantía: • Defectos de materiales o de trabajo. Por cuánto tiempo después de la compra: • Un año, a partir de la fecha de compra. (El periodo de garantía para unidades arrendadas se inicia con la primera renta o 45 días de la fecha del embarque a la firma de arrendamiento, lo que ocurra primero).
- Page 102 Índice Alerta de Mensaje (para máquina contestadora) 23 Dejar Mensaje 16 Almacenar Archivos del Identificador de Llamadas Dejar un Recado 17 Almacenar Archivos del Identificador de Llamadas El Contador de Mensajes 15 en la Memoria Interna 37 Enmudecedor 30 Almacenar un Nombre y Número en la Memoria Estatuto sobre la Exposición a la Radiación de la FCC RF 6 Almacenar un Número de Volver a Marcar 33...
- Page 103 Para Sujetar el Gancho del Cinturón 42 Precauciones de Seguridad para la Batería 42 Licensing 3 Pre-Marcado 28 Lista de Partes 9 Programación de Fábrica 26 Llamar de un Auricular a Otro 29 Programación delTeléfono 18 Localizador 29 Programación delTeléfono 19 Localizar desde la Base/Localizador de Grupo 30 Recibir Archivos del Identificador de Llamadas 36 Marcado en Cadena desde la Memoria 35...
- Page 104 área individuales a las cuales se envíe la mercancía. Los artículos están sujetos a disponibilidad. Los precios están sujetos a cambios sin previo aviso. ATLINKS USA, Inc. 101 West 103rd Street Modelo 25833 Indianapolis, IN 46290 00003415 (Rev 0 E/S ) © 2005 ATLINKS USA, Inc. 05-08 Trademark(s) ®...