Table of Contents
Advertisement
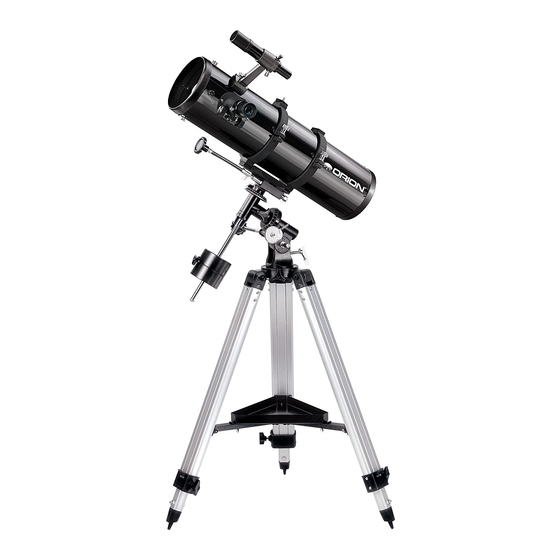
inStruCtiOn MAnuAl
Orion
®
SpaceProbe
130St EQ
™
#9007
Equatorial Newtonian Reflector Telescope
Customer Support (800) 676-1343
E-mail: support@telescope.com
Corporate Offices (831) 763-7000
89 Hangar Way, Watsonville, CA 95076
Providing Exceptional Consumer Optical Products Since 1975
IN 153 Rev. C 02/09
Advertisement
Table of Contents

Related Manuals for Orion SPACEPROBE 130ST EQ


Summary of Contents for Orion SPACEPROBE 130ST EQ
- Page 1 MAnuAl Orion ® SpaceProbe 130St EQ ™ #9007 Equatorial Newtonian Reflector Telescope Customer Support (800) 676-1343 E-mail: support@telescope.com Corporate Offices (831) 763-7000 89 Hangar Way, Watsonville, CA 95076 Providing Exceptional Consumer Optical Products Since 1975 IN 153 Rev. C 02/09...
- Page 2 Alignment thumb screws(2) Finder scope Dovetail slot Spring-loaded tensioner Eyepiece Finder scope bracket Piggyback adapter Tube mounting rings Focuser Tube ring clamps Dec. slow-motion control cable Dec. setting circle Primary mirror cell R.A. lock knob Counterweight R.A. setting circle lock knob Latitude adjustment T-bolt Azimuth lock knob Counterweight...
-
Page 3: Table Of Contents
Accessory tray wing screws ping container. In the event that the telescope needs to be (may be attached to accessory tray) shipped to another location, or returned to Orion for warranty Slow-motion control cables repair, having the proper shipping container will help ensure Collimation cap that your telescope will survive the journey intact. - Page 4 1. Lay the equatorial mount on its side. Attach the tripod Dec. slow-motion control cable R.A. setting legs one at a time to the mount by sliding the screws circle installed in the tops of the tripod legs into the slots at the Dec.
-
Page 5: Getting Started
Alignment thumbscrews Focus lock ring Tensioner Objective lense Finder Scope Bracket Figure 3a. Figure 3b. The 6x30 Inserting the finder-scope. finder scope into the finder scope bracket your fingers (Figure 3b). Push the finder scope through the bracket until the O-ring seats just inside the front opening of the bracket’s cylinder. -
Page 6: Focusing The Telescope
horizontal position. 5. With one hand on the telescope optical tube, loosen the Dec. lock knob. The telescope should now be able to rotate freely about the Dec. axis. Loosen the tube ring clamps a few turns, until you can slide the telescope tube forward and back inside the rings (this can be aided by using a slight twisting motion on the optical tube while you push or pull on it) (Figure 4c). -
Page 7: Setting Up And Using The Equatorial Mount
Figure 6. To find Polaris in the night sky, look north and find the Little Dipper Big-Dipper. Extend an imaginary line (in Ursa Minor) from the two “Pointer Stars” in the bowl of the Big Dipper. Go about five times the distance between those Big Dipper N.C.P. - Page 8 Once the object is visible in the telescope’s eyepiece, use the slow-motion controls to center it in the field of view. You So, the coordinates for the Orion Nebula listed in a star atlas can now switch to a higher magnification eyepiece, if you will look like this: wish.
-
Page 9: Collimating The Optics
scale that is on the eastern half of the Dec. setting circle. Retighten the Dec. lock knob. 2. Loosen the R.A. lock knob and rotate the telescope until the R.A. value from the star atlas matches the reading on the R.A. setting circle. Retighten the lock knob. Most setting circles are not accurate enough to put an object dead-center in the telescope’s eyepiece, but they should place the object somewhere within the field of view of the... -
Page 10: Aligning The Secondary Mirror
Collimation Cap and Mirror Center Mark be centered in the focuser drawtube, in the direction parallel Your SpaceProbe 130ST EQ comes with a collimation cap. to the length of the telescope. If it isn’t, as in Figure 8b, it This is a simple cap that fits on the focuser drawtube like a must be adjusted. -
Page 11: Aligning The Primary Mirror
Figure 9. Figure 10. To center the secondary mirror under the focuser, hold Adjust the tilt of the secondary mirror by loosening or the secondary mirror holder in place with one hand while adjusting tightening the three alignment set screws with a 2mm Allen wrench. the center screw with a Phillips screwdriver. -
Page 12: Using Your Telescope-Astronomical Observing
Planetary observing may also be poor. For example, the SpaceProbe 130ST EQ, which has a focal length of 650mm, used in combination with the 25mm eye- In conditions of good seeing, star twinkling is minimal and piece, yields a magnification of images appear steady in the eyepiece. - Page 13 (this is a fun- the front opening of the SpaceProbe 130ST EQ. The primary damental law of optics). The steadiness of the air (the “seeing”) attraction is sunspots, which change shape, appearance, and can also limit how much magnification an image can tolerate.
-
Page 14: Care And Maintenance
D. The Stars Stars will appear like twinkling points of light. Even power- ful telescopes cannot magnify stars to appear as more than a point of light. You can, however, enjoy the different colors of the stars and locate many pretty double and mul- tiple stars. -
Page 15: Specifications
Next, remove the primary mirror from the mirror cell; you will need to remove the three mirror clips to do this. Your SpaceProbe 130ST EQ telescope requires very little Completely unthread the two Phillips head screws on each mechanical maintenance. The optical tube is steel and has clip, and carefully lift the mirror from its cell. - Page 16 Orion’s option, any warranted instrument that proves to be defective, provided it is returned postage paid to: Orion Warranty Repair, 89 hangar Way, Watsonville, CA 95076. If -the product is not registered, proof of purchase (such as a copy of the original invoice) is required.