Accu-Chek Multiclix -Lancing Device Instructions For Use
- Instructions for use (2 pages) ,
- Manual (2 pages) ,
- Getting started manual (17 pages)
Advertisement
Instructions for use
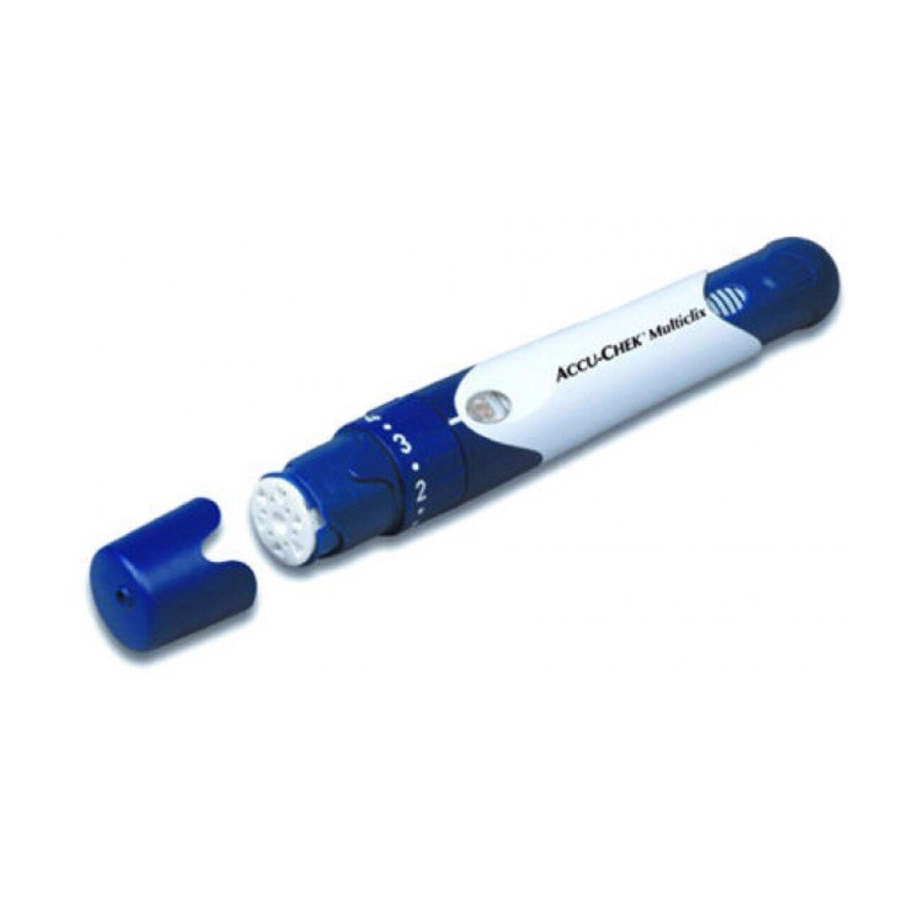
The Accu-Chek Multiclix lancing device is an easy-touse lancing device that has been developed to allow virtually pain-free collection of capillary blood from a fingertip. There are 11 penetration depth settings so users can choose the one most suitable for their own skin type. The lancing device features a drum containing six lancets. You can fingerprick six times, using a new sterile lancet each time, before the drum needs changing.
| These instructions contain two types of warning:
|
 The Accu-Chek Multiclix lancing device is intended for patient self-monitoring by a single person. It must not be used on more than one person due to the risk of infection.
 Use the Accu-Chek Multiclix lancing device only together with Accu-Chek Multiclix lancet drums. Using other lancets or lancet drums may impair operation of the lancing device or damage it permanently.
Overview

Inserting the lancet drum
To use the lancing device to obtain blood, you must first insert a lancet drum or replace a used drum with a new one.
You can tell that a lancet drum is new by the fact that the blue ring cannot be moved over the white cylinder. When a drum has been used, the blue ring can be rotated over the cylinder and two red stripes are visible.
A used lancet drum has an in-built safety feature that stops you from inserting it again. This rules out a potential infection risk.
- Remove the cap from the lancing device. Hold the cap as illustrated, then simply pull it off.


- Insert a new lancet drum – blue ring first – into the lancing device.

The drum is properly inserted when it slots into position with an audible CLICK. - Press the cap on again. Be sure to align the cut-away section of the cap with the raised contour on the front end of the lancing device.
 Each drum contains six lancets. The first lancet is now ready to be used.


The scale on the plunger shows five white bars, signifying that there are still five lancets in reserve.
Obtaining blood
The best place for obtaining capillary blood is from a finger. We recommend using the side of a fingertip, as this registers least pain.
To avoid infection, use a new lancet each time you take blood. Using each lancet only once helps ensure virtually pain-free blood sampling.
You can choose the penetration depth from a possible eleven settings. The larger the number, the greater the penetration depth. The white marker in front of the release button indicates the current depth setting.
- Twist the dial until you reach your chosen setting. We recommend a low setting (e.g. 2) if you are using the Accu-Chek Multiclix lancing device for the first time.
 You must prime the lancing device before you can trigger the lancet.
![warning]() Do not prime the lancing device until you are ready to take blood.
Do not prime the lancing device until you are ready to take blood.
 You must prime the lancing device before you can trigger the lancet.
- Press the plunger in as far as it will go.
 The lancing device is primed when a yellow dot appears in the transparent release button.

![warning]() Be careful not to press the release button when priming the device. Doing so would trigger the lancet immediately and could cause accidental injury.
Be careful not to press the release button when priming the device. Doing so would trigger the lancet immediately and could cause accidental injury. - Wash hands with warm water and soap, and dry well. This helps ensure proper hygiene and stimulates blood flow.
- Gently press the front end of the lancing device against the site you have chosen. You will feel the slightly raised ring on the bottom of the cap pressing against your skin. This is the pin-hole through which the tip of the lancet emerges.
- Press the release button. This triggers the lancet, which penetrates the skin.

![warning]() Only use the lancing device when the cap is attached. If the cap is not attached, the lancet penetrates too deep and causes unnecessary discomfort.
Only use the lancing device when the cap is attached. If the cap is not attached, the lancet penetrates too deep and causes unnecessary discomfort. - Gently massage your finger towards the fingertip to encourage a drop of blood to form.
The amount of blood that emerges at the penetration site depends on the penetration setting and the pressure used to hold the lancing device against the skin.
If the amount of blood you obtain is too small, try again, applying more pressure this time. If you still obtain insufficient blood, repeat the procedure with progressively deeper settings.
If too much blood emerges, reduce the penetration depth. - Measure blood glucose according to the instructions that came with your blood glucose meter.


-
After you have applied blood to the test strip, wipe the puncture site with a dry, clean paper towel and keep it clean.
Loading the next lancet
Prepare a new lancet for use as follows:
- Twist the plunger one quarter-turn as far as it will go (1), and back (2).
 This twisting action turns the lancet drum and the second lancet is now ready to be used.
The scale on the plunger shows four white bars, signifying that there are now four lancets left.
![]() Only twist the plunger when you can see at least one white bar on the scale showing the number of lancets left. An in-built safety feature stops you twisting the plunger when the scale shows there are no lancets left. This prevents an infection risk, as used lancets cannot be re-used.
Only twist the plunger when you can see at least one white bar on the scale showing the number of lancets left. An in-built safety feature stops you twisting the plunger when the scale shows there are no lancets left. This prevents an infection risk, as used lancets cannot be re-used.
![]() Only twist the plunger when the lancing device is not primed. When the lancing device is primed, the drum cannot rotate and twisting the plunger would damage the device.
Only twist the plunger when the lancing device is not primed. When the lancing device is primed, the drum cannot rotate and twisting the plunger would damage the device.
![]() The lancet drum cannot be rotated backwards. An in-built safety feature prevents this. This prevents an infection risk, as used lancets cannot be re-used.
The lancet drum cannot be rotated backwards. An in-built safety feature prevents this. This prevents an infection risk, as used lancets cannot be re-used. - Proceed as above to change each lancet in turn. Each time a new lancet is loaded, the number of white bars visible on the scale decreases by one.
When no more white bars are visible on the scale, you have used five lancets. The sixth and last lancet is loaded and ready to be used.

Changing the lancet drum
When you have used the sixth and last lancet, you need to replace the used lancet drum with a new one.
- Remove the cap from the lancing device.
-
Hold the lancet drum between thumb and index finger and pull it out of the lancing device.
 As you pull it out, the blue ring separates from the white cylinder and rotates freely. Two red stripes are visible on the cylinder.
![warning]() If a lancet drum containing used lancets is dropped on a hard surface (either on its own or in the lancing device), lancets may in rare cases protrude from the front of the drum. These lancets could cause injury. Therefore take great care not to touch the front of the drum.
If a lancet drum containing used lancets is dropped on a hard surface (either on its own or in the lancing device), lancets may in rare cases protrude from the front of the drum. These lancets could cause injury. Therefore take great care not to touch the front of the drum. - Insert a new lancet drum (see Inserting the lancet drum).
![]() A lancet drum that has been removed from the lancing device has an in-built safety feature that prevents it being re-inserted. This rules out a potential infection risk.
A lancet drum that has been removed from the lancing device has an in-built safety feature that prevents it being re-inserted. This rules out a potential infection risk.
Used lancet drums can be discarded with regular household waste.

Keeping the lancing device in a safe place
Never keep the lancing device in a primed state nor expose it to extreme temperatures (e.g. in a hot car). This can cause parts of the lancing device to become deformed, so impairing its operation.
Cleaning the lancing device
To keep the lancing device in tip-top condition, clean it regularly and wipe off any blood from it immediately. Clean the lancing device from the outside only. Follow a weekly cleaning regime using a cloth moistened with 70% ethanol or 70% isopropanol (available at your pharmacy/chemist).
In addition, thoroughly wipe the inside of the cap using a cotton bud moistened with 70% ethanol or 70% isopropanol.
Allow the lancing device time to dry thoroughly.
Never dip the lancing device in the cleaning liquid.
This may damage internal parts, so impairing operation of the lancing device.
Use only 70% ethanol or 70% isopropanol to clean the lancing device. Other substances used for cleaning may attack the plastic and stop the lancing device from operating properly.
Guarantee
The statutory provisions on rights in consumer goods sales in the country of purchase shall apply.

Documents / ResourcesDownload manual
Here you can download full pdf version of manual, it may contain additional safety instructions, warranty information, FCC rules, etc.
Download Accu-Chek Multiclix -Lancing Device Instructions For Use
Advertisement
Thank you! Your question has been received!


Need Assistance?
Do you have a question about the Multiclix that isn't answered in the manual? Leave your question here.