
Related Manuals for Toshiba RAS-B07


Summary of Contents for Toshiba RAS-B07
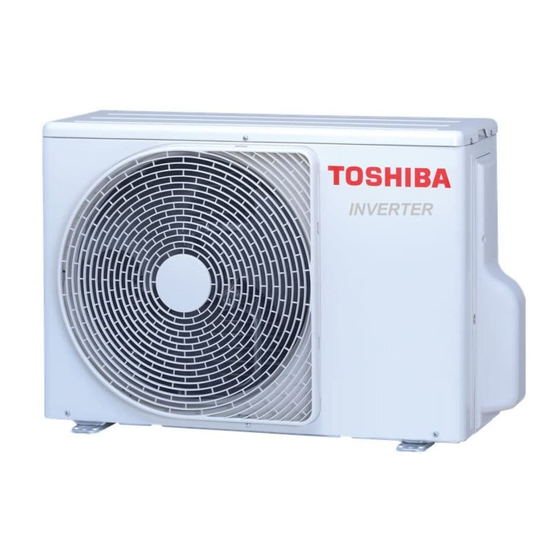
- Page 1 INSTALLATION MANUAL ENGLISH AIR CONDITIONER (SPLIT TYPE) Indoor unit RAS-B07, 10, 13, 16G3KVSG-E RAS-B07, 10, 13, 16G3KVSGB-E Outdoor unit RAS-07, 10, 13, 16J2AVSG-E1 1144250102...
-
Page 2: Table Of Contents
CONTENTS PRECAUTIONS FOR SAFETY ............................1 ACCESSORY PARTS .................................5 INSTALLATION DIAGRAM OF INDOOR AND OUTDOOR UNITS ...................6 Optional Installation Parts ...............................6 INDOOR UNIT ..................................7 Installation Place ................................7 Cutting a Hole and Mounting Installation Plate .......................7 Piping and Drain Hose Installation ..........................8 Indoor Unit Fixing ................................8 Drainage ..................................9 OUTDOOR UNIT .................................9... -
Page 3: Precautions For Safety
PRECAUTIONS FOR SAFETY PRECAUTIONS FOR SAFETY Read the precautions in This appliance is lled with this manual carefully before R32. operating the unit. Warning indications on the air conditioner unit Warning indication Description CAUTION CAUTION BURST HAZARD BURST HAZARD Open the service valves Open the service valves before the operation, otherwise before the operation, there might be the burst. - Page 4 DANGER FOR USE BY QUALIFIED PERSONS ONLY. TURN OFF MAIN POWER SUPPLY BEFORE ATTEMPTING ANY ELECTRICAL WORK. MAKE SURE ALL POWER SWITCHES ARE OFF. FAILURE TO DO SO MAY CAUSE ELECTRIC SHOCK. CONNECT THE CONNECTING CABLE CORRECTLY. IF THE CONNECTING CABLE IS CONNECTED WRONGLY, ELECTRIC PARTS MAY BE DAMAGED.
- Page 5 Do not use means to accelerate the defrosting process or to clean, other than those recommended by the manufacturer. The appliance shall be stored in a room without continuously operating ignition sources (for example: open fl ames, an operating gas appliance or an operating electric heater).
- Page 6 CAUTION • Exposure of unit to water or other moisture before installation could result in electric shock. Do not store it in a wet basement or expose to rain or water. • After unpacking the unit, examine it carefully for possible damage. •...
-
Page 7: Accessory Parts
Installation plate × 1 Wireless remote control × 1 Battery × 2 Remote control holder × 1 Toshiba Ultra pure fi lter × 2 Mounting screw × 6 Flat head wood screw × 2 Owner’s Manual × 1 Installation Manual × 1 B Label ×... -
Page 8: Installation Diagram Of Indoor And Outdoor Units
Pipe insulating material Air outlet 90 mm (polyethylene foam, 6 mm thick) 600 mm For RAS-B07, 10, 13G3KVSG-E Drain outlet RAS-B07, 10, 13G3KVSGB-E (polyethylene foam, 8 mm thick) When using a multi-system outdoor unit, refer to the installation manual For RAS-B16G3KVSG-E provided with the model concerned. -
Page 9: Indoor Unit
INDOOR UNIT Installation Place in operation above curtain rails, window cornice or other objects. (Unit : mm) A place which provides the spaces around the indoor unit as shown in the A place where there are no obstacles near the air inlet and outlet A place which allows easy installation of the to the outdoor unit A place which allows the front panel to be opened... -
Page 10: Piping And Drain Hose Installation
Left-hand connection with piping Piping and Drain Hose Installation Bend the connecting pipe so that it is laid within 43 mm above the wall surface. If the connecting pipe is laid exceeding 43 mm above the wall Piping and drain hose forming surface, the indoor unit may unstably be set on the wall. -
Page 11: Drainage
2. Put water in the drain pan and make sure that the water is drained out of Drainage doors. 3. When connecting extension drain hose, insulate the connecting part of extension drain hose with shield pipe. 1. Run the drain hose sloped downwards. NOTE Shield pipe The hole should be made at a slight downward slant on the outdoor side. -
Page 12: Draining The Water
Draining the Water Refrigerant Piping Connection Holes are provided on the base plate of the outdoor unit to ensure that the Flaring defrost water produced during heating operations is drained off effi ciently. If a centralized drain is required when installing the unit on a balcony or 1. -
Page 13: Evacuating
Packed valve handling precautions Evacuating Open the valve stem all the way out, but do not try to open it beyond the After the piping has been connected to the indoor unit, you can perform the stopper. air purge together at once. Pipe size of Packed Valve Size of Hexagon wrench AIR PURGE... -
Page 14: Electrical Works
ELECTRICAL WORKS RAS-B07G3KVSG-E RAS-B10G3KVSG-E RAS-B13G3KVSG-E RAS-B16G3KVSG-E Model RAS-B07G3KVSGB-E RAS-B10G3KVSGB-E RAS-B13G3KVSGB-E RAS-B16G3KVSGB-E – Power supply cable H07RN-F or 60245 IEC66 H07RN-F or 60245 IEC66 H07RN-F or 60245 IEC66 (1.25 mm or more) (0.75 mm or more) (1.5 mm or more) Connecting cable Indoor unit Outdoor unit Wiring of the connecting cable can be carried out without removing... -
Page 15: In Case Of Indoor Unit Connect With 1:1 Outdoor Unit
In Case of Indoor Unit Connect With 1:1 Outdoor Unit Power Supply Input at Outdoor Unit Terminal Block (Recommend) Indoor Unit Outdoor Unit Stripping length of the Connecting cable Connecting cable 1 2 3 connecting cable connect to 1 2 3 Earth line Terminal block (L N 1 2 3) 50 mm... - Page 16 Power supply input Wiring Diagram for 1:1 Outdoor Unit Power input at Outdoor Terminal Block (Recommend) Indoor Chassis Terminal Block Chassis Outdoor Terminal Block Power input Power input at Indoor Terminal Block (Optional) Indoor Chassis Terminal Block Power input Chassis Outdoor Terminal Block...
-
Page 17: In Case Of Indoor Unit Connect With Inverter Multi System (Ims)
In Case of Indoor Unit Connect With Inverter Multi System (IMS) Power Supply Input at Outdoor Unit Terminal Block Indoor Unit Outdoor Unit Stripping length of the Connecting cable Connecting cable 1(L) 2 3 connect to Connecting cable Terminal block (L N 1 2 3) Earth line 50 mm 10 mm... -
Page 18: Others
OTHERS Gas Leak Test Test Operation To switch the TEST RUN (COOL) mode, press [RESET] button for 10 seconds. (The beeper will make a short beep.) Check places for the indoor unit. Check places for OPERATION / the outdoor unit. RESET Button Auto Restart Function Setting Check the fl are nut connections for the gas leak with a gas leak detector...