Table of Contents
Advertisement
Quick Links
Advertisement
Table of Contents

Related Manuals for Bosch DUL60AF24


Summary of Contents for Bosch DUL60AF24
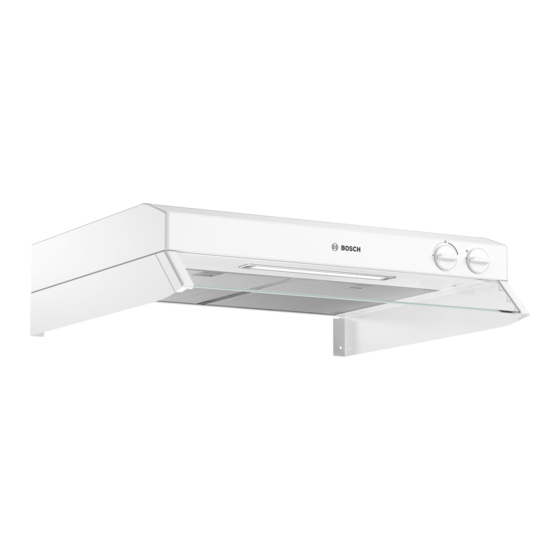
- Page 1 Extractor hood DUL60AF24 User manual and installation instructions [en]...
-
Page 2: Table Of Contents
en Safety Only use this appliance: Table of contents ¡ For extracting cooking vapour. ¡ In private households and in enclosed spaces in a domestic environment. USER MANUAL ¡ Up to an altitude of max. 2000 m above sea level. Safety .............. 2 Do not use the appliance: Avoiding material damage........ -
Page 3: Safety
Safety en Toxic gases from the flue or the extraction ▶ Never extinguish burning oil or fat with wa- shaft are sucked back into the living space. ter. Switch off the cooking zone. Extinguish flames carefully using a lid, fire blanket or something similar. -
Page 4: Avoiding Material Damage
en Avoiding material damage ▶ If the power cord of this appliance is dam- WARNING ‒ Risk of electric shock! aged, it must be replaced by the manufac- If the appliance or the power cord is dam- turer, the manufacturer's Customer Service aged, this is dangerous. or a similarly qualified person in order to ▶... -
Page 5: Operating Modes
Operating modes en 4 Operating modes 4.1 Air extraction mode The air which is drawn in is cleaned by the grease fil- ters and conveyed to the exterior by a pipe system. The air must not be discharged into a flue that is used for exhausting fumes from appliances burning gas or other fuels (not applicable to appliances that only discharge the air back into the... -
Page 6: Familiarising Yourself With Your Appliance
en Familiarising yourself with your appliance 5 Familiarising yourself with your appliance 5.1 Controls Activating or deactivating ventilation Activating ventilation for 60 minutes The controls are used to configure all functions of your appliance and to obtain information about the operat- Deactivating ventilation ing status. - Page 7 Cleaning and servicing en 7.5 Cleaning grease filters manually WARNING ‒ Risk of burns! The grease filters filter the grease from the cooking va- The appliance will become hot during operation. pour. Regularly cleaned grease filters guarantee a high Allow the appliance to cool down before cleaning it. ▶...
-
Page 8: Troubleshooting
en Troubleshooting 8 Troubleshooting Repairs to the appliance should only be carried out You can rectify minor faults on your appliance yourself. ▶ by trained specialist staff. Read the troubleshooting information before contacting Only use genuine spare parts when repairing the after-sales service. -
Page 9: Customer Service
Customer Service en 10 Customer Service If you have any queries on use, are unable to rectify The contact details for Customer Service can be found faults on the appliance yourself or if your appliance in the enclosed Customer Service directory or on our needs to be repaired, contact Customer Service. -
Page 10: 11.4 Secure Installation
en Installation instructions 11.4 Secure installation WARNING ‒ Risk of suffocation! Follow these safety instructions when in- Children may put packaging material over stalling the appliance. their heads or wrap themselves up in it and suffocate. WARNING ‒ Risk of poisoning! ▶ Keep packaging material away from chil- Risk of poisoning from flue gases being dren. - Page 11 Installation instructions en 11.5 General information WARNING ‒ Risk of electric shock! Follow these general instructions during the installation. Sharp-edged components inside the appli- ¡ For the installation, observe the currently valid build- ance may damage the connecting cable. ing regulations and the regulations of the local elec- ▶...
- Page 12 en Installation instructions Installing the appliance 11.8 Instructions for the exhaust air pipe Insert the screws in the appliance. The appliance manufacturer does not provide any war- ranty for faults attributable to the pipeline. ¡ Use a short, straight exhaust air pipe with as large a pipe diameter as possible.
- Page 13 Installation instructions en Installing the side panels In order to increase the air flow, open the one-way flap and remove the reducing disc. Screw in the screws, but do not tighten them. Adjust the reducing disc. Hook in the side panels in place and screw them in tightly.
- Page 14 en Installation instructions 11.11 Air flow diagrams You can find the air flow diagrams below. Basic ventilation – adjustment diagram Static pressure drop Setting = The A-measured sound pressure level at 10 m² sabin = The A-measured sound pressure level relative to 1 pW 0.46 0.54 0.65...
- Page 15 Installation instructions en Basic ventilation – size diagram Real pressure in the ventilation duct = The A-measured sound pressure level at 10 m² sabin = The A-measured sound pressure level relative to 1 pW...
- Page 16 en Installation instructions Forced ventilation – adjustment diagram Existing opening of the reducing disc Static pressure drop Cut-away rings Without reducing disc = The A-measured sound pressure level at 10 m² sabin = The A-measured sound pressure level relative to 1 pW K-factor 2.37 2.82...
- Page 17 Installation instructions en Forced ventilation – size diagram Real pressure in the ventilation duct = The A-measured sound pressure level at 10 m² sabin = The A-measured sound pressure level relative to 1 pW...
- Page 20 Expert advice for your Bosch home appliances, help with problems or a repair from Bosch experts. Find out everything about the many ways Bosch can support you: www.bosch-home.com/service Contact data of all countries are listed in the attached service directory.