Table of Contents
Advertisement
Quick Links
R e h m
Display
Replacements of Parts
Display
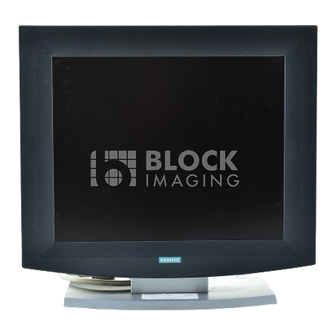
18" Color TFT Monitor (SCD 1897-M)
Applicable for Part Number 30 80 991
Print No.:
TD00-000.841.02.04.02
Replaces: TD00-000.841.02.03.02
03080991
TD
2001
© Siemens AG
The reproduction, transmission or use
of this document or its contents is not
permitted
without
express
authority. Offenders will be liable for
damages. All rights, including rights
created by patent grant or registration
of a utility model or design, are
reserved.
English
Doc. Gen. Date: 05.05
written
Advertisement
Table of Contents

Related Manuals for Siemens SCD 1897-M


Summary of Contents for Siemens SCD 1897-M
- Page 1 R e h m Display Replacements of Parts Display 18” Color TFT Monitor (SCD 1897-M) Applicable for Part Number 30 80 991 03080991 2001 © Siemens AG The reproduction, transmission or use of this document or its contents is not...
- Page 2 Assemblers and other persons who are not employed by or otherwise directly affiliated with or authorized by Siemens or one of its affiliates are directed to contact one of the local offices of Siemens or one of its affiliates before attempting installation or service pro- cedures.
-
Page 3: Table Of Contents
Mammomat Novation DR ..........14 3 _______ Changes to Previous Version_____________________________________ 22 Siemens AG TD00-000.841.02.04.02... -
Page 4: General Remarks
Do not connect the unit in the patient area! Monitor Remarks • The SCD 1897-M is a high-resolution 18" display (46 cm). • Prerequisite for the adjustment is the Instruction Manual that is shipped with each dis- play. Display TD00-000.841.02.04.02... -
Page 5: Repair / Troubleshooting
All required settings, see the Adjustment chapter, must be performed using the push-buttons on the side of the unit. A laptop is not required. • "SMFit test meter" luminous density meter, see the SPC. Siemens AG TD00-000.841.02.04.02 Display Page 5 of 22 Medical Solutions 05.05... -
Page 6: Adjustment Note
Adjustments may be performed only after a warm-up time of 15 minutes! NOTE As a rule, the push-buttons are not locked in replacement units (from the E-warehouse). They must be locked following installation. Display TD00-000.841.02.04.02 Siemens AG Page 6 of 22 05.05 CSPS21 Medical Solutions... -
Page 7: General Remarks Regarding System-Related Adjustments
The listed tolerances are not values for the constancy check of the display! • The monitor must be switched on at least 20 minutes prior to beginning the adjustment. Siemens AG TD00-000.841.02.04.02 Display Page 7 of 22 Medical Solutions 05.05... -
Page 8: Ax Application
Frequency and Phase Fig. 2: • Using the Text Page (more exactly adjustable) Select Explorer to specify the background color of Notepad and to select Notepad. Select Explorer: Display TD00-000.841.02.04.02 Siemens AG Page 8 of 22 05.05 CSPS21 Medical Solutions... - Page 9 The measurement is made using the Mavo monitor. When performing the measurement, make sure that the measuring sensor does not exert any pressure on the panel surface. Otherwise damage to the panel cannot be ruled out! Siemens AG TD00-000.841.02.04.02 Display Page 9 of 22 Medical Solutions 05.05...
-
Page 10: Leonardo
- Final Check: All steps in the test pattern must be detectable. If not, repeat the adjust- ment. The operating buttons must be locked again! Leonardo NOTE This display is operated at 1280 x 1024 pixels / 75 Hertz. Display TD00-000.841.02.04.02 Siemens AG Page 10 of 22 05.05 CSPS21 Medical Solutions... - Page 11 Select Display (invert so that the highlighted elements appear on a black background): - Open “ Display” => select “ Appearance” => under Items, select “ Selected Items” => under Color, select “ black” => accept with apply. Generate a text page with “mmmm”: Siemens AG TD00-000.841.02.04.02 Display Page 11 of 22 Medical Solutions 05.05...
- Page 12 (contrast). Backlight: The 100% field (maximum white) is adjusted using the backlight. Brightness: Adjustment of the black area (basic brightness and detection of the 5% field). Display TD00-000.841.02.04.02 Siemens AG Page 12 of 22 05.05 CSPS21 Medical Solutions...
- Page 13 - Alternately repeat both adjustments (backlight and brightness) until the specified val- ues are reached. - Final Check: All steps in the test pattern must be detectable. If not, repeat the adjust- ment. The operating buttons must be locked again! Siemens AG TD00-000.841.02.04.02 Display Page 13 of 22 Medical Solutions 05.05...
-
Page 14: Sp Application
Select Service and Local Service in the menu bar under Options. • Delete the password in the SW screen and click on OK. Fig. 8: Mammomat Novation DR -1 Service SW Display TD00-000.841.02.04.02 Siemens AG Page 14 of 22 05.05 CSPS21 Medical Solutions... - Page 15 System-related Adjustments • Select the Acquisition System button in the Home menu. Fig. 9: Mammomat Novation DR -2 Service SW Pos. 1 Acquisition system Siemens AG TD00-000.841.02.04.02 Display Page 15 of 22 Medical Solutions 05.05 CSPS21...
- Page 16 System-related Adjustments • Under Acquisition System, Quality Tests, select the Link Display. Fig. 10: Mammomat Novation DR -3 Service SW Pos. Displays Display TD00-000.841.02.04.02 Siemens AG Page 16 of 22 05.05 CSPS21 Medical Solutions...
- Page 17 System-related Adjustments • Then click on the Start button. Fig. 11: Mammomat Novation DR -4 Service SW Pos. 1 Start button Siemens AG TD00-000.841.02.04.02 Display Page 17 of 22 Medical Solutions 05.05 CSPS21...
- Page 18 • Then select the test images. Fig. 12: Mammomat Novation DR -5 Service SW Pos. 1 Test images • Maximize the image (double-click on the top blue bar). Display TD00-000.841.02.04.02 Siemens AG Page 18 of 22 05.05 CSPS21 Medical Solutions...
- Page 19 Fig. 13: Mammomat Novation DR - 6 Service SW Pos. 1 AWS Test Images Pos. 2 TFT Auto Calibration Fig. 14: Vertical bars on SMPTE Pos. 1 Max. resolution Siemens AG TD00-000.841.02.04.02 Display Page 19 of 22 Medical Solutions 05.05 CSPS21...
- Page 20 The region with the lowest horizontal resolution (vertical ines) must be displayed sharply, see (Fig. 14 / p. 19) or the green region (Fig. 15 / p. 20) must be displayed without disturbances or artefacts. Display TD00-000.841.02.04.02 Siemens AG Page 20 of 22 05.05 CSPS21 Medical Solutions...
- Page 21 After completing the adjustments, latch the control butotns by pressing the following buttons sequentially: - "SET" button 1x, - Press and hold the "Up arrow" key at least 3 sec. Siemens AG TD00-000.841.02.04.02 Display Page 21 of 22 Medical Solutions 05.05...
- Page 22 Changes to Previous Version 3Changes to Previous Version • Under System-specific Adjustments: Chapter “ SP Application => Mammomat Novation DR “ => Note deleted and Selection for Test Images changed. Display TD00-000.841.02.04.02 Siemens AG Page 22 of 22 05.05 CSPS21 Medical Solutions...