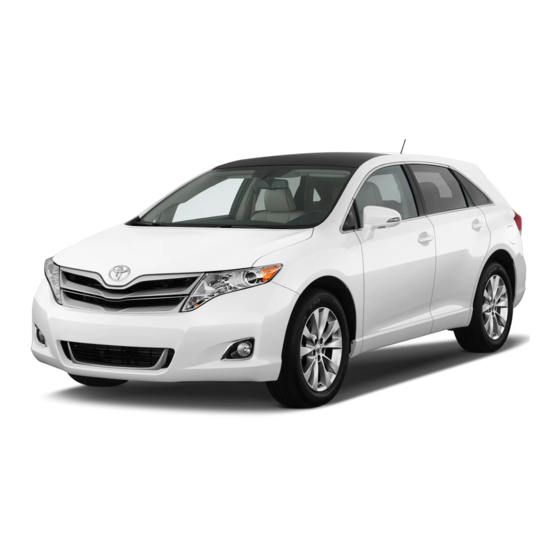
Toyota Venza 2013 Quick Reference Manual
Hide thumbs
Also See for Venza 2013:
- Owner's manual (521 pages) ,
- Catalog (7 pages) ,
- Features and specifications (21 pages)
Table of Contents
Advertisement
Advertisement
Table of Contents

Related Manuals for Toyota Venza 2013


Summary of Contents for Toyota Venza 2013
- Page 1 Venza 2 0 1 3 Quick RefeRence Guide...
- Page 2 Your dealership and the entire staff of Toyota Motor Sales, U.S.A., Inc. wish you many years of satisfied driving in your new Venza. A word about safe vehicle operations...
-
Page 3: Table Of Contents
Seat belts-Shoulder belt anchor Spare tire & tools Star Safety System 26-27 Tire Pressure Monitoring (warning) System Visit your Toyota dealer for information on customizing this feature. Programmable by customer. Refer to the Owner’s Manual for instructions and more information. ® HomeLink... -
Page 4: Steering Wheel Audio Controls 1
OVERVIEW Instrument panel Steering wheel controls 1,2,3 Steering wheel audio controls Telephone controls 1,2,3 Voice command button 1,2,3 Cruise control Ignition switch (standard key) Headlight, turn signal and front fog light controls Wiper and washer controls “ENGINE START STOP” button (Smart Key) Multi-Information Display Emergency flasher button Multi-Information Display switches... - Page 5 Air Conditioning controls Outside rearview mirror defoggers/Rear window defogger button/ Windshield wiper de-icer Enhanced VSC/TRAC OFF switch Power back door switch Power outside rearview mirror controls Power back door main switch If equipped For details, refer to the “Navigation System Owner’s Manual.” For details, refer to the “Display Audio System Owner’s Manual.”...
-
Page 6: Instrument Cluster
Electric power steering system warning If indicator does not turn off within a few seconds of starting engine, there may be a malfunction. Have vehicle inspected by your Toyota dealer. If this light flashes, refer to “Cruise control,” Section 2-4, 2013 Owner’s Manual. - Page 7 Low windshield washer fluid level warning Smart Key system warning Low fuel level warning Open door warning Airbag SRS warning Master warning Low Tire Pressure Warning Headlight low/high beam indicator Turn signal indicator Fog light indicator Slip indicator/Hill-start Assist Control indicator Cruise control/Cruise control SET indicator Anti-lock Brake System warning Automatic high beam indicator...
- Page 8 OVERVIEW Keyless entry Locking operation Without Smart Key system With Smart Key system Push Unlocking operation Without Smart Key system With Smart Key system Push ONCE: Driver door TWICE: All doors NOTE: If a door is not opened within 60 seconds of unlocking, all doors will relock for safety.
- Page 9 Smart Key system (if equipped) Start function Green indicator ON Depress Push brake pedal Carrying NOTE: Gear shift lever must be in Park and brake pedal depressed. Power (without starting engine) Without depressing the brake pedal, pressing the “ENGINE START STOP” button will change the operation mode in succession from: ACCESSORY Accessories such as the radio will operate.
-
Page 10: Fuel Tank Door Release And Cap
OVERVIEW Fuel tank door release and cap Turn to open Pull Store NOTE: Tighten until one click is heard. If the cap is not tightened enough, Check Engine “ ” indicator may illuminate. Light control-Instrument panel Brightness control Hood release Pull up latch and raise hood Pull Engage support rod... -
Page 11: Engine Maintenance
Engine maintenance 2.7 L 4-cylinder (1AR-FE) engine 3.5 L V6 (2GR-FE) engine Engine coolant reservoir Engine oil filler cap Engine oil level dipstick Windshield washer fluid tank NOTE: Regularly scheduled maintenance, including oil changes, will help extend the life of your vehicle and maintain performance. Please refer to the “Warranty Maintenance Guide.”... -
Page 12: Automatic Transmission
FEATURES/OPERATIONS Automatic Transmission Park* Reverse Neutral Drive “S” mode “D” “S” * The “ENGINE START STOP”/ignition switch must be “ON” and the brake pedal depressed to shift from Park. “S” (Sequential) mode Shift the shift lever to “S” position from “D” position. : Upshift (push and release) : Downshift (pull and release) Downshifting increases power going uphill, or provides engine braking downhill. -
Page 13: Auto Lock/Unlock 1
Auto lock/unlock Automatic door locks can be programmed to operate in four different modes, or turned OFF. -Doors lock when shifting from Park. -Doors lock when the vehicle speed is approximately 12 mph or higher. -Doors unlock when shifting into Park. -Doors unlock when the driver’s door is opened within 10 seconds after turning the “ENGINE START STOP”... -
Page 14: Seat Adjustments-Rear
FEATURES/OPERATIONS Seat adjustments-Rear Seat back angle Seat back angle Refer to the Owner’s Manual for more details. Seats-Folding rear row seats From inside From outside Pull Pull Left side remote Right side/center seat release rear remote seat release (1) Stow the seat belt buckles. (2) Hook the seat belt to the seat belt hangers. -
Page 15: Moonroof
Seats-Head restraints Rear center Front and rear (excluding center) seats Height Lock release button Lock release button Windows-Power Window lock switch Down Automatic operation Push the switch completely down or pull it completely up and release to fully open or close. To stop window midway, lightly push the switch in the opposite direction. -
Page 16: Lights & Turn Signals
FEATURES/OPERATIONS Lights & turn signals Headlights Headlights Parking lights Auto DRL OFF Without automatic high beam Low beam High beam flasher High beam -Daytime Running Light system (DRL) Automatically turns on the headlights at a reduced intensity. -Automatic light cut off system Automatically turns lights off after a delay of 30 seconds. -
Page 17: Windshield Wipers & Washers
Front fog lights (if equipped) Turn Front fog lights come on only when the headlights are on low beam. Turn signals Right turn Lane change Lane change Left turn Windshield wipers & washers Front Adjust frequency* Single wipe * Intermittent windshield wiper frequency adjustment Rotate to increase/decrease Interval wipe... -
Page 18: Air Conditioning/Heating
FEATURES/OPERATIONS Seat heaters (if equipped) Driver’s seat Front passenger’s seat Turn Air Conditioning/Heating Push: Automatic climate control ON Adjusting the temperature setting will cause the airflow vents, air intake and fan to adjust automatically. Turn: Temperature selector (driver side) Fan speed Airflow vent In “... -
Page 19: Enhanced Vsc Off Button
Enhanced VSC OFF button Enhanced VSC OFF button The Enhanced VSC OFF button is used to switch between modes related to the TRAC and Enhanced VSC functions. Refer to Section 2-4 of the Owner’s Manual for more information. Power outlets-12V DC Instrument panel Inside center console Luggage compartment... -
Page 20: Audio
FEATURES/OPERATIONS Audio Audio Type 1 Touch screen display Turn to Push to turn tune radio ON/OFF stations manually Push to or select display tracks or audio files screen Eject CD Seek station/ CD track select Push to pause or resume playing Type 2 - additional function Premium... -
Page 21: Audio
USB/AUX port By inserting a mini plug into the USB/AUX port, you can listen to music from a portable audio device through the vehicle’s speaker system while in USB/AUX mode. Steering wheel switches Volume control “ ” Use to search within the selected audio medium (radio, CD, iPod ®... -
Page 22: Cruise Control
FEATURES/OPERATIONS Cruise control Turning system ON/OFF System ON/OFF Functions Resume Increase speed Cancel Decrease speed The set speed may also be cancelled by depressing the brake pedal. The set speed may be resumed once vehicle speed exceeds 25 mph. Hill-start Assist Control (HAC) Brake pedal HAC helps prevent rolling backwards on an incline. -
Page 23: Garage Door Opener (Homelink®) 3
Garage door opener (HomeLink ® (if equipped) Garage door openers manufactured under license from HomeLink ® * can be programmed to operate garage doors, estate gates, security lighting, etc. Refer to “Garage door opener,” Section 3-5 in the Owner’s Manual for more details. -
Page 24: Multi-Information Display (Clock) 2
FEATURES/OPERATIONS Multi-Information Display (clock) TFT type LCD type Push “INFO” or “INFO-CLOCK” to change information in the following: (1) Average fuel economy (AVERAGE ECON) (2) Current fuel economy (CURRENT ECON) (3) Distance to empty (RANGE) (4) Average speed (AVERAGE SPEED) (5) Trip timer (TFT type only) Setting the clock TFT type (1) Press the “SETUP”... -
Page 25: Customizable Features
Customizable features If your vehicle has a TFT type multi-information display, you will be able to customize certain electronic features. Press the “SETUP” button while stopped to access the “Custom Settings” screen. Please see the Owner’s Manual for details. Tilt and telescopic steering wheel Lock release lever Angle Length... -
Page 26: Seat Belts
” indicator will illuminate. Correctly adjusting tire inflation will turn off the light after a few minutes. If the light does not turn off, have the system checked by your Toyota dealer. Refer to the Owner’s Manual for more details. -
Page 27: Doors-Child Safety Locks
Doors-Child safety locks Rear door Moving the lever to the lower position will allow the door to be opened only from the outside. Spare tire & tools Tool location Jack Jack handle Wheel nut wrench Removing the spare tire Loosen and remove the bolt Refer to the Owner’s Manual for tire changing and jack positioning procedures. - Page 28 Traction Control helps maintain traction on loose gravel and wet, icy, or uneven surfaces by applying brake force to the spinning wheel(s). Toyota’s TRAC sensors are activated when one of the drive wheels starts to slip. TRAC limits engine output and applies the brakes to the spinning wheel. This transfers power to the wheels that still have traction to help keep you on track.
-
Page 29: Floor Mat Installation
Floor mat installation There are two types of Toyota floor mats: carpeted and all-weather. Each vehicle has model-specific floor mats. Installation is easy. To keep your floor mat properly positioned, follow these steps: • Only use floor mats designed for your specific model. - Page 30 NOTES...
- Page 32 customeR expeRience centeR 1-800-331-4331 printed in u.s.A. 5/12 12-tcs-05898 00505-QRG13-Ven...