HP ProCurve MSM317 Installation And Getting Started Manual
Access device
Hide thumbs
Also See for ProCurve MSM317:
- Installation and configuration manual (61 pages) ,
- Deployment manual (21 pages) ,
- Installation manual (4 pages)
Table of Contents

Related Manuals for HP ProCurve MSM317


Summary of Contents for HP ProCurve MSM317
- Page 1 Installation and Getting Started Guide for HP HP ProCurve MSM317 Access Device ProCurve 5400zl Switches HP ProCurve MSM317 Access Device Installation and Getting Started Guide Installation and Getting Started Guide Power over Ethernet...
- Page 3 HP ProCurve MSM317 Access Device Installation and Getting Started Guide...
- Page 4 Publication Number material. 5998-0319 The only warranties for HP products and services are set forth April 2010 in the express warranty statements accompanying such products and services. Nothing herein should be construed as Applicable Products constituting an additional warranty.
-
Page 5: Table Of Contents
802.11b/g radio ....................1-7 Pass Through port...................1-7 PoE support .....................1-7 Safety information......................1-8 Professional Installation Required ...............1-8 Servicing .........................1-8 HP ProCurve Networking support ................1-9 Before contacting support ................1-9 Getting started ......................1-9 Online documentation ....................1-9 Installation Hardware overview......................2-2 External interfaces and status lights..............2-2 External interfaces ..................2-2... - Page 6 Contents Using the reset button ..................2-6 Power ........................2-6 Faceplate and trim panel ..................2-7 Installation .......................2-7 Removal ......................2-8 Radio and antennas ....................2-8 Installing the MSM317 ....................2-9 Checking status after installation................2-9 Connecting cables to the MSM317 ..............2-9 Additional configuration..................2-9 Configuration Important configuration information ................3-2 Provisioning the MSM317....................3-2 Directly provisioning the MSM317 ..............3-3 Connectivity page ...................3-5...
- Page 7 Contents VLAN ID ......................3-16 Quarantine VLAN ..................3-17 Allow dynamic VLAN assignment...............3-18 VSC binding ......................3-19 Binding to an access-controlled VSC ............3-20 Binding to a non-access-controlled VSC............3-27 Authentication .....................3-29 802.1X ......................3-30 MAC-based.....................3-30 RADIUS ......................3-30 Viewing status information ..................3-31 AP details .......................3-31 Diagnostic information ................3-33 Networking information - Controller ............3-34 Networking information - Manager ............3-34 Maintenance information................3-34...
- Page 8 Contents...
-
Page 9: Introduction
Contents About this guide ......................1-2 Products covered....................1-2 Important terms .....................1-2 Conventions ........................1-3 New in this release .......................1-5 Introducing the MSM317 Access Device ..............1-6 Key features......................1-7 Safety information......................1-8 Servicing .........................1-8 HP ProCurve Networking support ................1-9 Getting started ......................1-9 Online documentation ....................1-9... -
Page 10: About This Guide
The following terms are used in this guide. Term Description MSM AP Refers to any HP ProCurve Networking MSM3xx or MSM4xx Access Point. Specific model references are used where appropriate. MSM7xx Refers to any HP ProCurve Networking MSM7xx Controller, including Controller both Access Controller and Mobility Controller variants. -
Page 11: Conventions
Introduction Conventions Conventions Management tool This guide uses specific syntax when directing you to interact with the provisioning tool interface on the MSM317 and the management tool interface on an MSM7xx Controller. Refer to the following images for identification of key user-interface elements and then the table below for sample directions: MSM317 provisioning tool Main menu... -
Page 12: Warnings And Cautions
Introduction Conventions Example instructions in this guide What to do in the user interface Select Provisioning > Discovery. On the MSM317 On the main menu select Provisioning, and then select Discovery on the sub-menu. For Password specify secret22. On the MSM317 and an MSM7xx Controller In the Password field enter the text secret22 exactly as shown. -
Page 13: Commands And Program Listings
Introduction New in this release Commands and program listings Monospaced text identifies commands and program listings as follows: Example Description Command name. Specify it as shown. use-access-list Items in italics are parameters for which you must supply a value. ip_address Items enclosed in square brackets are optional. -
Page 14: Introducing The Msm317 Access Device
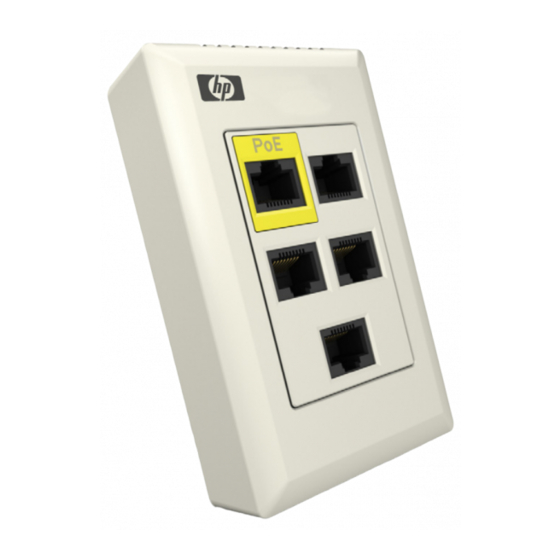
Introduction Introducing the MSM317 Access Device Introducing the MSM317 Access Device The MSM317 Access Device revolutionizes the way wireless and wired IP-based services are delivered to hospitality and residential properties. The MSM317 integrates wired and wireless connectivity into a small unit that can be quickly and discretely installed in a standard wall box. -
Page 15: Key Features
For the MSM317 to provide 802.11af Class 0 and 3 support, it must be powered by an 802.3at or PoE+ source with an output power greater than 23 watts. For example, the HP ProCurve 2910al-POE+ switch provides up to 30 watts per port. -
Page 16: Safety Information
It is normal for the rear metal cover of the MSM317 to get hot during operation. The cover is a heat sink and is used to dissipate the heat generated by the MSM317. Servicing There are no user-serviceable parts inside HP ProCurve products. Any servicing, adjustment, maintenance, or repair must be performed only by trained service personnel. -
Page 17: Hp Procurve Networking Support
Introduction HP ProCurve Networking support HP ProCurve Networking support HP ProCurve Networking offers support 24 hours a day, seven days a week through a number of automated electronic services. See the Customer Support/Warranty booklet included with your product. The HP ProCurve Networking Web site, www.hp.com/go/procurve/support... - Page 18 Introduction Online documentation 1-10...
-
Page 19: Installation
Chapter 2: Installation Installation Contents Hardware overview......................2-2 External interfaces and status lights..............2-2 Punch-down block wiring..................2-5 Integrated switch ....................2-5 Reset button ......................2-6 Power ........................2-6 Faceplate and trim panel ..................2-7 Radio and antennas ....................2-8 Installing the MSM317 ....................2-9 Checking status after installation................2-9 Connecting cables to the MSM317 ..............2-9 Additional configuration..................2-9... -
Page 20: Hardware Overview
Installation Hardware overview Hardware overview This section provides detailed descriptions of the MSM317 hardware and its functionality. External interfaces and status lights External interfaces The MSM317 features the following external interfaces: Front interfaces Description Port 1, 2, 3, 4 Auto-sensing 10/100 Mbps Ethernet port with RJ-45 connector. -
Page 21: Status Lights
Installation Hardware overview Rear interfaces Description Uplink port (RJ-45 Auto-sensing 10/100 Mbps Ethernet port with both an RJ-45 or punch-down connector and punch-down block. Only one connector can be block) used at a time. Managed by the MSM317. ... - Page 22 Installation Hardware overview The status lights provide the following information while the MSM317 attempts to discover and establish a management tunnel with an MSM7xx Controller. See Working with Controlled APs in the MSM7xx Controllers Management and Configuration Guide for more information about the discovery process.
-
Page 23: Punch-Down Block Wiring
Installation Hardware overview Punch-down block wiring The punch-down block connector is wired as follows: Caution Do not connect both the Punch-down block and the Uplink port to a network. Only one connection can be used at a time. To ensure good connections when using the punch-down block: ... -
Page 24: Reset Button
For the MSM317 to provide 802.11af Class 0 and 3 support, it must be powered by an 802.3at or PoE+ source with an output power greater than 23 watts. For example, the new HP ProCurve 2910al-POE+ switch provides up to 30 watts per port. The Uplink port must be connected to an 802.3af compliant power source. -
Page 25: Faceplate And Trim Panel
Installation Hardware overview The HP ProCurve Switch 2610 series features several models with PoE support that can be used in conjunction with the MSM317 to build a cost-effective wireless networking infrastructure. Faceplate and trim panel The MSM317 includes the following faceplates and trim panels: ... -
Page 26: Removal
Installation Hardware overview Removal To remove the faceplate, slightly push in two tabs on one side of the MSM317 body with a small flat screwdriver. To remove the trim panel, pry off the trim panel with a small flat screwdriver. (BS 4662 version shown.) Press here to remove... -
Page 27: Installing The Msm317
Installation Installing the MSM317 Installing the MSM317 Install the MSM317 as directed in the MSM317 Access Device Installation Guide provided with the unit and available online. The Installation Guide describes how to physically install a factory-default MSM317 in an electrical outlet box and make basic connections. For most installations, installing a factory-default MSM317 is sufficient, as the MSM317 will automatically discover and connect with an MSM7xx Controller after it is powered on. - Page 28 Installation Installing the MSM317 2-10...
-
Page 29: Configuration
Chapter 3: Configuration Configuration Contents Important configuration information ................3-2 Provisioning the MSM317....................3-2 Directly provisioning the MSM317 ..............3-3 Configuring the switch ports ..................3-8 Important note regarding controller teaming ............3-8 Switch ports page ....................3-8 Port configuration page ..................3-9 Port settings ......................3-9 Quality of service....................3-10 Rate limiting ......................3-12 MAC filter ......................3-13 VLAN ........................3-15... -
Page 30: Important Configuration Information
Important configuration information Important configuration information The MSM317 is part of the HP ProCurve MSM family of wireless networking products. As such, it shares many of the same configuration options available on other MSM APs, and is configured in the same way by using the management tool on an MSM7xx Controller. -
Page 31: Directly Provisioning The Msm317
Configuration Provisioning the MSM317 Directly provisioning the MSM317 Note Direct provisioning of the MSM317 can only be done when the MSM317 is in its factory-default state, meaning that it has not been provisioned or has not discovered an MSM7xx Controller since last being reset to factory defaults. To force an MSM317 into its factory-default state, see Reset button on page 2-6. - Page 32 Configuration Provisioning the MSM317 8. On the Login page, specify admin for both Username and Password and then select Login. The provisioning tool home page opens. 9. Click Provision at the bottom of the home page and provision the MSM317 via settings on the Connectivity and Discovery pages.
-
Page 33: Connectivity Page
Configuration Provisioning the MSM317 Connectivity page Use the Connectivity page to define addressing settings for the Uplink port. Enable provisioning of Connectivity here. Interface Set the VLAN ID that will be used on the Uplink port for management traffic. This VLAN is only used for the discovery of an MSM7xx Controller and does not apply to user traffic sent on Ports 1 to 4 or the Uplink port. - Page 34 Configuration Provisioning the MSM317 802.1X Enable this option when the MSM317 Uplink port is connected to a secured switch port that requires 802.1X authentication. Once the MSM317 is authenticated, controller discovery proceeds as usual. Note If this option is enabled and the MSM317 Uplink port is connected to a unsecured switch port, 802.1X is ignored and discovery proceeds as usual.
-
Page 35: Discovery Page
Configuration Provisioning the MSM317 Discovery page Enable provisioning of Discovery here. Use the Discovery page to provision the method that the MSM317 uses to discover an MSM7xx Controller. Discover using DNS When this option is enabled, the MSM317 attempts to connect with an MSM7xx Controller using the host names in the order that they appear in the list. -
Page 36: Location Page
Configuration Configuring the switch ports Location page You can optionally use the Location page to record a reminder as to where your are physically installing the MSM317. Configuring the switch ports This section explains how to configure the switch ports using the management tool on an MSM7xx Controller. -
Page 37: Port Configuration Page
Configuration Configuring the switch ports Port configuration page Ports 1 to 4 each have their own configuration page. The following screen shows the configuration page for Port 1. Configuration settings for the other ports are identical, except for the Power over Ethernet option which is only available on Port 1. Enable/disable the port here. -
Page 38: Port Name
Configuration Configuring the switch ports Port name Friendly name assigned to the port. Flow control When this option is enabled, the MSM317 uses Ethernet flow control when exchanging traffic with a connected device. If you are using the Rate limiting option to limit ingress traffic you should enable flow control. -
Page 39: Default Traffic Priority
Configuration Configuring the switch ports Default traffic priority Use this option to specify the priority (queue) that the MSM317 will assign to traffic in certain cases. The following tables summarize how traffic is classified. If the Priority lookup option is disabled: Is a VLAN QoS marking on Queue to which... -
Page 40: Priority Lookup
Configuration Configuring the switch ports Priority lookup Enable this option to classify ingress traffic based on 802.1p, DiffServ, or both. 802.1p This mechanism classifies traffic based on the value of the VLAN priority field present within the VLAN header. Queue 802.1p (VLAN priority field value) DiffServ (Differentiated Services) This mechanism classifies traffic based on the value of the Differentiated Services (DS) -
Page 41: Ingress Rate
Configuration Configuring the switch ports Ingress rate Set the maximum rate at which this port will accept ingress traffic. Traffic in excess of the set rate is dropped. When using this option you should enable Flow control. This will ensure that a client device does not send traffic in excess of the ingress limit. - Page 42 Configuration Configuring the switch ports 3. Select Add New MAC List. The Add/Edit MAC list page opens. Each entry in the MAC list contains a MAC address and its associated mask. By varying the mask, an entry can be defined to match a single address or a range of addresses. 4.
-
Page 43: Vlan
Configuration Configuring the switch ports 9. Select the MAC filter checkbox. 10. Select the MAC filter checkbox. 11. Under Available MAC lists, select each MAC list you want to use and select the right arrow icon. 12. Select Save. VLAN This option lets you define a VLAN on the port. -
Page 44: Vlan Id
Configuration Configuring the switch ports For example: VLAN settings Incoming traffic Outgoing traffic Uplink port Port type = Untagged Only untagged Outgoing traffic on Traffic is sent/received on VLAN ID = 20 traffic is accepted. the port is untagged. VLAN 20. Port type = Tagged Only traffic tagged Outgoing traffic on... -
Page 45: Quarantine Vlan
Configuration Configuring the switch ports VLAN example The following diagram illustrates how traffic is handled by the switch when VLANs are assigned to one or more ports. MSM317 Switch Port 1 VLAN 10 VLAN 10 VLAN 10,Tagged Port 2 VLAN 10 VLAN 10 VLAN 30 VLAN 10,Tagged... -
Page 46: Allow Dynamic Vlan Assignment
Configuration Configuring the switch ports Allow dynamic VLAN assignment When this option is enabled, a VLAN that is dynamically assigned to a user will override the VLAN settings for the port. Dynamic VLANs are assigned by setting an attribute in a user’s RADIUS account or in a local user account on the MSM7xx Controller. -
Page 47: Vsc Binding
Configuration Configuring the switch ports Example 2: When binding to a non-access-controlled VSC In this scenario, Port 2 is bound to a non-access-controlled VSC named Guest. This VSC is configured to provide 802.1X authentication with the login credentials for user A validated against the local user list stored on the MSM7xx Controller. -
Page 48: Binding To An Access-Controlled Vsc
The following examples illustrate various ways of binding to an access-controlled VSC. Example 1: Binding to the default VSC In this scenario, Port 2 is bound to the VSC named HP ProCurve (which is the default VSC). Authentication occurs using the local user accounts on the MSM7xx Controller (via 802.1X or HTML-based logins). - Page 49 Configuration Configuring the switch ports Key configuration settings for Port 2 are as follows: Key configuration settings for the VSC are as follows: Example 2: Binding to a specific VSC 3-21...
- Page 50 Configuration Configuring the switch ports In this scenario, Port 2 is bound to the VSC named Guest. Authentication occurs using the local user accounts on the MSM7xx Controller (via 802.1X or HTML-based logins). Once authenticated, user A gains access to resources on the private network according to the configuration of the public access interface feature on the MSM7xx Controller.
- Page 51 Configuration Configuring the switch ports Key configuration settings for the VSC are as follows: Example 3: Binding to multiple VSCs 3-23...
- Page 52 Configuration Configuring the switch ports In this scenario, the MSM317 provides access for three types of users as follows: VOIP phone An in-room IP phone is connected to Port 1, which is bound to the VSC named Phone. Authentication occurs using the phone MAC address via the local user accounts on the MSM7xx Controller.
- Page 53 Configuration Configuring the switch ports User A Wired guests, as illustrated by user A, connect to Port 2, which is bound to the VSC named Guest. Authentication occurs using the local user accounts on the MSM7xx Controller. Once authenticated, user A gains access to resources on the private network according to the configuration of the public access interface feature on the MSM7xx Controller.
- Page 54 Configuration Configuring the switch ports User B Wireless guests, illustrated by user B, connect to the MSM317 radio using the SSID Guest. This SSID is defined in the VSC named Guest which is bound to the MSM317 using Controlled APs > [AP group] >> VSC bindings on the MSM7xx Controller. (There is no option on the MSM317 to bind a VSC to the wireless port.) Authentication occurs using the local user accounts on the MSM7xx Controller.
-
Page 55: Binding To A Non-Access-Controlled Vsc
Configuration Configuring the switch ports Binding to a non-access-controlled VSC When a port is bound to a non-access-controlled VSC, the MSM7xx Controller is used for authentication tasks only. Authentication can occur by checking the user’s MAC address or via 802.1X. Access control must then be performed by another device on the network, or not at all. - Page 56 Configuration Configuring the switch ports Key configuration settings for Port 2 are as follows: Key configuration settings for the VSC are as follows: 3-28...
-
Page 57: Authentication
Configuration Configuring the switch ports If the private network is operating on a VLAN, you can assign a VLAN to Port 2. In the following scenario, once authenticated, the user gains direct access to any resources on the private network using VLAN 10. Authentication This option is only available if the VSC binding option is not enabled. -
Page 58: 802.1X
Configuration Configuring the switch ports If both authentication options are enabled at the same time, then: 802.1X takes priority for client stations that are 802.1X enabled. If 802.1X authentication fails, MAC authentication is not checked and the client station fails to authenticate. ... -
Page 59: Viewing Status Information
Configuration Viewing status information Viewing status information The MSM7xx management tool provides a number of pages where you can view MSM317 status information. To access these pages, first select the MSM317 in the Network Tree. Note For detailed descriptions of each page shown in the following sections, see the online help. AP details To view global information about the MSM317, select the MSM317 in the Network Tree under Controlled APs, then in the right pane select Overview >... - Page 60 Configuration Viewing status information Status Green: The controller is synchronized. Red: The controller is not functioning normally. Refer to the Diagnostic column for details. Grey blinking: An action is pending for this controller. Sec. the Action column for details Controller name Name assigned to the controller.
-
Page 61: Diagnostic Information
Configuration Viewing status information Diagnostic Description Resetting configuration The controller’s configuration is being reset to factory defaults. This is normal and will occur when the software version on the manager is changed or if the controller is not synchronized. Restoring configuration The controller is currently restoring its previous configuration settings. -
Page 62: Networking Information - Controller
Configuration Viewing status information Networking information - Controller Control channel Interface the controller is using to communicate with the manager. VLAN identifier VLAN the controller is using to communicate with the manager. MAC address Controller MAC address. IP address Controller IP address. IP netmask Network mask associated with the IP address. -
Page 63: Security Information
Configuration Viewing status information Firmware revision Version number of the firmware currently loaded on the controller. Security information Authorization status Indicates if the controller has been authenticated by the manager. Connected since Indicates the date and time the controller last connected to the manager. Wireless clients To see a list of all wireless clients connected to the MSM317 and related status information, select the MSM317 in the Network Tree under Controlled APs, then in the right pane select... -
Page 64: Port Statistics
Configuration Viewing status information Signal Indicates the strength of the radio signal received from client stations. Signal strength is expressed in decibel milliwatt (dBm). The higher the number the stronger the signal. Noise Indicates how much background noise exists in the signal path between client stations and the MSM317. - Page 65 Configuration Viewing status information Errors: Number of packets received with errors. This can be caused by overruns, unaligned frames, bad CRCs, frame length violations, or late collisions. Transmit Packets: Number of packets transmitted. Dropped: Number of transmitted packets that were dropped. ...
-
Page 66: Bridge Port Statistics
Configuration Viewing status information Bridge port statistics To see the traffic forwarding tables for the bridge and the switch ports, select the MSM317 in the Network Tree under Controlled APs, then in the right pane select Status > Bridge. For example: Bridge status State... -
Page 67: Bridge Forwarding Table
Identifies the MAC address to be matched. Traffic addressed to this address is forwarded on the corresponding port. VSC ID Internal identifier assigned to a VSC. For use by HP ProCurve support. VLAN Identifies the VLAN that the MAC address is associated with. - Page 68 Identifies the MAC address to be matched. Traffic addressed to this address is forwarded on the corresponding port. VSC ID Internal identifier assigned to a VSC. For use by HP ProCurve support. VLAN Identifies the VLAN that the MAC address is associated with.
- Page 69 Appendix A: Regulatory information Regulatory information Contents Notice for U.S.A......................A-2 Notice for Canada ....................... A-3 Notice for the European Community ............... A-3 Notice for Brazil ......................A-4 Notice for Japan ......................A-5 Notice for Taiwan......................A-5 Notice for Korea ......................A-5...
-
Page 70: Regulatory Information
Regulatory information Notice for U.S.A. Manufacturer's FCC Declaration of Conformity Statement Manufacturer: Hewlett-Packard Company 3000 Hanover Street Palo Alto, CA 94304-1185 USA Phone: 650-857-1501 For questions regarding this declaration, contact the Product Regulations Manager at the above address or phone number. This device complies with Part 15 of the FCC rules. -
Page 71: Notice For Canada
R&TTE Directive 1999/5/EC. Compliance with these directives implies conformity to harmonized European standards (European Norms) that are listed on the EU Declaration of Conformity that has been issued by HP for this device. Countries of Operation & Conditions of Use... -
Page 72: Disposal Of Waste Equipment By Users In Private Household In The European Union
All HP ProCurve devices are designed to be compliant with the rules and regulations in locations they are sold and will be labeled as required. Any changes or modifications to HP ProCurve Equipment, not expressly approved by HP, could void the user's authority to operate this device. -
Page 73: Notice For Japan
Regulatory information Notice for Japan Notice for Korea (warning for wireless equipment) Notice for Taiwan DGT LPD (Low Power Device) Statement... - Page 74 Regulatory information...
- Page 76 To learn more, visit www.hp.com/go/procurve/ © Copyright 2010 Hewlett-Packard Development Company, L.P. The information contained herein is subject to change without notice. The only warranties for HP products and services are set forth in the express warranty statements accompanying such products and services.