
Related Manuals for Sony CDX-G3150UP


Summary of Contents for Sony CDX-G3150UP
-
Page 1: Compact Disc
4-542-303-51(1) FM/AM Operating Instructions Compact Disc Player For the connection/installation, see page 16. To switch the FM/AM tuning step, see page 5. To cancel the demonstration (DEMO) display, see page 10. CDX-G3150UP... - Page 2 For safety, be sure to install this unit in the dashboard of the car as the rear side of the unit becomes hot during use. For details, see “Connection/Installation” (page 16). Laser Diode Properties Emission Duration: Continuous Laser Output: Less than 53.3 μW (This output is the value measurement at a distance of 200 mm from the objective lens surface on the Optical Pick-up Block with 7 mm aperture.)
-
Page 3: Table Of Contents
Table of Contents Guide to Parts and Controls ....4 Getting Started Detaching the Front Panel....5 Switching the FM/AM Tuning Step . -
Page 4: Guide To Parts And Controls
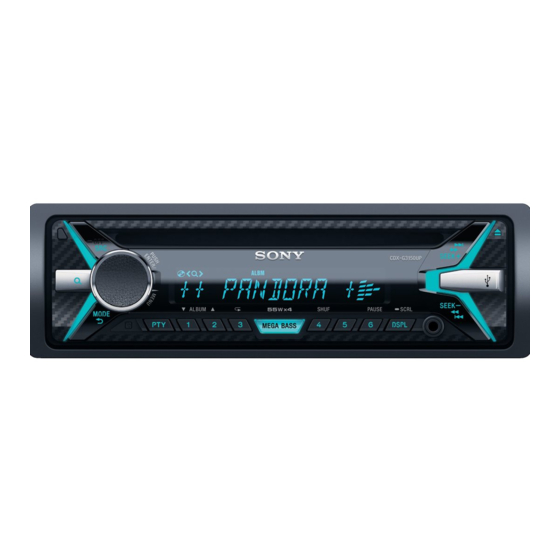
Guide to Parts and Controls Main unit Front panel release button (back) Return to the previous display. SRC (source) MODE (page 6, 8, 9) Turn on the power. Change the source. Receptor for the remote commander ... -
Page 5: Getting Started
Setting the Clock Getting Started Press MENU, rotate the control dial to select [GENERAL], then press it. Detaching the Front Panel Rotate the control dial to select [CLOCK- You can detach the front panel of this unit to ADJ], then press it. prevent theft. -
Page 6: Connecting Other Portable Audio Device
Connecting Other Portable Listening to the Radio Audio Device Listening to the Radio Turn off the portable audio device. Tuning step setting is required (page 5). Turn down the volume on the unit. To listen to the radio, press SRC to select [TUNER]. Connect the portable audio device to the AUX input jack (stereo mini jack) on the Storing automatically (BTM) -
Page 7: Using Radio Data System (Rds)
Using Radio Data System (RDS) Playback Selecting program types (PTY) Playing a Disc Press PTY during FM reception. Insert the disc (label side up). Rotate the control dial until the desired program type appears, then press it. The unit starts to search for a station broadcasting the selected program type. -
Page 8: Searching And Playing Tracks
To remove the device To exit the Quick-BrowZer mode Stop playback, then remove the device. Press (browse). Caution for iPhone Searching by skipping items When you connect an iPhone via USB, phone call volume is controlled by the iPhone, not the unit. Do (Jump mode) not inadvertently increase the volume on the unit during a call, as a sudden loud sound may result... -
Page 9: Listening To Pandora
Using the station list Listening to Pandora® The station list allows you to easily select a desired station. Pandora® is available to stream music through your During playback, press (browse). iPhone. You can control Pandora® on a USB- connected iPhone from this unit. Press SEEK + to select the sorting order The Pandora®... -
Page 10: Settings
AUTO OFF Shuts off automatically after a desired time Settings when the unit is turned off: [NO], [30S] (30 seconds), [30M] (30 minutes), [60M] (60 Canceling the DEMO Mode minutes). AUX-A (AUX audio) You can cancel the demonstration display which Activates the AUX source display: [ON], [OFF]. -
Page 11: Display Setup (Display)
Display Setup (DISPLAY) Additional Information DEMO (demonstration) Activates the demonstration: [ON], [OFF]. Precautions BLK OUT (black out) Cool off the unit beforehand if your car has been Turns off the illumination automatically for any parked in direct sunlight. source (e.g., during radio reception/CD ... -
Page 12: Maintenance
MP3/WMA file (track) If you have any questions or problems concerning your unit that are not covered in this manual, consult your nearest Sony dealer. Maintenance Cleaning the connectors The unit may not function properly if the connectors between the unit and the front panel are not clean. -
Page 13: Troubleshooting
Your dealer may not handle some of the above listed accessories. Please ask the dealer for detailed Tuning range: information. 531 – 1,602 kHz (at 9 kHz step) 530 – 1,710 kHz (at 10 kHz step) Design and specifications are subject to change AM tuning step: without notice. -
Page 14: Radio Reception
CD playback Stored stations and correct time are erased. The fuse has blown. The disc does not play back. Makes a noise when the position of the ignition Defective or dirty disc. is switched. The CD-R/CD-RW is not for audio use (page 11). ... -
Page 15: Error Displays/Messages
: The beginning or the end of the disc has been reached. If these solutions do not help improve the situation, consult your nearest Sony dealer. : The character cannot be displayed. If you take the unit to be repaired because of CD playback trouble, bring the disc that was used at the time the problem began. -
Page 16: Connection/Installation
Parts List for Installation Connection/Installation Cautions Run all ground (earth) leads to a common ground (earth) point. × 2 Do not get the leads trapped under a screw, or caught in moving parts (e.g., seat railing). ... -
Page 17: Connection
Connection Subwoofer* Power amplifier* White White/black striped Front speaker* Gray Gray/black striped Green Green/black striped *1*2 Rear speaker Purple Purple/black striped Black Yellow For details, see “Making connections” (page 18). Blue/white striped (MAX 0.4A) from a wired remote control (not supplied)* from a car antenna (aerial) *1 Not supplied... -
Page 18: Installation
Making connections Installation To a common ground (earth) point First connect the black ground (earth) lead, then Removing the protection collar and the connect the yellow and red power supply leads. bracket To the +12 V power terminal which is energized at all times Before installing the unit, remove the protection Be sure to first connect the black ground (earth) -
Page 19: Detaching And Attaching The Front Panel
In such a case, Make sure the 4 catches on the protection collar consult your nearest Sony dealer. are properly engaged in the slots of the unit. Mounting the unit in a Japanese car You may not be able to install this unit in some makes of Japanese cars. - Page 20 ©2014 Sony Corporation Printed in Thailand...