Miele KM 520 Operating And Installation Instructions
Ceramic hobs
Hide thumbs
Also See for KM 520:
- Operating and installation manual (44 pages) ,
- Operating and installation instructions (36 pages) ,
- Operating and installation instructions (48 pages)
Table of Contents
Advertisement
Quick Links
Advertisement
Table of Contents

Related Manuals for Miele KM 520


Summary of Contents for Miele KM 520
- Page 1 Operating and Installation instructions Ceramic hobs KM 520 KM 523 en - GB To avoid the risk of accidents or damage to the appliance it is essential to read these instructions before it is installed and used for the first time.
-
Page 2: Table Of Contents
KM 520........ - Page 3 Contents Installation ............28 Safety instructions for installation .
-
Page 4: Description Of The Appliace
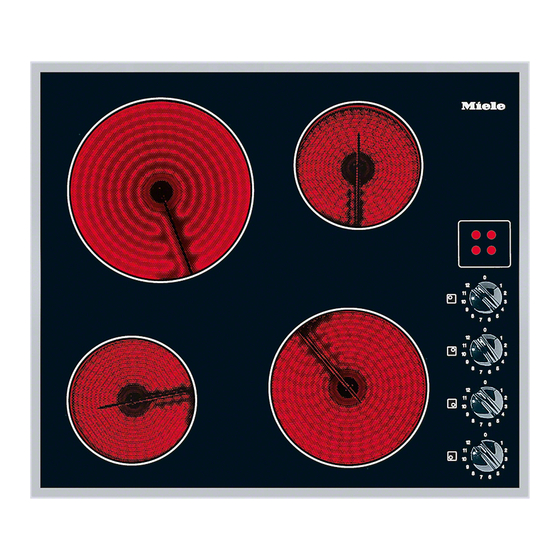
Description of the appliace KM 520 abcd Single circle zones Control for cooking zone f Rear left g Rear right Residual heat indicators h Front right i Front left... - Page 5 Description of the appliace KM 523 Double circle zone Control for cooking zone bd Single circle zones f Rear left g Rear right Extended cooking zone h Front right i Front left Residual heat indicators...
-
Page 6: Cooking Zones
Description of the appliace Cooking zones Cooking KM 520 KM 523 zone C in cm C in cm Rating in watts Rating in watts (230 V) (230 V) 14.5 1200 12.0 / 21.0 750 / 2200 21.0 2300 14.5 1200 14.5... -
Page 7: Warning And Safety Instructions
Warning and Safety instructions The electrical safety of this To avoid the risk of accidents and appliance can only be guaranteed damage to the appliance, please when continuity is complete between it read these instructions carefully and an effective earthing system which before using it for the first time. - Page 8 Warning and Safety instructions Correct usage Do not use the appliance to heat up the room. Due to the high temperatures For safety reasons this appliance radiated, objects near the appliance must only be operated after it has been could catch fire. The life of the built in.
- Page 9 Warning and Safety instructions Safety with children Keep all pans out of reach of children. Turn pan handles inwards The appliance is only intended for away from the edge of the hob. Danger use by adults who have read these of burning or scalding.
- Page 10 Warning and Safety instructions Protecting the appliance from To prevent the risk of spillages etc. burning on, remove any soiling as damage quickly as possible and ensure that pan Do not use pots and pans on the bases are clean, dry and free of ceramic hob with bases with grease.
- Page 11 Warning and Safety instructions Protection from burning and Do not cover the appliance, e.g. with a cloth, kitchen foil, etc. This could scalding be a fire hazard if the appliance is The surface of the appliance is hot switched on by mistake. when in use, and remains hot for quite If oil or fat does catch fire, do not a while after being switched off.
- Page 12 Disconnect completely from the that the cable of the electrical electricity supply. Contact the Miele appliance does not come into contact Customer Contact Centre. with the hot appliance. The insulation...
-
Page 13: Caring For The Environment
Caring for the environment Disposal of the packing Disposal of your old appliance material Electrical and electronic appliances often contain materials which, if The transport and protective packing handled or disposed of incorrectly, has been selected from materials which could be potentially hazardous to are environmentally friendly for human health and to the environment. -
Page 14: Before Using For The First Time
Before using for the first time Heating up for the first time Please stick the extra data plate for the appliance supplied with this On hobs with bevelled glass edges, documentation in the space provided in a small gap may be visible between the "After sales service"... -
Page 15: How The Cooking Zones Work
How the cooking zones work Single circle cooking zones have one Single circle zone heating element, whilst double circle (vario) cooking zones and extended zones have two. Depending on the model, the heating elements may be separated by an isolating ring. Each cooking zone has overheating protection (a temperature limiter), which stops the ceramic surface from... -
Page 16: Operation
Operation Switching on and off Residual heat indicator When a cooking zone is switched on, Do not leave the appliance e.g. front left, the appropriate residual unattended whilst it is being used. heat indicator lights up in the display when the zone has reached a certain temperature. -
Page 17: Settings
Operation Settings Cooking process Settings Melting butter, chocolate etc. 1 - 2 Dissolving gelatine Preparing yoghurt Thickening sauces containing egg yolk and butter 1 - 3 Warming small quantities of food/liquid Keeping warm food which sticks easily Cooking rice Warming liquid and semi-solid foods 3 - 5 Thickening sauces, e.g. -
Page 18: Switching On An Extended Area
Operation Switching on an extended area Switch the extended cooking zone off by turning the control anti-clockwise Depending on model, the outer circle of back to the "0" position. a double circle zone or the extended cooking zone can be switched on to provide an extended cooking area when cooking with larger pans. -
Page 19: Pans
Operation Pans – Place pans carefully into position on the hob. Sliding them across the – Pans made from any material can be surface can cause scuffs and used on a ceramic hob. scratches. – However, the best pans are those –... -
Page 20: Tips On Saving Energy
Operation Tips on saving energy – Use as little water as possible to cook with, and reduce the power – Use a pan lid whenever possible to setting once the water has come to minimise heat loss. the boil or the oil is hot enough to fry –... -
Page 21: Overheating Protection
Operation Overheating protection Overheating can be caused by: Each cooking zone is equipped with – switching on a cooking zone without overheating protection. An internal a pan on it. temperature limiter switches off the – heating up an empty pan. heating elements in the cooking zone before the ceramic surface overheats. -
Page 22: Cleaning And Care
Cleaning and care For Miele branded cleaning and The appliance should be cleaned after conditioning products see "Optional each use. Allow the hob to cool down accessories". before cleaning. Wipe all coarse soiling off using a Do not use a steam cleaner to clean damp cloth. - Page 23 Cleaning and care Spots caused by limescale deposits, Should any sugar, plastic or water and aluminium residues (which aluminium foil spill or fall on to a hot have a metalic appearance) can be cooking zone while it is in use, first removed using the ceramic cleaner.
-
Page 24: Problem Solving Guide
Check whether the mains fuse has tripped. If it has, contact a qualified electrician or the Miele Customer Contact Centre..the heating element for one of the cooking zones switches on and off This is quite normal, and due to the electronic regulation of the temperature (see "How the cooking zones work"). -
Page 25: To Test The Power Level
To test the power level ^ Take a note of the diameter and You can test the power level of a cooking zone by measuring how long it wattage of the cooking zone to be takes to bring a specific amount of tested (see "Guide to the appliance - water to the boil. - Page 26 To test the power level C cooking zone Rating in watts Quantity of water Max duration in cm for 230 V in litres in minutes (approx.) 12.0 700 / 750 13.0 14.5 1000 / 1100 14.5 1350 17.0 1500 18.0 1250 11.0 18.0...
-
Page 27: Optional Accessories
Ceramic and stainless steel hob cleaner 250 ml Removes heavy soiling, limescale deposits and aluminium residues E-Cloth Removes finger marks and light soiling These products can be ordered via the internet (depending on country) or from the Miele Customer Contact Centre (see back cover). -
Page 28: After Sales Service, Data Plate
– Your Miele dealer, or – the Miele Customer Contact Centre (see back cover for address). When contacting Miele, please quote the model and serial number of your appliance. These are given on the data plate. Please note that telephone calls may be monitored and recorded to improve our service. -
Page 29: Installation
Installation Safety instructions for After installing the hob, you need to make sure that the underside of the installation appliance cannot be accessed or touched. In some cases a front panel Fit the wall units and extractor hood and a protective shelf must be fitted before fitting the hob to avoid (see "Protective shelf"). - Page 30 Installation Safety distance above the hob When two or more appliances are installed together below a cooker hood, e.g. an electric hob and a gas wok combiset, which have different safety distances given in the installation instructions, you should select the greater distance of the two.
- Page 31 Installation Safety distances to the sides of the Ideally the hob should be installed with plenty of space on either side. There may be a wall at the rear and a tall unit or wall at one side. On the other side, however, no unit or divider should stan- d higher than the hob (see illustrations).
- Page 32 Installation Safety distance when installing the appliance near a wall with additional niche cladding There must be a minimum distance of 50 mm between the niche cladding and the worktop cut-out. This distance is only necessary for niche cladding made of wood or any other combustible material.
-
Page 33: Building-In Dimensions
Installation Building-in dimensions KM 520 a Spring clamps b Building-in depth c Building-in depth for mains connection box d Front... - Page 34 Installation KM 523 a Spring clamps b Building-in depth c Building-in depth for mains connection box d Front...
-
Page 35: Preparing The Worktop
Installation Preparing the worktop If, during installation, you find that ^ Make the worktop cut-out following the seals on the corners of the frame the dimensions applicable. are not flush with the worktop Remember to maintain the minimum surface, the corner radius (ß R4) can safety distance from the back wall, be carefully scribed to fit. -
Page 36: Fixing The Spring Clamps
Installation Fixing the spring clamps Granite and marble worktops Worktops made of wood ^ Position the spring clamps a, and fix in place using double-sided tape f. ^ Position the spring clamps (supplied) a in the positions shown (see "Building-in dimensions") by placing them on the upper edge of the cut-out as illustrated, and secure with the 3.5 x 25 mm screws supplied. -
Page 37: Installing The Hob
Installation Installing the hob Wooden worktops ^ Feed the hob connection cable down through the cut-out. ^ Lightly position the hob on the spring clamps a. ^ Using both hands, press down evenly on the sides of the hob until it clicks into position. -
Page 38: Protective Shelf
Installation Protective shelf Sealant After installing the hob, you need to make sure that the underside of the Do not use any sealant unless appliance cannot be accessed or expressly instructed to do so. The touched. sealing strip under the edge of the top A panel and a protective shelf must be part of the hob provides a sufficient fitted if:... -
Page 39: Electrical Connection
(including switch, type H 05 W-F or H 05 RR-F, fuses and relays). available from the Miele Customer Contact Centre. Important U.K. The appliance is supplied for Ensure power is not supplied to the... - Page 40 Installation WARNING THIS APPLIANCE MUST BE EARTHED The electrical safety of this appliance can only be guaranteed when continuity is complete between it and an effective earthing system, which complies with current local and national safety regulations. It is most important that this basic safety requirement is present and regularly tested and where there is any doubt, the electrical wiring...
-
Page 41: Wiring Diagram
Installation Wiring diagram N.B. This appliance is supplied single phase only in the U.K. / AUS / NZ... - Page 44 Alteration rights reserved / 3209 M.-Nr. 06 464 850 / 05...