
Related Manuals for Sony URZ0146


Summary of Contents for Sony URZ0146
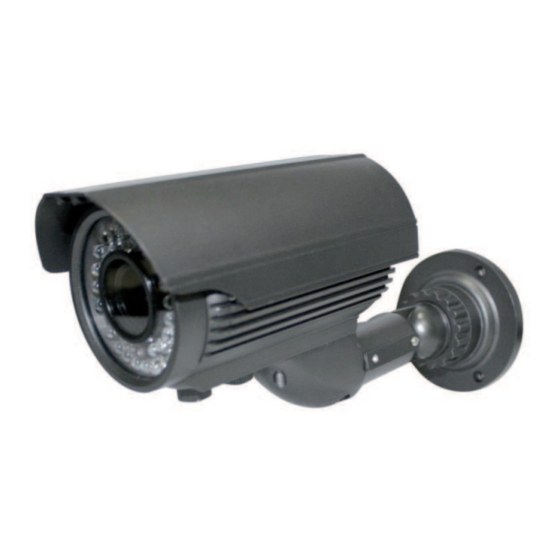
- Page 1 URZ0146 Waterproof IR CCD camera Wodoodporna kamera IR CCD Camera CCD IR rezistenta LA APA Wasserdichte IR CCD Kamera CCTV SYSTEM...
-
Page 3: Specification
Owner’s manual Specification CCD type 1/3” Sony CCD Pixels (HxV) 752(H) x 582(V) Scanning system Horizontal resolution 480TV Lines Synchronization Internal Minimum illumination 0Lux/F1.2(IR LED ON) Backlight compensation ON/OFF switchable Electronic shutter 1/60~1/100.000 seconds White balance Automatic Lens 4~9mm IR LED Ø5 x 42 PCS... -
Page 4: External Dimension
Owner’s manual External dimension 245mm x 78mm x 117mm Varifocal Zoom... - Page 5 Owner’s manual The use and installation attention 1. Before the installation the cameras in use please carefully read this instruction manual. 2. Please pay special attention to this product not dropped on the floor or strong percussion. 3. The use must comply with electrical safety standard the DC power cable and video transmission line with the process of high- pressure equipment of cables maintain sufficient distance.
- Page 6 Owner’s manual Link - BNC connect video cable - DC jack to DC12V Recommended power: 1000mA Video IN terminal on the rear of the monitor. 1. BNC 2. DC jack 3. Video input terminal BNC 4. DC adapter 5. DC power line...
- Page 7 Owner’s manual Installation and operating instruction 1. Fixed steady will be installed in the difficult off, cool spacious place, and then the camera fixed on the steady. 2. The regulator will exchange-DC transformer (AC) plugs into AC outlet, DC-plug power output inserted camera. 3.
- Page 8 Instrukcja obsługi Specyfikacja Przetwornik 1/3” Sony CCD Liczba pikseli (HxV) 752(H) x 582(V) Standard 480TV linii Rozdzielczość Synchronizacja Wewnętrzna Minimalne oświetlenie 0Lux/F1.2(IR LED włączone) Kompensacja tła ON/OFF Migawka elektroniczna 1/60~1/100.000 sekund Balans bieli Auto Obiektyw 4~9mm IR LED Ø5 x 42 szt.
- Page 9 Instrukcja obsługi Wymiary zewnętrzne 245mm x 78mm x 117mm Zmiana Zoom ogniskowej...
- Page 10 Instrukcja obsługi Użytkowanie kamery 1. Przed instalacją kamery uważnie przeczytaj instrukcję obsługi. 2. Zwróć szczególną uwagę, aby nie narażać kamery na uderze- nia i silne wstrząsy. 3. Zawsze używaj kabli najwyższej jakości, zarówno do zasilania jak i transmisji video. 4. Nie narażaj obiektywu kamery na bezpośrednie działanie promieni słonecznych.
- Page 11 Instrukcja obsługi Podłączenie - Kabel video BNC - Zasilanie DC 12V, 1000mA Wejścia video na monitorze. 1. BNC 2. Zasilanie DC 3. Wejście video BNC 4. Zasilacz DC 5. Kabel zasilający...
-
Page 12: Instalacja Kamery
Instrukcja obsługi Instalacja kamery 1. Przymocuj trwale kamerę do stabilnego podłoża, najlepsze do instalacji są chłodne miejsca gdzie obiektyw nie będzie narażony na bezpośrednie działanie promieni słonecznych. 2. Podłącz kabel video 75ohm. 3. Podłącz zasilanie kamery. 4. Dostosuj położenie kamery do żądanej pozycji. Wygląd i specyfikacja urządzenia może ulec zmianie bez powia- domienia. - Page 13 Manual de utilizare Specificatii Tip camera CCD 1/3" Sony CCD Pixeli (H*V) 752(H) x 582(V) Sistem TV Rezolutie orizontala 480 Linii TV Sincronizare interna Iluminare minima 0 Lux/F1.2 (IR LED pornit) Compensare iluminare din Comutator PORNIRE/ spate OPRIRE Obturator electronic 1/60~1/100.000 Sec.
- Page 14 Manual de utilizare Dimensiuni externe 245mm x 78mm x 117mm Distanta focala Zoom variabila...
- Page 15 Manual de utilizare Utilizare si instalare 1. Inainte de instalarea si utilizarea camerei cititi cu atentie manu- alul. 2. Va rugam sa fiti atenti ca produsul sa nu fie scapat sau sa nu fie supus unor socuri mecanice puternice. 3. Nu expuneti camera la lumina directa a soarelui sau la alta lu- mina puternica, pentru a nu afecta durata de functionare a CCD.
- Page 16 Manual de utilizare Conexiuni - Cablu video cu mufa BNC - Mufa DC la DC12V Amperaj maxim: 1.000mA Video IN terminal on the rear of the monitor. 1. BNC 2. Mufa DC 3. Terminal intrare video BNC 4. Adaptor DC 5.
- Page 17 Manual de utilizare Instructiuni de instalare si functionare 1. Suportul fix va fi instalat intr-un loc spatios si racoros, iar cam- era va fi fixata apoi pe acesta. 2. Conectati adaptorul DC la reteaua AC iar iesirea mufei DC la priza de alimentare a camerei.
-
Page 18: Technische Daten
Bedienungsanleitung Technische Daten CCD Type 1/3" Sony CCD Pixel (H*V) 752(H) x 582(V) Scanning System 480 TV Linien Horizontale Auflösung Synchronisation Intern Minimale Beleuchtung 0 Lux/ F1.2 (IR LED EIN) Gegenlichtkompensation Ein-/Ausschaltbar Elektronischer Verschluss 1/60~1/100.000 Sekunden Weißabgleich Automatisch Linsen 4 – 9 mm IR LED Ø... - Page 19 Bedienungsanleitung Äußere Abmessungen 245mm x 78mm x 117mm Variable Brennweite Zoom...
- Page 20 Bedienungsanleitung Benutzung und Installationshinweise 1. Vor der Installation und Benutzung der Kamera, lesen Sie sorgfältig diese Bedienungsanleitung. 2. Bitte achten Sie darauf die Kamera nicht fallen zu lassen, oder staken Schocks auszusetzen. 3. Der Einsatz muss den elektrischen Sicherheitsnormen en- tsprechen die Strom-Kabel und Video-Übertragungskabelmüssen ausreichend Abstand von Hochdruck-Geräte halten.
- Page 21 Bedienungsanleitung Anschlüsse - BNC Stecker Videokabel - DC JACK für DC12V Empfohlene Leistung: 1.000mA Video IN terminal on the rear of the monitor. 1. BNC 2. DC JACK 3. Videoeingangsstecker BNC 4. DC Netzteil 5. DC Stromkabel...
- Page 22 Bedienungsanleitung Installation und Bedienungsanleitung 1. Kamera in kühlen geräumigen Platz installieren und dann die Kamera ausrichten. 2. Stecker des Netzgerätes an die AC Steckdose und DC Stecker an die Kamera anschließen. Kühlen 3. Mit 75Ω Koaxialkabel Kmera und Monitor verbinden. 4.