Panasonic SC-HC28 Operating Instructions Manual
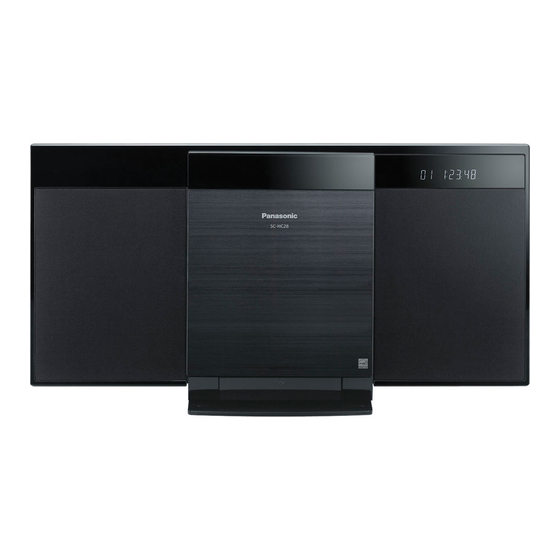
Compact stereo system
Hide thumbs
Also See for SC-HC28:
- Owner's manual (16 pages) ,
- Operating instructions manual (100 pages)

Related Manuals for Panasonic SC-HC28


Summary of Contents for Panasonic SC-HC28
-
Page 1: Operating Instructions
Operating Instructions Compact Stereo System Model No. SC-HC28 Thank you for purchasing this product. Please read these instructions carefully before using this product, and save this manual for future use. RQT9736-L... -
Page 2: Safety Precautions
Safety precautions WARNING CAUTION Unit Unit ≥ To reduce the risk of fire, electric shock or product damage, ≥ This unit utilizes a laser. Use of controls or adjustments or – Do not expose this unit to rain, moisture, dripping or performance of procedures other than those specified herein splashing. -
Page 3: Table Of Contents
Accessories Product Identification Marking is located on the bottom of the unit. Check the supplied accessories before using this unit. ∏ 1 Remote control (with a battery) -If you see this symbol- (N2QAYC000079) Information on Disposal in other Countries ∏ 1 AC mains lead outside the European Union This symbol is only valid in the ∏... -
Page 4: Control Reference Guide
Control reference guide Unless otherwise indicated, operations are described using the remote control. Standby/on switch (Í/I) (Í) Press to switch the unit from on to standby mode or vice iPod/ versa. In standby mode, the unit is still consuming a small amount of power. -
Page 5: Connections
Connections Adhesive tape (not supplied) FM indoor antenna (supplied) AM loop antenna (supplied) Connect the AC mains lead after all other connections are completed. This unit consumes a small amount of AC power (l 13) even when turned off. AC mains lead (supplied) To household mains socket ≥... -
Page 6: Inserting Media
Inserting media Select “IPOD_PORT” as the source Select “CD” as the source “USB” is displayed when a compatible USB is inserted. *1, 2, 3 iPad iPod RADIO VOLUME OPEN/CLOSE /USB OPEN/CLOSE Attach the pad before using this unit. (l 15) Select “IPOD_DOCK”... -
Page 7: Media Playback Operations
Media playback operations To navigate through the iPod/ ∫ [iPod] iPhone menu The following marks indicate the availability of the Open the Music App to use this feature with feature. iPod touch/iPhone. CD audio in CD-DA format and a CD that [CD]: –... -
Page 8: Listening To The Radio
Listening to the radio ∫ Manual tuning and presetting Select a radio broadcast. You can preset up to 30 FM channels / 15 AM channels. Press [PLAY MENU] repeatedly to select “TUNEMODE”. Preparation Press [3, 4] to select “MANUAL” and then press ≥... -
Page 9: Sound Adjustment
Sound adjustment Play timer The following sound effects can be added to the audio You can set the timer so this unit turns on at a certain output. time every day. Press [SOUND] repeatedly to select the effect. Preparation Set the clock (l left). Press [3, 4] to select the setting and then press [OK]. -
Page 10: Others
≥ An AC mains lead or fluorescent light is near the cords. Keep other appliances and cords away from this unit’s cables. When other Panasonic equipment responds to the supplied remote control, change the remote control MP3 cannot be read. - Page 11 “CHECKING CONNECTION” Radio ≥ The unit is checking the connected iPod/iPhone/iPad. ≥ If this display keeps appearing, make sure that the battery of the A beat sound or noise is heard while receiving iPod/iPhone/iPad is not depleted and that the iPod/iPhone/iPad is radio broadcast.
-
Page 12: Playable Media
≥ Compatibility depends on the software version. Update your iPod/iPhone/iPad to the latest software before using it with this unit. ≥ Please be aware that Panasonic accepts no responsibility for the loss of data and/or information. “Made for iPod”, “Made for iPhone”, and “Made for iPad” mean... -
Page 13: Specifications
Specifications ∫ DISC SECTION Disc played (8 cm or 12 cm) ∫ GENERAL CD, CD-R/RW (CD-DA, MP3* Pick up Power consumption 40 W Wavelength 790 nm (CD) Power consumption in standby mode* Audio output (Disc) Approx. 0.2 W Number of channels Power consumption in standby mode 2 ch (FL, FR) (With the iPod dock open) -
Page 14: Limited Warranty (Only For Australia)
Panasonic Warranty 1. The product is warranted for 12 months from the date of purchase. Subject to the conditions of this warranty Panasonic or its Authorised Service Centre will perform necessary service on the product without charge for parts or labour, if in the opinion of Panasonic, the product is found to be faulty within the warranty period. -
Page 15: Attaching The Support Pad To This Unit
Attaching the support pad to this unit Attach the supplied support pad to prevent damage or scratches to this unit’s sliding door or the device connected to the “IPOD_DOCK”. Attach the support pad before using this unit. ≥ The location is the same for either iPod touch, iPod nano, iPhone or iPad mini. Align this page to the sliding door and locate the position to attach the pad. - Page 16 Panasonic Corporation Web Site: http://panasonic.net RQT9736-L C Panasonic Corporation 2013 F0313SR0...