
Related Manuals for LG CRD-8320B


Summary of Contents for LG CRD-8320B
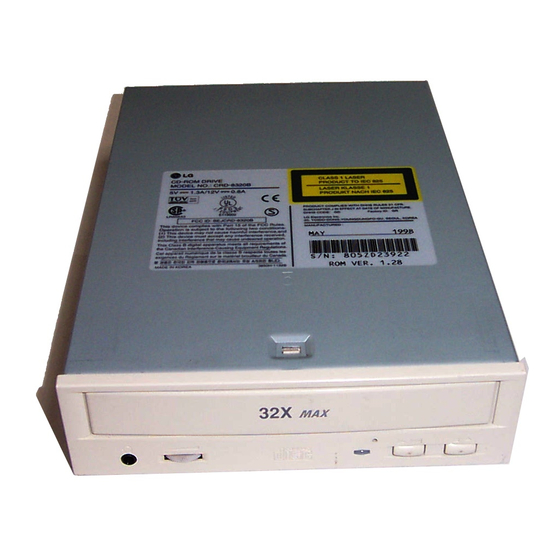
- Page 1 CD-ROM DRIVE OWNER’S MANUAL MODEL : CRD-8320B To enjoy fully all the features and functions of your CD-ROM Drive, Please read this Owner’s Manual carefully and completely.
- Page 2 CAUTION: The laser used in the CD-ROM drive can damage your eyes. Do not attempt to open the cover. To reduce the risk of electric shock, do not remove cover (or back). No user-serviceable parts inside. Refer servicing to qualified service personnel. This unit uses CD-ROM discs marked with this symbol: Use of controls or performance of procedures other than those specified herein may result in hazardous radiation...
-
Page 3: System Requirements
FEATURES FEATURES ßö E-IDE interface ßö 90ms Random access time ßö Multimedia PC compatible ßö Photo CD multisession support ßö Small CPU bandwidth (MPC spec.) ßö 32X-speed Max 4800KB/sec data transfer rate ßö Intelligent 128KB data buffering system ßö Horizontal/Vertical mounting support ßö... -
Page 4: Location And Function Of Controls
LOCATION AND FUNCTION OF CONTROLS FRONT VIEW ®Á Headphone Jack 3.5mm jack for monitoring the audio signal from audio CDs. Headphone Volume Control Adjusts the headphone sound level. ®È Disc Drawer Accepts a CD-ROM disc on its tray. ®Í Busy Indicator The Busy Indicator lights during initialization and data-read operations. -
Page 5: Back View
BACK VIEW ®Á Digital Audio Ouput Connector This is a digital audio output connector or Video CD output connector. You can connect this to the digital audio system or Video CD Board. ®Ë Analog Audio Output Connector The Audio Output Connector connects to a sound card. The supplied audio cable is a SoundBlaster ®... - Page 6 I N S TA L L ATION, USAGE AND HANDLING PRECAUTIONS ßö Installation Avoid placing the drive in a location subject to : - high humidity - high temperature - mechanical vibration - direct sunlight ßö Operation - During operation, excessive vibration or a sudden jolt to the drive may cause a malfunction.
-
Page 7: Hardware Installation
HARDWARE INSTALLATION This section describes how to install your CD-ROM drive into your computer. WARNING: To protect the CD-ROM Drive, your computer, and peripheral devices from damage, turn off their power before installing the drive. Note: If you are not comfortable about opening your PC and attempting the CD-ROM drive installation, many local computer shops can perform this service for a reasonable cost. - Page 8 WHEN USING A PRIMARY IDE CONTROLLER Most PCs provide one IDE cable to support two devices (one for hard disk, the other for a second hard disk or a CD-ROM drive). This IDE cable originates either on the motherboard or on a controller card. This controller is termed the primary IDE controller, and the hard disk attached that contains the operating system for boot-up is set up as the Primary Master.
- Page 9 WHEN USING A SECONDARY CONTROLLER * If your PC has an additional IDE controller on the motherboard or on a system slot, each IDE device connected to the secondary IDE controller must also be set to the Master or Slave mode. If you are connecting your CD-ROM drive to a secondary IDE card, and it is the 1st device you are connecting to it, then set the CD-ROM jumper to the Master position.
-
Page 10: Mounting The Cd-Rom Drive
MOUNTING THE CD-ROM DRIVE Step 1. Turn off and unplug your computer and all peripheral devices attached to it. Step 2. Remove the cover from your computer. Step 3. Remove the front panel from an unused half-height slot. Step 4. Slide the CD-ROM drive into the half-height slot, and secure the drive in place with screws and brackets. -
Page 11: Connecting An Audio Cable
Step 6. Connect the 40-pin IDE Cable to the back of the CD-ROM Drive. Please make sure that the red edge of the IDE Cable is connected to Pin 1 on the CD- ROM Drive. CONNECTING AN AUDIO CABLE If you want to connect audio equipment or a sound card to the CD-ROM drive, use an audio cable to connect the drive to the sound device. -
Page 12: Software Setup
SOFTWARE SET UP THE SET UP PROCESS The INSTALL program performs the following functions. * Allows the user to select the target disk drive where CD-ROM device driver files will be set-up. * Unless modified by the user, the INSTALL program searches the target disk for directory(\CDROM);... - Page 13 RUNNING THE INSTALL PROGRAM (DOS INSTALLATION) Step 1. Insert the CD-ROM device driver install diskette into the appropriate drive. Step 2. Go to the floppy drive by typing A: or B: at the DOS prompt, as appropriate. Step 3. Type the word INSTALL and press [ENTER]. Step 4.
-
Page 14: Troubleshooting
Windows 95. For other operating systems, try looking for either a LG Electronics or Goldstar IDE CD-ROM drive software driver. If none is found, try selecting one of the device drivers for Non-listed IDE CD-ROM . -
Page 15: Specifications
SPECIFICATIONS General Data Capacity 553 Mbyte (mode 1), 635 Mbyte (mode 2) Disc Diameter 12 cm / 8 cm Rotational Speed 200 - 7,000 rpm Performance Interface E-IDE Supported System IBM PC-AT or Compatible Transfer rate Sustained Data Transfer Rate = Max 4800Kbytes/sec Access Time Random 90 ms MTBF... - Page 16 CRD-8320B CD - ROM DRIVE CLASS 1 LASER PRODUCT glish..Page E-2 ~ E-15 KLASSE 1 LASER PRODUKT LUOKAN 1 LASER LAITE KLASS 1 LASER APPARAT utsch..Seite D-2 ~ D-15 nçais..Page F-2 ~ F-15 ano.....Page I-2 ~ I-15 n i s h..Página S-2 ~ S-15 ®œ...