Table of Contents
Advertisement
Advertisement
Table of Contents

Related Manuals for Yamaha TSX-B232


Summary of Contents for Yamaha TSX-B232
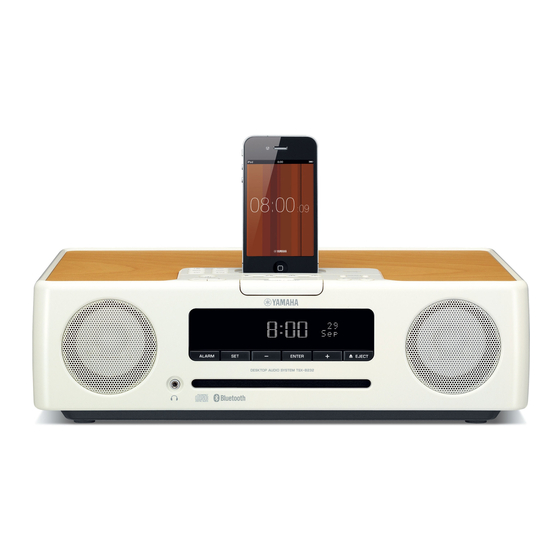
- Page 1 DESKTOP AUDIO SYSTEM TSX-B232 M a y OWNER’S MANUAL...
- Page 2 TO REDUCE THE RISK OF FIRE OR ELECTRIC injury. Yamaha will not be held responsible for any SHOCK, DO NOT EXPOSE THIS UNIT TO RAIN OR damage resulting from use of this unit with a voltage other MOISTURE.
-
Page 3: Table Of Contents
CONTENTS NAMES OF PARTS AND THEIR FUNCTIONS ..2 Selecting DAB stations..........12 Presetting DAB stations (remote control only) .....13 Top panel / Front panel ..........2 Selecting preset DAB stations........13 Front panel display............3 Rear panel..............3 LISTENING TO FM STATIONS ......14 Remote control...............4 Selecting an FM station..........14 TURNING THE SYSTEM ON ........5 Presetting FM stations (remote control only) ....15... -
Page 4: Names Of Parts And Their Functions
NAMES OF PARTS AND THEIR FUNCTIONS Top panel / Front panel a VOLUME – / + h PRESET / Adjust the volume. Use these buttons to select a DAB/FM station (preset) that you’ve stored (☞ P. 16). (Power) i TUNING Press to turn the system on/off (☞... -
Page 5: Front Panel Display
NAMES OF PARTS AND THEIR FUNCTIONS Front panel display ~ ~ ~ ~ ~ ~ ~ ~ ~ ~ ~ ~ a Illumination sensor f Remote control signal receiver Detect ambient lighting. Do not cover this sensor. Make sure that this sensor is not obstructed (☞ P. 1). b Alarm time g Sleep indicator This indicates the alarm time. -
Page 6: Remote Control
NAMES OF PARTS AND THEIR FUNCTIONS Remote control a Remote control signal transmitter (Power) Press to turn the system on/off (☞ P. 5). c SNOOZE/SLEEP Set the sleep timer or switch the alarm to snooze mode (☞ P. 19, 20). d ALARM Switch the alarm on/off (☞... -
Page 7: Turning The System On
TURNING THE SYSTEM ON Connect the power cable to an AC outlet, and press The system will turn on, and will be ready to play audio sources. To turn the system off, press once again. If you set the rear panel CLOCK switch to the OFF position (☞... -
Page 8: Listening To Your Ipod
操 操 LISTENING TO YOUR iPod Playing music from your iPod • For details on compatible iPod models, refer to “SPECIFICATIONS” (P. 26). • Your iPod can also play back music and recharge while connected to the USB port (☞ P. 8). Press the iPod source button to switch the audio source to iPod. -
Page 9: Listening To Cd And Usb Devices
LISTENING TO CD AND USB DEVICES The unit will operate as follows when playing back tracks/files on CD/USB devices. • If the CD/USB device being played back is stopped, the track that was being played back will start playing from the beginning of the track the next time playback begins. -
Page 10: Listening To A Usb Device
LISTENING TO CD AND USB DEVICES Listening to a USB device Press the USB source button to switch the audio source to USB. If a USB device is already connected, playback will start. RADIO Connect a USB device to the USB port. Playback starts automatically. -
Page 11: Listening To Music From Your Bluetooth Component
(This procedure or display may differ depending on the iPod type of your iPod touch/iPhone/iPad.) From the Bluetooth connection list of the other component, choose this unit (TSX-B232 Yamaha). When pairing has been completed, your iPod touch/ 1 5 : 3 0 iPhone/iPad will indicate “Connected”. -
Page 12: Listening To A Bluetooth Component
In the Bluetooth settings of the other component, turn Bluetooth on. From the Bluetooth connection list of the other component, choose this unit (TSX-B232 Yamaha). The Bluetooth connection will be established, and the front panel display of this unit will indicate the name of the other component. -
Page 13: Disconnecting A Bluetooth Connection
LISTENING TO DAB STATIONS Disconnecting a Bluetooth connection If any of the following operations are performed while a Bluetooth connection is being used, the Bluetooth connection will be disconnected. • Hold down source button on this unit or on the remote control. •... -
Page 14: Selecting Dab Stations
LISTENING TO DAB STATIONS Selecting DAB stations Press the RADIO source button repeatedly to switch the audio source to DAB. Press TUNING to select the DAB RADIO station. While receiving DAB, DAB station information is shown on the front panel display. iPod If the unit does not receive a DAB signal, “Off Air”... -
Page 15: Presetting Dab Stations (Remote Control Only)
LISTENING TO DAB STATIONS Presetting DAB stations (remote control only) Use the preset function to store your favorite 30 stations. Select the station that you want to preset, and press MEMORY. The display will indicate “PRESET MEMORY”. Press PRESET / to select the preset number that you want to store. -
Page 16: Listening To Fm Stations
LISTENING TO FM STATIONS Selecting an FM station Connect the antenna if you want to listen to the FM (☞ P. 3). Press the RADIO source button repeatedly to switch the audio source to FM. Tuning FM stations. RADIO Automatic tuning: Press and hold TUNING Manual tuning: Press TUNING repeatedly. -
Page 17: Presetting Fm Stations (Remote Control Only)
LISTENING TO FM STATIONS Presetting FM stations (remote control only) Use the preset function to store your favorite 30 stations. Auto preset This method tunes automatically, and automatically presets only the stations that have good reception. Press and hold down MEMORY on the remote control. -
Page 18: Selecting Preset Fm Stations
LISTENING TO EXTERNAL SOURCES Selecting preset FM stations Main unit Press the RADIO source button repeatedly to switch the audio source to FM. RADIO You can also switch the audio source by pressing RADIO on the remote control. Press PRESET / to select the FM station iPod that you want to listen. -
Page 19: Using The Alarm Function
Source Playback method Function The unit resumes play from the last track you played. If you’ve created a playlist* with the name “ALARM Yamaha DTA” in advance, the iPod Resume playlist stored on the iPod can be played back repeatedly. -
Page 20: Setting The Alarm
USING THE ALARM FUNCTION Setting the alarm Set the alarm time and alarm type Alarm settings cannot be made when the unit is in power saving. If you want to use the alarm function, set the rear panel CLOCK switch to the ON position. -
Page 21: Operations While The Alarm Sound Is Playing
For example, for each day of the week, you can specify the alarm time (Weekly Alarm) and adjust the IntelliAlarm as desired. The front panel display shows information for the Weekly Alarm you’ve set. Monday Tuesday Wednesday Thursday Friday Saturday Sunday For details of “DTA Controller”, refer to the product information in the Yamaha website. -
Page 22: Using The Sleep Timer
USING THE SLEEP TIMER When the specified time has elapsed, the system will turn off automatically. Press SNOOZE/SLEEP repeatedly to specify Press repeatedly the time after which the system will turn off. You can specify 30, 60, 90 or 120 minutes. When you select a time, the sleep timer is turned on, and the sleep indicator ( ) is shown in the front panel display. -
Page 23: Troubleshooting
If there is a problem with the unit, check the following list first. If you cannot resolve the problem with the suggested solutions or if the problem is not listed below, turn off and unplug the system, and consult the nearest authorized Yamaha dealer or service center. -
Page 24: Usb Device Playback
TROUBLESHOOTING iPod Problem Cause Solution No sound. The iPod is not set in the iPod dock firmly. Remove the iPod from the unit, and then set it in the iPod dock again (☞ P. 2). The headphones of the iPod are connected. Remove the headphones. -
Page 25: Dab Reception
TROUBLESHOOTING Bluetooth Problem Cause Solution Cannot make this unit paired The other component does not support A2DP. Perform pairing operations with a component which with the other component. supports A2DP. A Bluetooth adaptor, etc. that you want to pair Use a Bluetooth adaptor, etc. whose password is “0000”. with this unit has a password other than “0000”. - Page 26 TROUBLESHOOTING FM reception Problem Cause Solution Too much noise. The antenna may be connected improperly. Make sure the antenna is connected properly (☞ P. 3) or use a commercially available outdoor antenna. The antenna is too close to the unit or to an Position the antenna as far away as possible from the unit electronic device.
-
Page 27: Notes On Discs And Usb Devices
(such as USB chargers or USB hubs), PCs, card readers, an external HDD, etc. * ISO 9660 format CD-R/RW • Yamaha will not be held responsible for any damage to or data loss on the USB device occurring while the device is connected to this unit. -
Page 28: Specifications
SPECIFICATIONS PLAYER SECTION Bluetooth SECTION • Bluetooth version ............Ver. 2.1+EDR iPod (Digital connection) [As of July, 2012] • Supported protocols............A2DP, AVRCP • Compatible iPod models • Supported codecs..............SBC, AAC ........iPod touch (1st, 2nd, 3rd and 4th generations) •... - Page 29 • Yamaha does not guarantee all wireless connections between this We, Yamaha Music Europe GmbH hereby declare that this unit unit and devices compatible with Bluetooth function.
- Page 30 Use of controls or adjustments or performance of procedures other than those specified herein may result in hazardous radiation exposure. Yamaha Music Europe GmbH Siemensstr. 22-34 25462 Rellingen, Germany Tel: +49-4101-303-0 Yamaha Music Australia Pty. Ltd. Level 1, 99 Queensbridge Street, Southbank, Victoria 3006, Australia Tel: +61-3-9693-5111...
- Page 31 © 2012 Yamaha Corporation Printed in Malaysia ZD83580...