Table of Contents
Advertisement
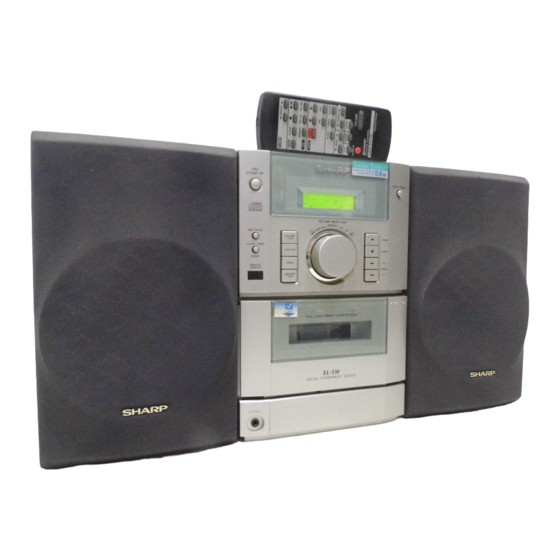
MICRO COMPONENT SYSTEM
OPERATION MANUAL
Thank you for purchasing this SHARP product.
To obtain the best performance from this product please read this manual carefully.
It will guide you in operating your SHARP product.
CONTENTS
SPECIAL NOTES . . . . . . . . . . . . . . . . . . . . . . 1
ACCESSORIES . . . . . . . . . . . . . . . . . . . . . . . . 2
PRECAUTIONS . . . . . . . . . . . . . . . . . . . . . . . . 2
PREPARATION FOR USE . . . . . . . . . . . . . . 3-4
SOUND CONTROL . . . . . . . . . . . . . . . . . . . . . 5
SETTING THE CLOCK . . . . . . . . . . . . . . . . . . 6
COMPACT DISC OPERATION . . . . . . . . . . 7-9
CASSETTE OPERATION . . . . . . . . . . . . . . . 10
Page
RADIO OPERATION . . . . . . . . . . . . . . . . . 11-12
RECORDING . . . . . . . . . . . . . . . . . . . . . . . . . 13
HOW TO USE THE BUILT-IN TIMER . . . 14-15
HEADPHONES . . . . . . . . . . . . . . . . . . . . . . . 16
RESETTING THE MICROCOMPUTER . . . . 16
MAINTENANCE . . . . . . . . . . . . . . . . . . . . . . . 16
SPECIFICATIONS . . . . . . . . . . . . . . . . . . . . . 17
TERMS OF GUARANTEE . . . . . . .Back cover
MODEL
XL-530H
Page
Advertisement
Table of Contents

Related Manuals for Sharp XL-530H


Summary of Contents for Sharp XL-530H
-
Page 1: Table Of Contents
XL-530H OPERATION MANUAL Thank you for purchasing this SHARP product. To obtain the best performance from this product please read this manual carefully. It will guide you in operating your SHARP product. CONTENTS Page Page SPECIAL NOTES ..... . 1 RADIO OPERATION . -
Page 2: Special Notes
L or coloured red. Recording and playback of any material may require consent, which SHARP is unable to give. Please refer particularly to the provisions of the Copyright Act 1956, the Dramatic and Musical Performers Protection... -
Page 3: Accessories
SHARP will not be held responsible for any damage resulting from use of this unit with a voltage other than that which is specified. -
Page 4: Preparation For Use
The speaker grille is not removable. Caution: The speakers included with the unit should only be used with the XL-530H. Do not use them with other models. Do not connect the XL-530H’s speaker terminals to any speakers other than those included with the unit. - Page 5 (Continued) Remote control Connecting the AC power lead 2 "AA" size batteries ( U M / SU M - 3, R 6, HP-7 or similar) AC 230 V, 50 Hz Batteries are not included. To AC INPUT To an AC socket Connect the AC power lead to the AC power input socket, then connect the AC power lead plug to an AC socket.
-
Page 6: Sound Control
SOUND CONTROL Volume Treble (Remote control) (Main unit) (Main unit) VOLUME / MULTI JOG VOLUME / MULTI JOG (Remote control) (Main unit operation) When the VOLUME control is turned clockwise, the volume will increase. When it is turned anti- clockwise, the volume will decrease. (Remote control operation) (Main unit operation) Press the VOLUME... -
Page 7: Setting The Clock
SETTING THE CLOCK Press the CLOCK/TIMER/SLEEP button to enter (Main unit operation) the time check mode. In this example, the clock is set for the 24-hour Within 3 seconds, press the MEMORY/SET but- (0:00) system. ton. Turn the jog dial to select the time display mode. "0:00"... -
Page 8: Compact Disc Operation
COMPACT DISC OPERATION Care of compact discs Compact discs are fairly resistant to damage, however mistracking can occur due to an accu- mulation of dirt on the disc surface. Follow the guidelines below for maximum enjoy- ment from your CD collection and player. Do not write on either side of the disc, partic- ularly the non-label side. - Page 9 (Continued) APSS (Auto Program Search System) APSS automatically locates the beginning of any track. To listen again to the track being played: VOLUME (Main unit operation) /JOG Press the VOLUME/JOG button. Jog dial The track number will flash. Whilst the track number is flashing, turn the jog dial anti-clockwise.
- Page 10 (Continued) APMS (Automatic Programmable Music Selector) The CD can be programmed to play the tracks in any order, or skip certain tracks. Load a compact disc and close the CD com- partment. Press the MEMORY/SET (MEMORY) button to prepare for programming. "MEMORY"...
-
Page 11: Cassette Operation
CASSETTE OPERATION Cassette tape For playback, use normal or low-noise tape for the best sound. (Metal or CrO tape is not rec- ommended.) For recording, use only normal tape. Do not use C-120 tapes, tapes with large di- ameter reels, or poor-quality tapes, as they may cause malfunctions. -
Page 12: Radio Operation
RADIO OPERATION Tuning Preset tuning You can store up to 30 stations in memory (30 (Main unit operation) stations consisting of any combination of FM and AM stations you like) and recall them at the push of a button. (Main unit operation) 3,5,6 Press the ON/STAND-BY button to turn the power on. - Page 13 (Continued) To recall a memorised station: To clear a memorised station: (Main unit operation) Press the VOLUME/JOG button. PRESET Turn the jog dial to select the preset channel number you want to erase. Press the MEMORY/SET button. Within 5 seconds, press the CLEAR button. Preset memory scan The stations saved in the preset memory can be scanned automatically.
-
Page 14: Recording
RECORDING When recording important selections, be sure Recording from the built-in radio to make a preliminary test to ensure that the desired material is being properly recorded. The ALC (Automatic Record Level Control) cir- cuit automatically controls the level of the input signal used for recording. -
Page 15: How To Use The Built-In Timer
HOW TO USE THE BUILT-IN TIMER Before setting the timer, make sure that the clock Timer playback setting is correct. (Page 6) Press the ON/STAND-BY button to turn the power on. Press the FUNCTION button to select the desired function, and then adjust the sound volume using the VOLUME control. - Page 16 (Continued) Sleep operation The radio, compact disc and cassette deck can all be turned off automatically. (Remote control operation) Play back the desired sound source. Press the SLEEP button. The sleep timer is initially set to 3 hours. To change the sleep time: Press the SLEEP button repeatedly to select the desired sleep time.
-
Page 17: Headphones
HEADPHONES MAINTENANCE Internal care Do not touch the Laser pickup lens. If finger- Before plugging in or unplugging the head- prints or dust accumulate on the pickup, clean phones, make sure the volume level is re- it gently with a dry cotton swab. duced. -
Page 18: Specifications
SPECIFICATIONS As a part of our policy of continuous improve- ment, SHARP reserves the right to make de- sign and specification changes for product improvement without prior notice. The perfor- mance specification figures indicated are nom- inal values of production units. There may be some deviations from these values in individual units. -
Page 19: Terms Of Guarantee
3. To benefit from this guarantee, any fault which occurs must be notified to Sharp, or its appointed Service Facility within one year from the date this product was purchased. Proof of purchase must be provided.