
Related Manuals for Suzuki HP-275e


Summary of Contents for Suzuki HP-275e
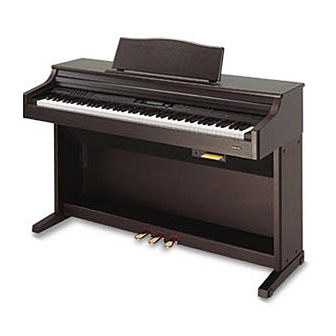
- Page 1 SUZUKI Pianos HP-275e HP-175e COMPOSER ENSEMBLE OWNER’ S MANUAL SUZUKI PDF 文件使用 "pdfFactory Pro" 试用版本创建 www.fineprint.com.cn...
- Page 2 PDF 文件使用 "pdfFactory Pro" 试用版本创建 www.fineprint.com.cn...
- Page 3 WELCOME! We would like to express our appreciation and congratulate you for purchasing this Suzuki composer ensemble piano. This piano has been designed to provide you with years of musical enjoyment. State of the art electronics are combined with an elegant cabinet that will add beauty and sophistication to any home environment.
- Page 4 GENERAL PRECAUTIONS CAUTION RISK OF ELECTRIC SHOCK DO NOT OPEN CAUTION: TO REDUCE THE RISK OF ELECTRIC SHOCK, DO NOT REMOVE COVER OR BACK NO USER-SERVICEABLE PARTS INSIDE REFER SERVICING TO QUALIFIED SERVICE PERSONNEL INSTRUCTIONS PERTAINING TO A RISK OF FIRE, ELECTRIC SHOCK OR INJURY: The lightning flash with arrowhead symbol, within an equilateral triangle, is intended to alert the user to the presence of uninsulated or “dangerous voltage”...
- Page 5 TAKING CARE OF YOUR DIGITAL PIANO This Suzuki digital piano will supply you with years of musical enjoyment if you follow the simple rules listed below. SERVICE AND MODIFICATION discoloration, or more serious damage, w direct sunlight (near a window),...
-
Page 6: Table Of Contents
Song Select ..........68 Adjusting the Tempo ......... 38 Using the Lesson Feature ......69 One Touch ..........38 DISK (HP-275e Only) ........71 AUTO ACCOMP. (AUTO BASE CHORD) .. 39 Load Song ..........72 One Finger ..........41 Save Song ..........73 Fingered .......... -
Page 7: Easy Set Up And Quick Play
EASY SET UP AND QUICK PLAY EASY SET UP AND QUICK PLAY IN FOUR SIMPLE STEPS CHECK THE ASSEMBLE THE PACKAGE PIANO STAND CONTENTS TURN THE POWER PLACE THE PIANO SWITCH ON, ON THE STAND, ADJUST THE ATTACH THE CABLES VOLUME AND AND PLUG IN BEGIN TO PLAY... -
Page 8: Assembly
ASSEMBLY CHECK THE PACKAGE CONTENTS - Please make sure your package contains the following items prior to assembly. CHECK THE ITEM PIANO ............1 PACKAGE PEDAL STAND ASSEMBLY......1 CONTENTS RIGHT FOOT ..........1 LEFT FOOT ..........1 FOOT BOLTS ..........4 PLASTIC SCREW COVERS ....... - Page 9 ASSEMBLY PLACE THE PIANO ON THE STAND, ATTACH THE CABLES AND PLUG IN Place the four metal piano support rods into the stand. Insert the support rod screws into the stand and tighten securely. Put the plastic screw covers into the holes in the piano stand PLACE THE legs.
- Page 10 Plug the AC power cord into the “AC IN” jack, located on the back of the piano. ATTACH THE CABLES AND PLUG IN SUZUKI HP-275e AUX IN AUX OUT 1 AUX OUT 2 PDF 文件使用 "pdfFactory Pro" 试用版本创建 www.fineprint.com.cn...
- Page 11 ASSEMBLY Please note, to open the piano key cover gently lift up and then push inwards. SUZUKI SUZUKI TURN THE POWER SWITCH ON, ADJUST THE VOLUME AND BEGIN TO PLAY TURN THE POWER SWITCH ON - Turn on the power switch located on the left side of the piano.
-
Page 12: Connector Panels
CONNECTOR PANELS These connector jacks are located on the back of the piano. MIDI OUT / MIDI IN / MIDI THRU - This piano contains MIDI in, MIDI thru and MIDI output ports. MIDI jacks allow commu- nication with other products equipped with MIDI interfaces. Please see the MIDI section of this manual for further details. -
Page 13: Panel Controls
KYBD HP-275e This Suzuki piano’ s control panel is simple and elegant. The following is a brief description of all the features located on the control panel. POWER SWITCH - The power switch is located to the left of the keys. - Page 14 PANEL CONTROLS BALANCE ECHO ACCMP DEMO – TEMPO ONE TOUCH ACCOMP RHYTHM CONTROL SET UP INTRO / END START / STOP FILL IN FILL TO VAR FADE SYNCH KYBD conjunction with the accompaniment volume. Slide the controller up to increase the accompaniment volume and decrease the piano voice, slide the controller down to in- crease the piano voice and decrease the accompaniment volume.
- Page 15 PANEL CONTROLS BALANCE ECHO ACCMP – TEMPO ONE TOUCH ACCOMP RHYTHM CONTROL INTRO / END START / STOP FILL IN FILL TO VAR FADE SYNCH KYBD value will appear on the display. You can use the TEMPO +, TEMPO – buttons, or the +/– VALUE buttons to change the tempo value range from 40 to 240 bpm (beats per minute).
- Page 16 PANEL CONTROLS RHYTHM STYLES – TEMPO ONE TOUCH ACCOMP R & B BIG BAND SWING RHYTHM CONTROL INTRO / END ACOUSTIC OLDIES SYNCH START / STOP FILL IN FILL TO VAR FADE SYNC button and the indicator lights beside the tempo buttons will flash to the beat of the selected rhythm style.
- Page 17 PANEL CONTROLS RHYTHM STYLES – TEMPO ONE TOUCH ACCOMP R & B BIG BAND SWING S. BALLAD RHUMBA ACOUSTIC OLDIES ROCK START / STOP FILL IN FILL TO VAR FADE LATIN Press the FILL IN button at any time while the accompani- ment is playing.
- Page 18 PANEL CONTROLS CURSOR VALUE SCREEN ENTER ESCAPE – LEFT RIGHT cially while in the Setup mode. ESCAPE - The ESCAPE button will return the current display screen to the previous screen. Continue pressing this button to return to the original default performance screen.
- Page 19 PANEL CONTROLS SOUND GROUP UPPER PIANO VIBES ORGAN GUITAR BASS VIOLIN STRINGS GRAND PIANO SAXOPHONE FLUTE SYNTH LEAD SYNTH SYNTH FX BANJO STL.DRUM LAYER REVERB REGISTRATION MEMORY LOWER EFFECTS STORE mode and engages the selected voice for all 88 piano keys. Please see the Piano Voices section of this manual for more information.
- Page 20 PANEL CONTROLS SOUND GROUP GRAND PIANO VIBES BASS PIANO ORGAN GUITAR VIOLIN STRINGS TRUMPET REVERB FLUTE SYNTH LEAD SYNTH SYNTH FX BANJO STL.DRUM SOUND FX SAXOPHONE REGISTRATION MEMORY EFFECTS STORE BANK ing in a big room or hall where the sound reverberates off the walls and ceiling.
- Page 21 PANEL CONTROLS SOUND GROUP PIANO VIBES ORGAN GUITAR BASS VIOLIN STRINGS TRUMPET COMPOSER ACCOMP SAXOPHONE FLUTE SYNTH LEAD SYNTH SYNTH FX BANJO STL.DRUM SOUND FX PLAY/PAUSE REGISTRATION MEMORY STORE BANK have engaged. The piano has four banks each with six registrations for a total of 24 registration memories.
- Page 22 PANEL CONTROLS COMPOSER DISK METRONOME ACCOMP MEL. 1 MEL. 2 MEL. 3 MEL. 4 RESET MIDI SONG PLAY/PAUSE STOP RECORD BEG. MARK MARK 35. MEL (MELODY) 1-4 - There are four tracks for recording melody, which are assigned by the MELODY 1-4 buttons. 36.
- Page 23 PANEL CONTROLS MEL. 2 MEL. 3 MEL. 4 RESET DISK METRONOME RECORD MIDI SONG BEG. MARK MARK 43. METRONOME - The METRONOME button toggles the metro- nome feature on and off and accesses the Metronome menu. The tempo can be increased or decreased using the TEMPO + and - buttons.
-
Page 24: Disk Drive
DISK DRIVE SUZUKI DISK DRIVE - The disk drive is located under the piano keys on the right hand side of the unit. It is used to drive a floppy diskette. Please see the Disk section of this manual for more information. -
Page 25: Pedals
PEDALS SUZUKI PEDALS SOFT PEDAL - When the left pedal is engaged the piano volume is reduced and the timbre slightly altered on the notes that are played. FUNCTION PEDAL - This center pedal can be used to trigger various events, such as start/stop. Pedal function is as- signed in the setup menu, “Pedal Assign”. -
Page 26: Display Screen
DISPLAY SCREEN CURSOR VALUE SCREEN ENTER ESCAPE – LEFT RIGHT This screen displays the various Setup menus and performance screens. Use the CURSOR keys to select the portion of the screen that you wish to manipulate. The portion of the screen that is selected will be highlighted. -
Page 27: Demo
DEMO PLAYING THE DEMO SONGS - This piano has thirteen different demonstration songs that are designed to showcase the different sampled voices that are available. The display will show the song name. All the songs will play back repeatedly until the demonstration is stopped. There are over 50 songs in the musical Lesson course that can also be played back as a demonstration. -
Page 28: Piano Voices
PIANO VOICES ASSIGNING A MODE - This piano has four different piano modes or playing channels. UPPER UPPER VOICE - Upper is use to select the upper or main voice of the piano. The upper mode engages the selected piano voice for all of the piano keys. -
Page 29: Voice Selection
PIANO VOICES VOICE SELECTION - There are 128 GM (General MIDI) voices in 16 groups available on this piano. There is a complete list of UPPER all 128 voices in the back of the manual. Select a mode, UPPER, LAYER or LOWER, by pressing their LAYER control panel buttons, or by highlighting the mode area using the CURSOR buttons and pressing the value buttons until the... - Page 30 PIANO VOICES GRAND PIANO - This button will reset the piano to its default GRAND PIANO (power up) settings. The Grand Piano voice will be engaged for all 88 keys. No matter what control, functions, features or modes that the piano is in, it will be “reset”...
-
Page 31: Quick Select
PIANO VOICES SOUND GROUP PIANO VIBES ORGAN GUITAR BASS VIOLIN STRINGS TRUMPET SAXOPHONE FLUTE SYNTH LEAD SYNTH SYNTH FX BANJO STL.DRUM SOUND FX QUICK SELECT - There are 16 voices that can be selected quickly UPPER by pressing one of the 16 quick select SOUND GROUP buttons. - Page 32 PIANO VOICES SELECTING ONE OF THE 128 VOICES Press a quick select SOUND GROUP button twice, to engage a voice selection menu on the display screen. Each button is SAXOPHONE assigned eight related voices in two groups of four. Reed Group A Soprano Sax Alto Sax...
-
Page 33: Rhythm Section
RHYTHM SECTION RHYTHM STYLE SELECTION - This piano offers 50 rhythm styles and a variation of each style pattern to choose from. There is a complete list of all 50 styles in the back of the manual. RHYTHM STYLE SELECTION - There are 50 rhythm styles in ten groups available on this piano. -
Page 34: Quick Select
RHYTHM SECTION RHYTHM STYLES R & B BIG BAND SWING RHUMBA S. BALLAD ACOUSTIC OLDIES ROCK LATIN QUICK SELECT - There are ten rhythm styles that can be selected quickly by pressing one of the ten quick select RHYTHM STYLES buttons. BIG BAND Press the RHYTHM STYLES button that corresponds to the desired rhythm style, the indicator will light up. - Page 35 RHYTHM SECTION SELECTING ONE OF THE 50 RHYTHM STYLES Press a quick select RHYTHM STYLES button twice, to en- gage a rhythm style selection menu on the display screen. SWING Each button is assigned four to six related rhythm styles. Swing Group A Swing...
-
Page 36: Starting And Stopping The Rhythm Style
RHYTHM SECTION STARTING AND STOPPING THE RHYTHM STYLE - There are several ways to start and stop the rhythm style. RHYTHM CONTROL INTRO / END START / STOP FILL IN FILL TO VAR FADE SYNCH SYNCHRONIZED START - Synchronized Start mode engages the auto accompaniment mode to standby. -
Page 37: Fill-In
RHYTHM SECTION RHYTHM CONTROL INTRO / END START / STOP FILL IN FILL TO VAR FADE SYNCH Variation. When the FILL-IN button is selected, after the fill the rhythm style will return to the main pattern. Holding down FILL IN the FILL-IN button will extend the fill indefinitely. -
Page 38: Adjusting The Tempo
RHYTHM SECTION – TEMPO ONE TOUCH ACCOMP ADJUSTING THE TEMPO - There is a four-beat indicator next to the TEMPO buttons that indicate the tempo and the beat of the selected rhythm style. Each style has its own preset tempo. The tempo can be adjusted by pressing either of the Tempo + or - buttons. -
Page 39: Auto Accomp. (Auto Base Chord)
AUTO ACCOMPANIMENT – TEMPO ONE TOUCH ACCOMP AUTO ACCOMPANIMENT (AUTO BASS CHORD) - All 50 rhythm styles have their own auto accompaniment, dedicated to that rhythm style. These auto accompaniments create fully or- chestrated rhythm, bass and chord progressions based on the chords that you play with your left hand. - Page 40 AUTO ACCOMPANIMENT – TEMPO ONE TOUCH ACCOMP RHYTHM CONTROL SYNCH INTRO / END START / STOP FILL IN FILL TO VAR FADE AUTO BASS CHORD FINGERING - This piano has three auto accompaniment fingering modes, one finger, fingered, and piano. ACCOMP Press the ACCOMP button so the indicator light turns on.
-
Page 41: One Finger
AUTO ACCOMPANIMENT ACCOMP : One Finger One Finger Fingered Piano Mode ONE FINGER MODE - Single fingering mode, or intelligent chord mode, makes it simple to produce four types of orchestrated accompaniment chords using a minimum of fingers, (one, two, or three fingers at the most), while playing in the auto accompaniment section of the piano. -
Page 42: Fingered
AUTO ACCOMPANIMENT ACCOMP : Fingered One Finger Fingered Piano Mode FINGERED MODE - The fingered mode is ideal if you already know how to play chords on the piano. It allows you to play the chords in the auto accompaniment section of the piano to produce the auto accompaniment pattern. -
Page 43: Piano
AUTO ACCOMPANIMENT ACCOMP : Piano One Finger Fingered Piano Mode PIANO CHORD MODE - When the Piano fingering chord mode is engaged you may enter chords anywhere on the piano. The auto accompaniment will play the complete accompaniment arrangements from your chord input. You are not limited to the auto accompaniment section or the range of the split point. -
Page 44: Starting And Stopping The Auto Accomp
AUTO ACCOMPANIMENT STARTING AND STOPPING THE AUTO ACCOMPANIMENT RHYTHM CONTROL INTRO / END SYNCH START / STOP FILL IN FILL TO VAR FADE SYNCHRONIZED START - Synchronized Start mode makes the auto accompaniment standby. The auto accompaniment will start as soon as you play a recognized chord in the auto accompaniment section of the piano. -
Page 45: Fill-In
AUTO ACCOMPANIMENT FILL - IN - The fill feature will insert a short rhythmic pattern of one to FILL IN two measures in length, depending on the rhythm style selected. There are two distinct fill patterns, Fill-in and Fill to Variation. -
Page 46: Setup
SETUP The setup mode is used to set up or to adjust various parameters related to the operation of this piano. The SETUP button will access menus for Performance, Harmony, Key Mode, Sustain, Reverb, Chord mode, Effects, Pedal, Percussion, and Metronome setup. USING THE SETUP MENU Press the SETUP button. -
Page 47: Velocity
SETUP PERFORMANCE SETUP MENU Press the SETUP button. Press the ENTER button to access the Performance menu. Use the CURSOR button to access the following options. Velocity Performance Setup Velocity Norm Split Point Transpos Screen Hold The piano offers four types of piano velocity settings, low, normal, high, and fixed. -
Page 48: Transpose
SETUP PERFORMANCE SETUP MENU Press the SETUP button. Press the ENTER button to access the Performance menu. Use the CURSOR button to access the following options. Transpose Performance Setup Velocity Norm Split Point Transpos Screen Hold The transpose feature can shift the pitch of the piano up or down in semitone intervals. -
Page 49: Tune
SETUP PERFORMANCE SETUP MENU (PAGE 2) Press the SETUP button. Press the ENTER button to access the Performance menu. Press the SCREEN RIGHT button to access the second page of the Performance menu. Use the CURSOR button to access the following options. Tune Performance Setup Tune... -
Page 50: Fade Time
SETUP PERFORMANCE SETUP MENU (PAGE 2) Press the SETUP button. Press the ENTER button to access the Performance menu. Press the SCREEN RIGHT button to access the second page of the Performance menu. Use the CURSOR button to access the following options. Fade Time Performance Setup Tune... -
Page 51: Harmony
SETUP Press the SETUP button. Use the CURSOR button to highlight the Harmony menu. Press the ENTER button to access the Harmony menu. Use the CURSOR button to select a harmony type, then use the VALUE buttons to turn that harmony type on or off. Only one harmony type can be selected at a time. -
Page 52: Key Mode
SETUP Press the SETUP button. Use the CURSOR button to highlight the Key Mode menu. Press the ENTER button to access the Key Mode menu. Use the CURSOR button to select a key mode type, then use the VALUE buttons to turn that key mode type on or off. Manual Bass Manual Bass Key Mode... -
Page 53: Sustain
SETUP be affected by the sustain pedal. Press the SETUP button. Use the CURSOR button to highlight the Sustain menu. Press the ENTER button to access the Sustain menu. Use the CURSOR button to select a sustain type, then use the VALUE buttons to turn that sustain type on or off. -
Page 54: Reverb
SETUP the power is turned on. Pressing the REVERB button will toggle this effect on or off. When reverb is engaged the indicator light will be lit. To select a type of reverb and to adjust the reverb levels use the Reverb setup menu. Press the SETUP button. - Page 55 SETUP simultaneously to recall the default level of 100. Reverb Setting Layer - When reverb layer is turned on the layer voice keys will Reverb UPPER LAYER LOWER reverberate. Use the VALUE + and - buttons to select a reverb level from 0-127. Press the VALUE + and - buttons Room simultaneously to recall the default level of 100.
-
Page 56: Chord (Auto Accompaniment Fingering)
SETUP hand. There are three fingering modes to choose from, One finger, Fingered or Piano. Use the Chord menu to select a mode, please see the Auto Accompaniment section of this manual for more information on fingering modes. Press the SETUP button. Use the SCREEN RIGHT button to access the second page of the setup menu options. -
Page 57: Effects
SETUP Pressing the EFFECTS button on the control panel will toggle the Effects Function on and off. The effects setting does not affect the auto accompaniment. Select the type of effect and adjust the level in the Effect menu. Press the SETUP button. Use the SCREEN RIGHT button to access the second page of the setup menu options. - Page 58 SETUP selected effect. Use the – VALUE + buttons to select a effect depth level from 0-127. Press the – VALUE + buttons simul- taneously to recall the default level of 100. Effect Setting Layer - When reverb layer is turned on the layer voice keys Effect UPPER LAYER...
-
Page 59: Pedal Assign
SETUP Press the SETUP button. Use the SCREEN RIGHT button to access the second page of the setup menu options. Use the CURSOR button to highlight the Pedal menu. Press the ENTER button to access the Pedal menu. Use the CURSOR button to select the following options, the pedal can only be assigned to one. -
Page 60: Percussion (Drum Kit Assign)
SETUP There are eight drum kits, based on the standard kit, that can be assigned and a sound effects kit. Please see the “Drum List” at the back of the manual for a complete listing. Press the SETUP button. Use the SCREEN RIGHT button to access the third page of the setup menu options. - Page 61 SETUP menu and the metronome sound will start immediately. You can access the Metronome menu from the SETUP button as follows. Press the SETUP button. Use the SCREEN RIGHT button to access the third page of the setup menu options. Use the CURSOR button to highlight the Metronome menu.
-
Page 62: Registration Memory
REGISTRATION MEMORY A registration is a particular set up of style, voice, chord and other parameters or features you are using. By saving your “set up” it can be recalled by pressing a single button. This piano has four banks with six registration numbers in each bank, for a total of 24 registrations. -
Page 63: Record
RECORD This piano is equipped with a real time 5 track recorder (sequencer). It is designed to be very simple to use. It will record all note events and the accompaniment patterns exactly as they are performed. All the recorded tracks can playback separately or together as a complete song. This recorded information is nonvolatile and therefore will not be lost when the power is turned off. - Page 64 RECORD will record, the chord changes, style, tempo, variation, intro, fill-in and ending. Pressing The ACCOMP track button will select the accompa- niment track for recording. If only the ACCOMP Record track button has been selected, the auto accompaniment Record will be synchronized to start when the piano keys are played.
-
Page 65: Recording
RECORD The top line shows which melody track is Record Melody 3 recording. The piano mode. Record Accomp If the accompaniment 1 : 3 / = 100 track is being recorded it will show here. The current bar (1) The current tempo. and beat (3). -
Page 66: Playback
RECORD COMPOSER ACCOMP MEL. 1 MEL. 2 MEL. 3 MEL. 4 RESET PLAY/PAUSE STOP RECORD BEG. MARK END MARK PLAYBACK - To hear your recording follow these directions. The indicators of the tracks with recorded information in them will be lighted. ACCOMP If you do not wish to hear a track, press the corresponding track button to turn that track off. -
Page 67: Mark
RECORD COMPOSER ACCOMP MEL. 1 MEL. 2 MEL. 3 MEL. 4 RESET PLAY/PAUSE STOP RECORD BEG. MARK END MARK MARK - The mark feature allows you to isolate a section of the recording of the song. This marked sequence will function under the same param- eters as the real-time recording, except it is only that portion of the song instead of the entire track. -
Page 68: Lesson
LESSON The SONG button will access a music Lesson package that can be used for fun and enter- tainment to improve your playing. There are over 50 songs built into the piano as reference for your Lesson entertainment. SONG SELECT Press the SONG button to display the Song Select Screen. -
Page 69: Using The Lesson Feature
LESSON The name of the This area will count the selected song. songs measure during play or test. Bumble Bee Measure Use “Play” to listen to the Play RHnd=Y LHnd=Y Acmp=Y On this line select the selected parts parts of the song you Test / = 110 of the song. - Page 70 LESSON USING THE LESSON FEATURE continued Test - Highlight “Test” and press the ENTER button to test your playing on the selected song. You may test yourself on the right hand melody, the left hand accompaniment or both hands by highlighting the appropri- ate area and using the VALUE buttons to toggle those parts on, Y (Yes) or off, N (No).
-
Page 71: Disk (Hp-275E Only)
DISK (HP-275e Only) The disk feature allows you to load, save, delete or rename your recorded musical perfor- mances (songs). Insert the diskette here, label side up, metal shutter edge leading. Press this eject button to remove a diskette. INSERT THE DISK - Insert the 3.5 disk into the disk drive with the label side up and the metal shutter leading into the drive. -
Page 72: Load Song
DISK (HP-275e Only) Load Song - Load Song retrieves a previously stored MIDI song from the floppy disk drive. If you want to permanently edit a song you must load the file into the music recorder (sequencer). Since the Standard MIDI file that you have on... -
Page 73: Save Song
DISK (HP-275e Only) Save Song - Save song lets you save your musical performance data that you recorded in the 5 track sequencer and save it onto a floppy disk so that it can be accessed later. DISK MENU Load Song... -
Page 74: Utility
DISK (HP-275e Only) Utility - Selecting Utility will access a Disk Utility sub-menu. DISK MENU Load Song Utility Save Song Play Disk Use the Utility sub-menu to access the following options. Format - Format prepares a new disk for use. Most Floppy disks have been formatted but if you happan to have a disk that is not formatted then data cannot be stored on it. -
Page 75: Delete
DISK (HP-275e Only) Utility Menu continued Delete - Delete is used to remove unwanted files from the disk to make more space available. Disk Utility Format Copy Delete Rename Load the disk into the disk drive. Make sure that the disk you have selected has the song data file you want to delete on the disk. -
Page 76: Play Disk
DISK (HP-275e Only) disk that you can play. It will play the selected MIDI file di- rectly from the floppy disk. Please note, if you want to permanently edit the song you must load the file into the sequencer. DISK MENU... -
Page 77: Midi
Whether you interface with computers, sequencers, expanders or other pianos your Suzuki piano’ s technical capabilities, and your musical horizons will be greatly enhanced. For further information on MIDI and MIDI equipment that is available, please contact your local Suzuki music store. - Page 78 By connecting this Suzuki piano to another piano in this way you can essentially play two instruments at the same time or play on your piano to the sound of another MIDI devise to produce thick, layered multi-instrument sounds.
- Page 79 MIDI MIDI LOCAL CONTROL MODE - Local control refers to the fact that normally, this Suzuki piano controls the internal tone generator. This is the normal play mode. Local control can be turned off, so that the piano does not play the internal voices, however, the MIDI information is still transmitted via the MIDI Out connector when notes are played on the piano.
-
Page 80: Midi Implementation Chart
MIDI IMPLEMENTATION CHART Function Transmitted Recognized Remark Basic Channel 1 CH 1-16 CH Channel changed 1-16 CH 1-16 CH Default Mode Note Number 9-120 0-127 Velocity: Note On Velocity: Note Off Pitch Bender Control Change: 0 Variation page Modulation Portamento value 7, 10 Volume, Pan Expression... -
Page 81: Voice List
VOICE LIST Please note: The MIDI program number for any voice listed is one less than the display number. Group A Group B Piano PIANO 1 : Grand Piano 2 : Bright Piano 5 : Rhodes Piano 6 : Chorus Piano 3 : Elec. -
Page 82: Style List
STYLE LIST Group A Group B R & B R & B 1 : R & B 2 : Rap 3 : Dance 4 : Funk Big Band BIG BAND 5 : Big Band 6 : Jazz Band 7 : Jazz Waltz 1 8 : Jazz Waltz 2 Swing SWING... -
Page 83: Drum Kit List 1
DRUM KIT LIST DRUM KIT LIST 1 Please note: In the first title row the number in the bracket, after the kit name, is the MIDI program number. The Drum kits name and number that are shown on the LCD display are listed in the second title row. The “No.” refers to MIDI note number, and “Key”... -
Page 84: Drum Kit List 2
DRUM KIT LIST DRUM KIT LIST 2 Please note: In the first title row the number in the bracket, after the kit name, is the MIDI program number. The Drum kits name and number that are shown on the LCD display are listed in the second title row. The “No.” refers to MIDI note number, and “Key”... -
Page 85: Specifications
SPECIFICATIONS SPECIFICATIONS Performance: Velocity, Split point, Transpose, Screen PIANO 88-note, hammer-action piano Hold, Tune, Fixed Level, Fade Time, Octave Shift Key Mode: Manual Bass, Lower Hold POLYPHONY: 64 Harmony: Trio, Duet, Octave Sustain: Upper, Layer, Lower VOICES Reverb: 8 Reverb settings, Upper, Layer, Lower Levels 128 Voices Effects: 8 Effects settings, Upper, Layer, Lower Levels Chord (Accomp Finger Mode): One Finger, Fingered,... -
Page 86: Warranty
Authorized Suzuki Retail Center with the proof of purchase. The dealer will then repair the product or return it to the Suzuki distribution center in San Diego, California for repairs. Upon completion of the repair, the unit will be returned to the dealer freight prepaid. - Page 87 PDF 文件使用 "pdfFactory Pro" 试用版本创建 www.fineprint.com.cn...
- Page 88 SUZUKI composer ensemble HP-275e HP-175e OWNER’ S MANUAL SUZUKI P.O. BOX 261030 SAN DIEGO, CALIFORNIA 92196 (858) 566-9710 Visit us on the web at www.suzukipianos.com Copyright 2003 Suzuki Musical Instrument Corporation PDF 文件使用 "pdfFactory Pro" 试用版本创建 www.fineprint.com.cn...