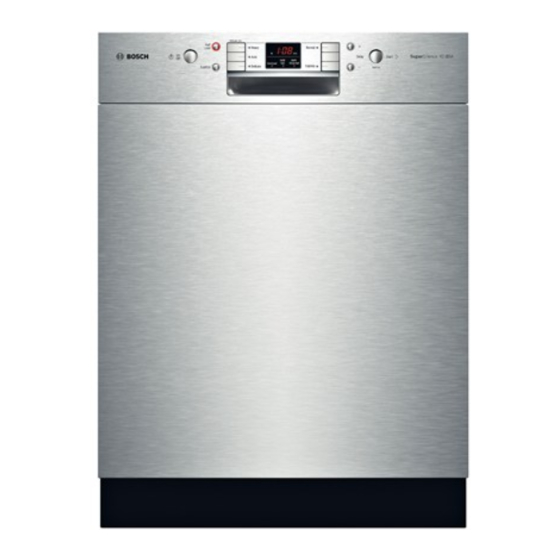
Bosch SHU 9950 Installation Instructions Manual
Hide thumbs
Also See for SHU 9950:
- Use and care manual (32 pages) ,
- Use and care manual (32 pages) ,
- Use and care manual (32 pages)
Summary of Contents for Bosch SHU 9950
- Page 1 DISHWASHER Installation Instructions LAVE-VAISSELLE LAVADORA DE PLATOS Instructions Instrucciones d’installation de instalación SHV 6800, 4800,4300 SHI 6800,4300 SHU 9950, 9920, 9910, 8810, 8800, 6800, 5300, 4320,3300, 3131, 3030...
-
Page 2: Table Of Contents
TABLE OF CONTENTS INTRODUCTION ...........2 TOOLS AND MATERIALS NEEDED ......3 MATERIALS SUPPLIED.......... .4 CHOOSING LOCATION .........5 PLUMBING PREPARATION ........6 ELECTRICAL PREPARATION ........7 PLACING THE DISHWASHER ........ .8 DRAIN HOSE CONNECTION ........9 HOT WATER CONNECTION ........10 ELECTRICAL SUPPLY CONNECTION ...... -
Page 3: Introduction
INTRODUCTION THESE INSTALLATION INSTRUCTIONS ARE INTENDED FOR USE BY QUALIFIED INSTALLERS. In addition to these instructions the dishwasher shall be installed: • In the United States, in accordance with the National Electric Code/State and Municipal codes and/or local codes. • In Canada, in accordance with the Canadian Electric Code C22.1 -latest edition/Provincial and Municipal codes and/or local codes. -
Page 4: Tools Needed For Installation
TOOLS & MATERIALS NEEDED Tools Needed for Installation Figure 1 Materials Needed Electric Connection - 2 conductor, 1 ground insulated electrical supply cable (30” or sufficient length for your installation). Hot Water Supply Line - Minimum 3/8” O.D. copper tubing or metal braided dishwasher supply line. -
Page 5: Materials Supplied
MATERIALS SUPPLIED Accessory Parts Supplied Accessory Parts for your model dishwasher will come in one or more plastic bags. Check to make sure that the parts supplied for your model are all there. See Figure 3. If any parts are missing, stop the installation and contact your dealer immediately. -
Page 6: Choosing Location
CHOOSING A LOCATION THESE INSTALLATION INSTRUCTIONS ARE INTENDED FOR USE BY QUALIFIED INSTALLERS Choosing the Location Select a location as close to the sink as possible for ready access to water and drain lines. Most of the installation work is done before 1-15/16”... -
Page 7: Plumbing Preparation
Electrical supply cable line Figure 7 1. In order to reduce running time, Bosch recommends 140° F water inlet temperature. Your dishwasher will perform equally as well at 120° F water temperature, but the run time will be extended. 6 - ENGLISH... -
Page 8: Electrical Preparation
ELECTRICAL PREPARATION WARNING THESE INSTALLATION INSTRUCTIONS ARE INTENDED FOR USE BY 23-5/8" - 24-1/8" 24”-24-1/4” QUALIFIED INSTALLERS (600-613 mm) (610-616mm) 3-1/2 (90 mm) 1-5/16 (49 mm) Electrical Supply It is the customer’s responsibility to insure that the dishwasher installation is in compliance with all national and local Figure 8 electrical codes and ordinances. -
Page 9: Placing The Dishwasher
PLACING THE DISHWASHER A. Mounting bracket Placing the Dishwasher for mounting to under The profile strips on the sides of the countertop dishwasher allow the dishwasher to fit into a cabinet opening with a width of 24” (610 mm) to 24-1/4” (616 mm). Before sliding the dishwasher into the cabinet opening: •... -
Page 10: Drain Hose Connection
DRAIN HOSE CONNECTION Air Gap THESE INSTALLATION Drain Hose INSTRUCTIONS ARE in Sink with INTENDED FOR USE BY Air Gap/ No QUALIFIED INSTALLERS Disposer Rubber Connector Be sure to follow your national and local codes at all times. Trap Drain Hose Figure 12 •... -
Page 11: Hot Water Connection
HOT WATER CONNECTION THESE INSTALLATION INSTRUCTIONS ARE INTENDED FOR USE BY QUALIFIED INSTALLERS Shut off valve Connecting the Hot Water (not included) Supply Line • If using a solder joint instead of a com- pression fitting, be sure to make all Figure 15 solder connections before connecting the water line to the dishwasher . -
Page 12: Electrical Supply Connection
ELECTRICAL SUPPLY CONNECTION WARNING THESE INSTALLATION INSTRUCTIONS ARE INTENDED FOR USE BY ELECTRICAL SHOCK HAZARD QUALIFIED INSTALLERS • DISCONNECT ELECTRICAL POWER AT THE CIRCUIT BREAKER BOX OR FUSE BOX BEFORE INSTALLING THE Connecting Electrical Supply DISHWASHER. • ELECTRICALLY GROUND DISH- Be sure to follow all local and natio- WASHER. -
Page 13: Door Panel Installation
DOOR PANEL INSTALLATION Accessory Panel Installation SHU Models If you have an SHU model (other than the SHU 9910, 9920 or 9940 models) and have ordered an accessory panel kit it must be installed prior to sliding the dishwasher into place. - Page 14 DOOR PANEL INSTALLATION 1/4” max. 25” (6 mm) (636 mm) SEE FOLDED PANEL INSTALLATION TEMPLATE SHEET FOR STEP BY STEP 23-1/16” (586 mm) INSTRUCTIONS ON HOW TO INSTALL YOUR DISHWASHER PANEL(S). Figure 19 IMPORTANT Do NOT Drill Completely through your custom door panel. "...
-
Page 15: Final Adjustments
FINAL ADJUSTMENTS Door Tension Adjustment (only in SHI and SHV models) After installation of the dishwasher, open and close the door several times to make sure that it does so with ease. If the door closes too quickly or if the door falls open, the spring tension needs to be adjusted. -
Page 16: Base And Toe Panel
BASE AND TOE PANEL SHU 6800 Series Base and Toe Panel Installation Steps Installation Parts • SHU 6800 Base Part • Base Part Screws • SHU 6800 Toe Panel • SHU Toe Panel Screws • SHU 6800 Installation Kit (Refer to “Materials Supplied” section) Remember to carefully check, the “Materials Figure 24 Supplied”... -
Page 17: Toe Panel And Handle
TOE PANEL AND HANDLE Regular Toe Panel Installation (for models other than SHU 6800) • Obtain Toe Panel Screws from the Dishwasher Installation Kit bag (see Figure 3). • Insert screws through the Toe Panel. • With a Torx screwdriver, fasten screws Figure 27 and toe panel into dishwasher base. -
Page 18: Final Checklist
If problem persists, take the following steps (in the order listed below) until the problem is corrected to your satisfaction. Contact your installer or the Bosch Authorized Service Contractor in your area. E-mail us from the Customer Service section of our web site, www.boschappliances.com. - Page 19 56 02 04 2334 (8108)/ CS Part # 481829...


