
Related Manuals for LG CodePlus PIVD100R


Summary of Contents for LG CodePlus PIVD100R
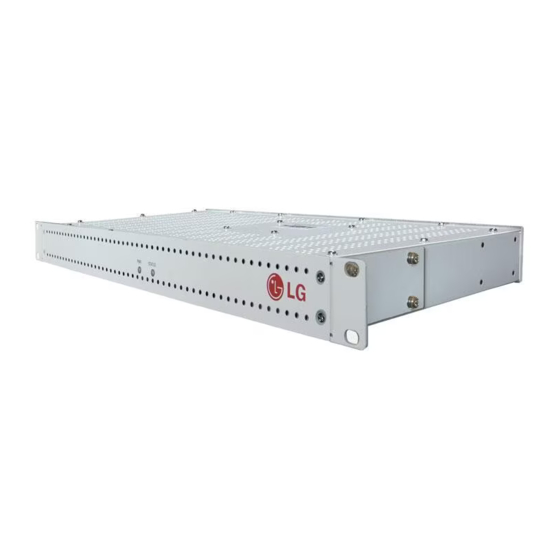
- Page 1 CodePlus™ PIVD100R ® Pro:Idiom Video Distribution Transcoder System Installation & Setup Guide Warranty P/N: 206-4202 (Rev A) © Copyright 2012, LG Electronics U.S.A., Inc.
-
Page 2: Safety Warnings
CAUTION: Do not attempt to modify this product in any way without written authorization from LG Electronics U.S.A., Inc. Unauthorized modification could void the user’s authority to operate this product. -
Page 3: Important Safety Instructions
When a cart is used, use caution when 20. Test Equipment moving the cart/apparatus combination In some cases, LG has supplied or recom- in order to avoid injury from tip-over. mended the use of test equipment and 13. Refer all servicing to qualified service devices for the setup and testing of the equip- personnel. - Page 4 IMPORTANT SAFETY INSTRUCTIONS 24. Safety Check (Continued from previous page) Upon completion of any service or repairs to 21. Damage Requiring Service this product, ask the service technician to Unplug this product from the wall power perform safety checks to determine that the outlet and refer servicing to qualified service product is in proper operating condition.
-
Page 5: Important Safety Instructions
IMPORTANT SAFETY INSTRUCTIONS E. Mains Outlet Earthing (Continued from previous page) The apparatus with Class I construction must B. Reduced Air Flow be connected to a mains socket outlet with a Installation of the equipment in a rack should protective earthing connection. be such that the amount of air flow required for safe operation of the equipment is not PIVD100R Server Installation on a Flat Surface... -
Page 6: Table Of Contents
Table of Contents Safety Warnings ..... . . 2 Configuration Options via Command Line ......37 – 60 Important Safety Instructions. -
Page 7: Pivd100R Product Description
ID must be set at the TV in order for Pro:Idiom decryption to be enabled. LG’s Pay-Per-View (PPV) partners can set up this session through their interface. LG’s Free- To-Guest (FTG) Mode of operation also enables Pro:Idiom decryption. -
Page 8: Setup Information
This document provides installation and setup support only for the PIVD100R. The satellite dish antenna and satellite STBs must be installed and operating before you proceed to set up the PIVD100R. LG recommends that the system be professionally installed. Check the following items before you begin the PIVD100R installation and setup procedures. -
Page 9: Setup Information
Setup Information (Cont.) Channel Assignments for RF Output __ Create a channel assignment plan for the installation site, or modify an existing plan to incorporate the RF output of the PIVD100R. Ensure that up to four contiguous CATV channels are allocated for the PIVD100R RF output. The PIVD100R uses a 256-QAM modulation format, thereby occupying approximately 24 MHz of frequency spectrum. -
Page 10: Rear And Front Panel Overviews
Rear and Front Panel Overviews PIVD100R Rear View R F - RF Out X-Ports 8, 7, 6, 5 Disconnect Device X-Ports 4, 3, 2, 1 The AC mains plug is used Service Port as the disconnect device. USB Ports Feature & Control The disconnect device must (Ethernet) Ports remain readily operable. -
Page 11: Rack Installation
Rack Installation Typical Rack Installation 1. (Optional) As shipped, the PIVD100R mounting brackets are attached flush with the front of the unit (see diagram a). If desired, the mounting brackets may be detached from the unit and reattached, for example, so that they are flush with the rear of the unit (see diagram b). If you wish to change the location/orientation of the mounting brackets, carefully remove each of the four (M4 x 10 mm) screws and attendant washers (one flat and one lock washer per screw) holding each bracket in place. -
Page 12: Rack-Mount Considerations
Rack Installation (Cont.) Front View of Rack Cabinet 1 inch minimum STATUS STATUS 1 inch minimum Rack-mount Considerations A. Elevated Operating Ambient If installed in a closed or multi-unit rack assembly, the operating ambient temperature of the rack environment may be greater than room ambient. Therefore, consideration should be given to installing the equipment in an environment compatible with the maximum ambient tempera- ture (Tma) specified by the manufacturer (see Specifications information in this document). -
Page 13: System Setup
CAT5E Cable Distribution System Setup Network Refer to the following diagrams, and complete the system installation as described on pages 15 to 19. Caution: Do NOT make system connections until instructed to do so during the system installation procedure. In some instances, configuration steps must be performed before physical connections are made. -
Page 14: Typical Setup Flowchart For Pivd100R
System Setup (Cont.) Typical Setup Flow Chart for PIVD100R with IP Output Satellite In X-Port 1 Satellite X-Port 2 X-Port 3 Satellite Signal/ Network Distribution Ethernet X-Port n ** PIVD100R Laptop Feature Port Service Port Connection CAT5E Cable Distribution Network * Multi-switch will be necessary if the number of transcoders exceeds the dish antenna’s capacity. -
Page 15: Typical System Installation
Once the connection is established, you should see a login prompt. (If the login prompt is not automatically displayed, press Enter to refresh the screen.) 7. At the login as: prompt, type admin and press Enter. Then, type the admin user password (provided by LG) at the password: prompt. (Continued on next page) 206-4202... - Page 16 The initial System Information display identifies PIVD100R default configuration settings, including the Control Port IP address, the STB type, and the output configuration, for example: PIVD100R Pro:Idiom Video Distribution Transcoder System Copyright (c) 2010-2012 LG Electronics U.S.A., Inc. Copyright (c) 2010-2012 Zenith Electronics LLC 101-12470001 Version HW id:...
- Page 17 System Setup (Cont.) (Continued from previous page) 12. (RF output only) Complete PIVD100R RF output configuration as follows: a) If the Command > prompt is on display, type setup and press Enter to access the Setup Menu. b) Use the Setup Menu “rf” command, as described on page 50, to configure the RF mode and the RF channels.
- Page 18 System Setup (Cont.) (Continued from previous page) 14. (Optional) For remote management purposes, you can set a static IP address for the PIVD100R Control Port as follows: a) If the Command > prompt is on display, type setup and press Enter to access the Setup Menu.
-
Page 19: System Setup
System Setup (Cont.) (Continued from previous page) Note: If you set a new STB type, you will be prompted to reset the system. If you intend to modify additional configuration settings during the current session, you may wait until all changes are complete before you reset the system. -
Page 20: Network And Communication Setup
Network and Communication Setup This section describes PIVD100R communication options for configuration purposes. Note: Before you proceed with any additional configuration, the system should be installed and operating as described in the system installation procedure on pages 15 to 19. Also note that configuration updates periodically require that you reset the PIVD100R. -
Page 21: Configuration Options Via Gui
Configuration Options via GUI Access the PIVD100R Web GUI Note: The PIVD100R must be connected to an IP network for GUI access. See “Network and Communication Setup” on page 20 for further information. If necessary, consult the system administrator to obtain the “admin” user password before proceeding. -
Page 22: Pivd100R System Status
Configuration Options via GUI (Cont.) PIVD100R System Status For each transport stream (one per COM 23 STB or two per ViP 222/ViP 222k STB), the System Status screen identifies the STB number, the STB channel, the STB signal level, and the streaming bitrates. -
Page 23: Stb Information
Configuration Options via GUI (Cont.) yellow yellow The STB Signal Level and Bitrates columns refresh every 30 seconds with the latest data. If green a bitrates value is shown with a green background, the data transmission is within a standard yellow operating range;... -
Page 24: Stb Menu Options
Configuration Options via GUI (Cont.) STB Menu Options The STB Menu screen enables you to view and/or modify the STB configuration. To access the STB Menu for a selected STB, either: • Click on the desired STB channel number in the System Status or STB Information screen, or •... - Page 25 Configuration Options via GUI (Cont.) Typical STB Menu Screen (ViP 222k Satellite STB) Set the STB/Tuner Channel In the Change Channel section of the STB Menu screen, you can specify the appropriate channel number(s) for the STB. • COM 23 STBs: Type the desired channel number in the Tuner 1 Channel field. Then, click on the Set button at the right of the field.
- Page 26 Configuration Options via GUI (Cont.) Note: It may take a few minutes before a channel change registers in the system. During the transition period for the channel change, or if the channel is not valid and thus the STB cannot tune to the selected channel, the System Status, STB Information, and STB Menu screens will all show indication of a transition in the STB Channel column/field, for example: Note: If you set/change a ViP 222/ViP 222k STB/tuner channel, it is recommended that...
-
Page 27: Pivd100R System Setup Options
Configuration Options via GUI (Cont.) (Continued from previous page) 2. If you enabled the STB Software Update in step 1, complete each of the date and time fields to set the parameters for the STB update. Click on the down arrow at the right of each field (Year, Month, Day, Hour, Minute) to select the appropriate value from the drop- down list of options. - Page 28 Configuration Options via GUI (Cont.) Typical System Setup Screen 206-4202...
- Page 29 Configuration Options via GUI (Cont.) Select the STB Type 1. In the STB Type section of the System Setup screen, click the radio button at the left of the appropriate service provider for your system, and then click on the Set button. If you successfully changed the STB type, the system will display at the bottom of the System Information display.
- Page 30 Configuration Options via GUI (Cont.) Output Mode Configuration In the Output Mode section of the System Setup screen, you can modify the PIVD100R output configuration (see RF and IP output configuration examples below). Example: RF Output Configuration Field Example: IP Output Configuration Fields Complete output configuration as follows: 1.
- Page 31 Configuration Options via GUI (Cont.) (Continued from previous page) 2. The next step depends on the output mode selected: • For RF output configuration: In the Start RF Channel field, type the RF start channel number. The remaining three channels will be automatically assigned per EIA-542 STD CATV frequency allocation standards.
-
Page 32: Mux Setup Options
Configuration Options via GUI (Cont.) (Continued from previous page) 3. The next step depends on whether you enabled or disabled NTP: • If you enabled NTP, type the IP address of the NTP server in the NTP Server field. • If you disabled NTP, complete the Date and Time fields to manually specify the date and time for the PIVD100R. - Page 33 Configuration Options via GUI (Cont.) Typical MUX Setup Screen Reset STB/Output Assignments To reset the previous, i.e., last stored, STB/output assignments, click on the Reset button at the bottom of the Stream column. The STB/output assignments will be reset immediately. Modify STB/Output Assignments 1.
-
Page 34: Pivd100R Maintenance Options
Note: If this is the first time the Pro:Idiom key will be reloaded, contact LG for the password. 1. Click on the Reload button in the Pro:Idiom Key Reload section of the Maintenance screen to reload the Pro:Idiom key on the TVs. - Page 35 Menu Commands” on pages 58 to 60 for further information. Update the PIVD100R Firmware The appropriate update file must be provided by LG. The system will not download an improper file. 1. In the Firmware Update section of the Maintenance screen, either click on the Browse button at the right of or simply click in the Filename field, and navigate to/select the appropriate file from the File Upload pop-up window.
-
Page 36: Configuration Options Via Gui
Configuration Options via GUI (Cont.) (Continued from previous page) If you opt to proceed, the system will initiate the firmware update, and progress and results messages will be displayed in the Result section at the bottom of the screen, for example: 4. -
Page 37: Line
Configuration Options via Command Line Log In to the PIVD100R and Access the Main Menu Note: The PIVD100R must be connected to an IP network for SSH client access. For direct access to the PIVD100R Service Port, use the FTDI TTL-USB cable (P/N TTL-232R-5V-AJ). See also “Network and Communication Setup”... -
Page 38: View System Information
ID (firmware version), Control Port MAC and IP addresses, and output configuration, for example: PIVD100R Pro:Idiom Video Distribution Transcoder System Copyright (c) 2010-2012 LG Electronics U.S.A, Inc. Copyright (c) 2010-2012 Zenith Electronics LLC 101-12470001 Version... - Page 39 Configuration Options via Command Line (Cont.) Example: System Monitor Display (DIRECTV STB/RF Output) SYSTEM MONITOR Date: 2012-02-16 16:44:27 STB type: DirecTV Output: Bitrates (Mbps): ------+------------+------+------+------+-----+-------- STB | Channel | Sig | Lck | Out | Str | ------+------------+------+------+------+-----+-------- 1-1 | | 100 | Yes | 5.1 | 1 60-1...
-
Page 40: Stb Menu Commands
Configuration Options via Command Line (Cont.) STB Menu Commands The following subsections describe how to access and use the STB Menu commands. Access the STB Menu 1. Log in to the PIVD100R as described on page 37. 2. At the Command > prompt, type stb and press Enter. 3. - Page 41 Configuration Options via Command Line (Cont.) Change STB This command enables you to switch to the STB Menu for another STB. 1. At the STB Command > prompt, type stb and press Enter. 2. At the Enter STB number [#]> prompt, type the number of the PIVD100R X-Port connected to the STB for which you wish to view/modify configuration.
- Page 42 Configuration Options via Command Line (Cont.) Monitor the System This option enables you to view static or dynamic system streaming data and is also available from the PIVD100R Main Menu and the Setup Menu. At the STB Command > prompt, either: •...
- Page 43 Configuration Options via Command Line (Cont.) Configure STB/Output Assignments This option enables you to reconfigure STB/output assignments. Note that each STB can only be assigned one output stream (DIRECTV) or one pair of streams (DISH Network). If you remap an existing stream assignment to another STB X-Port, the initial assignment will be disconnected.
- Page 44 Configuration Options via Command Line (Cont.) Schedule an STB Software Update (ViP 222 or ViP 222k STBs Only) This option is available only for ViP 222 and ViP 222k STBs. The STB Software Update feature enables the STB to check for and download software updates on a one-time, user- defined basis.
-
Page 45: Setup Menu Commands
Configuration Options via Command Line (Cont.) (Continued from previous page) 4. At each of the following prompts, type the hour and minute, respectively, at which you wish to schedule the STB software update. Note that the hour should be entered in 24-hour format. - Page 46 Configuration Options via Command Line (Cont.) Example: Setup Menu ---------- Setup Menu ---------- info System information monitor System monitor type Set STB type omode Set output mode setip Control port IP configuration menu RF output configuration ipout IP output configuration menu Timezone setup time Time setup...
- Page 47 Configuration Options via Command Line (Cont.) Select the STB Type 1. At the Setup Command > prompt, type type and press Enter. The system will display a list of the available STB types, followed by a prompt for the new STB type, for example: Available STB types: 1 - Dish...
- Page 48 Configuration Options via Command Line (Cont.) Configure the Control Port 1. At the Setup Command > prompt, type setip and press Enter. The system displays an overview of the current TCP/IP network configuration followed by the Network Configuration Menu, for example: Current Network Configuration Interface controller port Host name:...
- Page 49 Configuration Options via Command Line (Cont.) (Continued from previous page) 7. Once you enter the gateway IP address, the system will redisplay the Network Configuration Menu. • To modify the DNS configuration, continue with step 8. • If no additional network configuration is required, go to step 9. 8.
- Page 50 Configuration Options via Command Line (Cont.) Configure the RF Output This option enables you to specify the appropriate RF channels for your location. See “Channel Assignments for RF Output” on page 9, and/or check with your service representative, if necessary. Note: Ensure the output mode also has been set accordingly.
- Page 51 Configuration Options via Command Line (Cont.) Access the IP Output Configuration Menu 1. At the Setup Command > prompt, type ipout and press Enter. 2. At the IP Output Command > prompt, either: • Press Enter to display the IP Output Configuration Menu (see example below). •...
- Page 52 Configuration Options via Command Line (Cont.) (Continued from previous page) 2. At the Enter STB number [#]> command, type the number of the PIVD100R X-Port connected to the STB for which you wish to modify configuration. Then, press Enter. 3. (Dual tuner STB only) At the Enter tuner number (1 or 2) [1]> command, either press Enter to accept the default value in square brackets, or type the appropriate tuner number and press Enter.
- Page 53 Configuration Options via Command Line (Cont.) (Continued from previous page) 4. After you type the port number, the system returns to the IP Output Command > prompt. At the IP Output Command > prompt, type apply and press Enter to confirm and apply the configuration data to the system.
- Page 54 Configuration Options via Command Line (Cont.) (Continued from previous page) After you specify the time zone region, the system displays an overview of your location selections and prompts for confirmation, for example: The following information has been given: United States Central Time Therefore TZ=’America/Chicago’...
- Page 55 Configuration Options via Command Line (Cont.) (Continued from previous page) 2. At the Use NTP for time synchronization (Y/N) ? [Y]: prompt, either: • Type y and press Enter if you intend to use an NTP client for time synchronization. At the Enter new NTP server IP: [64.90.182.55]: prompt, either press Enter to accept the default value in square brackets, or type the appropriate NTP client IP address and press Enter.
-
Page 56: Update Menu Commands
Configuration Options via Command Line (Cont.) Change the Login Password 1. At the Setup Command > prompt, type pwd and press Enter. The system prompts for the current admin user password: Changing password for admin Old password: 2. Type the current password and press Enter. The system will then prompt you to type and retype the new password: New password: Retype password:... - Page 57 This option enables you to update PIVD100R firmware via a serial link to the PIVD100R. The appropriate update file must be provided by LG; the system will not transfer an improper file. Note: See “Update PIVD100R Firmware via Ethernet” above for information on updating firm- ware via the Ethernet.
-
Page 58: Pro:idiom Menu Commands
Access the Pro:Idiom Menu Note: You will need to know the Pro:Idiom password to enter this menu. If this is the first time the menu is being accessed, contact LG for the password. Otherwise, if necessary, obtain the password from the system administrator. - Page 59 Configuration Options via Command Line (Cont.) Example: Pro:Idiom Menu -------------- Pro:Idiom Menu -------------- Download a new Pro:Idiom key via Xmodem pnet Download a new Pro:Idiom key from a remote server pload Reload Pro:Idiom key pchk Checksum Pro:Idiom key Change PI password exit Return to the main menu P:I Command >...
-
Page 60: Reset The System
Configuration Options via Command Line (Cont.) View the Pro:Idiom Key Checksum At the P:I Command > prompt, type pchk and press Enter. The Pro:Idiom key checksum is a 10 digit number that identifies the Pro:Idiom key file installed on the PIVD100R, for example: Pro:Idiom key checksum = 1521204805 Change the Pro:Idiom Password 1. -
Page 61: Troubleshooting
Troubleshooting PIVD100R Setup The following sections provide basic troubleshooting information for the PIVD100R. Equipment Setup Review • Make sure all connectors and connections are tight and secure on all entertainment system components. • Check the PIVD100R LEDs: − Under standard operating conditions the PWR (Power) LED on the PIVD100R front panel is continuously lit green. -
Page 62: Pivd100R Communication
PIVD100R is configured with IP PIVD100R’s IP address. If address: 192.168.1.x and necessary, adjust and then Network mask: 255.255.255.0, reattempt communication. the PC’s IP address cannot be: 192.168.2.x. Problem solved? Contact LG. 206-4202... -
Page 63: Receiver Reception
Receiver Reception If one or more receivers have symptoms of broken audio or video or no signal, refer to the troubleshooting flow charts below and on the following pages. If necessary, contact LG for additional troubleshooting help. Broken Audio/Video on... - Page 64 Troubleshooting (Cont.) Receiver Reception (Cont.) Redisplay the PIVD100R System Status (via GUI) or All STBs System Monitor (via command activated? line), and check the ouput bitrates for each STB. Contact your satellite Bitrates at Go to service provider to activate ideal level for Chart C any unactivated STBs.
-
Page 65: Troubleshooting
Troubleshooting (Cont.) Receiver Reception (Cont.) For example: Verify that the problem • Check that the proper session ID has been set for Pro:Idiom receiver(s) is/are set up encryption. properly. • If using RF output, check that the RF signal level at the receiver is OK. -
Page 66: Specifications
Specifications Dimensions Height: 1.692 inches (42.977 mm) Width: 19.0 inches (482.6 mm) with mounting brackets attached (for EIA standard 19-inch rack mount) Depth: 8.5 inches (215.9 mm) Weight: 4.45 pounds (2.02 kgrms) rack-only weight Environmental Storage Conditions Temperature: -20° to 70° Celsius -4°... -
Page 67: Document Revision History / Notes
Document Revision History / Notes Document Revision History Date Description April 2012 Revision A: New document Product documentation is available online at: www.LGsolutions.com/products. From the Products page, select TVs, Systems & Solutions, then Head End Systems, then CodePlus Transcoder Series (click Show [+] to view the list of products), then PIVD100R. Click the Literature & Downloads tab at the bottom of the PIVD100R page, and select the required document(s) from the Downloads list. -
Page 68: Open Source Software Notice
Copyright © 1996-1998, 2003 William Allen Simpson all referenced license terms, warranty disclaimers and copy- Copyright © 2003 Peter Stuge right notices are available for download. LG Electronics Copyright © 2005 Reyk Floeter will also provide open source code to you on CD-ROM for a Copyright ©... -
Page 69: Warranty
God or other causes beyond the control of LG. Any alteration of the product after manufacture voids this warranty in its entirety.