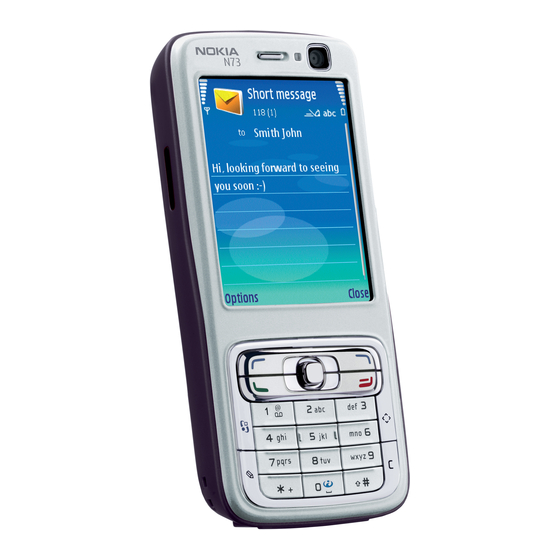
Nokia N73 User Manual
Hide thumbs
Also See for N73:
- User manual (265 pages) ,
- Additional applications (25 pages) ,
- Get started (17 pages)
Table of Contents
Advertisement
Available languages
Available languages
Quick Links
Advertisement
Chapters
Table of Contents

Related Manuals for Nokia N73


Summary of Contents for Nokia N73
- Page 1 User guide Manual del usuario Nokia N73-5...
- Page 2 Nokia N73 User Guide Nota: La traducción en español de este manual inicia en la Página 117. 9250265 ISSUE 1 EN...
- Page 3 Nokia Corporation. Other product and company names Nokia reserves the right to revise this document or withdraw it at any time without mentioned herein may be trademarks or tradenames of their respective owners.
-
Page 4: Table Of Contents
Image print ................31 Download! ................15 PrintOnline ................32 Games ..................15 Online sharing..............33 Support ............ 16 Media applications ........36 Nokia support and contact information .......16 Music player ................. 36 Help ..................16 Flash Player................37 Tutorial ...................16 Visual Radio ................38 RealPlayer................40... - Page 5 Time management........44 Connections ..........73 Clock ..................44 Bluetooth connectivity............73 Calendar................. 45 Infrared connection ............76 Data cable................77 Messaging ..........47 PC connections..............77 Write text................48 Connection manager ............78 Write and send messages ..........49 Synchronization ..............78 Inbox—receive messages........... 52 Device manager..............79 Mailbox ..................
- Page 6 Tools ............88 Product safety ........103 Settings.................. 88 Battery information ............103 Voice commands ..............96 Nokia battery authentication guidelines ....104 Application manager............97 Care and maintenance ............ 105 Digital Rights Management..........99 Additional safety information........106 Technical Information ............. 109 Troubleshooting: Q&A ......100...
-
Page 7: Get Connected
Use Nokia Connectivity Cable CA-53 (provided in the standard sales package) to connect to compatible devices, such as printers and PCs. See "Data cable," p. 77. Use Nokia miniSD card to transfer data or back up information, for example. See "Memory card tool," p. 13. -
Page 8: For Your Safety
For your safety Read these simple guidelines. Not following them may SWITCH OFF NEAR BLASTING Follow any be dangerous or illegal. Read the complete user guide restrictions. Do not use the device where for further information. blasting is in progress. SWITCH ON SAFELY Do not switch the device USE SENSIBLY Use only in the normal position on when wireless phone use is prohibited or... -
Page 9: About Your Device
EMERGENCY CALLS Ensure the phone function Copyright protections may prevent some images, music of the device is switched on and in service. (including ringing tones), and other content from being Press the end key as many times as needed to copied, modified, transferred or forwarded. -
Page 10: And Chargers
For availability and information on using SIM card services, Warning: Use only batteries, chargers, and contact your SIM card vendor. This may be the service enhancements approved by Nokia for use with provider, network operator, or other vendor. this particular model. The use of any other types may invalidate any approval or warranty and may be dangerous. -
Page 11: Your Nokia N73
You can insert your SIM card in the other device. When Settings Nokia N73 is switched on without a SIM card, the offline Your Nokia N73 normally has MMS, GPRS, streaming, and profile is automatically activated. -
Page 12: Essential Indicators
You are asked to enter a code on your Inbox folder in Messag.. Nokia N73. Enter a code (1-16 digits), and select OK. Enter the same code on the other device, and select OK. You have received new e-mail in the The devices are now paired. -
Page 13: Volume And Loudspeaker Control
A compatible loopset is connected to the device. Warning: Do not hold the device near your ear when the loudspeaker is in use, because the A compatible is connected to the device. volume may be extremely loud. A data call is active. To use the loudspeaker during a call, select Options >... -
Page 14: Headset
Removing the card in the middle of an operation may damage the memory card as well Use only miniSD cards approved by Nokia for use with this as the device, and data stored on the card may device. Nokia utilizes the approved industry standards for be corrupted. -
Page 15: File Manager
Tip! You can use Nokia Phone Browser available old information and save new data on a memory card. in Nokia PC Suite to view the different memories To browse files and folders in the device memory or on in your device and transfer data. -
Page 16: Download
To remove data to free memory, use File mgr., or go to Download! the respective application. For example, you can remove the following: Download! (network service) is a mobile content shop • Messages from Inbox, Drafts, and Sent folders available on your device. You can browse, download, and Messag. -
Page 17: Support
On the Web site, you can get information on the use help and the application that is open in the background, of Nokia products and services. If you need to contact press and hold customer service, check the list of local Nokia contact... -
Page 18: Camera
Camera Your Nokia N73 has two cameras, a high resolution camera Take pictures on the back of the device (the main camera) and a lower When taking a picture, note the following: resolution camera on the front (the secondary camera). -
Page 19: Still Image Camera Indicators
You can make lighting and color adjustments before taking • The image a picture by using the scroll key to scroll through the active resolution toolbar. See "Setup settings—Adjust color and lighting," indicator (3) p. 21. indicates whether the Saving the captured image may take longer if you change quality of the the zoom, lighting, or color settings. -
Page 20: Active Toolbar
Active toolbar Before taking a picture or recording a video, in the active toolbar, select from the following: In the camera, you can use to switch between the video and image modes active toolbar as a shortcut to select items and adjust to select the scene different settings before and after taking a picture... -
Page 21: After Taking A Picture
After taking a picture Still image camera settings After you take the picture, select the following from the There are two kinds of settings for the still image camera: active toolbar (available only if Show captured image Image setup and main settings. To adjust Image setup, see is set to... - Page 22 Default image name—Define the default name for the Setup settings—Adjust color and captured images. lighting Extended digital zoom (main camera only)—Select To enable the camera to reproduce colors and lighting allow the zoom increments to be smooth and continuous more accurately, or to add effects to your pictures or videos, between digital and extended digital zoom.
-
Page 23: Take Pictures In A Sequence
If you select a new scene, the color and lighting settings To make your own scene suitable for a certain are replaced by the selected scene. See "Scenes," p. 22. environment, scroll to User defined, and select Options > You can change the setup settings after selecting a scene Change. -
Page 24: You In The Picture-Self-Timer
You in the picture—self-timer 3 Select Stop to stop recording. The video clip is automatically saved to the Imgs. & video folder of The self-timer is available only in the main camera. Gallery. See "Gallery," p. 26. The maximum length of the video is 60 minutes (if enough memory available). -
Page 25: Video Capture Indicators
Video capture indicators To display all viewfinder indicators, select Options > Show icons. Select Hide icons to display only the video status The video viewfinder displays the following: indicators, and during the recording, the available record • The current capture mode indicator (1). time, zoom bar when zooming, and the selection keys. -
Page 26: Video Settings
Video settings Video stabilization—Select to reduce camera shake when recording the video. There are two kinds of settings for the video recorder: Audio recording—Select if you want to record both Video setup and main settings. To adjust Video setup image and sound. settings, see "Setup settings—Adjust color and lighting,"... -
Page 27: Gallery
Gallery To store and organize your images, video clips, sound clips, To open a file, press . Video clips, .ram files, and streaming playlists, and streaming links, press , and select Gallery. links are opened and played in RealPlayer, and music and sound clips in Music player. - Page 28 Open the Images & video folder in Gallery. The images and Active toolbar video clip files are in a loop, and ordered by date. The number In the Images & video folder, you can use active toolbar of files is displayed. To browse the files one by one, scroll as a shortcut to select different tasks.
-
Page 29: Albums
to delete the selected image or video clip To tag an image for later printing, select an image, and Add to Print Basket from the active toolbar. to print the viewed image To view the images in the Print Basket, select View Print to reduce the resolution of the selected image Basket... -
Page 30: Edit Images
Edit images Reduce redness To reduce redness of the eyes in an image, select Options > To edit the pictures after taking them, or the ones already Apply effect > Red eye reduction. Move the cross onto saved in Gallery, select Options >... -
Page 31: Send Videos
The video editor supports video file formats 3gp and .mp4, To play the selected video clip from the start, select and sound file formats .aac, .amr, .mp3 and .wav. Options > Play. The custom video clips are automatically saved in the Tip! To take a snapshot of a video clip, press the Images &... -
Page 32: Slide Show
Tip! If you want to send a video clip that is over the To add sound to the slide show, select Options > maximum multimedia message size allowed by your Slide show > Settings and from the following: service provider, you can send the clip using Bluetooth •... -
Page 33: Printonline
Note: The availability of this service may vary If you have connected a printer compatible with PictBridge according to your country or sales area, and the using Nokia Connectivity Cable CA-53, the printer is service may only be available in a limited number automatically displayed. -
Page 34: Online Sharing
Order prints Scroll left or right to view and change the image details of the other images. You can only print images that are in .jpeg format. Change customer info to change the customer and Press , and select Gallery >... -
Page 35: Get Started
With the Online sharing application, you can share your Select service view opens. To create a new account for images and videos in online albums, weblogs, or in other a service, select Options > Add new account or the service online sharing services on the Web. - Page 36 After you open a service, select from the following: provider. If you delete an account in accounts, the services related to the account are also deleted from you • Open in Web browser—to connect to the selected device, including the sent items for the service. service and view the uploaded and draft albums in the Web browser.
-
Page 37: Media Applications
Tip! You can transfer music files from your device playlist, or select a saved playlist. to a compatible memory card (if inserted) with Nokia Audio Manager available in Nokia PC Suite. To adjust the volume, use the volume key on the side of your device. -
Page 38: Flash Player
To select between random play and normal play mode, To delete a playlist, press . Deleting a playlist only select Options > Random play. To select whether playing deletes the playlist, not the music files. stops at the end of the playlist or restarts from its beginning, select Options >... -
Page 39: Visual Radio
Play flash files Visual Radio Press , and select Applications > Flash Player. Scroll to a flash file, and press the scroll key. Press , and select Applications > Radio. You can use the To increase or decrease the volume, use the volume key application as a traditional FM radio with automatic tuning on the side of your device. -
Page 40: Listen To The Radio
Listen to the radio To save the current tuned station to your station list, select Options > Save station. To open the list of your saved Note that the quality of the radio broadcast depends on stations, select Options > Stations. the coverage of the radio station in that particular area. -
Page 41: Realplayer
Settings but some .mp4 files may include content that is not compliant with 3GPP standards and, therefore, is not supported by Select Options > Settings and from the following: this device. Start-up tone—Select whether a tone is played when the application is started. -
Page 42: Receive Realplayer Settings
The access points may be configured when you first start Proxy settings your device. proxy—To use a proxy server, select Yes. Contact your service provider for more information. Proxy serv. address—Enter the IP address of the proxy server. In RealPlayer, you can only open an rtsp:// URL address. Proxy port number—Enter the port number of the However,... -
Page 43: Movie Director
Movie director 2 Scroll to the desired style, and select Options > Customize. 3 Select the clips you want to include in your muvee To create muvees, press , and select Gallery, images Videos & images or Music. and videos, and Options >... - Page 44 5 To preview the custom muvee before saving it, select To let Movie director randomly include or exclude a part Options > Play. of the video clip, scroll to the part, and select Options > Mark as neutral. 6 To save the muvee, select Options >...
-
Page 45: Time Management
Time management Clock To change the clock shown in the standby mode, select Clock type > Analog or Digital. To allow the mobile phone network to update the time, Press , and select Applications > Clock. To set a new date, and time zone information to your device (network alarm, select Options... -
Page 46: Calendar
Snooze. of the following: Tip! You can synchronize your calendar with Meeting—to remind a compatible PC using Nokia PC Suite. you of an appointment When creating a calendar entry, set the desired that has a specific date Synchronization option. -
Page 47: Calendar Views
Calendar views Manage your calendar entries Deleting past entries in Calendar saves space in your Tip! Select Options > Settings to change the device memory. starting day of the week or the view that is shown when you open the calendar. To delete more than one event at a time, go to the month view, and select Options... -
Page 48: Messaging
Messaging Press , and select Messag. (network service). In Messag., Drafts—Draft messages that have not been sent you can create, send, receive, view, edit, and organize text are stored here. messages, multimedia messages, e-mail messages, and Sent—The last 20 messages that have been sent, special text messages containing data. -
Page 49: Write Text
123 indicates the number mode. press the keys — Press each key only once Traditional text input for one letter. For example, to write "Nokia" when the is displayed when you write text using traditional English dictionary is text input. selected, press for N, •... -
Page 50: Write And Send Messages
3 When you finish writing the word correctly, press Tips on text input to confirm it, or press to add a space. To insert a number in the letter mode, press and hold the If the word is not correct, press repeatedly to view desired number key. - Page 51 1 Select New message and from the following: 5 To add a media object to a multimedia message, select Options > Insert object > Image, Sound clip, or Video Text msg.—to send a text message clip. When sound is added, is shown.
- Page 52 Your device supports the sending of text messages beyond Receive MMS and e-mail settings the character limit for a single message. Longer messages You may receive the settings in a message from your are sent as a series of two or more messages. Your service network operator or service provider.
-
Page 53: Inbox-Receive Messages
Inbox—receive messages When you open a multimedia message ( ), you may see an image and a message. is shown if sound is included, if video is included. To play the sound or the video, select the indicator. In the Inbox folder, indicates an unread text message,... -
Page 54: Mailbox
message—To save the bookmark to the bookmarks list Open the mailbox in the Web browser, select Options > Add to bookmarks. When you open the mailbox, the device asks if you want If the message contains both access point settings and to connect to the mailbox (Connect to mailbox?). -
Page 55: Delete E-Mail Messages
2 After you retrieve the e-mail messages, you can To print an e-mail message on a compatible Basic Print continue viewing them online, or select Options > Profile (BPP) equipped printer with Bluetooth connectivity Disconnect to close the connection and view the (such as HP Deskjet 450 Mobile Printer or HP Photosmart e-mail messages offline. -
Page 56: View Messages On A Sim Card
If you are offline, the e-mail is deleted first from your Messaging settings device. During the next connection to the remote mailbox, Fill in all fields marked with Must be defined or with a it is automatically deleted from the remote mailbox. If you red asterisk. -
Page 57: Multimedia Messages
Message validity—Select how long the message center Access point in use—Select which access point is used as the resends your message if the first attempt fails (network preferred connection for the multimedia message center. service). If the recipient cannot be reached within the Multimedia retrieval—Select how you want to receive validity period, the message is deleted from the... - Page 58 Message validity—Select how long the message center Incoming mail serv.—Enter the IP address or host name resends your message if the first attempt fails (network of the mail server that receives your e-mail. service). If the recipient cannot be reached within the Access point in use—Select an Internet access point (IAP).
-
Page 59: Automatic Retrieval
Outgoing mail serv.—Enter the IP address or host name of Retrieval settings the mail server that sends your e-mail. You may only be E-mail to retrieve—Define which parts of the e-mail are able to use the outgoing server of your network operator. retrieved: Headers only,... -
Page 60: Cell Broadcast
Cell broadcast Other settings Check the available topics and related topic numbers with Press , and select Messaging > Options > Settings > your service provider. Press , and select Messaging > Other and from the following: Options > Settings >... -
Page 61: Contacts (Phonebook)
Tip! To add and edit contact cards, you can also use and update contact information, such as phone numbers, Nokia Contacts Editor available in Nokia PC Suite. home addresses, or e-mail addresses, of your contacts. To attach a small thumbnail image to a contact card, open... -
Page 62: Copy Contacts
Tip! You can synchronize your contacts addresses, you can easily call or send a message to the to a compatible PC with Nokia PC Suite. contact to a certain number or address. The default number is also used in voice dialing. -
Page 63: Add Ringing Tones For Contacts
To restrict calls from your device to selected phone numbers, You can also use a video clip as a ringing tone. select Options > Activ. fixed dialing. You need your PIN2 To remove the ringing tone, select Default tone from code to activate and deactivate fixed dialing or edit your the list of ringing tones. -
Page 64: Make Calls
Make calls Calls To call your voice mailbox (network service), press and hold in the standby mode. See also "Call forwarding," p. 95. Tip! To increase or decrease the volume during a Tip! To change the phone number of your voice call, use the volume key on the side of your device. -
Page 65: Voice Dialing
Select a participant, and select Private. The conference Voice dialing call is put on hold on your device. The other participants Your device supports enhanced voice commands. can still continue the conference call. After you finish Enhanced voice commands are not dependent on the the private conversation, select Options >... -
Page 66: Answer Or Decline A Call
2 A short tone is played, and Speak now is displayed. If you do not want to answer a call, press . If you have Say clearly the name or nickname that is saved on activated the Call forward > If busy function to forward the contact card. -
Page 67: Log
Options during a call To clear all recent call lists, select Options > Clear recent calls in the recent calls main view. To clear one of the call Many of the options that you can use during a voice call registers, open the register you want to erase, and select are network services. -
Page 68: Monitor All Communication Events
Monitor all communication events To add an unknown phone number from to your contacts, select Options > Add to contacts. Icons in Log: To filter the log, select Options > Filter and a filter. Incoming To erase the contents of the log, recent calls register, and Outgoing messaging delivery reports permanently, select Options... -
Page 69: Web Browsers
Your device may have some bookmarks loaded for sites not Access point affiliated with Nokia. Nokia does not warrant or endorse To access pages, you need service settings for the page these sites. If you choose to access them, you should take that you want to use. -
Page 70: Connection Security
Connection security Shortcut: Use to jump to the end of a page to the beginning of a page. If the security indicator is displayed during a connection, To go to the previous page while browsing, select Back. the data transmission between the device and the Internet Back is not available, select Options... -
Page 71: End A Connection
When you start a download, a list of ongoing, paused, and End a connection completed downloads from the current browsing session is To end the connection and view the browser page offline, displayed. You can also view the list by selecting Options >... -
Page 72: Web
Font size—Select the text size. Auto. bookmarks—Enable or disable automatic bookmark collecting. If you want to continue collecting automatic Press , and select Applications > (network service). bookmarks but hide the folder from the bookmarks view, select Hide folder. With this browser, you are able to view normal Web pages Screen size—Select what is shown when you are browsing: that use extensible hypertext markup language (XHTML) or... -
Page 73: End Connection
To subscribe to a Web feed on Web pages, select Options > To allow or prevent the automatic opening of multiple Subscribe. To view the Web feeds you have subscribed to, windows, select Options > Settings > Block pop-ups > Yes. in the Web bookmarks view, select feeds. -
Page 74: Connections
Connections Bluetooth connectivity use Nokia approved enhancements for this model. Check with the manufacturers of other devices to determine their compatibility with this device. You can connect wirelessly to other compatible devices with Glossary: A profile corresponds to a service or a wireless Bluetooth technology. - Page 75 > Bluetooth. When you open the remote SIM mode from the other device. application for the first time, you are asked to define a When remote SIM mode is on in your Nokia N73, Remote name for your device. After you set Bluetooth connectivity is displayed in the standby mode.
-
Page 76: Send Data Using Bluetooth Connectivity
Send data using Bluetooth connectivity 3 Select the device with which you want to connect. 4 If the other device requires pairing before data can be Several Bluetooth connections can be active at a time. transmitted, a tone sounds, and you are asked to enter For example, if you are connected to a compatible headset, a passcode. -
Page 77: Infrared Connection
Paired devices are indicated by in the device search. Switch off Bluetooth connectivity To set a device as authorized or unauthorized, scroll To switch off Bluetooth connectivity, select Bluetooth > Off. to a device, and select from the following options: Set as authorized—Connections between your device Infrared connection... -
Page 78: Data Cable
Bluetooth connectivity, infrared, or a USB data Data cable cable (network service). Detailed installation instructions can be found in the user guide for Nokia PC Suite. Tip! When using Nokia PC Suite for the first time, Press , and select Tools >... -
Page 79: Connection Manager
Connection manager The synchronization application uses SyncML technology for synchronization. For information on SyncML compatibility, contact the supplier of the application with which you want to synchronize your device data. Press , and select Tools > Conn. mgr.. You may receive synchronization settings in a special text Data connections message. -
Page 80: Device Manager
Device manager Server password—Enter a password to identify your device to the server. Access point—Select an access point to be used when Press , and select Tools > Dev. mgr.. You may receive connecting to the server. server profiles and different configuration settings from Host address—Enter the URL address of the server. -
Page 81: Office
Office Calculator Set base currency and exchange rates Select Type > Currency > Options > Currency rates. Before you can make currency conversions, you must select To add, substract, multiply, divide, and calculate a base currency and add exchange rates. The rate of the square roots and percentages, press , and select base currency is always 1. -
Page 82: Recorder
Recorder Quickword supports the viewing of documents saved in .doc format from Microsoft Word 97 or later. Not all variations or features of the mentioned file formats are supported. To record voice memos, press , and select Office > See also "More information," p. 82. Recorder. -
Page 83: Adobe Reader
View spreadsheets View presentations To move around in the spreadsheet, use the scroll key. To move between the slide, outline, and the notes view, press To switch between worksheets, select Options > Pan. To move to the next or previous slide in the presentation, To search the speadsheet for a text within a value press or formula, select... -
Page 84: More Information
Note: This application is only available in a limited View PDF files number of languages. When a PDF file is open, select Options and one of To access and open documents: the following: • Press , and select Office > Adobe PDF. -
Page 85: Personalize Your Device
Personalize your device • To use the standby display for fast access to your • To change the welcome note to an image or animation, most frequently used applications, see "Active standby press , and select Tools > Settings > Phone >... -
Page 86: 3-D Tones
To modify a profile, press , and select Tools > Profiles. Warning: In the offline profile you cannot make Scroll to the profile, and select Options > Customize. (or receive) any calls, except make calls to certain Scroll to the setting you want to change, and press emergency numbers, or use other features that to open the choices. -
Page 87: Change The Look Of Your Device
To change the 3–D effect that is applied to the ringing Change the look of tone, select Sound trajectory and the desired effect. your device To modify the effect, select from the following settings: Trajectory speed—Select the speed at which sound moves To change the look of the display, such as the wallpaper from one direction to another. -
Page 88: Active Standby Mode
Active standby mode The active standby display is shown with default applications across the top of the screen, and calendar, Use your standby display to-do, and player events listed below. for fast access to your most Scroll to an application or event, and press frequently used applications. -
Page 89: Tools
Tools Settings Writing language—Changing the language affects the characters and special characters available when writing text and the predictive text dictionary used. To change settings, press , and select Tools > Settings. Predictive text—Set the predictive text input To open a settings group, press . -
Page 90: Call Settings
Active standby apps.—Select the application shortcuts Call waiting—If you have activated call waiting (network you want to appear in the active standby. This setting service), the network notifies you of a new incoming call is only available if Active standby is on. -
Page 91: Access Points
Line in use—This setting (network service) is shown only To establish a data connection, an access point is required. if the SIM card supports two subscriber numbers, that is, You can define different kinds of access points, such as: two phone lines. Select which phone line you want to use •... -
Page 92: Packet Data
To edit the settings of an access point, select Options > Homepage—Depending on the access point you are setting Edit. Follow the instructions from your service provider. up, enter the Web address or the address of the multimedia messaging center. Connection name—Enter a descriptive name for the connection. -
Page 93: Phone And Sim
If you select When needed, the device uses a packet data Security connection only if you start an application or action that needs it. Phone and SIM Access point—The access point name is needed to use your device as a packet data modem to your computer. PIN code request—When active, the code is requested each time the device is switched on. -
Page 94: Certificate Management
Lock if SIM changed—You can set the device to ask for Lock code (also known as security code)—This code (5 digits) the lock code when an unknown SIM card is inserted into can be used to lock the device to avoid unauthorized use. your device. - Page 95 They should also be used if you want to reduce the risk • Certificate not trusted—You have not set any of viruses or other malicious software and be sure of application to use the certificate. See "Change the trust the authenticity of software when downloading and settings,"...
-
Page 96: Call Restriction
Track protected object Several forwarding options can be active at the same time. When all calls are forwarded, is shown in the Some copyright-protected music files may include a standby mode. transaction identifier. Select whether you allow the identifier Call restricting and call forwarding cannot be active to be sent with the music file if you send or forward the file. -
Page 97: Voice Commands
Network Select Headset, Loopset, TTY, Bluetooth handsfree, Car kit and from the following: Default profile—Set the profile that you want activated Operator selection—Select Automatic to set the device each time you connect a certain compatible enhancement to search for and select one of the available networks, to your device. -
Page 98: Application Manager
.sis extension. Only install software specifically designed of the application or profile displayed in the list. for your Nokia N73. Software providers will often refer to the official model number of this product: the Nokia To add more applications to the list, select Options >... -
Page 99: Remove Applications And Software
• To display the security certificate details of the During installation, the device shows information about application, select Options > View certificate. the progress of the installation. If you are installing an See "Certificate management," p. 93. application without a digital signature or certification, the device displays a warning. -
Page 100: Digital Rights Management
If another software package depends on the software OMA DRM 2.0 and OMA DRM 1.0. If certain DRM software package that you removed, the other software package fails to protect the content, content owners may ask that may stop working. Refer to the documentation of the such DRM software's ability to access new DRM-protected installed software package for details. -
Page 101: Troubleshooting: Q&A
Troubleshooting: Q&A Access codes Q: Why can’t I end a Bluetooth connection? Q: What is my password for the lock, PIN, or PUK codes? A: If another device is connected to your device, you can either end the connection using the other device or by A: The default lock code is 12345. - Page 102 A: Save your data using one of the following methods: A: You may have activated a filter, and no communication • Use Nokia PC Suite to make a backup copy of all data events fitting that filter have been logged. To see all to a compatible computer.
- Page 103 A: Make sure that Nokia PC Suite is installed and running the multimedia messaging center. on your PC. See the user guide for Nokia PC Suite on the CD-ROM. For further information on how to use Nokia PC Check that the settings for multimedia messaging are...
-
Page 104: Product Safety
Use only terminals may damage the battery or the connecting object. Nokia approved batteries, and recharge your battery only Leaving the battery in hot or cold places, such as in a closed with Nokia approved chargers designated for this device. -
Page 105: Nokia Battery Authentication Guidelines
Nokia battery authentication guidelines 2 When you angle the hologram Always use original Nokia batteries for your safety. To check left, right, down, and up, you that you are getting an original Nokia battery, purchase it should see 1, 2, 3, and 4 dots from an authorized Nokia dealer, look for the Nokia Original on each side respectively. -
Page 106: Care And Maintenance
Take it to the nearest authorized • Do not attempt to open the device other than as Nokia service point or dealer for assistance. The use of a instructed in this guide. battery that is not approved by the manufacturer may be •... -
Page 107: Additional Safety Information
All of the above suggestions apply equally to your device, Parts of the device are magnetic. Metallic materials may be battery, charger, or any enhancement. If any device is not attracted to the device. Do not place credit cards or other working properly, take it to the nearest authorized service magnetic storage media near the device, because information facility for service. -
Page 108: Potentially Explosive Environments
• Not carry the device in a breast pocket objects, including installed or portable wireless equipment in the area over the air bag or in the air bag deployment • Hold the device to the ear opposite the pacemaker area. If in-vehicle wireless equipment is improperly installed to minimize the potential for interference. -
Page 109: Emergency Calls
Emergency calls Certification information (SAR) Important: Wireless phones, including this device, THIS MOBILE DEVICE MEETS GUIDELINES FOR EXPOSURE operate using radio signals, wireless networks, TO RADIO WAVES. landline networks, and user-programmed functions. Your mobile device is a radio transmitter and receiver. Because of this, connections in all conditions cannot It is designed not to exceed the limits for exposure to radio be guaranteed. -
Page 110: Technical Information
Feature Specification band. Additional SAR information may be provided under Weight 115 g (4.1 oz) product information at www.nokia.com. Volume: 89.1 cm (5.4 in Your mobile device is also designed to meet the requirements Length: 110 mm (4.3 in) Size for exposure to radio waves established by the Federal Width: 49 mm (1.9 in) - Page 111 Notes...
-
Page 112: Index
21 deleting entries 46 application manager saving video clips 23 settings 46 applications self-timer 23 synchronizing Nokia PC Suite 45 installing 97 sequence mode 22 call log Java 97 still image camera settings 20 See log removing 98... - Page 113 contact cards device manager inserting pictures 60 dictionary file formats sending 60 digital certificates .jad 97 storing touch tones 66 See certificates .jar 97, 98 contact information digital rights management .sis 97 converter Download! RealPlayer 40 copying file manager contacts between the SIM card and See digital rights management fixed dialing device memory 61...
- Page 114 See applications miniSD cards missed calls packet data connections language settings See multimedia messages settings 91 lock code movies, muvees PC connections custom muvees 42 PC Suite erasing contents 67 quick muvees 42 see Nokia PC Suite filtering 67...
- Page 115 personalization recorder Bluetooth connectivity 74 phonebook remote mailbox calendar 46 See contact cards remote SIM mode call forwarding 95 PIN codes reports call restricting 95 predictive text input See delivery reports certificates 93 print images ringing tones clock 44 printing 3-D 85 data connections 90 calendar entries 46...
- Page 116 sis file receiving 52 voice dialing saving 59 voice mailbox see text messages sending 50 changing the phone number 63 snooze settings 55 forwarding calls to voice software writing 48, 50 mailbox 95 installing applications 97 themes voice messages removing applications 98 time voice tags transferring a file to your device 97...
- Page 117 Notes...
- Page 118 Manual del Usuario Nokia N73 Importante: Para prevenir cualquier malfuncionamiento y evitar daños, lea detalladamente este manual de instrucciones antes de conectar y operar este aparato. Conserve el manual para referencias futuras. 9250265 EDICIÓN 1 ESPAÑOL...
- Page 119 MPEG LA, LLC. See http://www.mpegla.com. Copyright © 2006 Nokia. Todos los derechos reservados. Nokia opera bajo un sistema de desarrollo continuo. Nokia se reserva el derecho de hacer cambios y mejoras en cualquier producto descrito en este manual sin previo aviso.
- Page 120 Presentaciones..............148 Administrador de archivos ..........130 Imprimir imágenes ............148 Descargue................131 PrintOnline................149 Juegos...................131 Compartir en línea............150 Aplicaciones multimedia ......154 Soporte...........132 Reproductor de música ........... 154 Soporte Nokia e información de contacto....132 Reproductor Flash............. 155 Ayuda..................132 Visual Radio................ 156 Tutorial.................132...
- Page 121 RealPlayer................158 Exploradores Web .........189 Director de películas ............160 Servicios ................189 Web ..................193 Administración de tiempo ....163 Conexiones ..........195 Reloj..................163 Agenda .................164 Conectividad Bluetooth ..........195 Conexión de infrarrojos ..........199 Mensajería..........166 Cable de datos..............199 Escribir texto ..............167 Conexiones de PC .............
- Page 122 Herramientas .........211 Seguridad del producto ......227 Configuraciones..............211 Información sobre las baterías ........227 Comandos de voz..............220 Normas para la autenticación de baterías Nokia..228 Administrador de aplicaciones........221 Cuidado y mantenimiento..........229 Administración de derechos digitales ......223 Información adicional de seguridad......230 Información técnica............
-
Page 123: Conexiones
Use la conexión de infrarrojos, por ejemplo, para transferir y sincronizar datos entre dispositivos compatibles. Consulte "Conexión de infrarrojos", pág. 199. Use el cable de conectividad Nokia CA-53 proporcionado en el paquete de ventas estándar para conectarse a dispositivos compatibles, como impresoras y PCs. Consulte "Cable de datos", pág. -
Page 124: Para Su Seguridad
Para su seguridad Lea estas sencillas normas. El incumplimiento de ellas APAGUE EL TELÉFONO CUANDO puede ser peligroso o ilegal. Lea el manual del usuario CARGUE COMBUSTIBLE. completo para obtener más información. No utilice el dispositivo en las estaciones de servicio. -
Page 125: Acerca De Su Dispositivo
COPIAS DE SEGURIDAD. Recuerde hacer copias aceptar solicitudes de conectividad, descargar contenido y de seguridad o guardar un registro por escrito de aceptar instalaciones sólo de fuentes fiables. Para aumentar toda la información importante. la seguridad de su dispositivo, tiene la opción de instalar un software antivirus con un servicios de actualizaciones CONEXIÓN CON OTROS DISPOSITIVOS. -
Page 126: Servicios De Red
Advertencia: Utilice sólo baterías, cargadores y ciertas opciones de su dispositivo sean inhabilitadas o accesorios aprobados por Nokia para este modelo no activadas. En ese caso, no aparecerán en el menú del particular de teléfono. El uso de cualquier otro tipo dispositivo. -
Page 127: Su Nokia N73
(incluso tonos de timbre) y otro contenido. tomacorriente de pared. Puede insertar su tarjeta SIM en el otro dispositivo. Cuando el Nokia N73 está encendido sin una tarjeta SIM, el perfil Configuraciones desconectado se activa automáticamente. Su Nokia N73 normalmente cuenta con MMS, GPRS, Transferir contenido streaming y ajustes de Internet móvil configurados... -
Page 128: Indicadores Esenciales
Bluetooth, seleccione Continuar. Seleccione Regist. transf. su otro dispositivo de la lista. Se le solicita que ingrese un código en su Nokia N73. Ingrese un código (de uno a Indicadores esenciales dieciséis dígitos) y seleccione Aceptar. Ingrese el mismo código en el otro dispositivo y seleccione Aceptar. -
Page 129: Control De Volumen Y Altavoz
Todas las llamadas al dispositivo serán desviadas Una conexión de infrarrojos está activa. Si el a otro número. Si tiene dos líneas telefónicas indicador está destellando, el dispositivo está (servicio de red), el indicador para la primera tratando de conectarse al otro dispositivo o se línea es y para la segunda ha perdido la conexión. -
Page 130: Auricular
Retirar la tarjeta en medio de una operación puede dañar Sólo use las tarjetas miniSD aprobadas por Nokia para uso la tarjeta de memoria y el dispositivo, además de con este dispositivo. Nokia usa los estándares aprobados alterar los datos almacenados en ella. -
Page 131: Formatear Una Tarjeta De Memoria
Fijar una contraseña Puede usar una tarjeta de memoria compatible como espacio adicional de almacenamiento. Se puede volver a Para fijar una contraseña para proteger la tarjeta de memoria, escribir en las tarjetas de memoria, de modo que puede seleccione Opciones >... -
Page 132: Descargue
Puede explorar, descargar e Sugerencia: Puede utilizar Nokia Phone Browser instalar elementos, como aplicaciones y archivos multimedia, disponible en Nokia PC Suite para ver las diferentes en su dispositivo desde Internet. memorias en su dispositivo y transferir datos. -
Page 133: Soporte
En el sitio Web, puede obtener más información sobre el uso de productos y servicios Nokia. Si necesita comunicarse Para acceder a la ayuda desde el menú principal, seleccione con el centro de atención al cliente, consulte la lista de los Aplicaciones >... -
Page 134: Cámara
Cámara Su Nokia N73 tiene dos cámaras, una cámara de alta resolución Puede enviar imágenes y videoclips en un mensaje multimedia, en la parte posterior del dispositivo (la cámara principal) y como un archivo adjunto de e-mail o usando la conectividad una cámara de baja resolución en la parte frontal (la cámara... - Page 135 3 Para tomar una foto, en la cámara principal, pulse la blancos, compensación de exposición, tono de color y tecla capturar. No mueva el dispositivo antes de que se sensibilidad a la luz (la barra de herramientas activa no guarde la imagen. aparece durante el enfoque y captura de imagen).
-
Page 136: Barra De Herramientas Activa
Barra de herramientas activa para alternar entre los modos de video e imagen para seleccionar la escena En la cámara, puede usar la barra de herramientas activa para seleccionar el modo de flash como un acceso directo a para activar el temporizador (sólo imágenes). ciertos elementos y ajustar Consulte "Usted en la foto: temporizador", pág. - Page 137 Después de tomar una foto Configuraciones de cámara para imagen fija Después que tome la foto, seleccione de las siguientes opciones de la barra de herramientas activa (disponible Hay dos tipos de configuraciones para la cámara de imágenes sólo si Mostrar imagen captur.
- Page 138 Mostrar imagen captur.: seleccione Sí para ver la Para cambiar el modo del flash, en la barra de herramientas imagen tras capturarla o para seguir tomando activa, seleccione el modo de flash deseado. fotos inmediatamente. Ajustar las configuraciones: ajusta Nombre imagen predet.: defina el nombre predeterminado el color y luz para las imágenes capturadas.
-
Page 139: Tomar Fotos En Secuencia
Los ajustes de configuración son específicas para la cámara, Cuando toma fotos, la escena predeterminada es Automática. si cambia las configuraciones en la cámara secundaria, las Puede seleccionar la escena Definida por usuario como la configuraciones en la cámara prinicpal no cambian. Los escena predeterminada. -
Page 140: Usted En La Foto: Temporizador
Usted en la foto: temporizador 3 Seleccione Parar para detener la grabación. El videoclip se guarda automáticamente en la carpeta Imág. & video El temporizador sólo está disponible en la cámara principal. en Galería. Consulte "Galería", pág. 142. La duración máxima del video es de sesenta minutos (si hay Use el temporizador para retrasar la captura de una imagen suficiente memoria disponible). - Page 141 • El indicador de sonido silenciado (2). Después de grabar un video • La barra de herramientas activa (3), por la cual puede Después de grabar un videoclip, seleccione alguna de las desplazarse antes de grabar para seleccionar la escena, siguientes opciones de la barra de herramientas activa equilibrio de blancos y tono de color (la barra de (sólo está...
- Page 142 pero las configuraciones principales quedan igual hasta Agregar a álbum: seleccione si desea guardar el videoclip que las cambie de nuevo. Para cambiar las configuraciones grabado en un álbum en Galería. Seleccione Sí para abrir principales, seleccione Opciones > Configuraciones una lista de los álbumes disponibles.
-
Page 143: Galería
Galería Para guardar y organizar sus imágenes, videoclips, clips de Los archivos guardados en su tarjeta de memoria compatible sonido, listas de reproducción y enlaces de streaming, (si hay una insertada) se indican por pulse y seleccione Galería. Para abrir un archivo, pulse . - Page 144 Bluetooth o usando infrarrojos. Para ver una imagen o Para imprimir sus imágenes en una impresora compatible videoclip recibido en Galería o en el reproductor multimedia, o para guardarlas en su tarjeta de memoria (si hay una debe guardarlo en la memoria del dispositivo o en una insertada) para la impresión, seleccione Opciones >...
-
Page 145: Liberar Memoria
Si desea que la barra de herramientas activa quede visible Liberar memoria en la pantalla, seleccione Opciones > Mostrar iconos. Para reducir la resolución y tamaño de archivo de las imágenes guardadas en Galería y liberar memoria para Si desea que la barra de herramientas activa quede visible nuevas fotos, seleccione Opciones >... -
Page 146: Álbumes
Para eliminar una imagen de la Cesta de impresión, seleccione Recortar la imagen una imagen en la carpeta Imágenes/video o en un álbum y Para cortar una imagen, seleccione Opciones > Apply Remove from print de la barra de herramientas activa. effect >... -
Page 147: Editar Videoclips
Accesos directos útiles Los videoclips personalizados se guardan en la carpeta Imágenes/video en Galería. Los clips se guardan en la tarjeta Accesos directos en el editor de imagen: de memoria. Si la tarjeta de memoria no está disponible, se • Para ver una imagen en la pantalla completa, pulse usa la memoria del dispositivo. -
Page 148: Presentación De Diapositivas
Sugerencia: Para una toma instantánea de un Sugerencia: Si desea enviar un videoclip que videoclip, pulse la tecla de editar. sobrepasa el tamaño máximo permitido por su proveedor de servicios, puede enviar el clip usando la Para seleccionar las partes que incluirá en el videoclip y definir tecnología inalámbrica Bluetooth. -
Page 149: Presentaciones
Para ver Si conectó una impresora compatible con PictBridge usando archivos SVG, seleccione la carpeta Presentations, desplácese el cable de conectividad Nokia CA-53, la impresora aparece a una imagen y seleccione Opciones > Play. -
Page 150: Printonline
Vista previa de la impresión Con la aplicación PrintOnline puede hacer ordenes de compra de fotos directamente desde su cada o tienda a la que puede La vista previa de impresión se abre sólo cuando comienza ir a buscar sus fotos. También puede hacer ordenes de compra a imprimir una imagen en la galería. -
Page 151: Compartir En Línea
Información para ver información sobre el proveedor Agregar imagen para agregar más imágenes a la orden de servicios, por ejemplo, la dirección de una tienda y de compra. enlaces Web para obtener más información sobre el Eliminar imagen para eliminar las imágenes de la proveedor de servicios. - Page 152 Cuando selecciona el servicio, las imágenes y videos consulte www.nokiausa.com/support (para EE.UU.) o seleccionados aparecen en el estado para la edición. Puede www.latinoamerica.nokia.com/manuales abrir y ver los archivos, volver a organizarlos, agregar texto (para Latinoamérica) a los archivos o agregar nuevos archivos.
- Page 153 Abrir un servicio en línea Configuraciones para compartir contenido en línea Para ver las imágenes y videos cargados en el servicio en línea y crear borradores y enviar entradas en su dispositivo, en Para editar las configuraciones de Compar. en línea, la carpeta Imágenes/video, seleccione Opciones...
- Page 154 Configuraciones de aplicación Avanzadas Proveedores de servicios: para ver o editar las configuraciones Tamaño imag. pantalla: para seleccionar el tamaño para de proveedor de servicios, agregar un nuevo proveedor de mostrar la imagen en la pantalla de su dispositivo. Esta servicios o ver los detalles de un proveedor de servicios.
-
Page 155: Aplicaciones Multimedia
Opciones > Agregar a compatible (si hay una insertada) utilizando Nokia lista pistas y haga una nueva lista de reproducción o Audio Manager disponible en Nokia PC Suite. seleccione una lista de reproducción guardada. -
Page 156: Reproductor Flash
Para ajustar el volumen, use la tecla de volumen en la parte Para agregar canciones, álbumes, artistas, géneros o lateral del dispositivo. compositores a la lista de reproducción, seleccione los elementos y Opciones > Agregar a lista pistas. Puede crear Para seleccionar entre el modo de reproducción aleatorio y una lista de reproducción nueva o agregar a una existente. -
Page 157: Visual Radio
Para mover un archivo flash a otra carpeta, seleccione Ajustar a pantalla: para reproducir el archivo en su Opciones > Organizar > Mover a carpeta. tamaño original tras acercarlo (zoom). Activar modo panorám.: para moverse por la pantalla con Para crear una carpeta para organizar sus archivos flash, la tecla de desplazamiento cuando ha acercado la imagen. -
Page 158: Escuchar La Radio
Escuchar la radio Para guardar la estación actualmente sintonizada en su lista de estaciones, seleccione Opciones > Guardar estación. La calidad de la transmisión de radio depende de la cobertura Para abrir la lista de estaciones guardadas, seleccione de la estación de radio en su área. Opciones >... -
Page 159: Realplayer
Para escuchar una estación guardada, seleccione Opciones > RealPlayer Estación > Escuchar. Para ver el contenido visual para una estación con el servicio Visual Radio, seleccione Opciones > Pulse y seleccione Aplicaciones > RealPlayer. Con Estación > Iniciar servicio visual. RealPlayer, puede reproducir videoclips o archivos multimedia Para cambiar los detalles de la estación, seleccione de streaming por aire. -
Page 160: Recibir Configuraciones De Realplayer
2 Desplácese hacia un archivo y pulse para reproducir Para reproducir contenido directo por aire, seleccione un el archivo. enlace de streaming guardado en Galería, en una página Web o recibido en un mensaje de texto o multimedia. Antes de Accesos directos durante la reproducción: iniciar la reproducción de contenido directo, su dispositivo se •... -
Page 161: Director De Películas
Número puerto proxy: ingrese el número de puerto del Director de películas servidor proxy. Glosario: Los servidores proxy son servidores Para crear muvees, pulse y seleccione Galería, imágenes y intermediarios entre los servidores multimedia y videos y Opciones > Editar >... -
Page 162: Crear Un Muvee Personalizado
Crear un muvee personalizado Igual que música: para configurar la duración del muvee para que sea igual a la del clip de música seleccionado 1 En Galería, seleccione imágenes y videos para el muvee y Seleccionar auto.: para incluir en el muvee todas las Opciones >... - Page 163 Para que Direc. películas incluya o excluya partes del Memoria en uso: seleccione el lugar para guardar sus muvees. videoclip aleatoriamente, seleccione Opciones > Marcar Resolución: seleccione la resolución de sus muvees. Seleccione todo neutro. Automático para usar la resolución óptima basad en la cantidad y duración de los videoclips que ha seleccionado.
-
Page 164: Administración De Tiempo
Administración de tiempo Reloj Para cambiar el reloj mostrado en el modo standby, seleccione Tipo de reloj > Analógico o Digital. Para permitir que la red celular actualice la información Pulse y seleccione Aplicaciones > Reloj. Para configurar de hora, fecha y zona horaria en su dispositivo (servicio una nueva alarma, seleccione Opciones >... -
Page 165: Agenda
Pausa. Reunión: para recordarle Sugerencia: Puede sincronizar su agenda con de una cita con fecha y una PC compatible usando Nokia PC Suite. Al crear hora específica una entrada de agenda, configure la opción deseada Solicitud de reunión:... -
Page 166: Configuraciones De La Agenda
En la vista mensual, las fechas con entradas de agenda se Administrar sus entradas de la agenda marcan con un triángulo pequeño en la esquina inferior Eliminar ingresos vencidos en Agenda ahorra más espacio derecha. En la vista semanal, los recordatorios y aniversarios en la memoria del dispositivo. -
Page 167: Mensajería
Mensajería Pulse y seleccione Mensajes (servicio de red). En Buzón de correo: conéctese a su buzón de correo Mensajes, puede crear, enviar, recibir, ver, editar y organizar remoto para recuperar sus nuevos mensajes de e-mail o ver mensajes de texto, mensajes multimedia, mensajes de e-mail fuera de línea los mensajes de e-mail ya recuperados mientras y mensajes de texto especiales que contienen datos. -
Page 168: Ingreso De Texto Tradicional
Sugerencia: Cuando haya abierto cualquiera de Ingreso de texto tradicional las carpetas predeterminadas, para alternar entre aparece cuando está escribiendo texto usando el las carpetas, pulse ingreso de texto tradicional. Para ingresar y enviar solicitudes de servicio (también • Pulse una tecla numérica ( —... - Page 169 Para completar la palabra compuesta, letra. Por ejemplo, para pulse para agregar un espacio. escribir "Nokia" cuando el Desactivar el ingreso de texto predictivo diccionario español está seleccionado, pulse Para desactivar el ingreso de texto predictivo en todos los...
-
Page 170: Escribir Y Enviar Mensajes
Para abrir una lista de los caracteres especiales, mantenga En el cuadro Para, pulse pulsada para seleccionar los destinatarios o grupos de Sugerencia: para insertar varios caracteres especiales contactos o ingresar el a la vez, pulse cuando seleccione cada carácter. número telefónico o dirección de e-mail del Escribir y enviar mensajes... - Page 171 Para tomar una nueva foto o grabar sonido o video para cantidad de caracteres que se puede enviar en un solo un mensaje multimedia, seleccione Insertar nuevo > mensaje. En la barra de navegación, puede ver el indicador de Imagen, Clip de sonido o Videoclip.
-
Page 172: Buzón De Entrada: Recibir Mensajes
Pulse y seleccione Mensajes > Opciones > Cuando recibe un mensaje, 1 mensaje nuevo aparece Configuraciones > Mens. mult. > Punto acceso en uso en el modo standby. Para abrir el mensaje, seleccione el punto de acceso que creó como la conexión preferida. Mostrar. -
Page 173: Buzón De Correo
Si el mensaje incluye una presentación multimedia, aparece Notif. e-mail: le indica cuántos mensajes de e-mail hay en . Para reproducir la presentación, seleccione el indicador. su buzón de correo remoto. Una notificación extendida puede relacionar más información detallada. Datos y configuraciones Mensajes de servicio Web Su dispositivo puede recibir varios tipos de mensajes con datos (... - Page 174 Para conectarse con el buzón de correo y recuperar Después de recuperar los mensajes de e-mail, puede encabezados de e-mail o nuevos mensajes, seleccione Sí. seguir viéndolos en línea o seleccione Opciones > Cuando ve mensajes en línea, está conectado continuamente Desconectar para cerrar la conexión y ver los mensajes a un buzón de correo remoto usando una conexión de datos.
-
Page 175: Ver Mensajes En La Tarjeta Sim
Recuperar mensajes de e-mail automáticamente el mensaje se eliminará del buzón. Si está usando el protocolo POP3, sólo podrá eliminar los mensajes marcados para ser Para recuperar mensajes de e-mail automáticamente, borrados cuando cierre la conexión al buzón de correo remoto. seleccione Opciones >... -
Page 176: Configuraciones De Mensajes
Configuraciones de mensajes Validez de mensajes: seleccione por cuánto tiempo el centro de mensajes reenviará su mensaje si el primer intento no se Complete todos los campos marcados con Debe definirse logra (servicio de red). Si no se puede encontrar al destinatario con un asterisco rojo. - Page 177 Modo creación MMS: si selecciona Dirigido, el dispositivo Informe de entrega: seleccione si desea que el estado del le informa si usted trata de enviar un mensaje que no puede mensaje enviado aparezca en el registro (servicio de red). ser admitido por el destinatario. Seleccione Restringido, el Es posible que no pueda recibir un informe de entrega de dispositivo le impedirá...
- Page 178 Configuraciones de conexión Puerto: defina un puerto para la conexión. Para editar las configuraciones para el e-mail que Acceso seguro APOP (sólo para POP3): use con el protocolo recibe, seleccione E-mail entrante y alguna de las POP3 para encriptar el envío de contraseñas al servidor de siguientes opciones: e-mail remoto mientras se conecta al buzón de correo.
- Page 179 Enviar mensaje: defina la forma de enviar el e-mail desde Recuperación auto. su dispositivo. Seleccione Inmediatamente para que el Recuperac. encabez.: seleccione si desea que el dispositivo se conecte al buzón de correo cuando seleccione dispositivo recupere nuevo e-mail automáticamente. Enviar mensaje.
-
Page 180: Otras Configuraciones
Detección de temas: seleccione si el dispositivo busca Nº mens. guardados: defina cuántos mensajes enviados se automáticamente los nuevos números de temas y guarda guardarán en la carpeta Enviados. El límite predeterminado los nuevos números sin un nombre en la lista de temas. es de veinte mensajes. -
Page 181: Contactos (Directorio)
Sugerencia: Para agregar y editar tarjetas de guardar y actualizar información de contactos, como contacto, también puede utilizar Nokia Contacts números telefónicos, direcciones postales o de e-mail, de Editor disponible en Nokia PC Suite. sus contactos. Puede agregar un tono de timbre personal o Para adjuntar una imagen en miniatura a una tarjeta de una imagen miniatura a una tarjeta de contacto. -
Page 182: Copiar Contactos
De esta forma, si el contacto tiene Sugerencia: Puede sincronizar sus contactos con varios números o direcciones, podrá fácilmente llamarle o una PC compatible con Nokia PC Suite. enviarle un mensaje a un número o dirección específica. El número predeterminado también se usa para la marcación Directorio SIM y otros servicios SIM por voz. -
Page 183: Agregar Tonos De Timbre Para Contactos
Para restringir las llamadas de su dispositivo a números 3 Seleccione el tono de timbre que desea usar para el telefónicos específicos, seleccione Opciones > Activar contacto o grupo seleccionado. marcac. fija. Necesita su código PIN2 para activar y También puede usar un videoclip como un tono de timbre. desactivar la marcación fija o editar sus contactos de Para eliminar el tono de timbre, seleccione Tono predeter. -
Page 184: Realizar Llamadas
Realizar llamadas Llamadas Antes de poder realizar una llamada de esta forma, deberá copiar los nombres de contactos en su tarjeta SIM a Sugerencia: Para aumentar o disminuir el volumen Contactos. Consulte "Copiar contactos", pág. 181. durante una llamada, use la tecla de volumen en la Para llamar a su buzón de voz (servicio de red), mantenga parte lateral del teléfono. - Page 185 Para agregar a un nuevo participante, repita el paso 2 y Para asignar un número telefónico a una de las teclas de seleccione Opciones > Multiconferencia > Incluir en marcación rápida (de ), pulse y seleccione multiconf. Su dispositivo admite llamadas de Herram.
-
Page 186: Contestar O Rechazar Una Llamada
Cuando usa la marcación por voz, el altavoz está en uso. Contestar o rechazar una llamada Sujete el dispositivo a una corta distancia de usted cuando Para contestar una llamada entrante, pulse pronuncie la etiqueta de voz. Para silenciar el tono de timbre cuando hay una llamada Para iniciar la marcación por voz, en el modo standby, entrante, seleccione Silencio. -
Page 187: Registro
Para alternar entre las dos llamadas, pulse Cambiar. Para Registro conectar una llamada entrante o una llamada retenida con una llamada activa y para desconectarse de ambas llamadas, seleccione Opciones > Transferir. Para finalizar la llamada Para registrar los números telefónicos de llamadas perdidas, activa, pulse . -
Page 188: Paquete De Datos
Nota: El tiempo real de facturación de llamadas de Para monitorear todas las su proveedor de servicios puede variar dependiendo llamadas de voz, mensajes de de las características de la red, el redondeo de texto o conexiones de datos facturación, etc. registrados por este dispositivo, pulse Para borrar la duración de llamadas, seleccione... - Page 189 Para filtrar el registro, seleccione Opciones > Filtrar y un filtro. Para ver los detalles de un evento de comunicación, en la vista de registro general, desplácese a un evento y pulse Para borrar permanentemente el contenido del registro, registro de llamadas recientes e informes de entrega de Sugerencia: En la vista de detalles, puede, por mensajes, seleccione Opciones...
-
Page 190: Exploradores Web
Exploradores Web Servicios Para obtener más información, comuníquese con su operador de red o proveedor de servicios. Sugerencia: Las configuraciones pueden estar Pulse y seleccione Servicios (servicio de red). disponibles en el sitio Web de un operador de red o Varios proveedores de servicios mantienen páginas proveedor de servicios. - Page 191 El dispositivo puede tener cargados algunos favoritos de Explorar algunos sitios que no estén asociados con Nokia. Nokia no Importante: Use sólo servicios fiables que garantiza ni respalda estos sitios. Si accede a ellos, deberá brinden seguridad y protección adecuada contra tomar las mismas precauciones en cuanto a seguridad y software perjudicial.
-
Page 192: Descargar Y Comprar Elementos
Para regresar a la vista del explorador, seleccione Descargar y comprar elementos Opciones > Volver a página. Puede descargar elementos como tonos de timbre, imágenes, Para guardar una página mientras explora, seleccione logotipos del operador, temas y videoclips. Estos elementos Opciones >... - Page 193 Vaciar la memoria caché favoritos automáticos, pero desea ocultar la carpeta de la vista de favoritos, seleccione Ocultar carpeta. La información o servicios a los cuales ha accedido se guardan en la memoria caché del dispositivo. Tamaño de pantalla: seleccione lo que desea que aparezca cuando está...
-
Page 194: Web
Los vínculos Web son archivos xml en páginas Web que se usan con frecuencia en las comunidades weblog para compartir las entradas de encabezados más recientes o el texto completo, por ejemplo, noticias del momento. Es común Pulse y seleccione Aplicaciones >... - Page 195 • Pulse para volver a la página anterior. Buscar información Puede usar Mini mapa para ver y buscar información • Pulse para ver una lista de todas las ventanas abiertas. en páginas Web que contienen una gran cantidad de • Pulse para mostrar una visión general de la página.
-
Page 196: Conexiones
Bluetooth, auto. Puede usar la conectividad Bluetooth para enviar utilice sólo accesorios aprobados por Nokia para este imágenes, videoclips, clips de música y sonido y notas, modelo. Compruebe con sus respectivos fabricantes la puede conectarse inalámbricamente a su PC compatible... - Page 197 Active el modo remoto de SIM desde el otro dispositivo. su dispositivo y este nombre pueden ser vistos por otros Cuando el modo remoto de SIM está activado en su Nokia usuarios con dispositivos que usan la tecnología Bluetooth. N73, aparece SIM remota en el modo standby.
- Page 198 Sugerencias de seguridad Abra la aplicación donde está guardado el elemento que desea enviar. Por ejemplo, para enviar una imagen Cuando no esté usando la conectividad Bluetooth, seleccione a otro dispositivo compatible, abra Galería. Bluetooth > Desactivado Visibilidad mi tel. >...
-
Page 199: Vincular Dispositivos
Vincular dispositivos Fijar no autorizado: las solicitudes de conexión de este dispositivo se deben aceptar cada vez por separado. Para abrir la vista de dispositivos vinculados ( ), en la vista principal de la aplicación Bluetooth, pulse Para cancelar una vinculación, desplácese al dispositivo y seleccione Opciones >... -
Page 200: Conexión De Infrarrojos
PC y de aplicaciones para la Para enviar datos por infrarrojos, localice el archivo comunicación de datos. Con Nokia PC Suite puede, por deseado en la aplicación o administrador de archivos y ejemplo, transferir imágenes entre su dispositivo y una... -
Page 201: Administrador De Conexiones
PC sincronizar sus notas, agenda y contactos con varias compatible y usar Nokia PC Suite, use el asistente aplicaciones de agenda y aplicaciones de contactos en una Get Connected disponible en Nokia PC Suite. -
Page 202: Sincronizar Datos
Sincronizar datos Para conectarse a un servidor y recibir ajustes de configuración para su dispositivo, desplácese a un perfil y En la vista principal de Sinc., puede ver diferentes perfiles seleccione Opciones > Iniciar config. de sincronización. Un perfil de sincronización contiene las configuraciones necesarias, por ejemplo, las aplicaciones Configuraciones del perfil de servidor que serán sincronizadas, para sincronizar los datos en su... -
Page 203: Oficina
Oficina Calculadora En el primer campo Cantidad, ingrese el valor que desea cambiar. El otro campo Cantidad cambia automáticamente para mostrar el valor convertido. Para sumar, restar, multiplicar, dividir y calcular la Configurar moneda base y tasas de cambio raíz cuadrada y porcentajes, pulse y seleccione Trabajo >... -
Page 204: Grabadora
Grabadora Quickword admite ver los documentos guardados en el formato .doc de Microsoft Word 97 o versión actualizada. No se admiten todas las variaciones ni funciones de los Para grabar recordatorios de voz, pulse y seleccione formatos de archivos mencionados. Trabajo >... - Page 205 No se admiten todas las variaciones ni funciones de los Quickpoint formatos de archivos mencionados. Con Quickpoint, puede ver presentaciones de Microsoft También consulte "Más información", pág. 204. PowerPoint en la pantalla de su dispositivo. Quickpoint admite ver las presentaciones creadas en el Ver hojas de cálculo formato .ppt de Microsoft PowerPoint 2000 o versión Para desplazarse por la hoja de cálculo, use la tecla...
-
Page 206: Adobe Reader
Adobe Reader • Explore las páginas Web. Asegúrese de que su dispositivo esté configurado con un punto de acceso a Internet antes de explorar. Consulte "Puntos de acceso", pág. 214. Administrar los archivos PDF Con Adobe Reader puede leer documentos PDF en la pantalla Para explorar y administrar los archivos PDF, pulse de su dispositivo. - Page 207 Vista: para ver el documento en la pantalla completa. Más información También puede girar el documento PDF noventa grados en Para obtener más información, consulte www.adobe.com cada dirección. (en inglés). a: para ir a una página seleccionada, a la página siguiente, Para ver y compartir preguntas, sugerencias e información la página anterior o la última página.
-
Page 208: Personalizar Su Dispositivo
Personalizar su dispositivo • Para utilizar la pantalla standby para acceso rápido a • Para cambiar el reloj que aparece en el modo standby, las aplicaciones que usa con más frecuencia, consulte pulse y seleccione Aplicaciones > Reloj > Opciones >... -
Page 209: Perfil Desconectado
Para cambiar el perfil, pulse en el modo standby. hacia y desde el dispositivo. Al tratar de enviar mensajes, Desplácese hasta el perfil que desea activar y éstos se guardan en el buzón de salida para enviarse en seleccione Aceptar. otro momento. -
Page 210: Cambiar La Apariencia De Su Dispositivo
Para activar los efectos 3-D, seleccione Efectos tono Para ajustar el volumen del tono de timbre, seleccione timbre 3-D > Activar. Para cambiar el tono de timbre, Herram. > Modos > Opciones > Personalizar > Volumen desplácese al tono de timbre que aparece, pulse timbre. -
Page 211: Modo Standby Activo
Para editar temas, desplácese a un tema y seleccione La pantalla de modo standby activo aparece con aplicaciones Opciones > Editar para cambiar las configuraciones de predeterminadas en la parte superior de la pantalla y con Imagen de fondo Ahorro de energía. -
Page 212: Herramientas
Herramientas Configuraciones Cambiar las configuraciones para Idioma del teléfono Idioma de escritura afecta cada aplicación en su dispositivo y el cambio permanece activo hasta que Para cambiar las configuraciones, pulse y seleccione modifique estas configuraciones nuevamente. Herram. > Config. Para abrir un grupo de configuraciones, Idioma de escritura: cambiar el idioma afecta los pulse... - Page 213 Modo standby Tiempo espera luz: seleccione un tiempo de espera tras el cual la luz de fondo de la pantalla se apaga. Standby activo: use los accesos directos para las aplicaciones en el modo standby. Consulte "Modo standby activo", Configuración de llamadas pág.
- Page 214 Resumen tras llam.: active esta configuración si desea que Conexión el dispositivo muestre brevemente la duración aproximada de la última llamada. Marcación rápida: seleccione Activar y los números Conexiones de datos y puntos de acceso asignados a las teclas de marcación rápida (de Su dispositivo admite las conexiones de paquete de datos pueden ser marcados al mantener pulsada la tecla.
- Page 215 Puntos de acceso Para usar una conexión de datos, el proveedor de servicios de red debe admitir esta opción y si fuera necesario, activarla en Puede recibir configuraciones de punto de acceso en un su tarjeta SIM. mensaje de su proveedor de servicios. Consulte "Datos y configuraciones", pág.
-
Page 216: Fecha Y Hora
Dirección IP teléfono (para IPv4): ingrese la dirección IP Configuraciones de su dispositivo. Puede recibir configuraciones seguras del servidor de su operador de red o proveedor de servicios en un mensaje de Dirección DNS: en primario:, ingrese la dirección IP configuración o las configuraciones pueden estar almacenadas del servidor primario DNS. - Page 217 Seguridad Sugerencia: Para bloquear manualmente el dispositivo, pulse . Se abre una lista de comandos. Seleccione Bloquear teléfono. Teléfono y SIM Bloq. si cambia SIM: puede configurar su dispositivo para pedir el código de bloqueo cuando una tarjeta SIM Solicitud código PIN: cuando está...
- Page 218 Código UPIN : este código se puede proporcionar con la Administración de certificados tarjeta USIM. La tarjeta USIM es una versión mejorada de Los certificados digitales no garantizan la seguridad, sino la tarjeta SIM. que sirven para verificar el origen del software. Código PIN2: este código (de cuatro a ocho dígitos) se En la vista principal de administración de certificados, podrá...
- Page 219 Ver detalles del certificado: verificar la autenticidad Desplácese a un certificado de autoridad y seleccione Opciones > Config. seguridad. Dependiendo del certificado, Sólo puede asegurarse de la identidad correcta de un servidor aparece una lista de las aplicaciones que el certificado cuando la firma y el período de validez del certificado de seleccionado puede usar.
- Page 220 Desvío de llamadas Las restricciones de llamadas y desvío de llamadas no pueden estar activos al mismo tiempo. Cuando las llamadas están restringidas, puede realizar Desvío llam. le permite desviar sus llamadas entrantes a su llamadas al número de emergencia oficial programado en buzón de voz u otro número telefónico.
-
Page 221: Comandos De Voz
Accesorios Comandos de voz Puede usar los comandos de voz para controlar su dispositivo. En el modo standby, indica que un auricular compatible Para obtener más información sobre los comandos de voz está conectado y que el auricular no está disponible o mejorados admitidos por su dispositivo, consulte que se ha perdido la conexión Bluetooth a un auricular. -
Page 222: Instalar Aplicaciones Y Software
Opciones > Configuraciones. Para desactivar el Installer en Nokia PC Suite para instalar una aplicación en sintetizador que reproduce las etiquetas de voz y comandos su dispositivo. Si usa Microsoft Windows Explorer para reconocidos en el idioma seleccionado del dispositivo,... -
Page 223: Eliminar Aplicaciones Y Software
aplicación del archivo de la instalación original o de la Para iniciar una conexión de red y ver datos adicionales copia de seguridad. sobre la aplicación, seleccione Opciones > Ir a dirección Web, si está disponible. • El archivo .jar es necesario para instalar las aplicaciones Java. -
Page 224: Administración De Derechos Digitales
Configuraciones para que el software acceda a nuevo contenido protegido por DRM. Revocar el acceso también puede evitar la Seleccione Opciones > Configuraciones y alguna de las renovación de contenido protegido por DRM que ya tenga siguientes opciones: en su dispositivo. Revocar software DRM de este tipo no Verif. -
Page 225: Solución De Problemas: Preguntas Y Respuestas
Solución de problemas: Preguntas y Respuestas Códigos de acceso Asegúrese de que el otro dispositivo no está programado en el modo oculto. P: ¿Cuál es mi contraseña para los códigos de bloqueo, PIN o PUK? Verifique la compatibilidad entre los dos dispositivos. R: El código de bloqueo original es 12345. - Page 226 También, si cambia la tarjeta (U)SIM, se borra la R: Guarde sus datos usando uno de los siguientes métodos: información del registro. • Use Nokia PC Suite para hacer copias de seguridad de Memoria baja todos sus datos en una computadora compatible.
- Page 227 P: ¿Por qué tengo problemas al conectar el dispositivo a mi PC? R: El dispositivo está tratando de recuperar un mensaje R: Asegúrese de que Nokia PC Suite está instalado y está multimedia del centro de mensajes multimedia. Asegúrese de funcionando en su PC.
-
Page 228: Seguridad Del Producto
(+) y negativo (-) de la batería. Utilice únicamente las baterías aprobadas por Nokia y (Estas parecen tiras metálicas en la batería). Puede ocurrir, recárguelas sólo con los cargadores aprobados por Nokia por ejemplo, cuando lleva una batería de repuesto en su... -
Page 229: Normas Para La Autenticación De Baterías Nokia
No las deseche junto con los desperdicios domésticos. Nokia, evite usarla y llévela al centro de servicio autorizado Nokia más cercano o a un distribuidor Nokia para pedir No desmantele, abra ni triture las pilas o baterías. -
Page 230: Cuidado Y Mantenimiento
Sí no puede confirmar que su batería Nokia con el holograma temperaturas pueden reducir la vida útil de los dispositivos en la etiqueta es una batería auténtica de Nokia, no la use. electrónicos, dañar las baterías y deformar o derretir Llévela al centro de servicio autorizado Nokia más cercano... -
Page 231: Entorno Operativo
• No utilice productos químicos perjudiciales, disolventes Información adicional de seguridad ni detergentes fuertes para limpiar el dispositivo. Su dispositivo y accesorios pueden contener partes pequeñas. • No pinte el dispositivo. La pintura puede obstruir las Manténgalos fuera del alcance de los niños. piezas movibles e impedir un funcionamiento apropiado. - Page 232 Las partes del dispositivo son magnéticas. Los materiales • No deben llevar el dispositivo en el bolsillo de la camisa metálicos pueden ser atraídos por el dispositivo. No coloque • Deben utilizar el dispositivo en el oído contrario al tarjetas de crédito ni otros artículos de almacenamiento marcapasos para minimizar las posibles interferencias.
-
Page 233: Llamadas De Emergencia
destinado al dispositivo, sus piezas o accesorios. Para los de los barcos, instalaciones de transferencia o almacenamiento automóviles con bolsas de aire, recuerde que éstas se inflan de productos químicos, vehículos que usan gas de petróleo con mucha fuerza. No coloque sobre las bolsas de aire ni licuado (como propano o butano) y áreas donde el aire sobre la zona de despliegue ningún objeto, incluidos el contiene elementos químicos o partículas como grano,... - Page 234 Información adicional sobre SAR podría ser provista en la independientemente de la edad y salud. sección de información de productos en www.nokia.com (en inglés).
-
Page 235: Información Técnica
Su dispositivo móvil está diseñado para reunir los Información técnica requerimientos que rigen la exposición a las ondas de radio los cuales fueron establecidos por la Comisión Federal de Función Especificación Comunicaciones (Federal Communications Commission) (EE.UU.) e Industria Canadiense. Estos requerimientos Peso 115 g (4,1 onzas) establecen un límite SAR de 1,6 V/kg promediado sobre 1... -
Page 236: Índice
125 configuraciones grabador crear entradas 164 Bluetooth de video 140 eliminar entradas 165 auricular 220 editar videos 146 sincronizar Nokia PC Suite 164 desactivar 198 flash 137 alarma dirección de dispositivo 197 guardar videoclips 139 altavoz enviar datos 197... - Page 237 código de seguridad códigos de acceso 216 copiar Consulte código de bloqueo conectividad Bluetooth 196 contactos entre la tarjeta SIM y la código UPIN conexiones de datos 213 memoria del dispositivo 181 código UPUK configuraciones originales 211 crear e-mail códigos desvío de llamadas 219 código de seguridad 217 e-mail 176...
- Page 238 enviar ordenar archivos informes de entrega tarjetas de contactos, tarjetas en álbumes 145, 150 borrar 188 de negocios 180 presentación de diapositivas 147 rechazar 176 videoclips 147 presentaciones 148 recibir 176 escenas GPRS infrarrojos, conexión escenas de imagen 138 Consulte conexiones de datos ingreso de texto escenas de video 138 grabadora...
- Page 239 171 pausa llamadas perdidas mensajes de voz PC Suite llamadas recientes mensajes multimedia consulte Nokia PC Suite configuraciones 175 películas, muvees crear 166 muvees personalizados 160 manejo de derechos digitales enviar 169 muvees rápidos 160 marcación fija...
- Page 240 RealPlayer solución de problemas transferir contenido desde registro sonido otro dispositivo borrar contenido 188 ajustar el volumen 128 Consulte registro sonidos videoclips filtro 188 grabar sonidos 203 Visual Radio reloj silenciar un tono de timbre 185 reproductor de música reproductor de video tarjeta SIM blogs 193 Consulte RealPlayer...
- Page 241 Notas...