Advertisement
Available languages
Available languages
Quick Links
Advertisement

Related Manuals for Philips LRM3120K/27


Summary of Contents for Philips LRM3120K/27
- Page 1 Home power LRM3120K/27...
-
Page 3: Low Battery Indicator
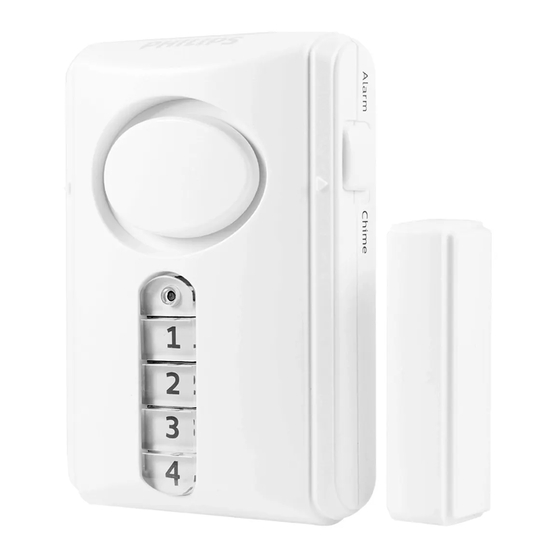
Home/ Alarm/ away chime Magnet switch switch Indicator light Learn Screws LEARN button Double- sided tape Battery compartment Mounting plate Low Battery Indicator The alarm unit has a low battery circuit. When the batteries reach a low level, the indicator light will flash slowly. Average battery life for typical usage is up to one year. - Page 4 Installing Batteries The keypad controlled door alarm requires three (3) AAA Alkaline batteries (not included). To install the batteries: 1. Remove screw from battery compartment door located on back of the unit. Slide off the door in the direction of the arrow.
- Page 5 Creating Your Personal Alarm Code The keypad allows you to set a personal 4-digit code for arming and disarming the alarm. 1. Remove screw from battery compartment door located on back of the unit. Slide off the door in the direction of the arrow. 2.
- Page 6 Installation 1. Select desired location for alarm. The alarm is designed to mount to the door frame or to the door itself. Use either the provided screws (for permanent mounting) or double-sided tape (for temporary mounting). The recommended location is the back of the door, with the magnet mounted to the door frame.
- Page 7 Note that the magnet may be mounted to either side of the alarm as long as the arrows line Distance must be less that 1/2” IMPORTANT: Whether mounting to the door or door frame, the gap distance between the alarm and magnet must be 1/2”...
- Page 8 the surface you are mounting to is clean and dry. For best results, clean the mounting surface with a mixture of 50% isopropyl alcohol and 50% water. Double-sided tape Mounting Plate Alarm Do not apply firm pressure until location is final. NOTE: When mounting to a door frame, the mounting plate mounts off-center to the left or right in...
- Page 9 3. Using double-sided tape, lightly attach the magnet to the opposite edge next to the alarm. Line up the arrows of the alarm and the magnet. Ensure the distance between the two pieces is 1/2” or less. To test the gap distance, slide the ALARM/CHIME switch to CHIME and open the door.
-
Page 10: Home Mode
Operating In The Alarm Mode 1. Locate ALARM/CHIME switch on right side of the alarm unit. 2. Slide switch to ALARM position. 3. Choose HOME or AWAY on the left side of the alarm unit. HOME MODE In HOME mode, the alarm will sound when the gap between the alarm and the magnet is greater than 1/2”... - Page 11 Arming the Alarm: 1. Arm the alarm by pressing your 4-digit code. When the 4 digit code is entered correctly the unit will flash a green light once. NOTE: if the 4 digit code is entered incorrectly, the unit will sound a higher tone and flash red 3 times.
- Page 12 Operating In The Chime Mode 1. Locate ALARM/CHIME switch on right side of unit. 2. Slide switch to CHIME mode. Activating the chime: 1. The chime will now sound immediately if the distance between the alarm and magnet is greater than 1/2” (i.e. the door is opened).
- Page 13 Warning Limitations of Alarm Products This product should be tested periodically to make sure it is working properly. The product, if used properly, may reduce the risk of burglary, robbery, or other adverse events. However, JASCO is not an insurer, this product is neither insurance nor a guarantee that such an event will be prevented, and users should protect themselves with proper insurance.
- Page 14 For indoor use only; do not use in wet locations. MADE IN CHINA Philips and the Philips Shield Emblem are registered trademarks of Koninklijke Philips N.V. and are used under license. This product has been manufactured by and is sold under the responsibility of Jasco Products Company, and Jasco Products Company LLC, 10 E.
- Page 15 Suppliers Declaration of Conformity | Model #: LRM3120K/27 | Jasco Products Co., 10 E. Memorial Rd, Oklahoma City, OK 73114, www.byjasco.com This device complies with Part 15 of the FCC rules. Operation is subject to the following two conditions: (1)
- Page 16 Like our product? Leave us a review on Amazon.com or your favorite retailer website! Having issues and Need more home need support? security devices? Call our U.S.-based For additional Philips home experts Monday–Friday, security visit our website! from 7AM–8PM (Central) 1-844-816-0320 byjasco.com/security...
- Page 17 Home power LRM3120K/27...
-
Page 19: Indicador De Batería Baja
Interruptor Interruptor de alarma/ en casa/ Imán campana fuera de casa indicadora Botón Tornillos crear LEARN Cinta doble faz Compartimento para baterías Placa de soporte Indicador de batería baja La unidad de alarma tiene un circuito de batería baja. Cuando las baterías lleguen a un nivel bajo, la luz indicadora se encenderá... - Page 20 Cómo Instalar Las Baterías La alarma para puertas controlada por teclado funciona con tres (3) baterías alcalinas AAA (no vienen incluidas). Para instalar las baterías: 1. Retire el tornillo de la tapa del compartimento para baterías que se encuentra en la parte de atrás de la unidad.
- Page 21 Cómo Creat Código Personal Para La Alarma El teclado le permite fijar un código personal de 4 dígitos para activar y desactivar la alarma. 1. Retire el tornillo de la tapa del compartimento para baterías que se encuentra en la parte de atrás de la unidad.
-
Page 22: Instalación
Instalación 1. Elija la ubicación deseada para la alarma. La alarma está diseñada para ser ubicada en el marco de la puerta o en la puerta. Puede utilizar los tornillos suministrados (si desea dejarla colocada permanentemente) o la cinta doble faz (si desea colocarla temporalmente). - Page 23 IMPORTANTE: Ya sea que coloque la alarma en la puerta o en el marco de la puerta, la distancia entre la alarma y el imán debe ser de 1/2” o menos. 2. Fije la placa de soporte a la parte de atrás de la alarma.
- Page 24 marco de la puerta, ubique la placa de soporte hacia la izquierda o derecha para que la alarma quede lo más cerca posible al borde de la puerta. 3. Con la cinta doble faz, fije suavemente el imán al borde opuesto al lado de la alarma.
- Page 25 Cómo Operar El Modo de Alarma 1. Ubique el interruptor de ALARMA / CAMPANA al lado derecho de la unidad de la alarma. 2. Deslice el interruptor a la posición de ALARMA. 3. Elija la posición EN CASA o FUERA DE CASA en el lado izquierdo de la unidad de la alarma.
- Page 26 Al regresar al área protegida, hay un lapso de 30 segundos para que ingrese el código de 4 dígitos antes de que suene la alarma. Cómo activar la alarma: 1. Active la alarma ingresando el código de 4 dígitos. Al ingresar correctamente el código de 4 dígitos, una luz verde se encenderá...
- Page 27 Código incorrecto Si se ingresa un código incorrecto, la unidad emitirá un sonido más alto y la luz indicadora roja se encenderá 3 veces de manera intermitente. Vuelva a ingresar el código correcto después de que la luz haya dejado de encenderse.
-
Page 28: Cuidado Y Mantenimiento
Cómo Operar La Modalidad De Campana 1. Ubique el interruptor ALARMA / CAMPANA en el lado derecho de la unidad. 2. Deslice el interruptor a la modalidad CAMPANA. Cómo Activar La Campana: 1. La campana sonará inmediatamente si la distancia entre la alarma y el imán es mayor a 1/2”... - Page 29 Advertencia Limitaciones de las alarmas Este producto debe ser revisado periódicamente para garantizar que esté funcionando bien. Si el producto es utilizado adecuadamente, puede reducir el riesgo de robo y otros eventos adversos. Sin embargo, JASCO no es una aseguradora, este producto no es un seguro ni una garantía de que se podrá...
- Page 30 HECHO EN CHINA Philips y el emblema de escudo Philips son marcas registradas de Koninklijke Philips N.V. y se usan bajo licencia. Este producto ha sido fabricado y se comercializa bajo responsabilidad de Jasco Products Company y Jasco Products Company LLC, 10 E.
- Page 31 DECLARACIÓN DE LA COMISIÓN FEDERAL DE COMUNICACIONES (FCC): Declaración de conformidad del proveedor | Modelo #: LRM3120K/27 | Jasco Products Co., 10 E. Memorial Rd, Oklahoma City, OK 73114, www.byjasco.com Este dispositivo cumple con las Especificaciones del apartado 15 de las normas de la FCC y con las especificaciones de las normas radioeléctricas (RSS) del Ministerio de Industria...
- Page 32 Si desea ver más Llame a nuestros expertos dispositivos de seguridad en los EE. UU., de lunes a para el hogar Philips, visite viernes, de 7 a. m. a 8 p. m. nuestro sitio web (hora del centro) 1-844-816-0320...