Table of Contents
Advertisement
Quick Links
RAK-50PPD
RAK-60PPD
RAC-50NPD
RAC-60NPD
SEPTEMBER 2017
OPTIONAL
WIRED REMOTE
CONTROLLER
(SPX-RCDB)
WIRELESS REMOTE
CONTROLLER
(SPX-RCKA2)
WIRED REMOTE
CONTROLLER
(SPX-WKT3)
※
For SPX-WKT3, Please refer to it's
own manual.
RAK-50PPD
1420 (300 ~2500)
5.00 (1.20 ~ 5.80)
17,060 (4,090 ~ 19,780)
1500 (300 ~ 2650)
6.00 (1.20 ~ 6.80)
20,470 (4,090 ~ 23,200)
900
300
230
11.5
RAK-50PPD / RAC-50NPD
RAK-60PPD / RAC-60NPD
RAC-50NPD
50/60 Hz, 220 ~ 240V
6.52 ~ 5.98
6.89 ~ 6.31
850
750
298
50
0631E
RAC-60NPD
RAK-60PPD
1710 (300 ~2600)
7.85 ~ 7.20
6.00 (1.20 ~ 6.50)
20,470 (4,093 ~ 22,177)
1840 (300 ~ 2650)
8.45 ~ 7.74
7.00 (1.20 ~ 8.00)
23,880 (4,093 ~ 27,292)
850
900
750
300
298
230
50
11.5
5
9
59
61
62
64
66
69
70
80
93
103
107
132
137
Advertisement
Table of Contents

Related Manuals for Hitachi RAK-50PPD


Summary of Contents for Hitachi RAK-50PPD
- Page 1 0631E RAK-50PPD / RAC-50NPD RAK-60PPD / RAC-60NPD RAK-50PPD OPTIONAL RAK-60PPD WIRED REMOTE CONTROLLER (SPX-RCDB) WIRELESS REMOTE CONTROLLER (SPX-RCKA2) WIRED REMOTE CONTROLLER (SPX-WKT3) RAC-50NPD RAC-60NPD ※ For SPX-WKT3, Please refer to it’s own manual. RAK-50PPD RAC-50NPD RAC-60NPD RAK-60PPD 50/60 Hz, 220 ~ 240V...
- Page 6 RAC-50NPD RAK-50PPD RAC-60NPD RAK-60PPD JX151XG1 1500g...
- Page 7 Figure showing the installation of Indoor unit...
- Page 8 Figure showing the installation of Outdoor unit Be sure to completely seal any gap WARNING above 100mm with putty. Flare connection only at outside of building The indoor piping should be insulated with the enclosed insulation pipe. (If the insulator is Refrigerant piping insuff cient, please use must be protected...
- Page 11 -10-...
- Page 12 -11-...
- Page 13 The OPERATION LAMP flashes/dimmed in the following case -12-...
- Page 14 -13-...
- Page 15 -14-...
- Page 16 -15-...
- Page 17 -16-...
- Page 18 -17-...
- Page 19 -18-...
- Page 20 -19-...
- Page 21 -20-...
- Page 22 Remote Controller Manual MODEL SPX-RCDB (RAR-5G2) -21-...
-
Page 23: Precautions For Use
PRECAUTIONS FOR USE In case of power failure happen, Wired Remote Controller may not show current operating mode when power ● comes back. However unit will continue to operate at previous setting mode. Some features of Wireless Remote Controller are not available when use Wired Remote Controller as mentioned ●... - Page 24 NAMES AND FUNCTIONS OF REMOTE CONTROLLER ■ This controls the operation function and timer setting of the room air conditioner. OPERATION LAMP Transmission Sign The transmission sign blinks START/STOP Button when a signal has been Press this button to start operation. send.
-
Page 25: Various Functions
VARIOUS FUNCTIONS ■ Auto Restart Control If there is a power failure, operation will be automatically restarted when the power is resumed with ● previous operation mode. (As the operation is not stopped by remote controller.) If you intend not to continue the operation when the power is resumed, switch off the power supply. ●... -
Page 26: Heating Operation
HEATING OPERATION Use the device for heating when the outdoor temperature is under 21°C. ● When it is too warm (over 21°C), the heating function may not work in order to protect the device. ● In order to maintain reliability of the device, please use this device when outdoor temperature is above –15°C Press the MODE SELECTOR button so that the display indicates (HEAT). -
Page 27: Dehumidifying Operation
DEHUMIDIFYING OPERATION Use the device for dehumidifying when the room temperature is over 16°C. When it is under 15°C, the dehumidifying function will not work. Press the MODE SELECTOR button so that the display indicates (DEHUMIDIFY). Press (FAN SPEED) button to select SILENT or LOW fan speed. -
Page 28: Cooling Operation
COOLING OPERATION Use the device for cooling when the outdoor temperature is –10 ~ 43°C. If indoor humidity is very high (80%), some dew may form on the air outlet grille of the indoor unit. Press the MODE SELECTOR button so that the display indicates (COOL). - Page 29 LEAVE HOME(LH) AND CLEAN (ONE TOUCH CLEAN) OPERATIONS Leave Home (LH) and CLEAN(One Touch Clean) operations activation buttons are not available on this device. ● The operations shall be activated by wireless remote controller. Please refer to wireless 'Remote Controller Manual' to activate the operations. ●...
-
Page 30: Timer Reservation
TIMER RESERVATION ■ ON Timer and OFF Timer are available. ■ Operation stop at setting timer OFF Timer Reservation OFF TIMER setting ● Select the OFF TIMER by pressing the (OFF) Button. ● Setting timer will change according to the below sequence when you press the button. - Page 31 HOW TO SET THE SLEEP TIMER Mode Indication 1 hour 2 hours 3 hours 7 hours Sleep timer Sleep timer off Sleep Timer: The device will continue working for the designated number of hours and then turn off. Press the SLEEP button. The timer information will be displayed on the remote controller.
-
Page 32: Installation Of Wired Remote Controller
INSTALLATION OF WIRED REMOTE CONTROLLER Connection to the electrical box; Remove the cover of electric box ● Connect the connector of wired remote controller to CN1102 of electrical board ● Assemble back the cover of electrical box ● Wiring installation for wired remote controller (2 methods); ●... - Page 33 Remote Controller Manual MODEL SPX-RCKA2 (RAR-6N1) -32-...
-
Page 34: Preparation Before Operation
PREPARATION BEFORE OPERATION ■ To install the batteries 1. Slide the cover to take it off. 2. Install two dry batteries AAA.LR03 (alkaline). The direction of the batteries should match the marks in the case. 3. Replace the cover at its original position. ■... - Page 35 PREPARATION BEFORE OPERATION ■ To set calendar and clock 1. Press (RESET) button when fi rst time setting. "Year" blinks. 2. Press (TIME) button to set the current year. 3. Press (CLOCK) button. "Day" and "Month" blink. 4. Press (TIME) button to set the current day and month.
-
Page 36: Remote Controller
NAMES AND FUNCTIONS OF REMOTE CONTROLLER REMOTE CONTROLLER This controls the operation of the indoor unit. The range of control is about 7 meters. If indoor lighting is ● controlled electronically, the range of control may be shorter. This unit can be fi xed on a wall using the fi xture provided. Before fi xing it, make sure the indoor unit can be controlled from the remote controller. - Page 37 NAMES AND FUNCTIONS OF REMOTE CONTROLLER MODE selector Button POWERFUL Button Use this button to select the Use this button to set the operating mode. Every time you POWERFUL mode. ( p. 11) press this button, the mode will (AUTO) ➞ change from (HEAT) ➞...
- Page 38 VARIOUS FUNCTIONS ■ Auto Restart Control ● If there is a power failure, operation will be automatically restarted when the power is resumed with previous operation mode and airfl ow direction. (As the operation is not stopped by remote controller.) ●...
- Page 39 HEATING OPERATION ● Use the device for heating when the outdoor temperature is under 21°C. When it is too warm (over 21°C), the heating function may not work in order to protect the device. ● In order to maintain reliability of the device, please use this device when outdoor temperature is above –15°C.
- Page 40 DEHUMIDIFYING OPERATION Use the device for dehumidifying when the room temperature is over 16°C. When it is under 15°C, the dehumidifying function will not work. Press the MODE selector button so that the display indicates (DEHUMIDIFY). The fan speed is set at LOW. Press (FAN SPEED) button to select SILENT or LOW fan speed.
- Page 41 COOLING OPERATION Use the device for cooling when the outdoor temperature is -10~ 43°C. If indoors humidity is very high (80%), some dew may form on the air outlet grille of the indoor unit. Press the MODE selector button so that the display indicates (COOL).
-
Page 42: Fan Operation
FAN OPERATION User can use the device simply as an air circulator. Press the MODE selector so that the display indicates (FAN). Set the desired FAN SPEED with the (FAN SPEED) button (the display indicates the setting). (HIGH) (MED) (LOW) (SILENT) START Press the... -
Page 43: Powerful Operation
POWERFUL OPERATION ● By pressing (POWERFUL) button during AUTO, HEATING, DEHUMIDIFYING, COOLING or FAN operation, the air conditioner performs at the maximum power. ● During POWERFUL operation, cooler or warmer air will be blown out from indoor unit for COOLING or HEATING operation respectively. -
Page 44: Silent Operation
SILENT OPERATION ● By pressing (SILENT) button during AUTO, HEATING, DEHUMIDIFYING, COOLING or FAN operation, the fan speed will change to ultra slow. ■ To start SILENT operation ● Press (SILENT) button during operation. “ ” is displayed on the LCD. Fan speed will be ultra slow. ■... -
Page 45: Eco Operation
ECO OPERATION There are two kinds of ECO OPERATION with sensor or without sensor, depending on models. Please refer to [Names and Functions of each part] in the unit instruction manual to verify if your unit is equipped with a sensor and read the following instruction on ECO Operation accordingly. ■... - Page 46 ECO OPERATION ■ ECO OPERATION with sensor The sensor detects the presence of people in the room. When nobody is detected, the unit automatically starts enegy saving operation by shifting the set temperature in two steps. By pressing the (ECO) button during AUTO, HEATING, ●...
- Page 47 LEAVE HOME (LH) OPERATION Prevent the room temperature from falling too much when no one is at home. The initial setting temperature is 10°C and the temperature range can be set between 10°C and 16°C. This operation is able to operate by "Continuous operation" or "Day timer operation". Please use "Day timer operation" to set the number of days up to 99 days.
- Page 48 CLEAN (ONE TOUCH CLEAN) OPERATION Drying indoor heat exchanger after cooling operation to prevent mildew. ■ To start CLEAN operation ● Press (CLEAN) button when unit is OFF. Total time taken for One Touch Clean operation is 60 minutes. During this operation, HEATING or FAN operation shall operate.
- Page 49 ONCE TIMER (ON/OFF TIMER) OPERATION OFF TIMER The device can be set to turn off at a preset time. 1. Press (OFF-TIMER) button. blink on the display. 2. Set the "turn-off time" with (TIME) button. 3. After setting, direct the remote controller towards the indoor and press (SEND) button.
- Page 50 ECO SLEEP TIMER OPERATION The timer can be set up to a duration of 7 hours. By pressing (SLEEP) button during AUTO, HEATING, DEHUMIDIFYING, COOLING or FAN operation, the unit shifts the room temperature and reduces the fan speed. It results in energy saving. Set the current time fi...
- Page 51 ECO SLEEP TIMER OPERATION ■ To set ECO SLEEP TIMER and ON TIMER The air conditioner will be turned off by ECO SLEEP TIMER and turned on by ON TIMER. 1. Set the ON TIMER. 2. Press (SLEEP) button and set ECO SLEEP TIMER. Example: In this case, air conditioner will turn off in 2 hours (at 1:38) and it will be turned on at 6:00 the next morning.
-
Page 52: Weekly Timer Operation
WEEKLY TIMER OPERATION It is possible to select Mode A or Mode B. For each mode, up to 6 programs can be set per day. In total, a ● maximum of 42 programs can be set for a week for each mode. If calendar and clock are not set, the reservation setting for WEEKLY TIMER cannot be set. - Page 53 WEEKLY TIMER OPERATION 5. Press (ON-OFF TIMER) button to select ON TIMER or OFF TIMER reservation. 6. Press (TIME) button to set time reservation. 7. Press (TEMP ) button to set temperature reservation. 8. Press (OK) button. The reservations are set. Day, program number, ON reservation, setting temperature will light up.
- Page 54 WEEKLY TIMER OPERATION Step 2: Select Mode A or Mode B and activate or deactivate WEEKLY TIMER. ■ How to select Mode A or Mode B of WEEKLY TIMER setting. 1. Press (WEEKLY) button. blink on the display. (Normally Mode A will blink fi rst). 2.
- Page 55 WEEKLY TIMER OPERATION Step 3: Copy and cancel the reservation schedule. ■ How to copy and paste. Editing the reservation schedule is easy by copying data from one day to another day. 1. Press (WEEKLY) button to select Mode A or Mode B. 2.
- Page 56 WEEKLY TIMER OPERATION Step 3: Copy and cancel the reservation schedule. ■ How to delete WEEKLY TIMER data. [Delete one program number reservation] 1. Press (WEEKLY) button to select Mode A or Mode B. 2. Press (WEEKLY) button for 3 seconds to start editing the reserva- tion schedule.
- Page 57 WEEKLY TIMER OPERATION Step 3: Copy and cancel the reservation schedule. [Delete one day reservation] 1. Press (WEEKLY) button to select Mode A or Mode B. 2. Press (WEEKLY) button for 3 seconds to start editing the reservation schedule. 3. Press (DAY) button to select a day of the week to edit.
-
Page 58: Info Function
INFO FUNCTION ● By pressing (INFO) button, temperature around remote controller and monthly power consumption will be displayed on the remote controller. ● After changing the batteries, direct the remote controller towards the indoor unit and press (INFO) button. Current calendar and clock will be transmitted from indoor unit. ●... - Page 59 OPERATION MODE LOCK The remote controller can be set to fi x the HEATING mode (including FAN), COOLING mode (including FAN) and DEHUMIDIFYING mode (including FAN) operations. ■ Method to lock HEATING mode (including FAN) operation. Press (ECO) and (POWERFUL) buttons simultaneously for about 5 seconds when the remote controller is OFF.
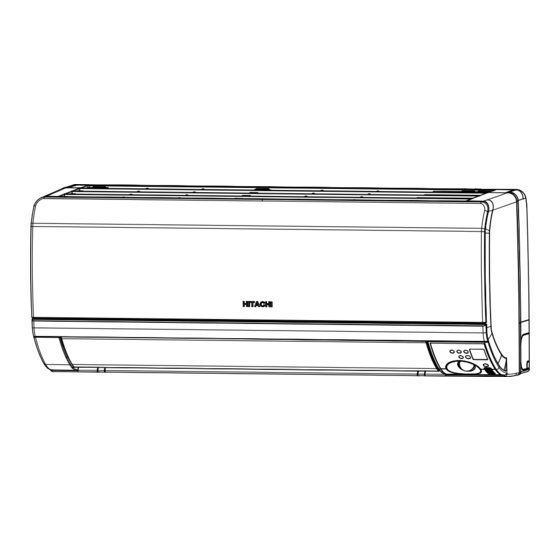
- Page 60 RAK-50PPD / RAK-60PPD Top air suction grille Front cover Discharge grille Vertical deflector Horizontal deflector 60 67.5 -59-...
- Page 61 RAC-50NPD / RAC-60NPD -60-...
- Page 62 RAK-60PPD RAK-50PPD RAK-50PPD RAK-60PPD RAC-50NPD RAC-60NPD -60-...
- Page 63 RAC-50NPD RAC-60NPD JX151XG1 -61-...
- Page 64 MODEL RAK-50PPD/RAC-50NPD & RAK-60PPD/RAC-60NPD IPM P.W.B CN21(BLU) P(+) N(-) COMPRESSOR CAPA P.W.B OUTDOOR CN22(BLU) DRIVE CIRCUIT MOTOR CN24 TAB4 (WHT) 2A FUSE REACTOR EXPANSION CN15 TAB3 VALVE (WHT) CN17 POWER EEPROM (WHT) CIRCUIT CN18 TEST (WHT) CN20 MICON (WHT) 3A FUSE CN27 (WHT) REVERSING SWITCHING VALVE POWER...
- Page 65 Indoor fan motor CN16 T001 XH-7P(Top)WHT/RED C126 12V-A MAIN P.W.B 2、3pin(none) (SW TRANS) (7) (8) WR005B WR005A WR004 C203 YEL 0.5mm YEL 0.5mm L151 C151 R151 RESISTOR RESISTOR DIODE INDICATION RESISTOR D102 GRN 0.5mm Clothing Clothing R152 Clothing C208 0.8over 0.8over SYMBOL VALUETOLERANCE WATTFORM REMARK SYMBOL VALUETOLERANCE WATTFORM...
- Page 66 MODEL : RAC-50NPD/RAC-60NPD REACTOR TAB7 TAB5 MOUNTING FOARMING A : AXIAL INSERTION R : RADIAL INSERTION P : RADIAL INSERTION (7.5mm pitch) H : HAND INSERTION C : CHIP FOR ACT MOUNTING BOARD H : HIC PCB (#HIC-BOARD) 5P C HIC C HIC CIRCUIT TO DETECT INSTANT CURRENT FOR ACT C HIC CIRCUIT TO DETECT EXCESS CURRENT FOR ACT (7-H) (5-G) C HIC A SIDE MOUNTING C HIC C HIC C HIC C HIC C HIC C HIC C HIC...
- Page 67 MODEL : RAC-50NPD/RAC-60NPD REACTOR TAB7 TAB5 COMPR motor C915 R009 MOUNTING FOARMING A : AXIAL INSERTION R : RADIAL INSERTION P : RADIAL INSERTION (7.5mm pitch) DRIVER CIRCUIT H : HAND INSERTION C : CHIP FOR ACT R905 MOUNTING BOARD L001 R907 M : MAIN PCB (#MBOARD-AS) I : IPM PCB (#IPM-BOARD) C : CAPA PCB (#CAPA-BORD) C009 D001 R005 PAM-0V Fan Motor The parts inside the dashed line should Resistance Capacitor Diode Photo Coupler 5P L007 Rating Rating PH-11P (BLUE) Symbol Symbol Symbol Type...
- Page 68 -66-...
- Page 69 -67-...
- Page 70 -68-...
- Page 71 -69-...
- Page 72 RAK-50PPD / RAK-60PPD -70-...
- Page 73 -71-...
- Page 74 -72-...
- Page 75 Lo/Silent (2) The indoor fan is operated in the "Lo" or "Silent" mode. During thermo OFF, indoor fan will be OFF 5 minutes and ON for 1 minute -73-...
- Page 76 -74-...
- Page 77 -75-...
- Page 78 -76-...
- Page 79 -77-...
- Page 80 ECO Operation (With Motion Sensor) In the room Cooling / Heating period In the room period Absent period operation ECO button press Remocon Signal Operation lamp Human sensor No signal No signal Pulse signal Absent flag In the room Timer [MNONTM] [MANON1] [MANOF1]...
- Page 81 -79-...
-
Page 82: Indoor Unit
RAK-50PPD / RAC-50NPD RAK-60PPD / RAC-60NPD COOLING, DEHUMIDIFYING, DEFROSTING OUTDOOR UNIT INDOOR UNIT CONDENSOR COMPRESSOR S-TANK REV-VALVE 4S VALVE (12.7mm)(2/4") EXPANSION VALVE Thermistor 2S VALVE (6.35mm)(1/4") STRAINER RAK-50PPD / RAC-50NPD RAK-60PPD / RAC-60NPD HEATING OUTDOOR UNIT INDOOR UNIT CONDENSOR COMPRESSOR... - Page 83 RAK-50PPD / RAK-60PPD -81-...
- Page 84 -82-...
- Page 85 T001 C126 12V-A (SW TRANS) L151 (7) (8) C151 D102 R151 L001 R152 WR005B WR005A 0.5mm2 D151 C127 8.5V D103 TH001 (6) (11) Drain D131 R134 D101 PC101 IC101 Sorce IC001 /OCP R103 C107 FB/OLP PC101 IC102 (9) (10) C101 R122 -83-...
- Page 86 -84-...
- Page 87 CN16 � IC��� CN16 CN16 CN16 CN16 CN16 -85-...
- Page 88 IC��� -86-...
- Page 89 7. Dip switch FACTORY -87-...
- Page 90 R409 CN4H CN5H CN2H -88-...
- Page 91 -89-...
- Page 92 -90-...
- Page 93 -91-...
- Page 94 IC601 R511 R513 OPERATION OUTPUT -92-...
- Page 95 RAC-50NPD / RAC-60NPD -93-...
- Page 96 -94-...
- Page 97 -95-...
- Page 98 -96-...
- Page 99 -97-...
- Page 100 -98-...
- Page 101 -99-...
- Page 102 -100-...
- Page 103 -101-...
- Page 104 -103-...
- Page 105 -104-...
- Page 106 -105-...
- Page 107 -106-...
- Page 108 -107-...
- Page 109 -108-...
- Page 110 -109-...
- Page 111 -110-...
- Page 112 -111-...
- Page 113 -112-...
- Page 114 -113-...
- Page 115 -114-...
- Page 116 -115-...
- Page 117 -116-...
- Page 118 -117-...
- Page 119 -118-...
- Page 120 -119-...
- Page 121 -120-...
- Page 122 -121-...
- Page 123 -122-...
- Page 124 -123-...
- Page 125 -124-...
- Page 126 -125-...
- Page 127 Measurement continuity where fan motor connector disconnect CN16 CN16 CN16 J S T CN16 During standby,check voltage pin there are voltage more than DC300V -126-...
- Page 128 -127-...
- Page 129 -128-...
- Page 130 -129-...
- Page 131 -130-...
- Page 132 -131-...
- Page 133 -132-...
- Page 134 -133-...
- Page 135 -134-...
- Page 136 SUMMARY OF TROUBLESHOOTING METHOD FOR INDOOR UNIT MODEL : RAK-50PPD / RAK-60PPD Fan Motor Check Checking the Room temperature thermistor. ( - side of multimeter probe) Operation Resistance Test Run 1) Power off the unit. (+) Red (Pin1) & 1) Power ON the unit and 2) Disconnect the thermistor wire from >...
- Page 137 SUMMARY OF TROUBLESHOOTING METHOD FOR OUTDOOR UNIT Test Run MODEL : RAC-50NPD AND RAC-60NPD 1) Remove Terminal 3 connection. Checking the fan motor Checking the IPM IC of IPM P.W.B. 2) Power ON the unit and winding. 1) Power off the unit. wait for 30 seconds.
- Page 138 PART LIST AND DIAGRAM OUTDOOR UNIT MODEL : RAK-50PPD RAK-60PPD -137-...
- Page 139 MODEL RAK-50PPD RAK-50PPD PMRAK-18QPA STEP MOTOR PMRAK- 50PPA REMOTE CONTROL SUPPORT PMRAK- 50PPD P.W.B (MAIN) PMRAK- 50PPD P.W.B RECEIVER PMRAK- 50PPD TANGENTIAL FLOW FAN PMRAK- 50PPD CYCLE-ASSY PMRAK- 50PPD FILTER PMRAK- 50PPD FRONT COVER ASSY PMRAK- 50PPD TERMINAL BOARD (3P)
- Page 140 MODEL RAK-60PPD RAK-60PPD PMRAK-18QPA STEP MOTOR PMRAK- 50PPA REMOTE CONTROL SUPPORT PMRAK- 60PPD P.W.B (MAIN) PMRAK- 50PPD P.W.B RECEIVER PMRAK- 50PPD TANGENTIAL FLOW FAN PMRAK- 50PPD CYCLE-ASSY PMRAK- 50PPD FILTER PMRAK- 50PPD FRONT COVER ASSY PMRAK- 50PPD TERMINAL BOARD (3P) THERMISTOR SUPPORT PMRAS-10C8M PMRAS-25YH4...
- Page 141 PART LIST AND DIAGRAM OUTDOOR UNIT MODEL : RAC-50NPD RAC-60NPD -140-...
- Page 142 MODEL RAC-50NPD RAC-50NPD PMKPNT1 PUSH NUT PMRAC-2226HV COMPRESSOR RUBBER PMRAC-25NH4 OVERHEAT THERMISTOR SUPPORT PMRAC-25NPA ELECTRICAL EXPANSION COIL EXPANSION VALVE PMRAC-25NPA PMRAC-30MH1 TOP COVER PMRAC-50NH4 VALVE (2S) PMRAC-50NH4 VALVE (4S) PMRAC-50NPD COMPRESSOR PMRAC-50NPD P.W.B (MAIN) PMRAC-50NPD CONDENSOR STRAINER (COND) PMRAC-50NPD PMRAC-50NPD CABINET PMRAC-50NPD STRAINER(PIPE)
- Page 143 MODEL RAC-60NPD RAC-60NPD PMKPNT1 PUSH NUT PMRAC-2226HV COMPRESSOR RUBBER PMRAC-25NH4 OVERHEAT THERMISTOR SUPPORT PMRAC-25NPA ELECTRICAL EXPANSION COIL EXPANSION VALVE PMRAC-25NPA PMRAC-30MH1 TOP COVER PMRAC-50NH4 VALVE (2S) PMRAC-50NH4 VALVE (4S) PMRAC-50NPD COMPRESSOR PMRAC-60NPD P.W.B (MAIN) PMRAC-50NPD CONDENSOR STRAINER (COND) PMRAC-50NPD PMRAC-50NPD CABINET PMRAC-50NPD STRAINER(PIPE)