Table of Contents
Advertisement
Quick Links
CD RECEIVER
RECEPTOR CON CD
RECEPTEUR CD
• This unit is equipped with the display demonstration. To cancel it, see page 9.
• Esta unidad está equipada con demostración en la pantalla. Para cancelarla, consulte la página 9.
• Cet appareil est équipé d'une fonction de démonstration des affichages. Pour l'annuler, référez-
vous à la page 9.
For installation and connections, refer to the separate manual.
Para la instalación y las conexiones, refiérase al manual separado.
Pour l'installation et les raccordements, se référer au manuel séparé.
INSTRUCTIONS
MANUAL DE INSTRUCCIONES
MANUEL D'INSTRUCTIONS
KD-SHX900
KD-SHX900
KD-SHX900
SOURCE
HD
OK
BAND
BACK
DISP
MENU
For customer Use:
Enter below the Model No. and Serial
No. which are located on the top or
bottom of the cabinet. Retain this
information for future reference.
Model No.
Serial No.
KD-SHX900
LVT1249-001A
[J]
Advertisement
Table of Contents

Related Manuals for JVC KD-SHX900


Summary of Contents for JVC KD-SHX900
- Page 1 CD RECEIVER KD-SHX900 RECEPTOR CON CD KD-SHX900 RECEPTEUR CD KD-SHX900 SOURCE KD-SHX900 BAND BACK DISP MENU • This unit is equipped with the display demonstration. To cancel it, see page 9. • Esta unidad está equipada con demostración en la pantalla. Para cancelarla, consulte la página 9.
-
Page 2: How To Reset Your Unit
Thank you for purchasing a JVC product. Please read all instructions carefully before operation, to ensure your complete understanding and to obtain the best possible performance from the unit. INFORMATION (For U.S.A.) This equipment has been tested and found to comply with the limits for a Class B digital device, pursuant to Part 15 of the FCC Rules. -
Page 3: Table Of Contents
Contents Graphic Displays ......... 29 How to reset your unit ........2 Basic procedure ..........29 Important! (How to read this manual) ..... 4 Downloading the files ........30 Main Features ..........4 Deleting the files ..........31 Deleting all files ..........33 Preparation (Remote Controller Activating the downloaded files .... -
Page 4: Important! (How To Read This Manual)
Important! • Button operations are explained only with the illustrations as follows: How to read this manual: To make the explanations as simple and easy-to-understand as possible, we have Press briefly. adapted the following methods: • Some related tips and notes are explained later in the sections “More Press repeatedly. -
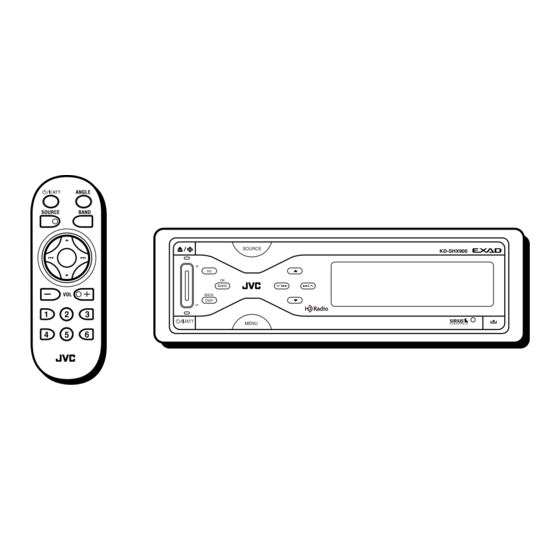
Page 5: Preparation (Remote Controller-Rm-Rk300)
Preparation (Remote Controller—RM-RK300) WARNINGS on the battery: • Store the battery in a place where children cannot reach. If a child accidentally swallows the battery, consult a doctor immediately. (back side) • Do not recharge, short, disassemble, or heat the battery or dispose of it in a fire. Doing any of these things may cause the battery to give off heat, crack, or start a fire. -
Page 6: Parts Identification
Parts Identification Control panel SOURCE BAND BACK DISP MENU 9 p q w Remote controller... - Page 7 1 0 (eject) / p DISP (BACK) button (angle) button • Open/close the control panel (and eject • Change the information shown on the the disc, if any, when opened). display. • Adjust the control panel angle if held • When operating the Menus, it works as then pressed.
-
Page 8: Basic Operations
Basic Operations Adjust the volume Turn on the power The Operation screen for last selected source is recalled. Select the DSP mode and sound mode as you want Select the source • For details, see pages 23 to 28. TUNER SOURCE LINE-IN CD-CH... -
Page 9: Canceling The Display Demonstration
What information is shown on the display The following information are shown commonly for all sources. • If you press DISP on the control panel, the display will show the different information or different screens. (Details about this will be explained later separately for each source.) Current source Current source Sound settings alternately appear... -
Page 10: Setting The Clock
○ ○ ○ ○ ○ ○ ○ ○ ○ Setting the clock Select “Clock Min.” You can also set the clock system to 24 hours or 12 hours. While playing any source... The Main Menu appears on the display. MENU Adjust the minute. -
Page 11: Radio Operations
Today, HD Radio broadcasts are comprised of both analog and digital signals. In the future, some radio stations may choose to remove their analog signals and broadcast an All Digital HD Radio signal. KD-SHX900 is capable of receiving today’s HD radio signals, along with the all- digital broadcasts of the future. - Page 12 What information is shown on the display The following information are shown commonly for tuner operations. • If you press DISP on the control panel, the display will show the different information or different screens (see page 17). While receiving an HD Radio station (Enhanced digital audio) lights up when receiving digital signals of the highest audio quality.
- Page 13 To search for HD Radio stations only— Select “Analog” or “Digital”. HD-Search Auto Digital While listening to any FM/AM Analog broadcast... Hold Auto: Activate automatic reception. • lights up. Digital: To receive digital signals. Select either “UP” or “DOWN.” • lights up.
- Page 14 When a conventional FM stereo While listening to a conventional FM broadcast or FM HD Radio broadcast... broadcast is hard to receive The Main Menu appears on • This function is only valid for conventional MENU the display. FM stations. While listening to an FM broadcast...
-
Page 15: Storing Stations In Memory
○ ○ ○ ○ ○ ○ ○ ○ ○ Storing stations in memory HD Radio station automatic presetting— HD-Memory You can preset any 6 stations for each band. You can automatically store 6 HD Radio stations. FM station automatic presetting—SSM Select the band (FM1 –... -
Page 16: Tuning In To A Preset Station
○ ○ ○ ○ ○ ○ ○ ○ ○ Tuning in to a preset station Manual presetting Ex. Storing an FM station of 92.5 MHz into the preset number 3 of the FM1 band. BAND BAND (in this example, FM1) Select a preset number (1 –... -
Page 17: Changing The Display Pattern
○ ○ ○ ○ ○ ○ ○ ○ ○ ○ ○ ○ ○ ○ ○ ○ ○ ○ ○ Changing the display pattern BACK DISP While receiving an HD Radio station While receiving a conventional station Information about the program is shown. For conventional FM/AM station, “No Text”... -
Page 18: Basic Disc Operations
Basic Disc Operations To fast-forward or reverse the track: Open the control panel Hold Fast-forwards. The unit turns on, then... Reverses. To go to the next or previous tracks: To next tracks. Insert a disc To the beginning of the current track, then the previous tracks. - Page 19 • Display indications when inserting • Display indications when inserting an audio CD or a CD Text: an MP3 or a WMA disc: Total play time Total track number Track number Total track number Disc name* Track name* Total folder number Folder number Track number Appear for CD Texts and CDs if it has been...
-
Page 20: Advanced Disc Operations
Advanced Disc Operations ○ ○ ○ ○ ○ ○ ○ ○ ○ Locating a folder/track Display the track list of the current folder. • This function is only for MP3/WMA discs. BAND To locate a folder by displaying the folder list of the current disc •... -
Page 21: Selecting Playback Modes-Mode
○ ○ ○ ○ ○ ○ ○ ○ ○ Selecting playback modes—MODE Finish the setting. You can use only one of the following playback BAND modes at a time. • Intro Scan: You can play back the first 15 seconds of each track sequentially. •... -
Page 22: Prohibiting Disc Ejection
○ ○ ○ ○ ○ ○ ○ ○ ○ ○ ○ ○ ○ ○ ○ ○ ○ ○ Changing the display pattern Prohibiting disc ejection BACK You can lock a disc in the loading slot. DISP • The control panel will open, but the disc will not eject. -
Page 23: Sound Adjustments-Daily Use
Sound Adjustments — Daily Use ○ ○ ○ ○ ○ ○ ○ ○ Selecting the DSP modes—DSP Select one of the DSP modes You can create a more acoustic sound field such as in a theater, hall, etc. Available DSP modes: •... - Page 24 To make further precise settings for the Select your listening seat position. DSP modes Front You can also make further precise settings to make the best sound field in your car L.Front R.Front compartment. These settings you make are valid for all DSP modes except “V.Cancel.” Setting items: The number of the built-in speakers: Select the number of the speakers built in...
-
Page 25: Making Sound Natural
○ ○ ○ ○ ○ ○ ○ ○ ○ Making sound natural To activate BBE Digital BBE Digital is a new digital processing method This unit is equipped with two features to make to restore the brilliance and clarity of the sound natural—CC Converter and BBE Digital. -
Page 26: Selecting Preset Sound Modes-Eq
○ ○ ○ ○ ○ ○ ○ ○ ○ ○ ○ ○ ○ ○ ○ ○ ○ ○ Selecting preset sound modes—EQ Storing your own sound modes You can select a sound mode suitable to the You can adjust the sound modes and store your music genre. -
Page 27: Sound Adjustments-Preference Settings
Sound Adjustments — Preference Settings ○ ○ ○ ○ ○ ○ ○ ○ Setting the basic sound selection Adjust the item ○ ○ ○ ○ ○ ○ ○ ○ menu—SEL While playing any source... The Main Menu appears on MENU the display. - Page 28 To adjust fader and balance—Fad/Bal: To adjust the input level of each source Adjust fader—speaker output balance between —VolAdjust: the front and rear speakers. This setting is required for each source except FM. Before making an adjustment, select an • Upmost—front only appropriate source for which you want to make •...
-
Page 29: Graphic Displays
Graphic Displays ○ ○ ○ ○ ○ ○ ○ ○ Basic procedure Move the cursor to “PICT” Before starting the following procedure, prepare a CD-R including still images (pictures) and animations (movies). • With Image Converter Color included in the supplied CD-ROM, you can create your Cursor own images and animations. -
Page 30: Downloading The Files
IMPORTANT: • Refer to Image Converter Operation Guide (or Manual) included in the supplied CD-ROM. • Still images (pictures) should have <jcl>, and animations (movies) should have <jca> as their extension code in their file names. • Before you download or delete the files, observe the following: –... -
Page 31: Deleting The Files
○ ○ ○ ○ ○ ○ ○ ○ ○ Deleting the files Select (highlight) a file to download. • If the folder includes more than 6 files, You can delete the files while playing any you can also display the other lists of files source. - Page 32 Delete all pictures. Delete the file. BAND When all pictures are deleted, BAND the PICT Menu appears again. To exit from the Menu operation, press When deletion is complete, the file list MENU again. appears again. • If the PICT Menu appears, there are no files stored.
-
Page 33: Deleting All Files
○ ○ ○ ○ ○ ○ ○ ○ ○ Deleting all files Select “Pict.” You can delete all stored files (pictures and animation) at a time. Repeat steps 3 to 6 on page 29 (in step 6 select “AllDelete”). then BAND Confirm your selection. -
Page 34: General Settings-Psm
General Settings—PSM ○ ○ ○ ○ ○ ○ ○ ○ Basic procedure Select a PSM item You can change the Preferred Setting Mode (PSM) items listed on the table that follows. • When changing the “Pict” setting, see “Activating the downloaded files” on page While playing any source... - Page 35 PSM items Selectable settings Initial Pages Demo ImageLink Demo/Link Demo/ImageLink Demo 9, 36 Standard2 Standard1 WallPaper Wall Paper Standard1 Standard3 Window2 Window1 Window Window Window Window3 Window4 Picture Slideshow Pict Picture Picture Movie Clock Hr Clock hour 1 — 12 (0 — 23) 1 (1:00AM) Clock Min Clock minute...
- Page 36 To show the display demonstration— To show the small window on the Demo/Link display—Window If no operation is done for about 20 seconds, You can show the level meters or scenery display demonstration starts. pictures in the window. • Demo: Display demonstration •...
- Page 37 • Off: Cancels Auto Dimmer. component to use. • On: Always activates Dimmer. • Changer: To use a JVC CD changer. • Sirius: To use a JVC SIRIUS Radio. To adjust the display brightness —Bright To turn on/off the key-touch tone—Beep...
-
Page 38: Other Main Functions
Other Main Functions ○ ○ ○ ○ ○ ○ ○ ○ ○ Assigning titles to the sources Assign a title. 1) Select a character set. You can assign titles to 30 station frequencies, 40 CDs (both in this unit and in the CD BACK DISP changer), and the external component. -
Page 39: Changing The Control Panel Angle
○ ○ ○ ○ ○ ○ ○ ○ ○ ○ ○ ○ ○ ○ ○ ○ ○ ○ Detaching the control panel Changing the control panel angle You can change the angle of the control panel. • When detaching and attaching the control panel, be careful not to damage the connectors. -
Page 40: Basic Cd Changer Operations
Basic CD Changer Operations To select a disc: With JVC MP3-compatible CD changer connected, you can play back your original See “Locating a disc” on page 42. CD-Rs and CD-RWs recorded either in audio To fast-forward or reverse the track: CD format or in MP3 format. - Page 41 (“No Name” also appears if no tag is recorded). It is recommended to use the JVC MP3-compatible CD changer with your unit. • You can also connect the CH-X series CD changers (except CH-X99 and CH-X100). However, they are not compatible with MP3 discs, so you cannot play back MP3 discs.
-
Page 42: Advanced Cd Changer Operations
Advanced CD Changer Operations ○ ○ ○ ○ ○ ○ ○ ○ ○ ○ ○ ○ ○ ○ ○ ○ ○ ○ Locating a disc Locating a folder/track To locate a disc by displaying the disc • This function is only for MP3 discs. lists •... -
Page 43: Selecting Playback Modes-Mode
○ ○ ○ ○ ○ ○ ○ ○ ○ Selecting playback modes—MODE To locate a track by displaying the track list of the current folder You can use only one of the following playback • This function is only possible using the modes at a time. -
Page 44: Changing The Display Pattern
○ ○ ○ ○ ○ ○ ○ ○ ○ • Intro Scan modes Changing the display pattern Mode Plays the beginnings of BACK DISP Track : All tracks of the current disc. • While playing, lights up. Folder*: First tracks of all folders of the current disc. -
Page 45: External Component Operations
(SIRIUS) • For details, see pages 23 to 28. To use JVC SIRIUS Radio, refer to the SIRIUS Radio Setup Manual (separate volume). ○ ○ ○ ○ ○ ○ ○ ○ ○ ○ ○ ○ ○ ○ ○ ○ ○ ○ ○... -
Page 46: Maintenance
Maintenance How to clean the connectors How to handle discs Center holder Frequent detachment will deteriorate the When removing a disc from connectors. its case, press down the center To minimize this possibility, periodically wipe holder of the case and lift the the connectors with a cotton swab or cloth disc out, holding it by the moistened with alcohol, being careful not to... -
Page 47: More About This Receiver
More about This Receiver ○ ○ ○ ○ ○ ○ ○ ○ ○ ○ ○ ○ ○ ○ ○ ○ ○ ○ Basic Operations Basic Disc Operations General Turning off the power • This unit has been designed to reproduce •... - Page 48 When playing a CD-R or CD-RW ImageLink • Use only “finalized” CD-Rs or CD-RWs. • ImageLink will not work in the following • Some CD-Rs or CD-RWs may not play back cases: on this unit because of their disc – If no <jcl> file is included in an MP3/ characteristics, and for the following causes: WMA folder.
- Page 49 ○ ○ ○ ○ ○ ○ ○ ○ ○ General Settings—PSM Storing your own sound modes • If you do not want to store your current • To set the “PICT” setting as you like, adjustment, but only to apply the adjustment download the required files before setting.
-
Page 50: Additional Information
Additional Information Preset EQ mode The table below shows the preset frequency level settings for each EQ mode. Sound Preset equalizing values Mode 60 Hz 150 Hz 400 Hz 1 kHz 2.4 kHz 6 kHz 12 kHz Flat Hard Rock R &... -
Page 51: Troubleshooting
Troubleshooting What appears to be trouble is not always • Sound quality changes when receiving an serious. Check the following points before HD Radio station. ] Fix the reception status by selecting calling a service center. “Digital” or “Analog” (see page 13). •... - Page 52 Disc playback—MP3/WMA Graphics • Disc cannot be played back. • Download does not seem to finish. ] MP3/WMA tracks do not have the ] If you are trying to download an extension code—<mp3> or <wma> in animation of many frames, it takes a quite their file names.
-
Page 53: Specifications
Specifications AUDIO AMPLIFIER SECTION [AM Tuner] Sensitivity: 20 µV Maximum Power Output: Front: 50 W per channel Selectivity: 65 dB Frequency Response: 30 Hz to 15 000 Hz Rear: 50 W per channel Continuous Power Output (RMS): (HD Radio broadcast) 19 W per channel into 4 Ω, 40 Hz Stereo Separation: 85 dB (HD Radio broadcast) Front:... - Page 54 Having TROUBLE with operation? Please reset your unit Refer to page of How to Reset Still having trouble?? USA ONLY Call 1-800-252-5722 http://www.jvc.com We can help you! VICTOR COMPANY OF JAPAN, LIMITED EN, SP, FR 0604MNMMDWJEIN © 2004 VICTOR COMPANY OF JAPAN, LIMITED...
- Page 55 NEGATIVA. Si su vehículo no courant continu de 12 V à masse NEGATIVE . Si votre véhicule voltage inverter is required, which can be purchased at JVC car posee este sistema, será necesario un inversor de tensión, que n’offre pas ce type d’alimentation, il vous faut un convertisseur de...
- Page 56 JVC. concesionario de JVC de equipos de audio para automóviles. • Il est recommandé de connecter des enceintes avec une • It is recommended to connect to the speakers with maximum power of more than 50 W (both at the rear and at the front, with •...
- Page 57 SUBWOOFER OUT (véase diagrama LINE IN—only for KD-SHX900/KD-AR7000 (see diagram SUBWOOFER OUT (voir le diagramme LINE IN (Entrada de linea)—solo para KD-SHX900/KD-AR7000 (véase diagrama LINE IN (Entrée de ligne)—seulement pour le KD-SHX900/KD-AR7000 (voir le diagramme Line out (see diagram Antenna terminal Salida de línea (véase diagrama...
- Page 58 For connecting the JVC SIRIUS Radio, refer to the SIRIUS Radio Setup Manual (separate volume). Para la conexión de la radio JVC SIRIUS, consulte el Manual de configuración de la radio SIRIUS (volumen separado). Pour brancher la radio JVC SIRIUS, référez-vous au Manuel d’installation de la radio SIRIUS (volume séparé).