Chapters
Table of Contents

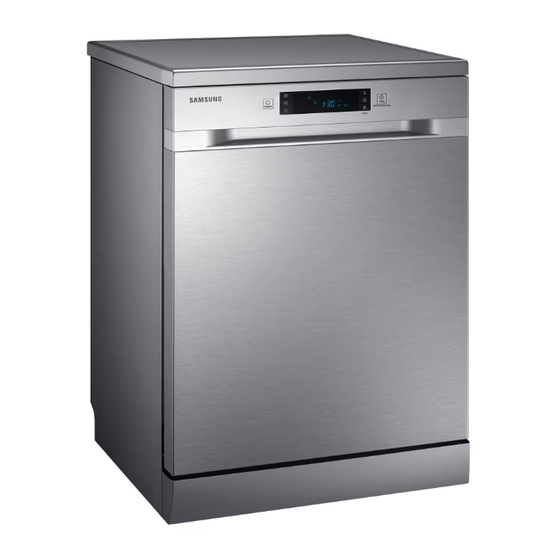
Related Manuals for Samsung DW60C7050 Series


Summary of Contents for Samsung DW60C7050 Series
- Page 1 Lava-louças Manual do usuário Série DW60C7050 DW2900RM_DW60C7050FS_AZ_DD81-04329A-00_BPT.indd 1 DW2900RM_DW60C7050FS_AZ_DD81-04329A-00_BPT.indd 1 2022-12-20 오후 1:52:59 2022-12-20 오후 1:52:59...
- Page 2 Preparação Conectar ao SmartThings (apenas no modelo Wi-Fi) 1. Inicie um leitor de código QR e digitalize a imagem do código QR que aparece no produto. 2. Conecte o aplicativo SmartThings ao produto. Registrar o produto / Ler o manual / Conectar-se aos Serviços 1.
-
Page 3: Table Of Contents
Conteúdo Informações de segurança Instruções de segurança importantes Antes de usar a sua lava-louças Configurar a lava-louças Desembalar a lava-louças Verificar as peças Cumprimento dos requisitos de instalação Painel de controle Visão geral dos ciclos Usar a lava-louças Instruções básicas Remover o cesto superior Carregamento do cesto inferior Carregamento do cesto superior... - Page 4 Conteúdo Solução de problemas Verifique estes pontos se a sua lava-louças… Códigos de informações Apêndice Ajudando o meio ambiente Especificações Garantia Português DW2900RM_DW60C7050FS_AZ_DD81-04329A-00_BPT.indd 4 DW2900RM_DW60C7050FS_AZ_DD81-04329A-00_BPT.indd 4 2022-12-20 오후 1:52:59 2022-12-20 오후 1:52:59...
-
Page 5: Informações De Segurança
Informações de segurança Em todo este manual, você verá observações de Aviso e de Cuidado . Essas importantes instruções de segurança não abrangem todas as possíveis situações que podem ocorrer. Instruções de segurança importantes O que significam os ícones e sinais neste manual do usuário: AVISO Riscos ou práticas pouco seguras que podem resultar em lesões corporais graves ou morte. - Page 6 Informações de segurança AVISO Ao usar a lava-louças, siga as precauções básicas, incluindo o seguinte: Leia todas as instruções antes de usar a lava-louças. Como acontece com qualquer equipamento que usa eletricidade, água e tem peças móveis, há riscos potenciais. Use a lava-louças apenas para a função pretendida.
- Page 7 A lava-louças deve estar devidamente aterrada. Nunca a conecte em uma tomada não aterrada. Veja a página 11 que contém mais informações sobre o aterramento da lava-louças. Após a instalação da lava-louças, verifique se a mangueira de drenagem está conectada corretamente e se não há...
-
Page 8: Antes De Usar A Sua Lava-Louças
Informações de segurança Antes de usar a sua lava-louças AVISO Risco de queda • Não use a lava-louças até que esteja instalada corretamente. • Não empurre pra baixo a porta da lava-louças quando ela estiver aberta. • Não coloque peso excessivo na porta da lava-louças quando ela estiver aberta. -
Page 9: Configurar A Lava-Louças
Assim que a sua nova lava-louças for entregue, desembale-a com cuidado e verifique se há danos. Se a lava-louças estiver danificada, mencione isso na guia de transporte e guarde uma cópia. Não instale a lava-louças e entre em contato com a Central de atendimento Samsung, pelo telefone 4004-0000 ou 0800 555 0000. -
Page 10: Verificar As Peças
Depois de desembalar a lava-louças, certifique-se de que recebeu todas as peças exibidas acima. Caso sua lava-louças tenha sido danificada durante o envio ou caso você não tenha recebido todas as peças, entre em contato com a Central de atendimento Samsung, pelos números 4004-0000 ou 0800 555 0000. -
Page 11: Cumprimento Dos Requisitos De Instalação
A lava-louças deve ser instalada corretamente, de acordo com as instruções no Manual de instalação, antes de ser utilizada. Se você não recebeu um Manual de instalação com a sua lava- louças, é possível obtê-lo no nosso site: http://samsung.com/br. Português DW2900RM_DW60C7050FS_AZ_DD81-04329A-00_BPT.indd 11... -
Page 12: Painel De Controle
Confgurar a lava-louças Painel de controle Quando você pressiona o botão POWER (LIGA/DESLIGA), o display inteiro 01 POWER (LIGA/ liga e desliga. Quando o ciclo selecionado termina, a lava-louças desliga DESLIGA) automaticamente. 02 Ciclos Para selecionar um ciclo de lavagem, pressione este botão. Quando a quantidade de itens a lavar for pequena, pressione o botão 03 Meia carga Meia carga, para economizar energia. - Page 13 Para iniciar um ciclo, pressione o botão START (INÍCIO) antes de fechar a porta. * Reiniciar: Para cancelar a execução do ciclo atual e drenar a lava-louças, 09 START (INÍCIO) pressione e mantenha pressionado o botão START (INÍCIO) por três (3) segundos.
-
Page 14: Visão Geral Dos Ciclos
Confgurar a lava-louças Visão geral dos ciclos Este ciclo detecta o nível de sujeira e inicia automaticamente o ciclo 01 Automático ideal depois de alguns minutos de operação. Use este ciclo para louças com sujeira normal. 02 Normal 03 Pesado Use este ciclo para louças muito sujas e louças com sujeira pesada. -
Page 15: Usar A Lava-Louças
Usar a lava-louças Instruções básicas 1. Abra a porta e coloque as louças (Veja as páginas 16 a 17). - Coloque as louças no cesto superior e no inferior, a não ser que você tenha selecionado Meia carga. - Limpe os restos de comida da louça antes de a colocá-la nos cestos. - Depois de colocar a louça nos cestos, gire os pulverizadores manualmente para verificar se alguma louça interfere com eles. -
Page 16: Remover O Cesto Superior
Usar a lava-louças OBSERVAÇÃO • Você deve usar secantes para obter um melhor desempenho de secagem. Você pode melhorar ainda mais o desempenho de secagem selecionando a opção Função Higiene. • Abra a porta da lava-louças e espere alguns minutos antes de retirar a louça. A louça ficará mais fria e a secagem ficará... -
Page 17: Carregamento Do Cesto Superior
Carregamento do cesto superior O cesto superior foi projetado para pratos pequenos, canecas, copos e itens de plástico marcados como “utilizável em lava-louças”. Coloque seus pratos na lava-louças fazendo duas filas, uma oposta à outra, de modo que a frente de cada prato fique voltada para a parte de trás do prato na frente dele, e o lado de cima dos pratos que ficam no centro da lava-louças fique voltado ao seu oposto. -
Page 18: Usar O Cesto De Talheres
Usar a lava-louças Usar o cesto de talheres Você pode colocar cada faca, colher ou garfo separadamente nos suportes de colher nas tampas da cesta para evitar trincas e descoloração. É possível usar o cesto de talheres com a tampa aberta. 6 1 6 1 6 6 1 6 1 6 1 1 6 1 6... -
Page 19: Usar Detergente
Usar detergente Em todos os ciclos da lava-louças é obrigatório que haja detergente no respectivo reservatório. Adicione a quantidade correta de detergente conforme o ciclo selecionado, para garantir o melhor desempenho. ATENÇÃO Use apenas detergente para lava-louças. O detergente comum produz muita espuma e isso pode diminuir o desempenho da lava-louças ou causar mau funcionamento. - Page 20 Usar a lava-louças 3. Feche o reservatório deslizando e pressionando a tampa para baixo. OBSERVAÇÃO • Não existe um botão separado para configurar o reservatório para usar detergente em pastilha. • Para um melhor resultado de limpeza, especialmente se você tiver itens muito sujos, despeje uma pequena quantidade (cerca de 8 g) de detergente na porta antes de fechá-la.
-
Page 21: Usar Secante
Usar secante Encher o reservatório do secante Quando o indicador Recarga do secante acender no painel de controle, encha novamente com o secante. Sua lava-louças foi concebida para usar apenas secante líquido. O uso de secante em pó obstruirá a abertura do reservatório e causará mau funcionamento da lava-louças. - Page 22 Usar a lava-louças Ajustar a quantidade de secante Você pode ajustar a quantidade de secante usada seguindo as instruções abaixo. Geralmente, quanto maior é a configuração, melhor é o desempenho da secagem. 1. Ligue a lava-louças. 2. Pressione o botão Ciclos durante cinco segundos dentro de 60 segundos depois de ligar a lava- louças.
-
Page 23: Limpeza E Conservação
Limpeza e conservação Limpeza dos fltros Sistema de fltragem Para sua conveniência, colocamos a bomba de drenagem e o sistema de filtragem dentro da cuba, facilitando o acesso. • O sistema de filtragem é formado por três componentes: o filtro principal, o filtro de malha grossa e o filtro de malha fina. - Page 24 Limpeza e conservação Montagem do fltro Para que o desempenho e os resultados sejam os melhores, o conjunto de filtragem deve estar limpo. Os filtros removem eficientemente as partículas de comida da água de lavagem, permitindo que ela recircule durante um ciclo. Por essa razão, convém remover as partículas maiores de alimentos presas no filtro depois cada ciclo de lavagem, enxaguando o filtro semicircular e o copo em água corrente.
-
Page 25: Limpeza Dos Pulverizadores
Limpeza dos pulverizadores É necessário limpar os pulverizadores regularmente. Para remover o pulverizador intermediário, segure a porca e gire o pulverizador no sentido horário para removê-lo. Para remover o pulverizador inferior, puxe-o para cima. Lave os pulverizadores com água morna Abrir e sabão e, em seguida, use uma escova macia para limpar os orifícios. -
Page 26: Proteção Contra Congelamento
Limpeza e conservação Proteção contra congelamento Se a lava-louças for deixada num local sem aquecimento durante o inverno: 1. Desconecte a energia elétrica da lava-louças. 2. Desligue o abastecimento de água e desconecte o tubo de entrada de água na válvula. 3. -
Page 27: Ciclos
Ciclos Gráfco de ciclos Série DW60C7050 Ciclo Automático Normal Pesado Ciclo Express Delicado Pré-lavagem Pré-lavagem Pré-lavagem Pré-lavagem Pré-lavagem Lavagem Lavagem Lavagem Lavagem Lavagem principal principal principal principal principal Sequência dos ciclos Enxaguar ... -
Page 28: Solução De Problemas
Solução de problemas Verifque estes pontos se a sua lava-louças… Problema Possível causa Solução A porta não está totalmente • Verifique se a porta está travada e fechada. completamente fechada. Nenhum ciclo está selecionado. • Selecione o ciclo adequado. O cabo de alimentação de •... - Page 29 Problema Possível causa Solução Sobra detergente no • Verifique se itens grandes, como reservatório. bandejas, tábuas de corte ou vasilhas, etc., não estão bloqueando o reservatório de detergente e impedindo-o de abrir corretamente. • Reorganize a louça para que ela não interfira com a operação de distribuição de detergente.
- Page 30 Solução de problemas Problema Possível causa Solução Não há secante no reservatório. • Verifique o reservatório e adicione secante. • Use um secante líquido. A temperatura da água é baixa • Verifique se a linha de quando a lava-louças está em abastecimento de água está...
- Page 31 Problema Possível causa Solução O som é gerado quando a • Trata-se de uma operação normal. tampa do reservatório está aberta e a bomba de drenagem está operando durante um estágio inicial. A lava-louças não está • Certifique-se de que a lava-louças A máquina é...
-
Page 32: Códigos De Informações
água estão congeladas ou entupidas por partículas estranhas. • Se o problema persistir, feche a válvula de entrada de água e entre em contato com uma central de atendimento autorizada da Samsung. Verificação do termistor • O sensor de temperatura está quebrado (curto-circuito ou circuito aberto). -
Page 33: Apêndice
Apêndice Ajudando o meio ambiente • A sua lava-louças é fabricada com materiais recicláveis. Se você decidir descartar, observe os regulamentos locais de descarte de lixo. Desconecte o cabo, de forma que a máquina não possa ser conectada a uma fonte de energia. •... -
Page 34: Garantia
1 (um) ano. Acessórios adquiridos separadamente possuem o prazo de 90 dias de garantia (garantia legal), conforme Termo de Garantia próprio. A SAMSUNG, sem nenhum custo para o usuário, reparará o produto de acordo com os termos desta garantia. O reparo poderá incluir a substituição de peças, por novas ou recondicionadas equivalentes, dependendo de prévio consentimento do consumidor quanto às últimas. - Page 35 SAMSUNG, através de sua rede de assistências técnicas autorizadas, providenciará o devido reparo do produto, sem custo ao cliente. A SAMSUNG não oferece nenhuma garantia quanto à cobertura, disponibilidade ou nível dos serviços oferecidos por companhias de serviços públicos ou concessionários;...
- Page 36 DÚVIDAS OU COMENTÁRIOS? PAÍS LIGUE OU VISITE NOSSO SITE EM 0800 555 0000 (Demais cidades e regiões) BRAZIL www.samsung.com/br/support 4004-0000 (Capitais e grandes centros) DD81-04329A-00 DW2900RM_DW60C7050FS_AZ_DD81-04329A-00_BPT.indd 36 DW2900RM_DW60C7050FS_AZ_DD81-04329A-00_BPT.indd 36 2022-12-20 오후 1:53:16 2022-12-20 오후 1:53:16...
- Page 37 Dishwasher User manual DW60C7050 Series DW2900RM_DW60C7050FS_AZ_DD81-04329A-00_EN.indd 1 DW2900RM_DW60C7050FS_AZ_DD81-04329A-00_EN.indd 1 2022-12-20 오후 1:40:52 2022-12-20 오후 1:40:52...
- Page 38 Preparation Connecting SmartThings (Wi-Fi model only) 1. Launch a QR code reader app and scan the QR code image on the product. 2. Try connecting the SmartThings app to the product. Registering the product / Reading the manual / Connecting to Services 1.
- Page 39 Contents Safety information Important safety instructions Before using your dishwasher Setting up your dishwasher Unpacking your dishwasher Checking parts Meeting installation requirements Control panel Cycle overview Using your dishwasher Basic guidelines Removing the upper rack Loading the lower rack Loading the upper rack Using the cutlery rack Using detergent Using rinse aid...
- Page 40 Contents Troubleshooting Check these points if your dishwasher… Information codes Appendix Helping the environment Specifications English DW2900RM_DW60C7050FS_AZ_DD81-04329A-00_EN.indd 4 DW2900RM_DW60C7050FS_AZ_DD81-04329A-00_EN.indd 4 2022-12-20 오후 1:40:52 2022-12-20 오후 1:40:52...
-
Page 41: Safety Information
Safety information Throughout this manual, you’ll see Warning and Caution notes. These important safety instructions do not cover all possible situations that might occur. Important safety instructions What the icons and signs in this user manual mean: WARNING Hazards or unsafe practices that may result in severe personal injury or death. CAUTION Hazards or unsafe practices that may result in personal injury or property damage. - Page 42 Safety information WARNING When using the dishwasher, follow basic precautions, including the following: Read all instructions before using the dishwasher. As with any equipment using electricity, water, and moving parts, potential hazards exist. Use the dishwasher only for its intended function. Use only detergents or wetting agents recommended for use in a dishwasher and keep them out of the reach of children.
- Page 43 After the dishwasher is installed, check that the drain hose is properly connected and that there is no leakage from the hose connectors. If the drain hose is loose, it may cause property damage. The water supply line is susceptible to breakage. As time goes by, it becomes less flexible. Check the line periodically.
-
Page 44: Before Using Your Dishwasher
Safety information Before using your dishwasher WARNING Tip-Over Hazard • Do not use the dishwasher until it is correctly installed. • Do not push down on the dishwasher door when it is open. • Do not place excessive weight on the dishwasher door when it is open. Electric Shock Hazard Failure to follow these instructions can result in Fatal accident, fire, or electric shock:... -
Page 45: Setting Up Your Dishwasher
• Once your new dishwasher has been delivered to you, carefully unpack it and check for any damage. If the dishwasher has been damaged, make note of it on the waybill and keep a copy. Do not install the dishwasher, and contact Samsung Customer Service at 4004-0000 or 0800 555 0000. -
Page 46: Checking Parts
When your dishwasher has been unpacked, make sure you’ve received all the parts shown below. If your dishwasher was damaged during shipping, or if you do not have all the parts, contact Samsung Customer Service at 4004-0000 or 0800 555 0000. 01 Door switch... -
Page 47: Meeting Installation Requirements
Your dishwasher must be properly installed in accordance with the Installation Guide before you use it. If you did not receive an Installation Guide with your dishwasher, you can obtain one by visiting our website at www.samsung.com. English DW2900RM_DW60C7050FS_AZ_DD81-04329A-00_EN.indd 11 DW2900RM_DW60C7050FS_AZ_DD81-04329A-00_EN.indd 11... -
Page 48: Control Panel
Setting up your dishwasher Control panel When you press the POWER button, the entire display turns on and 01 POWER off. When the selected cycle is complete, the dishwasher powers off automatically. 02 Cycles To select a wash cycle, press this button. For small amount of loading items, press the Half Load button to 03 Half Load save energy. - Page 49 NOTE • You can select options (Hi-Temp Wash, Sanitize) before starting a cycle. If you change the cycle after selecting an option, the original cycle is reset. • When you pause a cycle by opening the door during operation, press the START button before closing the door to continue the cycle.
-
Page 50: Cycle Overview
Setting up your dishwasher Cycle overview This cycle detects the level of soil and automatically initiates the 01 Auto optimal cycle after a few minutes of operation. Use this cycle for normally soiled dishes. 02 Normal 03 Heavy Use this cycle for heavily soiled dishes and dishes with heavy soil. Select this cycle for lightly soiled, fragile items such as glasses. -
Page 51: Using Your Dishwasher
Using your dishwasher Basic guidelines 1. Open the door and load your dishes (See pages 16 to 17). - Place dishes into the upper and lower racks, unless you have selected Half Load. - Remove any food remains from the dishes before placing them in the rack(s). - After placing the dishes into the racks, rotate the nozzles by hand to check whether any of the dishes will interfere with them. -
Page 52: Removing The Upper Rack
Using your dishwasher NOTE • You should use rinse aids for better drying performance. You can further improve drying performance by also selecting the Sanitize option. • Open the dishwasher’s door, and then wait a few minutes before removing the dishes. The dishes will be cooler and drying will be improved. -
Page 53: Loading The Upper Rack
Loading the upper rack The upper rack has been designed for small plates, mugs, glasses, and plastic items marked “dishwasher safe”. Load your plates into the dishwasher in two half rows, so that the front of each plate faces the back of the plate in front of it, and the open sides of the plates at the center of the dishwasher face each other. -
Page 54: Using The Cutlery Rack
Using your dishwasher Using the cutlery rack You can place each knife, spoon, or fork separately into the spoon stands in the basket’s covers to prevent chipping and discoloration. You can use the cutlery rack with the cover open. 6 1 6 1 6 6 1 6 1 6 1 1 6 1 6 6 1 6 1 6... -
Page 55: Using Detergent
Using detergent All dishwasher cycles require detergent in the detergent compartment. Add the correct amount of detergent for the selected cycle to ensure the best performance. CAUTION Use dishwasher detergent only. Regular detergent produces too much foam, which may decrease the dishwasher’s performance or cause it to malfunction. WARNING •... - Page 56 Using your dishwasher 3. Close the flap by sliding it and then pressing it down. NOTE • There is no separate button that sets the dispenser for tablet detergents. • For better cleaning result, especially if you have very dirty items, pour a small amount (about 0.3 oz or 8 g) of detergent on the door before closing it.
-
Page 57: Using Rinse Aid
Using rinse aid Filling the rinse aid reservoir When the Rinse refill indicator lights up on the control panel, refill with rinse aid. Your dishwasher has been designed to use liquid rinse aid only. Using a powdered rinse aid will clog the reservoir opening and cause the dishwasher to malfunction. - Page 58 Using your dishwasher Adjusting the amount of rinse aid You can adjust the amount of rinse aid used by following the instructions below. Generally. the higher the setting, the better the drying performance. 1. Turn on the dishwasher. 2. Press the Cycles button for five seconds within 60 seconds of turning on the dishwasher.
-
Page 59: Cleaning And Care
Cleaning and care Cleaning the filters Filtering system For your convenience, we have placed the drain pump and filtering system within easy reach inside the tub. • There are three components of the filtering system: the main filter, the coarse filter, and the fine filter. - Page 60 Cleaning and care Filter assembly For best performance and results, the filter assembly must be cleaned. The filter efficiently removes food particles from the wash water, allowing it to be recirculated during a cycle. For this reason, it is a good idea to remove the larger food particles trapped in the filter after each wash cycle by rinsing the semicircular filter and cup under running water.
-
Page 61: Cleaning The Spray Arms
Cleaning the spray arms It is necessary to clean the spray arms regularly. To remove the middle spray arm, hold the nut, and then rotate the arm clockwise to remove it. To remove the lower spray arm, pull out the spray arm upward.Wash the arms in warm, soapy water, and then use a soft brush to clean Open... -
Page 62: Protect Against Freezing
Cleaning and care Protect against freezing If your dishwasher is left in an unheated place during the winter: 1. Cut off electrical power to the dishwasher. 2. Turn off the water supply and disconnect the water inlet pipe from the water valve. 3. -
Page 63: Cycles
Cycles Cycle chart DW60C7050 Series Cycle Auto Normal Heavy Express 60 Delicate Prewash Prewash Prewash Prewash Prewash Mainwash Mainwash Mainwash Mainwash Mainwash Cycle sequence Rinse Rinse Rinse ... - Page 64 Troubleshooting Check these points if your dishwasher… Problem Possible cause Solution The door is not closed • Check if the door is latched and completely. closed completely. No cycle is selected. • Select a proper cycle. The power cable is not •...
- Page 65 Problem Possible cause Solution Detergent remains in the • Make sure large items such as dispenser. cookie sheets, cutting boards, or containers, etc. are not blocking the detergent dispenser and preventing it from opening properly. • Rearrange the dishes so they do not interfere with detergent dispenser operation.
- Page 66 Troubleshooting Problem Possible cause Solution There is no rinse aid in the • Check the dispenser and add dispenser. rinse aid. • Use a liquid type rinse aid. The temperature of the water • Make sure that the water supply is low when the dishwasher line is connected to a hot water is running.
- Page 67 Problem Possible cause Solution Sound is generated when the • This is normal operation. dispenser cover is open and the drain pump is operating in an early stage. The dishwasher is not level. • Ensure the dishwasher is level. Is too noisy. Foreign material (a screw, a •...
- Page 68 • If the problem continues, contact an authorized Samsung service center. Water supply check • Check if the water supply valve is closed, the water supply is suspended, or the water inlet valve or line is frozen or clogged by foreign particles.
- Page 69 Appendix Helping the environment • Your dishwasher is manufactured from recyclable materials. If you decide to dispose of it, please observe local waste disposal regulations. Cut off the power cable so that the appliance cannot be connected to a power source. •...
- Page 70 Memo DW2900RM_DW60C7050FS_AZ_DD81-04329A-00_EN.indd 34 DW2900RM_DW60C7050FS_AZ_DD81-04329A-00_EN.indd 34 2022-12-20 오후 1:41:07 2022-12-20 오후 1:41:07...
- Page 71 Memo DW2900RM_DW60C7050FS_AZ_DD81-04329A-00_EN.indd 35 DW2900RM_DW60C7050FS_AZ_DD81-04329A-00_EN.indd 35 2022-12-20 오후 1:41:07 2022-12-20 오후 1:41:07...
- Page 72 QUESTIONS OR COMMENTS? COUNTRY CALL OR VISIT US ONLINE AT 0800 555 0000 (Demais cidades e regiões) BRAZIL www.samsung.com/br/support 4004-0000 (Capitais e grandes centros) DD81-04329A-00 DW2900RM_DW60C7050FS_AZ_DD81-04329A-00_EN.indd 36 DW2900RM_DW60C7050FS_AZ_DD81-04329A-00_EN.indd 36 2022-12-20 오후 1:41:07 2022-12-20 오후 1:41:07...