Table of Contents
Advertisement
Quick Links
Advertisement
Table of Contents

Related Manuals for HP m500


Summary of Contents for HP m500
- Page 1 Moto Cam User Manual...
- Page 2 This product is designed with waterproof. However, it is forbidden to use a strong jet of water to rinse or flush the product. The warranty will be invalid if the damage is caused by this reason.
-
Page 3: Table Of Contents
Contents About this Guide ....................3 Regulatory notices..................... 3 Prohibition of co-location .................. 3 WEEE Notice ....................... 3 CE Regulatory Notice ..................3 Notes on Installation ..................3 Introduction ..................6 Feature ....................6 Package Contents .................. 6 Product Overview................... 7 1.3.1 Host…………………….. -
Page 4: About This Guide
About this Guide The content in this document is for information purpose and is subject to change without prior notice. We have made every effort to ensure that this User Guide is accurate and complete. However, no liability is assumed for any errors or omissions that may have occurred. - Page 5 4. Use the attached power cable and wires for installation only. Please do not use other brand of power cable or wires to avoid equipment burn or explosion. 5. Please seek for professional shops and technicians for installation. Caution Due to local laws and vehicles safety considerations, do not operate the ...
- Page 6 Explosion Area or in a zone with a “Switch Off 2-way Radios” sign by switching off camcorders that may interfere with the radio frequency. HP Inc. is NOT responsible for the loss of any data/content during operation. Product application disclaimer ...
-
Page 7: Introduction
1 Introduction Thank you for purchasing this advanced Moto Cam. This product is specifically designed for real time video recording when riding scooter. 1.1 Feature Intelligent Noise Reduce, suppress surrounding noise efficiently Dual waterproof camera, super high resolution ... -
Page 8: Product Overview
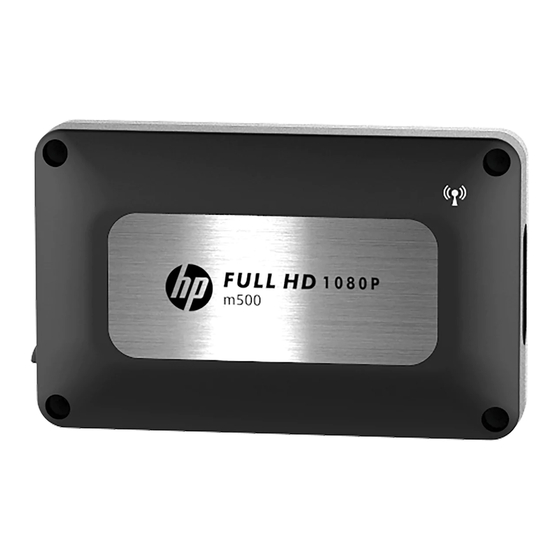
1.3 Product Overview 1.3.1 Host 編號 名 稱 編號 名 稱 Reset Green: to connect GPS(optional) microSD slot Blue: to connect rear camera 5in1 connector Yellow: to connect Easy Pad Red: to connect power cable Black: to connect front camera 1.3.2 Easy Pad Item... -
Page 9: Getting Started
Note: 1. The speed cam alert function must have the speed cam map datum of the country or region built into the GPS of the device. If there is no built-in map datum, this function will not work. If GPS is not installed, this function has no effect either. -
Page 10: Installation
1.5 Installation Below installation is for reference only. Please contact professional shops and technician for installation. 1.5.1 Connect host and accessories Connect host with power cable, front camera, rear camera, GPS and easy pad according to connector’s colors. -
Page 11: Installation Position
1.5.2 Installation position Item Installation position To be fixed on scooter’s head or the central of front case. Front camera Or use rear-view-mirror mount and fix it on the scooter’s rear-view-mirror. To be fixed on the front handle. (refer to above drawing) Easy pad DO NOT put the Microphone toward to front end. -
Page 12: Install Power Cable
1.5.3 Install power cable 1.5.4 Install front cam on rear-view-mirror 1. Dissemble the original mount from the camera. - Page 13 2. Temporarily take out the metal ring and put the Anti-slippery Sticker on the gutter of the camera. Then, peel off the transparent film. Put on metal ring once again. 3. Insert of the Mount in the middle of metal ring, and confirm the white mark on camera is always positioned up.
- Page 14 5. Put the whole set of rear-view-mirror back to motorcycle and fix it steadily. It’s highly recommended to install the Rear-view-mirror Mount on the right side of the motorcycle. If install on the left side, refer to below image for installation rendering.
-
Page 15: Adjust View Angle, Calibrate And Format
1.5.5 Adjust view angle, calibrate and format Use Go Moto Plus app to adjust the view angle. After adjusting your viewing angle, tap in the Go Moto Plus app to enter “Camera Setting”. On first use, be sure to calibrate “Tilt Sensor” and “Format”microSD card. Calibrate the Tilt Sensor: Hold your motorcycle upright, straight and still as possible, then tap on “Tilt Sensor”... -
Page 16: Setting
2 Setting 2.1 Download Go Moto Plus app The Moto Cam allows you to connect to the smart phone to preview, set-up camera, synchronize date/time and calibrate topple-over detection. When using the Moto Cam for the first time, download and install [Go Moto Plus ] app from your smart phone. -
Page 17: Use Go Moto Plus App
2.3 Use Go Moto Plus app Tap [Go Moto Plus] icon to activate the application. The main screen will pop up. Follow the below instruction to operate this application. - Page 18 2.3.1 Camera preview, record, snapshot You can use this feature to preview, record or take snapshot. icon Description Go Moto Plus logo / memory card message Preview Switch front and rear camcorder preview 180 ゜Rotate the preview angle...
- Page 19 Full screen display Start/Stop Record Snapshot Camera File. Recorded files in microSD card. Camera Setting Note: The emergency videos folder in microSD reaches capacity, and will be overwritten by new recordings. Please back up important files. This message icon will eliminate after backup. Map and riding track Note: 1.
- Page 20 2.3.2 Playback, delete, download You can use this feature to playback or delete the file saved in camcorder, or to download the file from camcorder to your mobile device. 1. Touch the icon [Camera File]. 2. The files saved in the camcorder will be displayed on your smart phone. Camcorder will stop recording for a few seconds until your smart phone finishes reading the saved files from camcorder.
- Page 21 3. Tap the right top corner “Select” and pick up the files that you want to delete or download and tap below icon to execute. Icon Description Download the file to smartphone. Delete file from microSD card. Downloaded file will mark as “Downloaded” on preview thumbnail.
- Page 22 2.3.3 Local Album You can use this feature to playback or delete the file that you download in your smart phone. The file can be opened and reviewed without Wi-Fi connection to the camera. Tap the icon [Album] below the home page. The camera will stop recording if it’s connected with app.
- Page 23 Tap the file from preview thumbnail to playback, delete or edit. Icon Description Edit the video or photo. (refer to next step for details.) Share the video or photo to social media. Video screenshot. Save the video or photo to smartphone’s album. When the file is saved, the screen will show a message of “Save to smartphone's album successfully.”...
- Page 24 2.3.4 Camera Setting You can use this feature to set up your car camcorder. Tap icon [Camera Setting]. Refer to the below table for details of menu items and available menu options. Menu Option Description Available options To set up time zone in order to auto sync date/time once GPS is positioned.
- Page 25 Domestic power supply varies by area. It is recommended that you should check the Anti-flicker 50Hz / 60Hz “Table of voltage and frequency of different countries” for the correct setting. Wi-Fi Setting To set up Wi-Fi password Default Return to factory default setting. Yes / Cancel Firmware Indicates the current camcorder’s firmware...
-
Page 26: Supercar 2.0
3 SuperCar 2.0 Please click this link to download particular video/GPS player SuperCar 2.0: https://ftp.digilife.com.tw/SuperCar_2.0/SuperCar_2.0.zip. Item Item Front Camera Playback G-sensor Value Browse File Rear Camera Playback Capture Software Version Fast Backward *Map(riding route) Playback / Pause File List Fast Forward Language and Map Change Volume Playback Duration... -
Page 27: Specification
4 Specification Item Description Image sensor 1/2.9” 2MP CMOS sensor 1920 (H) x 1080 (V) Effective pixels Supports microSD 16GB above and class V30 speed or greater, up to Storage media 128GB Wide Angle Fixed Focus lens Lens Aperture: F/1.55 Focus range 1.5m~Infinity Satellite System... - Page 28 Built-in IEEE 802.11g/n(HT20) Wi-Fi chip: RTL8188FTV Frequency range 2412~2484MHz Wi-Fi Channel Ch1~Ch13 Wi-Fi Max. output 18dBm...