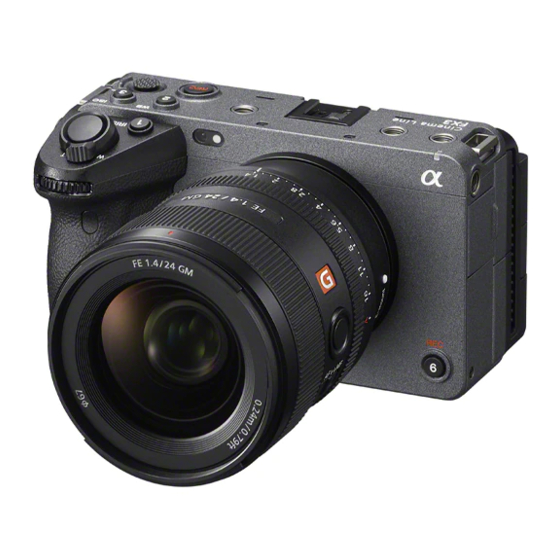
Sony FX3 Startup Manual
Interchangeable lens digital camera e-mount
Hide thumbs
Also See for FX3:
- Quick start manual ,
- Startup manual (179 pages) ,
- Startup manual (2 pages)
Advertisement
Quick Links
C:\Users\gotanda\Desktop\5025887111_GB\5025887111ILMEFX3AF1\01GB.indd
DTP data saved: 2020/11/13 14:57
PDF file created: 2020/11/13 14:57
Interchangeable Lens Digital Camera
E-mount
Startup Guide
ILME-FX3
About the manual for this camera
This guide describes the necessary preparations to start using the
product, basic operations, etc. For details, refer to the "Help Guide"
(web manual).
"Help Guide" (Web manual)
https://rd1.sony.net/help/ilc/2035/h_zz/
ILME-FX3 Help Guide
Preparations
Checking the supplied items
The number in parentheses indicates the number of pieces.
• Camera (1)
• USB Type-C® cable (1)
• Battery charger (1)
• XLR handle unit (1)
• Power cord (mains lead) (1)*
• Accessory shoe kit (1)
(supplied in some countries/regions)
• Body cap (1) (attached to the camera)
* Multiple power cords may be
• Shoe cap (1) (attached to the camera)
supplied with this equipment. Use the
• Handle shoe cap (1) (attached to the
appropriate one that matches your
handle)
country/region. See "Notes on use."
• Startup Guide (this manual) (1)
• Rechargeable battery pack NP-FZ100
• Reference Guide (1)
(1)
Identifying parts
For details on identifying parts, refer to the following Help Guide URL:
https://rd1.sony.net/help/ilc/2035_parts/h_zz/
©2021 Sony Corporation Printed in Thailand
Questo manuale d'istruzione è fornito da trovaprezzi.it. Scopri tutte le offerte per
cerca il tuo prodotto tra le
migliori offerte di Fotocamere Digitali
Preparing the battery pack
5-025-887-11(1)
1
Insert the battery pack into the battery
charger, and connect it to a wall outlet
(wall socket) using the power cord
(supplied).
• Place the battery pack on the battery charger
in the direction of . Slide the battery pack in
the direction of the arrow as far as it will go.
• When charging starts, the CHARGE lamp
on the battery charger will light up. When
charging is finished, the CHARGE lamp and
all indicators turn off.
2
Insert the battery pack into the camera.
• Open the battery cover, and then insert the
battery pack while pressing the lock lever.
Inserting a memory card into the camera
You can use CFexpress Type A memory cards and SD memory cards with this
camera.
Open the memory card cover and insert the memory card into Slot 1.
• Both Slot 1 and Slot 2 support CFexpress Type A memory cards and SD memory
cards.
• Insert a CFexpress Type A memory card with the label facing the monitor, and an
SD memory card with the terminal facing the monitor. Insert the card until it clicks
into place.
• You can change which memory card slot to use by selecting MENU
(Shooting) [Media] [
The Slot 1 is used in the default settings.
Hint
• When you use a memory card with the camera for the first time, it is recommended that you
format the card on the camera for more stable performance of the memory card.
Attaching a lens
1
Remove the body cap from the camera and the rear lens cap from the
rear of the lens.
2
Mount the lens by aligning the two white index marks (mounting
indexes) on the lens and camera.
3
While pushing the lens lightly toward the camera, turn the lens slowly
in the direction of the arrow until it clicks into the locked position.
CHARGE lamp
To a wall outlet
(wall socket)
Lock lever
Slot 1 Slot 2
Rec. Media Settings] [Prioritize Rec. Media].
Mounting indexes
Sony A-FX3 Corpo
Attaching the XLR handle unit (supplied)
By attaching the XLR handle unit, up to
four audio devices can be connected to the
camera simultaneously.
1
Remove the shoe cap from the camera
and the handle shoe cap from the XLR
handle unit.
2
Slide the XLR handle unit into the
Screw
Multi Interface Shoe until it reaches
the back of the shoe. Then, be sure to
securely tighten the screws on either
side using a coin, etc.
Setting the language and the clock
Power switch
Control wheel
Select items : //// /
Confirm : Center button
1
Set the power switch to "" (On) to turn on the camera.
2
Select the desired language and then press the center of the control
wheel.
3
Make sure that [Enter] is selected on the area/date/time confirmation
screen, and then press the center of the control wheel.
4
Select the desired geographic location, set [Daylight Savings], and then
press the center.
• [Daylight Savings] can be switched on/off using the top/bottom of the control
wheel.
5
Set the date format (year/month/day), and press the center.
6
Set the date and time (hour/minute/second), and press the center.
• To set the date and time or geographic location again at a later point, select
MENU
(Setup) [Area/Date] [Area/Date/Time Setting].
Shooting
Shooting movies
MODE (Mode) button
REC (Recording) button
Control wheel
6/REC (Custom 6/Recording) button
1
Press the MODE (Mode) button, use the control wheel to select
(Movie), and then press the center.
2
Press the REC (Recording) button to start recording.
Movie recording can be started from any shooting mode in the default setting.
3
Press the REC button again to stop recording.
o
Screw
Advertisement

Related Manuals for Sony FX3


Summary of Contents for Sony FX3
- Page 1 (Movie), and then press the center. Press the REC (Recording) button to start recording. Movie recording can be started from any shooting mode in the default setting. Press the REC button again to stop recording. ©2021 Sony Corporation Printed in Thailand...
- Page 2 • The monitor is manufactured using extremely high-precision technology, and over 99.99% of For question regarding your product or for the Sony Service Center nearest you, call 1-800-222- the pixels are operational for effective use. However, there may be some small black dots and/ SONY (7669) .