Sony SPP-A700 Operating Instructions Manual
Cordless telephone with answering system
Hide thumbs
Also See for SPP-A700:
- Operating instructions manual (96 pages) ,
- Operation manual (92 pages) ,
- Service manual (52 pages)

Related Manuals for Sony SPP-A700


Summary of Contents for Sony SPP-A700
- Page 1 3-860-469-14 (2) Cordless Telephone with Answering System Operating Instructions Manual de instrucciones SPP-A700 ©1997 by Sony Corporation...
- Page 2 The openings below. Refer to these numbers should never be blocked by placing whenever you call upon your Sony the product on the bed, sofa, rug, or dealer regarding this product. other similar surface. This product should never be placed near or over a Model No.
- Page 3 1. Use only the following type and size battery 5. If your equipment (SPP-A700) causes harm to pack: Sony BP-T16. the telephone network, the telephone company will notify you in advance that 2.
- Page 4 This equipment 7. If trouble is experienced with this equipment generates, uses and can radiate radio frequency (SPP-A700), for repair or warranty energy and, if not installed and used in information, please contact Sony Direct accordance with the instructions, may cause Response Center: Tel 1-800-222-7669.
-
Page 5: Table Of Contents
Table of contents Getting Started 27 Playing back messages 28 Screening incoming calls 6 Read this first 29 Recording a memo 7 Step 1: Checking the package contents 30 Operating from an outside phone 8 Step 2: Setting up the base unit Setting the security code 11 Step 3: Preparing the battery Picking up new messages... -
Page 6: Getting Started
Getting Started Read this first Before you use your phone, you must set it up. Here’s a quick way to set up your phone: Steps 1, 2, 3 and 4. Step 1 (page 7) First, unpack the phone and the supplied accessories. -
Page 7: Step 1: Checking The Package Contents
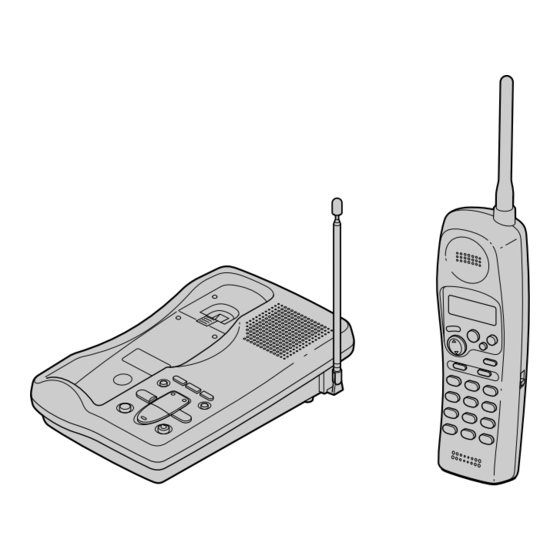
Step 1 Checking the package contents Make sure you have received the following items in the package. If anything is missing, contact your local Sony dealer. Base unit AC power adaptor Handset (AC-T46 or AC-T123) Telephone line cord Wall bracket/stand for base... -
Page 8: Step 2: Setting Up The Base Unit
Step 2 Setting up the base unit Do the following steps: • Choose the best location • Connect the base unit • Choose the dialing mode Choose the best location Where you place the base unit affects the reception quality of the handset. - Page 9 Connect the base unit If you want to hang the base unit on the wall, see page 41. Message counter Hook the cord. To AC outlet To DC IN 9V Align the ¢ AC power adaptor marks. (supplied) To telephone outlet Telephone line cord To LINE (supplied)
- Page 10 Step 2: Setting up the base unit (continued) Notes • Use only the supplied AC power adaptor. Polarity of the plug Do not use any other AC power adaptor. • Connect the AC power adaptor to a continuous power supply. •...
-
Page 11: Step 3: Preparing The Battery Pack
Step 3 Preparing the battery pack Charge the battery pack for more than 12 hours before you start using your phone. Slide open the battery compartment lid of the handset. Connect the battery connector Black with correct polarity (black and red cords). - Page 12 If the battery lasts only a few minutes even after 12 hours of charging, the usable life of the battery has expired and needs replacement. Contact your local Sony authorized dealer or service center, and ask for Sony BP-T16 rechargeable battery pack.
-
Page 13: Step 4: Entering Your Area Code
Step 4 Entering your area code When you use this phone for the first time, or move to an area that has a different area code, you must enter your area code. This is necessary because the phone must distinguish local or long distance calls to properly dial calls from the Caller ID list. -
Page 14: Basics
Basics Making calls Pick up the handset from the base unit. Press (TALK) and wait until “TALK” appears on the display. You then hear a dial tone. If you hear five short error beeps and “OUT OF RANGE” appears on the display, move closer to the base unit. -
Page 15: On-Hook Dialing
If the battery becomes weak during a call The handset will beep every three seconds and i and “BATTERY LOW” appears on the display. Finish your call and charge the battery pack. If this occurs, you cannot use the handset without charging it for more than one minute. -
Page 16: Redialing
Making calls (continued) Redialing Press (TALK) and wait until “TALK” appears on the display. Press (REDIAL/PAUSE) to redial the number last dialed. Note If the number exceeds 32 digits, five short error beeps will alert you that the number can’t be dialed. To check the phone number before redialing While the handset isn’t in use, press (REDIAL/PAUSE). -
Page 17: Receiving Calls
Receiving calls When you hear the phone ring, pick up the handset from the base unit, and press (TALK) . “TALK” appears on the display. When you’re done talking, press (OFF) or replace the handset on the base unit. The display goes off. (CALL WAITING/FLASH) Note The handset may become TALK mode... -
Page 18: Telephone Features
Phone Directory You can dial a number by scrolling through the Phone Directory. You can store up to 20 numbers. Storing phone numbers and names Example: to store “SONY” “123-4567”. Press (PGM). DIRECTORY AREA If “DIRECTORY” is not flashing, press $ to make it flash. - Page 19 Press (PGM). “ENTER NUMBER” appears. Enter the phone number. SONY You can enter up to 16 digits, including a tone 1234567 and a pause, each of which is counted as one digit. Press (PGM). You hear a long confirmation beep, and the name and the number are stored.
-
Page 20: Changing A Stored Name And/Or Phone Number
Phone Directory (continued) Changing a stored name and/or phone number Display the name and phone number you want to SONY change by doing steps 1 and 2 on page 21. 1234567 Press (ENTER). DIAL PGM ERASE 1234567 Press 4 to make “PGM” flash and press (ENTER). -
Page 21: Making Calls From The Phone Directory
Press (ENTER). “DIRECTORY” appears on the display. Press $ to display the name you want to call. The names appear in alphabetical order. SONY 1234567 Press (ENTER). DIAL PGM ERASE 1234567 Press (ENTER) again. The phone number will be dialed. -
Page 22: Paging
Paging You can page the handset from the base unit. Note that you can’t page if the handset is in use. To Page Press (PAGE). The handset rings. When you keep pressing (PAGE), the handset rings continuously. Note You can’t page the handset when its RING ON/OFF is set to OFF. Telephone Features... -
Page 23: Answering Machine Features
Answering Machine Features Preparing the answering machine Note that you can’t operate the base unit while the handset is in use. Setting the day and time Set the day and time so that you can stamp day and time for the incoming messages. -
Page 24: Recording The Greeting
Preparing the answering machine (continued) Notes • Do not allow more than 20 seconds (or 60 seconds when setting the minute) to elapse between each step of the procedure. • If a power interruption occurs, the day and time will be erased. •... -
Page 25: Turning On The Answering Function
Notes • If recording didn’t succeed, you hear five short error beeps. Start over the procedure. • If a call comes in during recording, recording is canceled. Start over the procedure. • If you hear five short error beeps while recording, the recording area may be full. - Page 26 Preparing the answering machine (continued) To select the answering mode There are three options of answering mode. Select the answering mode by setting the RINGER SELECT switch. RINGER SELECT switch Set RINGER SELECT to Mode TS (Toll Saver) If new messages have been recorded, the phone answers at the third ring and records incoming messages;...
-
Page 27: Playing Back Messages
Playing back messages When you come home SPEAKER VOLUME control If the counter shows the number of new messages, press (ERASE) (PLAY/STOP) to play back new messages. Message counter (SKIP) (REPEAT) Additional tasks when playing back messages Do this Adjust the speaker volume Slide SPEAKER VOLUME. -
Page 28: Screening Incoming Calls
Screening incoming calls You can screen calls by leaving the answering function on (see page 25) while you are at home. When a call is answered, you can hear the message being recorded through the base unit (“** ANSWERING **” appears on the display of the handset) but the caller cannot hear you. -
Page 29: Recording A Memo
Recording a memo You can record a “memo” (up to four minutes) as a personal reminder or as a message for other people. You can play back the recorded memo like any incoming messages (see page 27). Press (MEMO). You hear a tone. After the tone, start recording. -
Page 30: Operating From An Outside Phone
Operating from an outside phone You can call from a touch-tone phone and pick up new messages recorded on the phone. First, you just set the security code and turn on the answering function before going out. Setting the security code Press (SET/REC). -
Page 31: Picking Up New Messages
Picking up new messages Call your phone from a touch-tone phone. When you hear the greeting, enter (#), followed by your security code. You hear a long confirmation beep and the greeting stops. Following the number of messages recorded, you’ll hear the new messages. If there are no new messages, the phone stands by for you to enter a control code. -
Page 32: Caller Id Features
Caller ID Features Understanding the Caller ID service Caller ID allows the caller’s phone number to be shown on the display before you answer the call. In order to use this feature, you must first subscribe to Caller ID service. The name of this service may vary depending on your telephone company. -
Page 33: Looking At The Caller Id List
Looking at the Caller ID list The phone stores the data of the last 20 calls received including “OUT OF AREA” and “PRIVATE” calls. It keeps track of all calls received; even if they were not answered. Viewing the Caller ID list You can look through the Caller ID list to check the phone number and/or name of the calls received. -
Page 34: Erasing Data From The Caller Id List
Looking at the Caller ID list (continued) About the “*” mark “*” appears if there are more than two calls SMITH JOHN from the same phone number. The older data 1-201-123-4567 will be replaced by the new data, so the calls are counted as only one call. - Page 35 To erase the entire list at once Display any Caller ID data. SMITH JOHN 1-201-123-4567 Press (ENTER). DIAL PGM ERASE 1-201-123-4567 Press 4 to make “ERASE” flash and press ERASE NO YES ALL (ENTER). 1-201-123-4567 Press 4 to make “ALL” flash, then press ALL ERASE NO YES (ENTER).
-
Page 36: Using The Caller Id List
Using the Caller ID list By using the Caller ID list, you can call back a phone number from the Caller ID list easily, or store numbers from the Caller ID list into the Phone Directory. Calling back a number from the Caller ID list Display the phone number you want to call from the Caller ID list (see page 33). -
Page 37: Storing A Number Of The Caller Id List Into The Phone Directory
Storing a number of the Caller ID list into the Phone Directory Display the name and phone number you want to store from the Caller ID list (see page 33). SMITH JOHN 1-201-123-4567 Confirm the number and press (ENTER). DIAL PGM ERASE 1-201-123-4567 Press 4 to make “PGM”... -
Page 38: To Change The Number Of Digits Of The Phone Number
Using the Caller ID list (continued) To change the number of digits of the phone number If the number of digits of the phone number in the Caller ID list is different from the actual phone number, you need to adjust the number of digits of the phone number to call back or store into the phone directory. -
Page 39: Using "Caller Id With Call Waiting" Service
Using “Caller ID with call waiting” service This telephone is compatible with the “Caller ID with call waiting” service. Make sure that your telephone company offers this service. Like the basic Caller ID service, you need to subscribe to “Caller ID with call waiting”... -
Page 40: Additional Information
Additional Information Resetting the digital security code You normally do not need to set the digital security code. It is assigned to your base unit and handset automatically when you charge the battery pack for the first time (see page 11). However, in the very unlikely event that you suspect another cordless telephone using the same security code, you can change the code manually. -
Page 41: Mounting The Base Unit On A Wall
Mounting the base unit on a wall Reverse the hang-up tab. Hang-up Bundle the telephone line cord and put it in the wall bracket. Plug the AC power adaptor to the DC IN 9V jack, and hook the cord. Attach the wall bracket to the base unit. -
Page 42: Notes On Power Sources
Note: In some areas the disposal of nickel- cadmium batteries in household or business trash may be prohibited. For the Sony Service Center nearest you call 1-800-222-SONY (United States only) Caution: Do not handle damaged or leaking nickel-cadmium batteries. -
Page 43: Troubleshooting
Troubleshooting If you’ve experienced any of the following difficulties while using your phone, use this troubleshooting to help you remedy the problem. Should any problem persist, consult your nearest Sony dealer. Remedy Symptom • Make sure you set up the base unit correctly (page 8). - Page 44 Troubleshooting (continued) Symptom Remedy The handset doesn’t ring when • Set the RING ON/OFF switch to ON. calling from the base unit. • Use the SPEAKER VOLUME control on the base unit You can't hear anything from the speaker. to increase the speaker volume. No time stamp is heard.
- Page 45 Symptom Remedy You cannot dial the number • Make sure you entered your area code correctly from the Caller ID list. (page 13). • You may need to change the number of digits of the phone number (page 38). • This function may not work when the phone is connected to a Private Branch Exchange (PBX).
-
Page 46: Specifications
Specifications General Answering machine Frequency control Maximum recording time Crystal-controlled PLL About 15 minutes, using incorporated IC Operation mode Greeting message FM, duplex Up to 4 minutes Operating channel Incoming message 25 channels Up to 4 minutes/message Dial signal Memo Tone, 10 PPS (pulse) selectable Up to 4 minutes/message Supplied accessories... -
Page 47: Index
Index E, F Adjusting volume Erasing Recording handset volume 14 Caller ID data 34 greeting 24 speaker volume 15 last phone number memo 29 dialed 16 Announcement only 26 Receiving calls 17 messages 27 Answering machine Redialing 16 Phone Directory 20 turning on 25 Ringer Area code 13... - Page 48 Refiérase a estos números cama, sofá, sillón o superficie similar. cada vez que se comunique con su Este producto nunca debe colocarse distribuidor Sony con respecto al cerca de un radiador o calefacción, o producto. encima de éste. Este producto no debe...
- Page 49 PRECAUCIÓN: telefónica. 5. Si su equipo (SPP-A700) produce daños en la red telefónica, la compañía telefónica le Para reducir el riesgo de incendio o lesión a notificará con antelación que es posible que se personas debido a la pila, lea y siga estas requiera la interrupción temporal del servicio.
- Page 50 Este equipo genera, utiliza y puede 7. Si experimenta algún problema con este radiar energía de radiofrecuencia y, si no se equipo (SPP-A700), con respecto a la instala y se usa de acuerdo con las instrucciones, reparación o a la información sobre la puede ocasionar interferencia dañina en las...
- Page 51 Índice Procedimientos 28 Visualización de llamadas entrantes iniciales 29 Grabación de un memorando 6 Lea esto primero 30 Operación desde un teléfono 7 Paso 1: Comprobación del externo contenido del paquete Definición del código de 8 Paso 2: Instalación de la unidad seguridad base Recogida de nuevos mensajes...
- Page 52 Procedimientos iniciales Lea esto primero Antes de utilizar el teléfono, asegúrese de realizar la instalación. En los pasos 1, 2, 3 y 4 se describe un método rápido para la instalación del teléfono. Paso 1 (página 7) En primer lugar, desembale el teléfono y los accesorios suministrados.
- Page 53 Paso 1 Comprobación del contenido del paquete Verifique que el paquete incluye los siguientes elementos. En caso de que falte alguno, póngase en contacto con su proveedor local Sony. Unidad base Adaptador de alimentación Auricular de CA (AC-T46 o AC-T123) Cable de línea telefónica...
- Page 54 Paso 2 Instalación de la unidad base Realice los siguientes pasos: • Elección de la mejor ubicación • Conexión de la unidad base • Elección del modo de marcación Elección de la mejor ubicación La ubicación de la unidad base afecta a la calidad de recepción del auricular y, por tanto, deberá...
- Page 55 Conexión de la unidad base Para montar la unidad base en la pared, consulte la página 41. Contador de mensajes Gancho para el cable. A toma de CA A DC IN 9V Alinee las marcas ¢. Adaptador de alimentación de CA A toma de (suministrado) teléfono...
- Page 56 Paso 2: Instalación de la unidad base (continuación) Notas • Utilice solamente el adaptador de alimentación de CA. Polaridad del enchufe No utilice otros adaptadores de alimentación de CA. • Conecte el adaptador de alimentación de CA a un suministro de alimentación continuo.
- Page 57 Paso 3 Preparación de la batería Antes de utilizar el teléfono, cargue la batería durante más de 12 horas. Deslice la tapa del compartimiento de la batería, situada en el auricular, para abrirla. Haga coincidir el conector de la Rojo Negro batería con la polaridad adecuada (cables rojo y negro).
- Page 58 Si la batería dura sólo unos minutos tras cargarla durante 12 horas, significa que la vida útil de ésta ha expirado y, por tanto, es preciso cambiarla. Póngase en contacto con su proveedor Sony local o con el centro de servicio y solicite una batería recargable Sony BP-T16.
- Page 59 Paso 4 Introducción del prefijo Cuando utilice este teléfono por primera vez o si se traslada a un área cuyo código es diferente, deberá introducir el prefijo. Es necesario para que el teléfono pueda distinguir entre llamada local y llamada a larga distancia y marque correctamente los números de la lista de identificación de llamadas.
- Page 60 Procedimientos básicos Realización de llamadas Levante el auricular de la unidad base. Presione (TALK) y espere hasta que la pantalla muestre “TALK”. A continuación escuchará un tono de marcación. Si oye cinco Interruptor pitidos cortos de error y la pantalla muestra “OUT OF RANGE”, acérquese a la unidad base.
- Page 61 Si la batería pierde potencia durante una llamada El auricular emitirá un pitido cada tres segundos y la pantalla mostrará i y “BATTERY LOW”. Termine la llamada y cargue el paquete de batería. Si esto ocurre, no podrá utilizar el auricular sin antes cargarlo durante más de un minuto.
- Page 62 Realización de llamadas (continuación) Rellamada Presione (TALK) y espere hasta que la pantalla muestre “TALK”. Presione (REDIAL/PAUSE) para volver a llamar al último número marcado. Nota Si el número tiene más de 32 dígitos, cinco pitidos cortos de error le avisarán de que no es posible realizar la llamada.
- Page 63 Recepción de llamadas Cuando suene el teléfono, levante el auricular de la unidad base y presione (TALK). En la pantalla aparece “TALK”. Cuando termine de hablar, presione (OFF) o vuelva a colocar el auricular en la unidad base. La pantalla se apagará. (CALL WAITING/FLASH) Nota El auricular puede quedar ajustado...
- Page 64 Funciones del teléfono Directorio telefónico Es posible marcar números de una lista predefinida. Pueden almacenarse hasta 20 números. Almacenamiento de números de teléfono y nombres Ejemplo: para almacenar “SONY” “123- 4567”. Presione (PGM). DIRECTORY AREA Si “DIRECTORY” no parpadea, presione $ para que lo haga.
- Page 65 Presione (PGM). Aparece “ENTER NUMBER”. Introduzca el número de teléfono. SONY Puede introducir hasta 16 dígitos, incluidos un 1234567 tono y una pausa. Cada uno de estos últimos cuenta como un dígito. Presione (PGM). Se escucha un pitido largo de confirmación y se almacenan el nombre y el número.
- Page 66 Directorio telefónico (continuación) Modificación de nombres y/o números de teléfono almacenados SONY Siga los pasos 1 y 2 de la página 21 para ver en 1234567 la pantalla el nombre y el número de teléfono que desee cambiar. Presione (ENTER).
- Page 67 En la pantalla aparece “DIRECTORY”. Presione $ para ver en la pantalla el nombre al que desee llamar. Los nombres aparecen en orden alfabético. SONY 1234567 Presione (ENTER). DIAL PGM ERASE 1234567 Presione (ENTER) dos veces. Se marca el número de teléfono.
- Page 68 Intercomunicación entre la unidad base y el auricular Es posible intercomunicar el auricular con la unidad base. Si está utilizando el auricular, no es posible establecer la intercomunicación. Para intercomunicar el auricular y la unidad base Presione (PAGE). El auricular sonará. Si mantiene presionado (PAGE), el auricular sonará...
- Page 69 Funciones del contestador automático Preparación del contestador automático Tenga en cuenta que no es posible utilizar la unidad base mientras se está usando el auricular. Ajuste de la fecha y la hora Este ajuste permite indicar la fecha y la hora en los mensajes entrantes. Al reproducir los mensajes, en la grabación escuchará...
- Page 70 Preparación del contestador automático (continuación) Notas • Entre cada paso del proceso no deberán transcurrir más de 20 segundos (o 60 segundos cuando ajusta los minutos). • Si se produce una interrupción de la alimentación, la fecha y la hora se borrarán.
- Page 71 Notas • Si no se ha realizado la grabación, oirá cinco pitidos cortos de error. Empiece de nuevo el proceso. • Si recibe una llamada mientras graba, la grabación se cancelará. Empiece de nuevo el proceso. • Si escucha cinco pitidos cortos de error mientras graba, es posible que el área de grabación esté...
- Page 72 Preparación del contestador automático (continuación) Para seleccionar el modo de contestador Existen tres opciones para el modo de contestador. Para seleccionar un modo, ajuste el interruptor RINGER SELECT. Interruptor RINGER SELECT Ajuste RINGER SELECT en Mode TS (Ahorro de coste de llamada) Si se han grabado mensajes nuevos, el teléfono contesta a la tercera señal de llamada y graba el mensaje entrante;...
- Page 73 Reproducción de mensajes Al regresar a casa Control SPEAKER VOLUME Si el contador muestra el número de mensajes nuevos, (ERASE) presione (PLAY/STOP) para reproducirlos. Contador de mensajes (SKIP) (REPEAT) Tareas adicionales para la reproducción de mensajes Para Realice lo siguiente Ajustar el volumen del altavoz Deslice SPEAKER VOLUME.
- Page 74 Visualización de llamadas entrantes Es posible ver en pantalla las llamadas si deja activada la función de contestador (consulte la página 25) mientras está en casa. Cuando el teléfono responde una llamada, puede escuchar cómo se graba el mensaje en la unidad base (la pantalla del auricular muestra “** ANSWERING **”) sin que la persona que llama pueda oírle.
- Page 75 Grabación de un memorando Es posible grabar un pmemorandoa (máximo de cuatro minutos) como recordatorio personal o como mensaje para otra persona. El memorando se puede reproducir igual que cualquier mensaje entrante (consulte la página 27). Presione (MEMO). Oirá un tono. Después del tono, comienza la grabación.
- Page 76 Operación desde un teléfono externo Es posible llamar desde un teléfono de tonos y recoger los mensajes grabados. Basta con definir el código de seguridad y activar la función de contestador antes de salir. Definición del código de seguridad Presione (SET/REC). Presione (ANSWER ON/OFF).
- Page 77 Recogida de nuevos mensajes Llame a su teléfono desde un teléfono de tonos. Cuando oiga el saludo, introduzca (#) seguido de su código de seguridad. Cuando escuche un pitido largo de confirmación, el saludo se interrumpirá. A continuación del número de mensajes grabados, escuchará...
- Page 78 Funciones de identificación de llamadas Descripción del servicio de identificación de llamadas Este servicio permite que el número de teléfono de la persona que llama aparezca en la pantalla antes de responder la llamada. Para usar esta función, primero es necesario contratar el servicio correspondiente. Es posible que el nombre de este servicio varíe según la compañía telefónica.
- Page 79 Consulta de la lista de identificación de llamadas El teléfono almacena los datos de las últimas 20 llamadas recibidas, incluidas las llamadas “OUT OF AREA” y “PRIVATE”. Registra todas las llamadas recibidas, incluso aquellas que no se han contestado. Visualización de la lista de identificación de llamadas Es posible consultar la lista de identificación de llamadas para comprobar el número de teléfono y/o el nombre de las personas que han llamado.
- Page 80 Consulta de la lista de identificación de llamadas (continuación) La marca “*” “*” aparece si hay más de dos llamadas del SMITH JOHN mismo número de teléfono. Los datos más 1-201-123-4567 recientes sustituyen a los más antiguos, por lo que las dos llamadas se consideran una sola. Borrado de datos de la lista de identificación de llamadas Los datos antiguos se borran automáticamente al recibirse la llamada número 21;...
- Page 81 Para borrar la lista completa de una vez Visualice los datos de identificación de una SMITH JOHN llamada. 1-201-123-4567 DIAL PGM ERASE Presione (ENTER). 1-201-123-4567 Presione 4 para que “ERASE” parpadee y ERASE NO YES ALL presione (ENTER). 1-201-123-4567 Presione 4 para que “ALL” parpadee y después ALL ERASE NO YES presione (ENTER).
- Page 82 Uso de la lista de identificación de llamadas Con la lista de identificación de llamadas es posible devolver fácilmente la llamada a un número de la lista. También es posible almacenar números de la lista de identificación de llamadas para marcación rápida.
- Page 83 Almacenamiento de números de la lista de identificación de llamadas para marcación rápida Visualice el nombre y el número de teléfono de la lista identificación de llamadas que desee almacenar (consulte la página 33). SMITH JOHN 1-201-123-4567 Confirme el número y presione (ENTER).
- Page 84 Uso de la lista de ID de llamada (continuación) Para cambiar el número de dígitos del número de teléfono Si el número de dígitos del número de teléfono de la lista de ID de llamada difiere del número de teléfono real, es preciso ajustar el número de dígitos del número de teléfono para devolver la llamada o almacenarlo en el directorio telefónico.
- Page 85 Uso del servicio “Identificación de llamadas con llamada en espera” Este teléfono es compatible con el servicio “Identificación de llamadas con llamada en espera”. Cerciórese de que su compañía telefónica ofrece este servicio. Al igual que con el servicio básico de identificación de llamadas, para usar el servicio de “Identificación de llamadas con llamada en espera”...
- Page 86 Información adicional Restablecimiento del código de seguridad digital Normalmente no es necesario definir el código de seguridad digital. Éste se ha asignado automáticamente a la unidad base y al auricular al cargar la batería por primera vez (consulte la página 11). Sin embargo, en el caso poco probable de que sospeche que otro teléfono inalámbrico está...
- Page 87 Montaje de la unidad base en la pared Lengüeta de Invierta la lengüeta de suspensión. suspensión Enrolle el cable de línea telefónica y colóquelo en la abrazadera de pared. Enchufe el adaptador de alimentación de CA a la toma DC IN 9V y enganche el cable.
- Page 88 Usted podrá ayudar a conservar el medio ambiente devolviendo las baterías que no desee utilizar a un centro de reparaciones Sony para su recopilación, reciclado, y Interrupción del suministro eliminación apropiada. eléctrico Nota: En ciertas zonas, puede estar prohibido desechar baterías de níquel-...
- Page 89 Solución de problemas Si al utilizar el teléfono surge alguna de estas dificultades, aplique estas recomendaciones para solucionar el problema. En caso de que el problema persista, consulte a su proveedor Sony más próximo. Solución Síntoma • Verifique que ha instalado la unidad base Se escuchan cinco pitidos cortos correctamente (página 8).
- Page 90 Solución de problemas (continuación) Síntoma Solución El auricular no emite la señal • Ajuste el interruptor RING ON/OFF en ON. de llamada cuando se llama desde la unidad base. No se escucha el sonido por el • Utilice el control SPEAKER VOLUME de la unidad base para aumentar el volumen del altavoz.
- Page 91 Síntoma Solución El nombre y/o el número de • Compruebe si ha contratado el servicio “Identificación teléfono de la persona que de llamadas con llamada en espera” (consulte la llama no aparecen en la página 39). • Compruebe que nadie está hablando en la misma pantalla durante una llamada en espera.
- Page 92 Especificaciones General Unidad base Control de frecuencia Fuente de alimentación PLL controlado por cristal de cuarzo DC 9V desde adaptador de alimentación de Modo de funcionamiento Tiempo de carga de la batería FM, dúplex Aprox. 12 horas Canal de operación Dimensiones 25 canales Aprox.
- Page 93 Índice alfabético Ajuste de volumen Identificación de llamadas Operación desde un teléfono externo 30 volumen del altavoz 15 almacenamiento para OUT OF AREA 32 volumen del auricular marcación rápida 37 P, Q devolución de llamadas Altavoz 15 Prefijo 13 función de coincidencia PRIVATE 32 de memoria 32 Batería...
- Page 94 Sony Corporation Printed in Taiwan, R.O.C.