
Related Manuals for Siemens CM924G1 1B Series


Summary of Contents for Siemens CM924G1 1B Series
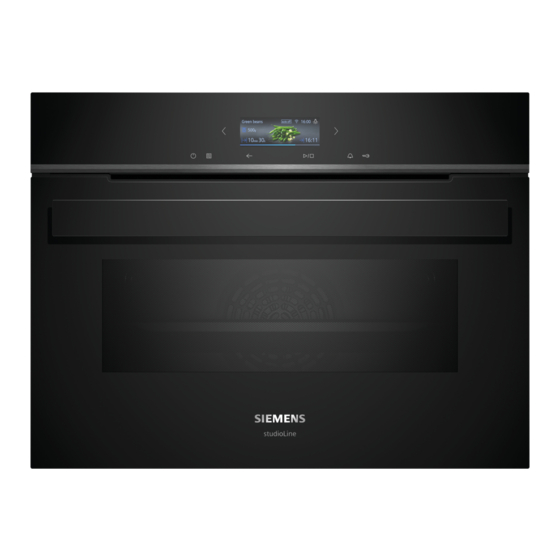
- Page 1 Oven CM924G1.1B User manual and installation instructions Register your product on My Siemens and discover exclusive ser- vices and offers. siemens-home.bsh-group.com/welcome The future moving in. Siemens Home Appliances...
-
Page 2: Table Of Contents
en Safety Futher information and explanations are available online: Table of contents INSTALLATION INSTRUCTIONS ....... 39 27.1 General installation instructions....... 39 INFORMATION FOR USE Safety .............. 2 1 Safety Preventing material damage ....... 6 Observe the following safety instructions. Environmental protection and saving en- 1.1 General information ergy ............... -
Page 3: Safety
Safety en When the cooking compartment is hot, any al- equate experience and/or knowledge, coholic vapours inside may catch fire. The ap- provided that they are supervised or have been instructed on how to use the appliance pliance door may spring open. Hot steam and jets of flame may escape. -
Page 4: Preventing Material Damage
en Safety Alcoholic vapours may catch fire in the hot WARNING ‒ Risk of suffocation! cooking compartment, and the appliance Children may put packaging material over door may spring open and may fall off. The their heads or wrap themselves up in it and door panels may shatter and fragment. - Page 5 Safety en Using the appliance for anything other than its WARNING ‒ Risk of explosion! intended purpose is dangerous. This is be- Liquids and other food may easily explode cause, for instance, overheated slippers, pil- when in containers that have been tightly lows filled with grain or cereal, sponges and sealed.
- Page 6 en Preventing material damage Never operate the appliance if the cooking WARNING ‒ Risk of electric shock! compartment door or the door seal is dam- The appliance uses a high voltage. aged. Microwave energy may escape. ▶ Never remove the casing. ▶ Never use the appliance if the cooking WARNING ‒ Risk of serious harm to compartment door, the door seal or the health!
-
Page 7: Environmental Protection And Saving En- Ergy
Environmental protection and saving energy en Placing aluminium containers in the appliance may 2.2 Microwave cause sparks, which will damage the appliance. Follow these instructions when using the microwave. Do not use aluminium containers in the appliance. ▶ ATTENTION! Operating the appliance without food in the cooking Metal touching the wall of the cooking compartment compartment may lead to overloading. - Page 8 en Familiarising yourself with your appliance 4 Familiarising yourself with your appliance 4.1 Control panel Symbol Meaning WiFi signal strength for Home Connect. You can use the control panel to configure all functions The more lines of the symbol are filled, of your appliance and to obtain information about the the better the signal.
-
Page 9: Operating Modes
Operating modes en Lighting Button Function One or more oven lights illuminate the cooking com- Select the timer. partment. → "Setting the timer", Page 14 When you open the appliance door, the light in the Press and hold for approx. 4 seconds: cooking compartment switches on. If the appliance Activate or deactivate the childproof door remains open for longer than 15 minutes, the light lock. - Page 10 en Operating modes Symbol Type of heating Temperature What it's used for and how it works range Possible additional functions 2D hot air 30 - 230 °C Bake or roast on one level. The fan in the back panel of the oven distributes the heat evenly throughout the cooking compartment.
-
Page 11: Accessories
Accessories en Note: The maximum microwave output setting "Boost" is not designed for heating food. To protect the appli- ance, the microwave output is gradually reduced to 600 watts during the first few minutes. Maximum output is made available again after a cooling period. 6 ... -
Page 12: Before Using For The First Time
7 Before using for the first time Configure the settings for initial start-up. Clean the ap- 7.2 Cleaning the appliance before using it pliance and accessories. - Page 13 Basic operation en Changing the temperature 8.4 Interrupting the operation Once the operation has started, you can change the You can interrupt the operation and then continue temperature at any time. again. Press the temperature. To interrupt the operation, press . Change the temperature using ...
-
Page 14: Time-Setting Options
en Time-setting options 9 Time-setting options For an operation, you can set the cooking time and the 9.2 Setting the end time time at which the operation should be finished. The You can delay the time at which the cooking time for timer runs independently of the operation. -
Page 15: Microwave
Microwave en Set the timer using or or directly via the adjust- Changing the timer ment bar. You can change the timer at any time. If required, use to reset the adjustment value. Press the ... - Page 16 en Microwave Set the cooking time using or or directly via the 10.2 Setting options with the microwave adjustment bar. You can use the microwave on its own or in combina- If required, use to reset the adjustment value. tion with a different operating mode.
-
Page 17: Dishes
Dishes en If required, you can select other settings and re- Changing added microwave ‒ start the operation. You can change or deactivate the added microwave at When the food is ready, use to switch the ap- ‒ any time. pliance off. -
Page 18: Favourites
en Favourites When the operation has finished, the appliance auto- 11.5 Automatic switch-off function matically stops heating. The automatic switch-off function for the dishes al- To achieve an optimal cooking result, remove your dish lows you to bake and fry without any stress. from the cooking compartment once the operation has finished. -
Page 19: Home Connect
Home Connect en Tone Selection Personalisa- Selection tion Button tone ¡ On ¡ off Elapsed cook- ¡ Display ing time ¡ Do not display Signal tone ¡ Very short duration Microwave ¡ On ¡ Short duration baking tray ¡ Medium duration ¡... - Page 20 en Home Connect Open the Home Connect app and scan the follow- 15.1 Setting up Home Connect ing QR code. Requirements ¡ The appliance is connected to the power supply and is switched on. ¡ You have a mobile device with a current version of the iOS or Android operating system, e.g.
-
Page 21: Cleaning And Servicing
Cleaning and servicing en stalling it via the Home Connect app if you are in your 15.3 Operating the appliance with the WLAN home network (Wi-Fi). The Home Connect app Home Connect app will inform you once installation is successful. You can use the Home Connect app to set and start Notes the appliance remotely. - Page 22 en Cleaning and servicing Using oven cleaner in a hot cooking compartment If different cleaning agents are mixed together, there damages the enamel. may be a chemical reaction between these. Never use oven cleaner in the cooking compartment Do not mix cleaning agents. ▶...
- Page 23 Cleaning aid humidClean en Area Suitable cleaning agents Information Shelf supports ¡ Hot soapy water Soak any heavily soiled areas and use a brush or steel wool. Note: To clean thoroughly, detach the shelf supports. → "Rails", Page 25 Accessories ¡ Hot soapy water Soak any heavily soiled areas and use a brush or steel wool.
-
Page 24: Drying
en Drying 18 Drying To prevent residual moisture, dry the cooking compart- 18.1 Drying the cooking compartment ment following microwave-only operation. You can dry the cooking compartment by hand or use ATTENTION! the "Drying" function. If there is water on the cooking compartment floor Allow the appliance to cool down. -
Page 25: Rails
Rails en Push the front pane in at the bottom until you Screw both screws back in on the left and right of hear it click into place. the appliance door. Open the appliance door slightly and remove the tea towel. -
Page 26: Troubleshooting
en Troubleshooting Hook the rear retainers with the hook into the top 20.3 Attaching the rails hole and push them into the bottom hole . Set the rear rail at an angle, hooking it into the re- tainers at the top and bottom ... - Page 27 Next time, set lower or higher values. ▶ Tip: A lot of other information about the food preparation and corresponding adjustment values can be found in the Home Connect app or on our website siemens-home.bsh- group.com . 22 Disposal 22.1 Disposing of old appliance...
-
Page 28: Source Software
2014/53/EU. appliance. A detailed RED Declaration of Conformity can be found online at siemens-home.bsh-group.com among the ad- ditional documents on the product page for your appli- ance. Only applies to Great Britain 2.4 GHz band (2400–2483.5 MHz): Max. -
Page 29: How It Works
Home Connect app or on our website ¡ Place the poultry onto the cookware breast-side or siemens-home.bsh-group.com . skin-side down. ¡ Turn roasting joints, grilled items or whole fish after 26.1 General cooking tips approx. - Page 30 en How it works ¡ When roasting meat, there should be at least 3 cm between the food and the lid. The meat may ex- You can find more microwave recipes here: pand. ¡ → "Defrosting", Page 33 ¡ → "Warming up food using the microwave mode", WARNING ‒ Risk of scalding! Page 34 Very hot steam may escape when the lid is opened...
- Page 31 How it works en 26.6 List of foods Recommended settings for a variety of foods, sorted into food categories. Recommended settings for various types of food Food Accessories/cook- Shelf pos- Type of Temperature in Microwave Cooking ware ition heating °C/grill setting power setting time in → Page 9 in W...
- Page 32 en How it works Food Accessories/cook- Shelf pos- Type of Temperature in Microwave Cooking ware ition heating °C/grill setting power setting time in → Page 9 in W mins Turkey, crown Uncovered cook- 150-160 20+15 ware → "Foot- notes_Ap- plica- tion_Cav- ity_GB", Page 000 Turkey, whole, 4-8 kg Universal pan ...
- Page 33 How it works en Recommended settings for desserts and compote Food Accessory/cook- Shelf pos- Type of Temperature in Microwave Cooking ware ition heating °C power setting time in → Page 9 in W mins Blancmange made from Covered cookware blancmange powder Yoghurt Individual moulds Cooking...
- Page 34 en How it works Food Accessory/cook- Shelf pos- Type of Temperature in Microwave Cooking ware ition heating °C power setting time in → Page 9 in W mins Bread rolls Wire rack 140-160 Cake, moist, 500 g Uncovered cook- 1. 180 1.
- Page 35 How it works en Food Accessory/cook- Shelf pos- Type of Temperature in Microwave Cooking ware ition heating °C power setting time in → Page 9 in W mins Vegetables, frozen, Covered cookware 8-12 loose, 250 g Plated meal, chilled, Covered cookware 1 portion Soup, stew, chilled, Covered cookware...
- Page 36 en How it works Food Accessory/cook- Shelf pos- Type of Temperature in Microwave Cooking ware ition heating °C power setting time in → Page 9 in W mins Fruit pie 20 cm diameter 170-190 60-75 plate Pie tin Quiche Dark coated 190-210 35-45 quiche tin...
- Page 37 How it works en Roasting and braising ¡ For 1.5 kg, the cooking time would therefore be 95 minutes. Cooking tips for roasting and braising Cooking time range, e.g. 10-15: Follow this information when frying or braising poultry ¡ Your food will be ready within the specified range of or meat.
- Page 38 en How it works Recommended settings for baking Food Accessory/cook- Shelf pos- Type of Temperature in Microwave Cooking ware ition heating °C power setting time in → Page 9 in W mins Shortbread Baking tray 150-160 20-30 Shortbread Baking tray 140-150 25-35 Small cakes...
-
Page 39: Installation Instructions
Installation instructions en Food Accessory/cook- Shelf pos- Type of Temperature in Microwave Cooking ware ition heating °C power setting time in → Page 9 in W mins Cakes Uncovered cook- 190-210 12-18 ware Chicken, halved Uncovered cook- 180-200 25-35 ware 27 ... - Page 40 en Installation instructions 27.3 Installation below a worktop ATTENTION! Carrying the appliance by the door handle Observe the installation dimensions and the installation could break it. The door handle cannot sup- instructions when installing below a worktop. port the weight of the appliance. ▶...
- Page 41 Installation instructions en ¡ To ensure that the appliance door can be opened, 27.5 Installation in a tall unit you must take the minimum dimensions into consid- Observe the installation dimensions and the installation eration when installing in a corner. The dimension ...
- Page 42 en Installation instructions 27.8 Installing the appliance Slide the appliance in fully and centre it. Screw the appliance into place. For handleless kitchens with vertical bar handle strips: Attach a suitable filling piece in order to cover ‒ any sharp edges and to guarantee a safe install- ation.
- Page 44 Valid within Great Britain: Imported to Great Britain by BSH Home Appliances Ltd. Grand Union House Old Wolverton Road Wolverton, Milton Keynes MK12 5PT United Kingdom Manufactured by BSH Hausgeräte GmbH under the trademark licence of Siemens AG *9001756140* 9001756140 (020613)