Table of Contents
Advertisement
Quick Links
Advertisement
Table of Contents

Related Manuals for Epson WorkForce Pro WFC5210DW


Summary of Contents for Epson WorkForce Pro WFC5210DW
- Page 1 User's Guide NPD5813-01 EN...
-
Page 2: Table Of Contents
Loading Long Papers..... 31 Using Epson iPrint..... . . 67 List of Paper Type. - Page 3 User's Guide Contents Uninstalling Applications - Windows..88 Replacing Ink Supply Units and Other Uninstalling Applications - Mac OS..89 Consumables Printing Using a Network Service....90 Checking the Status of the Remaining Ink and the Maintenance Box.
- Page 4 Where to Get Help......122 Technical Support Web Site....122 Contacting Epson Support....122...
-
Page 5: About This Manual
About This Manual Introduction to the Manuals The following manuals are supplied with your Epson printer. As well as the manuals, check the various types of help information available from the printer itself or from the Epson software applications. ❏ Important Safety Instructions (paper manual) Provides you with instructions to ensure the safe use of this printer. - Page 6 User's Guide About This Manual Searching by keyword Click Edit > Advanced Search. Enter the keyword (text) for information you want to find in the search window, and then click Search. Hits are displayed as a list. Click one of the displayed hits to jump to that page. Jumping directly from bookmarks Click a title to jump to that page.
-
Page 7: Marks And Symbols
User's Guide About This Manual Marks and Symbols Caution: Instructions that must be followed carefully to avoid bodily injury. Important: Instructions that must be observed to avoid damage to your equipment. Note: Provides complementary and reference information. & Related Information Links to related sections. - Page 8 User's Guide About This Manual ❏ Microsoft ® ® Windows Server 2008 R2 operating system ❏ Microsoft ® ® Windows Server 2008 operating system ❏ Microsoft ® ® Windows Server 2003 R2 operating system ❏ Microsoft ® ® Windows Server 2003 operating system Mac OS In this manual, "Mac OS"...
-
Page 9: Important Instructions
❏ Some of the symbols used on your printer are to ensure safety and proper use of the printer. Visit the following Web site to learn the meaning of the symbols. http://support.epson.net/symbols ❏ Use only the power cord supplied with the printer and do not use the cord with any other equipment. Use of other cords with this printer or the use of the supplied power cord with other equipment may result in fire or electric shock. -
Page 10: Printer Advisories And Warnings
User's Guide Important Instructions ❏ Be careful when you handle used ink supply units, as there may be some ink around the ink supply port. ❏ If ink gets on your skin, wash the area thoroughly with soap and water. ❏... -
Page 11: Advisories And Warnings For Using The Printer
User's Guide Important Instructions Advisories and Warnings for Using the Printer ❏ Do not insert objects through the slots in the printer. ❏ Do not put your hand inside the printer during printing. ❏ Do not touch the white flat cable inside the printer. ❏... - Page 12 User's Guide Important Instructions Settings > General Settings > System Administration > Restore Default Settings > All Settings...
-
Page 13: Printer Basics
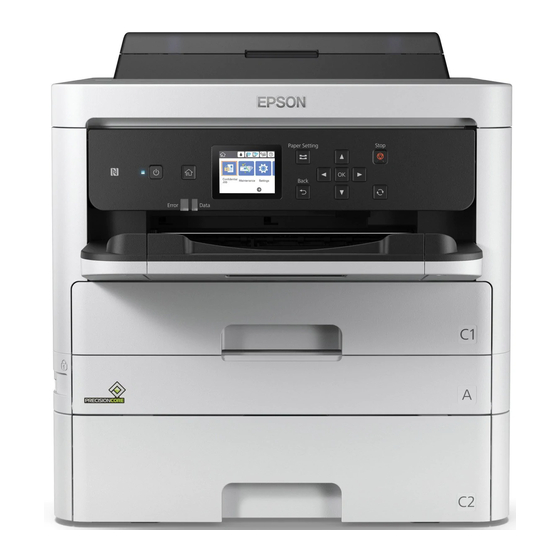
User's Guide Printer Basics Printer Basics Part Names and Functions Control panel Operates the printer. You can change the angle of the control panel. Paper cassette 1 or Paper cassette (C1) Loads paper. Paper cassette 2 (C2) Optional paper cassette unit. Loads paper. - Page 14 User's Guide Printer Basics Edge guides Feeds the paper straight into the printer. Slide to the edges of the paper. Paper support Supports loaded paper. Feeder guard Prevents foreign substance from entering the printer. Usually keep this guard closed. Rear paper feed (B) Loads paper.
- Page 15 User's Guide Printer Basics Printer cover (J) Open when removing jammed paper inside the printer. Print head Fires ink. Ink supply unit tray Sets an ink supply unit. Front cover (A) Open when replacing ink supply units. Front cover lock Locks the front cover.
-
Page 16: Control Panel
User's Guide Printer Basics LAN port Connects a LAN cable. USB port Connects a USB cable. AC inlet Connects the power cord. Rear Cover (D) Open when removing jammed paper. Rear Cover (E) Open when removing jammed paper. Maintenance box cover (H) Open when replacing the maintenance box. -
Page 17: Basic Screen Configuration
User's Guide Printer Basics Basic Screen Configuration Indicates items that have been setup for the printer as icons. Select the icon to check the current settings or access each setting menu. This action bar is displayed on the home screen only. Displays each mode. -
Page 18: Basic Operations
User's Guide Printer Basics Indicates whether or not Quiet Mode is set for the printer. When this feature is enabled, the noise made by printer operations is reduced, but print speed may slow down. However, noises may not be reduced depending on the selected paper type and print quality. -
Page 19: Entering Characters
User's Guide Printer Basics u d l r To enter the value, name, address, and so on, move the focus to the input field using the buttons, and then press the OK button to display the on-screen keyboard. Entering Characters On-screen Keyboard You can enter characters and symbols by using on-screen keyboard when you make network settings and so on. -
Page 20: Viewing Animations
User's Guide Printer Basics Enters a space. Enters character. Deletes a character to the left. Viewing Animations You can view animations of operating instructions such as loading paper or removing jammed paper on the LCD screen. ❏ Select on the home screen: Displays the help screen. Select How To and then select the items that you want to view. -
Page 21: Preparing The Printer
Available Paper and Capacities Epson recommends using genuine Epson paper to ensure high-quality printouts. Genuine Epson Paper Note: Genuine Epson paper is not available when printing with the Epson universal printer driver. Media Name Size Loading Capacity (Sheets) 2-Sided Print-... - Page 22 Preparing the Printer Note: ❏ The availability of paper varies by location. For the latest information on paper available in your area, contact Epson support. ❏ When printing on genuine Epson paper at a user defined size, only Standard or Normal print quality settings are available.
- Page 23 User's Guide Preparing the Printer Media Name Size Loading Capacity (Sheets or Envelopes) 2-Sided Print- Paper Cassette Paper Cassette Rear Paper Feed Plain paper, Copy *1*2 Letter , A4, Ex- Auto, Manual Up to the line indicated by the paper ecutive , B5, A5, symbol on the edge guide.
- Page 24 User's Guide Preparing the Printer Media Name Size Loading Capacity (Sheets or Envelopes) 2-Sided Print- Paper Cassette Paper Cassette Rear Paper Feed Thick paper *1*4 Letter , A4, Ex- Auto, Manual ecutive , B5, A5, (91 to 160 g/m2) SP1 (210×270 mm), 16K (195×270 mm) Legal, 8.5×13 in,...
- Page 25 User's Guide Preparing the Printer Media Name Size Loading Capacity (Sheets or Envelopes) 2-Sided Print- Paper Cassette Paper Cassette Rear Paper Feed Thick paper Legal, 8.5×13 in, – – Manual Letter , A4, Ex- (161 to 256 g/m2) ecutive , B5, A5, Half letter , A6, B6, SP1 (210×270...
-
Page 26: Loading Paper In The Paper Cassette
User's Guide Preparing the Printer ❏ Fan and align the edges of the paper before loading. Do not fan or curl photo paper. Doing so may damage the printable side. ❏ If the paper is curled, flatten it or curl it slightly in the opposite direction before loading. Printing on curled paper may cause paper jams and smears on the printout. - Page 27 User's Guide Preparing the Printer 1. Check that the printer is not operating, and then pull out the paper cassette. 2. Slide the front edge guide to its maximum position, and then slide the side edge guides to adjust to the paper size you want to use.
-
Page 28: Loading Paper In The Rear Paper Feed
User's Guide Preparing the Printer Important: Do not load more than the maximum number of sheets specified for the paper. For plain paper, do not load above the line indicated by the symbol inside the edge guide. For thick paper, do not load above the line indicated by the symbol inside the edge guide. - Page 29 User's Guide Preparing the Printer 2. Slide the edge guides. 3. Load paper at the center of the rear paper feed with the printable side facing up. Important: ❏ Do not load more than the maximum number of sheets specified for the paper. For plain paper, do not load above the line just under the triangle symbol inside the edge guide.
-
Page 30: Loading Envelopes And Precautions
User's Guide Preparing the Printer 4. Slide the edge guides to the edges of the paper. 5. On the control panel, set the size and type of the paper you loaded in the rear paper feed. Note: You can also display the paper size and paper type settings screen by pressing the button on the control panel. -
Page 31: Loading Long Papers
User's Guide Preparing the Printer Load envelopes in the paper cassettewith the flap facing up, and then slide the edge guides to the edges of the envelopes. ❏ Fan and align the edges of the envelopes before loading. When the stacked envelopes are puffed up with air, press them down to flatten them before loading. -
Page 32: List Of Paper Type
To obtain optimum printing results, select the paper type that suits the paper. Media Name Media Type Control Panel Printer Driver Epson Bright White Ink Jet Paper Plain paper plain papers Epson Ultra Glossy Photo Paper Ultra Glossy Epson Ultra Glossy Epson Premium Glossy Photo Paper Prem. - Page 33 User's Guide Preparing the Printer Sleep Timer: Adjust the time period to enter a sleep mode (energy saving mode) when the printer has not performed any operations. The LCD screen turns black when the setting time passes. Power Off Settings: Your product may have this feature or the Power Off Timer feature depending on the location of purchase.
- Page 34 User's Guide Preparing the Printer Printer Settings Select the menus on the control panel as described below. Settings > General Settings > Printer Settings You cannot change settings that have been locked by your administrator. Paper Source Settings: Paper Setting: Select the paper size and paper type you loaded in the paper sources.
- Page 35 User's Guide Preparing the Printer Check Paper Width: Select On to check the paper width before printing. This prevents printing beyond the edges of the paper when the paper size setting is incorrect, but this may lower the print speed. Skip Blank Page: Skips blank pages in the print data automatically.
- Page 36 You cannot change settings that have been locked by your administrator. Epson Connect Services: Displays whether the printer is registered and connected to Epson Connect. You can register to the service by selecting Register and follow the instructions. When you have registered, you can change the following settings.
-
Page 37: Menu Options For Print Counter
User's Guide Preparing the Printer http://www.epsonconnect.eu (Europe only) Google Cloud Print Services: Displays whether the printer is registered and connected to Google Cloud Print services. When you have registered, you can change the following settings. ❏ Enable/Disable ❏ Unregister For details on registering to Google Cloud Print services, see the following web site. https://www.epsonconnect.com/ http://www.epsonconnect.eu (Europe only) -
Page 38: Menu Options For Language
User's Guide Preparing the Printer Print Quality Adjustment: Select this feature if there are any problems with your print outs. You can check for clogged nozzles and clean the print head if necessary, and then adjust some parameters to improve print quality. Print Head Nozzle Check: Select this feature to check if the print head nozzles are clogged. -
Page 39: Menu Options For Printer Status/Print
User's Guide Preparing the Printer Menu Options for Printer Status/Print Select the menus on the control panel as described below. Settings > Printer Status/Print Print Status Sheet: Configuration Status Sheet: Print information sheets showing the current printer status and settings. Supply Status Sheet: Print information sheets showing the status of consumables. -
Page 40: Printing
User's Guide Printing Printing Printing from the Printer Driver on Windows If you cannot change some of the printer driver settings, they may have been restricted by the administrator. Contact your printer administrator for assistance. Accessing the Printer Driver When accessing the printer driver from the computer's control panel, the settings are applied to all of the applications. - Page 41 User's Guide Printing 1. Open the file you want to print. Load paper in the printer if it has not already been loaded. 2. Select Print or Page Setup from the File menu. 3. Select your printer. 4. Select Preferences or Properties to access the printer driver window. 5.
-
Page 42: Printing On 2-Sides
“Available Paper and Capacities” on page 21 & Print Settings Manual 2-sided printing is available when EPSON Status Monitor 3 is enabled. However, it may not be available when the printer is accessed over a network or is used as a shared printer. Note: To enable EPSON Status Monitor 3, click Extended Settings on the Maintenance tab, and then select Enable EPSON Status Monitor 3. -
Page 43: Printing Several Pages On One Sheet
User's Guide Printing 3. Click Print. For manual 2-sided printing, when the first side has finished printing, a pop-up window is displayed on the computer. Follow the on-screen instructions. Related Information “Printing Basics” on page 40 & “Main Tab” on page 57 &... -
Page 44: Printing And Stacking In Page Order (Reverse Order Printing)
User's Guide Printing Printing and Stacking in Page Order (Reverse Order Printing) You can print from the last page so that the documents are stacked in page order. Print Settings On the printer driver's Main tab, select Reverse Order. Related Information “Printing Basics”... -
Page 45: Printing One Image On Multiple Sheets For Enlargement (Creating A Poster)
User's Guide Printing Related Information “Printing Basics” on page 40 & “More Options Tab” on page 58 & Printing One Image on Multiple Sheets for Enlargement (Creating a Poster) This feature allows you to print one image on multiple sheets of paper. You can create a larger poster by taping them together. - Page 46 User's Guide Printing Making Posters Using Overlapping Alignment Marks Here is an example of how to make a poster when 2x2 Poster is selected, and Overlapping Alignment Marks is selected in Print Cutting Guides. 1. Prepare Sheet 1 and Sheet 2. Cut off the margins of Sheet 1 along the vertical blue line through the center of the top and bottom cross marks.
- Page 47 User's Guide Printing 2. Place the edge of Sheet 1 on top of Sheet 2 and align the cross marks, then temporarily tape the two sheets together from the back. 3. Cut the taped sheets in two along the vertical red line through the alignment markers (this time, the line to the left of the cross marks).
- Page 48 User's Guide Printing 4. Tape the sheets together from the back. 5. Repeat steps 1 to 4 to tape Sheet 3 and Sheet 4 together. 6. Cut off the margins of Sheet 1 and Sheet 2 along the horizontal blue line through the center of the left and right side cross marks.
- Page 49 User's Guide Printing 7. Place the edge of Sheet 1 and Sheet 2 on top of Sheet 3 and Sheet 4 and align the cross marks, and then temporarily tape them together from the back.
- Page 50 User's Guide Printing 8. Cut the taped sheets in two along the horizontal red line through the alignment markers (this time, the line above the cross marks). 9. Tape the sheets together from the back.
-
Page 51: Printing With A Header And Footer
User's Guide Printing 10. Cut off the remaining margins along the outer guide. Printing with a Header and Footer You can print information such as a user name and printing date in headers or footers. Print Settings On the printer driver's More Options tab, click Watermark Features, and then select Header/Footer. Click Settings, and then select the items you want to print. -
Page 52: Printing A Watermark
User's Guide Printing Related Information “Printing Basics” on page 40 & “More Options Tab” on page 58 & Printing a Watermark You can print a watermark such as "Confidential" or an anti-copy pattern on your printouts. If you print with an anti-copy pattern, the hidden letters appear when photocopied in order to distinguish the original from the copies. -
Page 53: Printing Password-Protected Files
User's Guide Printing Printing Password-Protected Files Yon can set a password for a print job so that it starts printing only after entering the password on the printer's control panel. Print Settings On the printer driver's More Options tab, select Confidential Job, and then enter a password. To print the job, select Settings on the home screen of the printer's control panel, and then select Confidential Job. -
Page 54: Printing Using The Color Universal Print Feature
User's Guide Printing When you select a print job added to Print Project in the Job Arranger Lite window, you can edit the page layout. Click Print from the File menu to start printing. Note: If you close the Job Arranger Lite window before adding all the print data to the Print Project, the print job you are currently working on is canceled. -
Page 55: Adjusting The Print Color
User's Guide Printing Adjusting the Print Color You can adjust the colors used in the print job. Note: These adjustments are not applied to the original data. Print Settings On the printer driver's More Options tab, select Custom as the Color Correction setting. Click Advanced to open the Color Correction window, and then select the method of color correction. -
Page 56: Printing Clear Bar Codes
User's Guide Printing “More Options Tab” on page 58 & Printing Clear Bar Codes You can print a bar code clearly and make it easy to scan. Only enable this feature if the bar code you printed cannot be scanned. You can use this feature under the following conditions. -
Page 57: Main Tab
User's Guide Printing Note: Menus vary depending on the option you selected. Main Tab Printing Presets Add/Remove Presets You can add or remove your own presets for frequently used print settings. Select the preset you want to use from the list. Show Settings Displays a list of items currently set on the Main and More Options tabs. - Page 58 Job Arranger Lite Opens the Job Arranger Lite window. You can save and edit data. EPSON Status Opens the EPSON Status Monitor 3 window. Here you can confirm the status of the printer and the Monitor 3 consumables.
-
Page 59: Printing From The Printer Driver On Mac Os
Changes the language to be used on the printer driver window. To apply the settings, close the printer driver, and then open it again. Software Update Starts EPSON Software Updater to check for the latest version of applications on the Internet. Technical Support Allows you to access the Epson technical support website. - Page 60 Printing 4. Select Print Settings from the pop-up menu. Note: On OS X Mountain Lion or later, if the Print Settings menu is not displayed, the Epson printer driver has not been installed correctly. Select System Preferences from the menu > Printers & Scanners (or Print & Scan, Print & Fax), remove the printer, and then add the printer again.
-
Page 61: Printing On 2-Sides
User's Guide Printing Printing on 2-Sides You can print on both sides of the paper. Note: ❏ If you do not use paper that is suitable for 2-sided printing, the print quality may decline and paper jams may occur. ❏ Depending on the paper and the data, ink may bleed through to the other side of the paper. Related Information “Available Paper and Capacities”... -
Page 62: Printing Several Pages On One Sheet
User's Guide Printing Printing Several Pages on One Sheet You can print two or four pages of data on a single sheet of paper. Print Settings Select Layout from the pop-up menu. Set the number of pages in Pages per Sheet, the Layout Direction (page order), and Border. -
Page 63: Printing A Reduced Or Enlarged Document
User's Guide Printing “Menu Options for Paper Handling” on page 65 & Printing a Reduced or Enlarged Document You can reduce or enlarge the size of a document by a specific percentage or to fit the paper size you loaded in the printer. -
Page 64: Adjusting The Print Color
These adjustments are not applied to the original data. Print Settings Select Color Matching from the pop-up menu, and then select EPSON Color Controls. Select Color Options from the pop-up menu, and then select one of the available options. Click the arrow next to Advanced Settings, and then make more detailed settings. - Page 65 ColorSync Select the method for color adjustment. These options adjusts colors between the printer and the computer display to minimize the difference in color. EPSON Color Controls Menu Options for Paper Handling Collate pages Prints multi-page documents collated in order and sorted into sets.
-
Page 66: Making Operation Settings For The Mac Os Printer Driver
User's Guide Printing Grayscale Select when you want to print in black or shades of gray. Mirror Image Inverts an image to print as it would appear in a mirror. Menu Options for Color Options Manual Settings Adjusts the color manually. In Advanced Settings, you can select detailed settings. PhotoEnhance Produces sharper images and more vivid colors by automatically adjusting the contrast, saturation, and brightness of the original image data. -
Page 67: Printing From Smart Devices
Using Epson iPrint Epson iPrint is an application that allows you to print photos, documents, and web pages from a smart device such as a smartphone or tablet. You can use local print, printing from a smart device that is connected to the same wireless network as your printer, or remote print, printing from a remote location over the Internet. - Page 68 6. Enter the password displayed on the printer's control panel on the smart device. 7. After the connection is established, select OK or Close on the printer's control panel. 8. Close the screen. Installing Epson iPrint You can install Epson iPrint on your smart device from the following URL or QR code. http://ipr.to/c...
- Page 69 Starts printing. Note: To print from the document menu using iPhone, iPad, and iPod touch running iOS, start Epson iPrint after transferring the document you want to print using the file sharing function in iTunes. Printing by Touching Smart Devices to the N-Mark You can simply connect and print by touching your smart device to the printer's N-Mark.
-
Page 70: Using Epson Print Enabler
You can wirelessly print your documents, emails, photos, and web pages right from your Android phone or tablet (Android v4.4 or later). With a few taps, your Android device will discover an Epson printer that is connected to the same wireless network. -
Page 71: Using Airprint
User's Guide Printing 5. Go to Settings on your Android device, select Printing, and then enable Epson Print Enabler. 6. From an Android application such as Chrome, tap the menu icon and print whatever is on the screen. Note: If you do not see your printer, tap All Printers and select your printer. -
Page 72: Canceling Ongoing Jobs
User's Guide Printing Canceling Ongoing Jobs Press the button to cancel the ongoing job. -
Page 73: Replacing Ink Supply Units And Other Consumables
2. Click EPSON Status Monitor 3 on the Maintenance tab, and then click Details. Note: If EPSON Status Monitor 3 is disabled, click Extended Settings on the Maintenance tab, and then select Enable EPSON Status Monitor 3. Checking the Status of the Remaining Ink and the Maintenance Box - Mac OS 1. -
Page 74: Ink Supply Unit Codes
The following are the codes for genuine Epson ink supply units. Note: ❏ Ink supply unit codes may vary by location. For the correct codes in your area, contact Epson support. ❏ Not all ink supply units are available in all regions. - Page 75 User's Guide Replacing Ink Supply Units and Other Consumables ❏ After bringing an ink supply unit inside from a cold storage site, allow it to warm up at room temperature for at least 12 hours before using it. ❏ Do not touch the sections shown in the illustration. Doing so may prevent normal operation and printing. ❏...
-
Page 76: Replacing Ink Supply Units
& Maintenance Box Code Epson recommends the use of a genuine Epson maintenance box. The following is the code for the genuine Epson maintenance box. T6716 Maintenance Box Handling Precautions Read the following instructions and Important Safety Instructions (paper manual) before replacing the maintenance box. -
Page 77: Temporarily Printing With Black Ink
Because this feature is only available for approximately five days, replace the expended ink supply unit as soon as possible. Note: ❏ If EPSON Status Monitor 3 is disabled, access the printer driver, click Extended Settings on the Maintenance tab, and then select Enable EPSON Status Monitor 3. ❏ The available period varies depending on the usage conditions. -
Page 78: Temporarily Printing With Black Ink - Windows
User's Guide Replacing Ink Supply Units and Other Consumables Temporarily Printing with Black Ink - Windows 1. When the following window is displayed, cancel printing. Note: If you cannot cancel printing from the computer, cancel using the printer's control panel. 2. -
Page 79: Temporarily Printing With Black Ink - Mac Os
You can continue printing while preparing a replacement black ink supply unit. This feature is only available when you select the following settings in the printer driver. ❏ Paper Type: plain papers ❏ Quality: Standard ❏ EPSON Status Monitor 3: Enabled... - Page 80 Replacing Ink Supply Units and Other Consumables Note: ❏ If EPSON Status Monitor 3 is disabled, access the printer driver, click Extended Settings on the Maintenance tab, and then select Enable EPSON Status Monitor 3. ❏ Composite black looks slightly different from pure black. In addition, the print speed is reduced.
-
Page 81: Maintaining The Printer
We recommend to turn off the printer. If print quality has still not improved, contact Epson support. ❏ To prevent the print head from drying out, do not unplug the printer while the power is on. -
Page 82: Checking And Cleaning The Print Head - Windows
User's Guide Maintaining the Printer 7. When cleaning is finished, print the nozzle check pattern again. Repeat cleaning and printing the pattern until all lines are printed completely. Related Information “Loading Paper in the Paper Cassette” on page 26 & Checking and Cleaning the Print Head - Windows 1. - Page 83 User's Guide Maintaining the Printer 2. Select Maintenance on the home screen. u d l r To select an item, move the focus to the item using the buttons, and then press the OK button. 3. Select Print Head Alignment. 4.
-
Page 84: Cleaning The Paper Path For Ink Smears
User's Guide Maintaining the Printer Cleaning the Paper Path for Ink Smears When the printouts are smeared or scuffed, clean the roller inside. Important: Do not use tissue paper to clean the inside of the printer. The print head nozzles may be clogged with lint. 1. -
Page 85: Network Service And Software Information
User's Guide Network Service and Software Information Network Service and Software Information This section introduces the network services and software products available for your printer from the Epson website or the supplied software disc. Application for Configuring Printer Operations (Web Config) Web Config is an application that runs in a web browser, such as Internet Explorer and Safari, on a computer or smart device. -
Page 86: Running Web Config On Windows
User's Guide Network Service and Software Information IPv6: http://[2001:db8::1000:1]/ Note: Using the smart device, you can also run Web Config from the maintenance screen of Epson iPrint. Related Information “Using Epson iPrint” on page 67 & Running Web Config on Windows When connecting a computer to the printer using WSD, follow the steps below to run Web Config. -
Page 87: Software Update Tools (Software Updater)
Click the start button, and then select All Programs (or Programs) > Epson Software > EPSON Software Updater. Note: You can also start EPSON Software Updater by clicking the printer icon on the task bar on the desktop, and then selecting Software Update. Starting on Mac OS Select Go >... -
Page 88: Uninstalling Applications
Note: ❏ You can download the latest applications from the Epson website. http://www.epson.com ❏ If you use Windows Server operating systems, you cannot use EPSON Software Updater. Download the latest applications from the Epson website. Related Information “Software Update Tools (Software Updater)” on page 87 &... -
Page 89: Uninstalling Applications - Mac Os
If the User Account Control window is displayed, click Continue. 7. Follow the on-screen instructions. Uninstalling Applications - Mac OS 1. Download the Uninstaller using EPSON Software Updater. Once you have downloaded the Uninstaller, you do not need to download it again each time you uninstall the application. -
Page 90: Printing Using A Network Service
6. Select the application you want to uninstall, and then click Uninstall. Important: The Uninstaller removes all drivers for Epson inkjet printers on the computer. If you use multiple Epson inkjet printers and you only want to delete some drivers, delete all of them first, and then install the necessary printer driver again. -
Page 91: Solving Problems
Turn the power off and on again, and then reinsert the paper cassette. If print from another cassette. the error message is still displayed, contact Epson support or an authorised Epson service provider to request repairs. You need to replace Ink Supply Unit(s). -
Page 92: Checking The Printer Status - Windows
2. Click EPSON Status Monitor 3 on the Maintenance tab, and then click Details. You can check the printer status, ink levels, and error status. Note: If EPSON Status Monitor 3 is disabled, click Extended Settings on the Maintenance tab, and then select Enable EPSON Status Monitor 3. Related Information “Accessing the Printer Driver”... -
Page 93: Paper Does Not Feed Correctly
User's Guide Solving Problems Caution: Never touch the buttons on the control panel while your hand is inside the printer. If the printer starts operating, it could cause an injury. Be careful not to touch the protruding parts to avoid injury. Important: Remove the jammed paper carefully. -
Page 94: Several Sheets Of Paper Are Fed At A Time
User's Guide Solving Problems Related Information “Loading Paper in the Paper Cassette” on page 26 & “Loading Paper in the Rear Paper Feed” on page 28 & Several Sheets of Paper are Fed at a Time When several sheets of paper are fed at a time during manual 2-sided printing, remove any paper which is loaded in the printer before you reload the paper. -
Page 95: Lcd Screen Gets Dark
User's Guide Solving Problems Note: Your product may have the Power Off Settings or Power Off Timer feature depending on the location of purchase. LCD Screen Gets Dark The printer is in sleep mode. Press any button on the control panel to return the LCD screen to its former state. Cannot Operate from the Control Panel When the user feature restriction is enabled, a user ID and password are required to print. -
Page 96: Checking The Software And Data
Checking the Software and Data ❏ Make sure that a genuine Epson printer driver is installed. If a genuine Epson printer driver is not installed, the available functions are limited. We recommend using a genuine Epson printer driver. See the related information link below for details. - Page 97 User's Guide Solving Problems Click the Driver tab. If your printer name is displayed in the list, a genuine Epson printer driver is installed on your computer. Mac OS Select System Preferences from the menu > Printers & Scanners (or Print & Scan, Print & Fax), and then select the printer.
-
Page 98: Checking The Printer Status From The Computer (Windows)
Network connection: EPSON XXXX Series (network) If you install the printer driver multiple times, copies of printer driver may be created. If copies such as "EPSON XXXX Series (copy 1)" are created, right-click the copied driver icon, and then click Remove Device. -
Page 99: Cannot Print From An Iphone Or Ipad
User's Guide Solving Problems ❏ Make sure the printer status is not Pause. Select System Preferences from the menu > Printers & Scanners (or Print & Scan, Print & Fax), and then double-click the printer. If the printer is paused, click Resume (or Resume Printer). Cannot Print from an iPhone or iPad ❏... -
Page 100: Printout Is Scuffed Or Color Is Missing
User's Guide Solving Problems ❏ This pattern allows you to perform alignment if vertical ruled lines appear misaligned. Find and select the number for the pattern that has the least misaligned vertical line. ❏ This pattern allows you to perform alignment if you see horizontal banding at regular intervals. Find and select the number for the least separated and overlapping pattern. -
Page 101: Colored Banding Appears At Intervals Of Approximately 3.3 Cm
User's Guide Solving Problems The print head nozzles may be clogged. Perform a nozzle check to check if the print head nozzles are clogged. Clean the print head if any of the print head nozzles are clogged. Related Information “Checking and Cleaning the Print Head” on page 81 &... -
Page 102: Print Quality Is Poor
Checking the ink supply unit ❏ Try to use genuine Epson ink supply units. This product is designed to adjust colors based on the use of genuine Epson ink supply units. The use of non-genuine ink supply units may cause print quality to decline. -
Page 103: Paper Is Smeared Or Scuffed
User's Guide Solving Problems Related Information “Adjusting the Print Quality” on page 99 & “Available Paper and Capacities” on page 21 & “List of Paper Type” on page 32 & “Paper Handling Precautions” on page 25 & Paper Is Smeared or Scuffed ❏... -
Page 104: Paper Is Smeared During Automatic 2-Sided Printing
User's Guide Solving Problems “Cleaning the Paper Path for Ink Smears” on page 84 & Paper is Smeared During Automatic 2-Sided Printing When using the automatic 2-sided printing feature and printing high density data such as images and graphs, set the print density to lower and the drying time to longer. -
Page 105: The Printed Image Is Inverted
User's Guide Solving Problems ❏ If there are any paused print jobs, printed characters may be corrupted. ❏ Do not put the computer manually into the Hibernate mode or the Sleep mode while printing. Pages of garbled text may be printed next time you start the computer. ❏... -
Page 106: Other Printing Problems
User's Guide Solving Problems Other Printing Problems Printing Is Too Slow ❏ Close any unnecessary applications. ❏ Lower the quality setting. High quality printing slows down the printing speed. ❏ Enable the bidirectional (or high speed) setting. When this setting is enabled, the print head prints while moving in both directions, and the printing speed increases. -
Page 107: Other Problems
> Printers & Scanners (or Print & Scan, Print & Fax), and then select the printer. Click Options & Supplies > Options (or Driver). Select On as the Quiet Mode setting. Forgot Your Password If you forget the administrator's password, contact Epson support. Related Information “Contacting Epson Support” on page 122 &... -
Page 108: Appendix
User's Guide Appendix Appendix Technical Specifications Printer Specifications Print Head Nozzle Placement Black ink nozzles: 800 Color ink nozzles: 800 for each color Plain Paper 64 to 90 g/m2(17 to 24lb) Weight of Paper Thick Paper 91 to 256 g/m2 (25 to 68 lb) Envelopes Envelope #10, DL, C6: 75 to 90 g/m2 (20 to 24 lb) Envelope C4: 80 to 100 g/m2 (21 to 26 lb) -
Page 109: Interface Specifications
IPv4, IPv6 UPnP Printing IPv4 Information appliance PictBridge Printing (Wi-Fi) IPv4 Digital camera ✓ Epson Connect (Email Print, IPv4 Remote Print) ✓ AirPrint (iOS, Mac OS) IPv4, IPv6 iOS 5 or later, Mac OS X v10.7 or later ✓ Google Cloud Print... -
Page 110: Ethernet Specifications
User's Guide Appendix Frequency Range 2.4 GHz Maximum Radio-Frequency 19.8 dBm (EIRP) Power Transmitted Coordination Modes *3*4 Infrastructure, Wi-Fi Direct (Simple AP) Wireless Securities WEP (64/128bit), WPA2-PSK (AES) , WPA2-Enterprise Complies with either IEEE 802.11b/g/n or IEEE 802.11b/g depending on location of purchase. IEEE802.11n is only available for the HT20. -
Page 111: Supported Third Party Services
User's Guide Appendix Supported Third Party Services AirPrint Print iOS 5 or later/Mac OS X v10.7.x or later Google Cloud Print Dimensions Only the printer Dimensions Storage ❏ Width: 425 mm (16.7 in.) ❏ Depth : 535 mm (21.1 in.) ❏... -
Page 112: Electrical Specifications
Power off: Approx. 0.2 W Note: ❏ Check the label on the printer for its voltage. ❏ For European users, see the following Website for details on power consumption. http://www.epson.eu/energy-consumption Environmental Specifications Operation Use the printer within the range shown in the following graph. -
Page 113: System Requirements
User's Guide Appendix System Requirements ❏ Windows 10 (32-bit, 64-bit)/Windows 8.1 (32-bit, 64-bit)/Windows 8 (32-bit, 64-bit)/Windows 7 (32-bit, 64- bit)/Windows Vista (32-bit, 64-bit)/Windows XP SP3 or later (32-bit)/Windows XP Professional x64 Edition SP2 or later/Windows Server 2016/Windows Server 2012 R2/Windows Server 2012/Windows Server 2008 R2/ Windows Server 2008/Windows Server 2003 R2/Windows Server 2003 SP2 or later ❏... - Page 114 User's Guide Appendix 5. Lower the printer onto the optional paper cassette unit. 6. Place the sticker indicating the cassette number. 7. Reconnect the power cord and any other cables, and then plug in the printer. 8. Turn on the printer by pressing the button.
- Page 115 User's Guide Appendix Setting the Optional Paper Cassette Unit in the Printer Driver To use the installed optional paper cassette unit, the printer driver needs to acquire the necessary information. Setting the Optional Paper Cassette Unit in the Printer Driver - Windows Note: Log on to your computer as an administrator.
-
Page 116: Regulatory Information
Manufacturer: Askey Computer Corporation Type: WLU6320-D69 (RoHS) This product conforms to Part 15 of the FCC Rules and RSS-210 of the IC Rules. Epson cannot accept responsibility for any failure to satisfy the protection requirements resulting from a non-recommended modification of the product. Operation is subject to the following two conditions: (1) this device may not cause harmful interference, and (2) this device must accept any interference received, including interference that may cause undesired operation of the device. -
Page 117: German Blue Angel
German Blue Angel See the following website to check whether or not this printer meets the standards for the German Blue Angel. http://www.epson.de/blauerengel Restrictions on Copying Observe the following restrictions to ensure the responsible and legal use of the printer. - Page 118 User's Guide Appendix Caution: ❏ When carrying the printer, lift it using a stable position. Lifting the printer using an unstable position may result in injury. ❏ Because this printer is heavy, it should always be carried by two or more people when unpacking and transporting.
- Page 119 User's Guide Appendix 6. Open the printer cover. Secure the print head to the case with tape. 7. Close the printer cover.
- Page 120 User's Guide Appendix 8. Uninstall the optional paper cassette if it is installed. 9. Prepare to pack the printer as shown below. 10. Remove the output tray from the printer. 11. Pack the printer in its box, using the protective materials. When you use the printer again, make sure you remove the tape securing the print head.
-
Page 121: Copyright
Neither Seiko Epson Corporation nor its affiliates shall be liable to the purchaser of this product or third parties for damages, losses, costs, or expenses incurred by the purchaser or third parties as a result of accident, misuse, or abuse of this product or unauthorized modifications, repairs, or alterations to this product, or (excluding the U.S.) -
Page 122: Where To Get Help
Depending on the product, network settings may be stored in the product’s memory. Due to breakdown or repair of a product, settings may be lost. Epson shall not be responsible for the loss of any data, for backing up or recovering settings even during a warranty period.