Table of Contents
Advertisement
Quick Links
Advertisement
Table of Contents

Related Manuals for Yamaha SW60XG


Summary of Contents for Yamaha SW60XG
- Page 1 SOUND CARD SW60XG OWNER’S MANUAL...
- Page 2 This product, when installed as indicated in the instructions contained in this manual, meets FCC requirements. Modifications not expressly approved by Yamaha may void your authority, granted by the FCC, to use the product. 2. IMPORTANT: When connecting this product to accessories and/or another product use only high quality shielded cables.
-
Page 3: Table Of Contents
INTRODUCTION Thank you for purchasing the SW60XG — a high quality sound card with hundreds of musical instrument voices and a variety of high quality digital effects. This owner’s manual covers installation of the SW60XG sound card as well as the installation of the applications and SW60XG driver. -
Page 4: Package Contents & Minimum System Requirements
Memory Requires an 80386SX/33MHz or higher internal CPU with a minimum of 8MB RAM. Hard Disk Proper software installation and running the SW60XG requires at least 3MB of free space on your hard disk. Floppy Disk Drive To install the application software, and to save and load user data. -
Page 5: Sw60Xg Setup
6 MIDI Port Address jumper: Allows to select the appropriate MIDI Port Address for sending the MIDI signals from the ISA bus to the SW60XG. You may need to change the MIDI Port Address (default address) if some conflict problem occurs. -
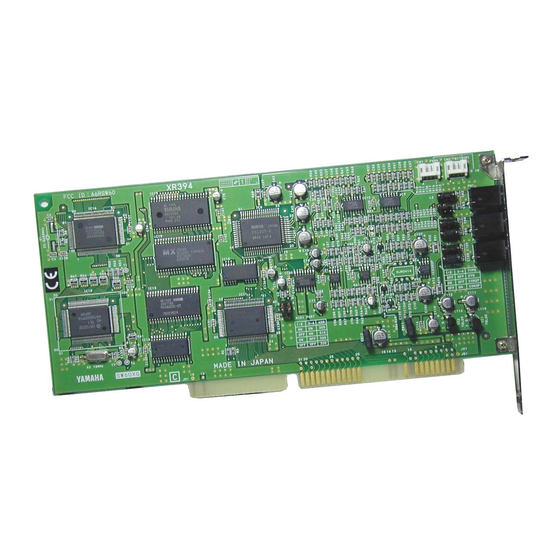
Page 6: Sound Card Installation
The following diagram shows how to connect the various devices. SW20 CD-ROM SW60XG Sound Card ¢Before making connections, be sure to UNPLUG THE POWER SUPPLY CORDS OF ALL DEVICES. After making connections, switch on the power of each device in the following order: External inputting devices first, then the computer, then external audio devices. - Page 7 ¢Before touching the sound card, first touch a metal surface to discharge any static electricity in your body; such static electricity can cause serious damage to your SW60XG. Also do not touch the inside surfaces of your sound card in order to prevent possible interference with or damage to the circuitry.
-
Page 8: Application Software Installation
3. SOFTWARE INSTALLATION To use the SW60XG, the SW60XG driver and the application software should be installed in your computer properly. ¢If your computer is run by Windows 3.1, the installation program will overwrite the contents of the MIDI Mapper. The installation program also overwrites the AUTOEXEC.BAT, SYSTEM.INI and CONTROL.INI files. If you don’t want to lose any existing data, please save them before you install the SW60XG application software. - Page 9 When Install Disk is verified, the following Setup screen will appear. 4. Click [OK] to proceed to next procedure. The drive/directory, which the SW60XG is to be installed into, will appear. 5. Verify the drive/directory names and click [OK]. £The default setting installs the software to the C drive and \_SW60XG directory.
- Page 10 Installation Procedure for Windows 95 1. Double click the [Control Panel] icon in My Computer. Control Panel window appears. 2. Double click the [Add/Remove Programs] icon in the Control Panel. Add/Remove Programs Properties will appear. 3. Click [Install]. Install Program from Floppy Disk Or CD-ROM will appear. 4.
- Page 11 If the other application software has already used the MIDI Port Address 300, you are required to select the address other than 300 in the SW60XG Driver Setup. (You are also required to change the MIDI Port Address jumper setting to the same number as the address you have selected here.
-
Page 12: Sw60Xg Application Software
SW60XG APPLICATION SOFTWARE SW60XG offers you to use two types of effect controllers, the one for Windows and the other for DOS; EffectGearII and EFFECTCON respectively. EffectGearII The EffectGearII lets you apply various types of effects to the signal input by a microphone, the line-level input signal from CD-ROM audio playback. -
Page 13: Effectcon
The EFFECTCON lets you apply high quality effects to the signal input by a microphone, the line-level input signal on the DOS command line. Startup Procedure Start EFFECTCON in the SW60XG directory. [KEY OPERATION] CD_\SW60XG + <ENTER> EFCON + <ENTER>... -
Page 14: Troubleshooting
M I D I ( i n t e r n a l s y n t h e s i z e r ) d o e s n o t s o u n d . • YAMAHA SW60XG Driver may not be selected as the MIDI output port. -
Page 15: Specifications
S y n t h e s i z e r M o d u l e Yamaha SWP00 Compatibility Sound Module Mode Effects Yamaha SWP00 Yamaha KP (YSS205) T e r m i n a l s OUTPUT LINE IN MIC IN CD-ROM Connector O t h e r S p e c i f i c a t i o n s Dimensions (W ×... - Page 16 The following is a legal agreement between you, the end user, and Yamaha Corporation (“Yamaha”). The enclosed Yamaha software program is licensed by Yamaha to the original purchaser for use only on the terms set forth herein. Please read this licensing agreement with care. Opening this package indicates that you accept all terms outlined herein.