Table of Contents
Advertisement
Quick Links
Advertisement
Table of Contents

Related Manuals for Kenwood NX-5200K3


Summary of Contents for Kenwood NX-5200K3
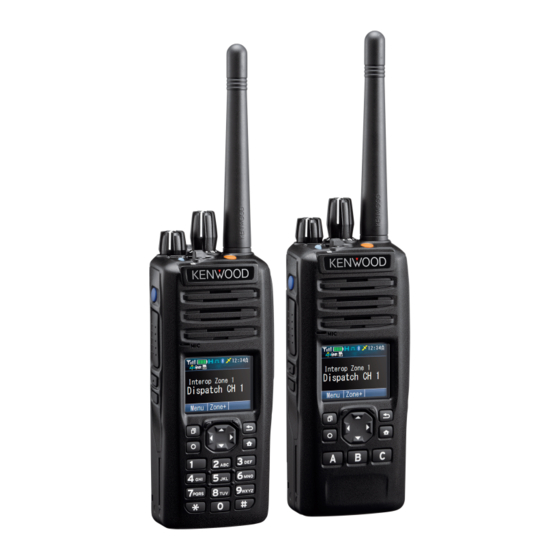
- Page 1 NX-5000 series USER MANUAL B5A-0327-50/04 (K)
-
Page 2: Table Of Contents
CONTENTS BASIC OPERATIONS ......................... 3 SWITCHING POWER ON/ OFF ....................3 ADJUSTING THE VOLUME ...................... 4 SELECTING A ZONE AND CHANNEL ..................4 TRANSMITTING ........................5 RECEIVING ..........................12 PROGRAMMABLE FUNCTIONS ....................14 FUNCTIONS OVERVIEW ......................25 FUNCTION DETAILS ........................ 37 SCAN ............................ -
Page 3: Basic Operations
BASIC OPERATIONS SWITCHING POWER ON/ OFF Turn the Power switch/ Volume control clockwise to switch the transceiver power The following screen appears if the Custom Start-up Screen has not been set. ● Turn the Power switch/ Volume control counterclockwise to switch the transceiver power OFF. -
Page 4: Adjusting The Volume
Press the [ ] or [ ] key to accept the number. Repeat steps 2 and 3 to enter the entire password. Press the [ ] or [#] key to delete an incorrectly entered number. Press and hold the ● ] or [#] key to delete all numbers. -
Page 5: Transmitting
TRANSMITTING Select the desired zone and channel using the keys programmed as [Zone Up]/ [Zone Down] and [Channel Up]/ [Channel Down]. Press the PTT switch and speak into the microphone. Release the PTT switch to receive. The LED indicator lights red while transmitting and green while receiving a signal. This ●... - Page 6 Press the [J] and [K] keys to select a Talkgroup ID/ name from the list that has been pre-entered into your transceiver. Press the [ ] or [ ] key to confirm the Talkgroup ID. Press and hold the PTT switch to make the call. Speak into the transceiver as you would during a normal call.
- Page 7 Press and hold the PTT switch to make the call. The “ ” icon blinks. “Individual” and the ID name of the target transceiver are ● displayed. Speak into the transceiver as you would during a normal call. ● Making Group Calls (P25 Trunking) You can select a channel with the Talkgroup ID you wanted to call to make a call to those parties on a Trunking channel.
- Page 8 Making Individual Calls (P25 Trunking) You can make calls to specific persons on a Trunking channel. Press the key programmed as [Individual], [Individual + Short Message] or [Individual + Status] to enter Individual Call Mode. Alternatively, press the key programmed as [Menu] to enter Individual Call Mode using the Menu Mode.
- Page 9 Making Group Calls (NXDN Conventional/ DMR Conventional) You can select a group ID from the list to make a call to those parties on a Conventional channel. Press the key programmed as [Group], [Group + Short Message] or [Group + Status] to enter Group Call Mode. Alternatively, press the key programmed as [Menu] to enter Group Call Mode using the Menu Mode.
- Page 10 Making Individual Calls (NXDN Conventional/ DMR Conventional) You can make calls to specific persons. Press the key programmed as [Individual], [Individual + Short Message] or [Individual + Status] to enter Individual Call Mode. Alternatively, press the key programmed as [Menu] to enter Individual Call Mode using the Menu Mode.
- Page 11 Making Group Calls (NXDN Trunking) You can select a channel with the Group ID you wanted to call to make a call to those parties on a Trunking channel. If the traffic channel is busy, a busy message appears and the busy tone sounds. Release ●...
-
Page 12: Receiving
Press the [J] and [K] keys to select a unit ID from the list that has been pre- entered into your transceiver. Alternatively, on full key models, you can enter a unit ID directly by pressing the keypad. Press the [ ] key to enter the manual input mode. - Page 13 Receiving Group Calls (P25) When you receive a group call on a Conventional channel and the received group ID matches the ID set up on your transceiver, you can hear the caller’s voice. When you receive a group call on a Trunking channel, the transceiver automatically switches to the traffic channel to receive the call.
-
Page 14: Programmable Functions
PROGRAMMABLE FUNCTIONS Refer to the tables in this section to determine which functions are available for appropriate channels. Function descriptions start on page 25. Please contact your dealer for further details on these functions. MENU MODE Many functions on this transceiver are selected or configured through the Menu instead of physical controls. - Page 15 Press [J]/[K] to select a function item. On full key models, you can enter a function number directly. ● Press the [ ] or [ ] key to set up the selected function item. Press the [ ] or [#] key to return to the category list. ●...
- Page 16 Function Menu Display Auto Telephone Auto Telephone Autodial Auto Dial Autodial Programming Auto Dial Prog Backlight Battery Information Battery Info Battery Status Battery Status Bluetooth Bluetooth Bluetooth Connect/ Disconnect Bluetooth Device BT Device Bluetooth Discoverable Discoverable Bluetooth Headset Connection BT Headset Typ Type Bluetooth Information Bluetooth Info...
- Page 17 Function Menu Display Format SD Card Format Card Front Panel Programming Panel Program Function GPS/ Bluetooth Reset GPS/BT Reset GPS Position Display GPS Pos Disp Group Group Group + Short Message Group+SDM Group+Status Group + Status Group ID/ Channel Entry High Transmit Power High TX Power Home Channel...
- Page 18 Function Menu Display Playback (Last Recording) Priority-channel Select Pri Ch Select Radio Check Radio Check Radio Inhibit Inhibit Radio Uninhibit Uninhibit Regroup Request Regroup Req Rekey Request Rekey Request Remote Control Remote Control RX Audio Equalizer (High) RX EQ High RX Audio Equalizer (High RX EQ High Mid Midrange)
- Page 19 Function Menu Display Surveillance Surveillance System Down System Lock System Lock System Search System Search System System Select System Up Tactical Zone Talk Around Talk Around Talkgroup Reset Talkgroup Rst Task Request Confirmation Task Telephone Disconnect Transceiver Password Password TX Audio Equalizer (High) TX EQ High TX Audio Equalizer (High TX EQ High Mid...
- Page 20 Function Menu Display ANR Preset ANR Preset Audio Profile Audio Profile Auto Telephone Auto Telephone Autodial Auto Dial Autodial Programming Auto Dial Prog Backlight Battery Information Battery Info Battery Status Battery Status Bluetooth Bluetooth Bluetooth Connect/ Disconnect Bluetooth Device BT Device Bluetooth Discoverable Discoverable Bluetooth Headset Connection...
- Page 21 Function Menu Display External Speaker External SP Fixed Volume Fixed Volume Format SD Card Format Card Front Panel Programming Panel Program Function GPS/ Bluetooth Reset GPS/BT Reset GPS Position Display GPS Pos Disp Group Group Group + Short Message Group+SDM Group + Status Group+Status Group ID/ Channel Entry...
- Page 22 Function Menu Display OVCM OVCM Playback Playback Playback (Last Recording) Priority-channel Select Pri Ch Select Radio Check Radio Check Radio Inhibit Inhibit Radio Uninhibit Uninhibit Regroup Request Regroup Req Rekey Request Rekey Request Remote Control Remote Control RX Audio Equalizer (High) RX EQ High RX Audio Equalizer (High RX EQ High Mid...
- Page 23 Function Menu Display Stack Stack Status Status Surveillance Surveillance System Down System Lock System Lock System Search System Search System System Select System Up Tactical Zone Talk Around Talk Around Talkgroup Reset Talkgroup Rst Task Request Confirmation Task Telephone Disconnect Transceiver Password Password TX Audio Equalizer (High)
- Page 24 CHARACTER ENTRY While in the character entry screen, you can use the following two methods to enter the characters: Pressing the [J]/[K] keys Press [J]/[K] to cycle the characters from A ~ Z, a ~ z, 0 ~ 9, and a space (default settings).
-
Page 25: Functions Overview
FUNCTIONS OVERVIEW Following is a brief overview of the functions available on the transceiver accessible using the Menu and/or programmable to the transceiver keys. For details on functions that are not included in “FUNCTION DETAILS” {p. 37} , please contact your dealer. Texts in the <... - Page 26 Backlight <Light> Press this key to turn the display backlight on or off. If Auto backlight is activated by your dealer, the backlight can be set to activate by key operations or when receiving a call/ message. Battery Information Allows you to check the detailed information of the Intelligent Battery installed on your transceiver.
- Page 27 Call 1 ~ 6 <Call1 ~ Call6> Press this key to send a message or initiate a call. Call Interruption <Intrpt> Allows a transceiver other than the transmitting transceiver to terminate voice communications by sending and receiving a Call Interruption request message. If a transceiver receives a Call Interruption request message on the channel where the transceiver is performing voice communications, the transceiver terminates the voice communications.
- Page 28 CW Message <CW_Msg> Press this key to send the CW message. Direct Channel 1 ~ 5 <DR1 ~ DR5> Press one of these keys to jump to a frequently used zone and channel (pre- programmed by your dealer). If activated by your dealer, you can set your own Direct Channels by selecting your desired zone and channel using Direct Channel 1 ~ 5 Select.
- Page 29 GPS/ Bluetooth Reset Activates GPS/ Bluetooth Reset mode. GPS Position Display <GPS_P> Allows you to display your location data. Location data that is saved on the microSD card using the Save GPS Data function or in GPS Position Display mode can be displayed.
- Page 30 Key Lock <KeyLck> Press this key to lock the transceiver keys. Press the key again to unlock the keys. The Selector, Lever switch as well as the PTT key on an external microphone or a Bluetooth device still function normally, and the following functions can still be operated: Backlight, Battery Status, Call Response, Clear, Emergency, Function, Key Lock, LCD Brightness, Monitor, Monitor Momentary, Squelch Off, Squelch Off Momentary and Zeroize.
- Page 31 Monitor <Moni> Allows you to turn the transceiver signaling off, to listen to all calls that are received on the channel. Monitor Momentary <Moni> Press and hold this key to momentarily turn the transceiver signaling off. Releasing this key turns the transceiver signaling back on. While signaling is off, you can listen to all calls that are received on the channel.
- Page 32 Regroup Request <Regrp> Allows you to send a request to the dispatcher to join the talkgroup set up by the dispatcher. The channel name for the dynamic regroup channel appears on the display when the transceiver joins the talkgroup. Rekey Request <Rekey> Allows you to make a request to update the Encryption key.
- Page 33 Scan Program <ScnPrg> Allows you to reprogram the Scan List and Priority channels using your transceiver. Refer to “SCAN PROGRAMMING” {p. 38} . Scrambler/ Encryption <Scr/ Encryp> Allows you to prevent a third party from listening in on your call. Refer to “SCRAMBLER (ANALOG/ LTR)/ ENCRYPTION (P25/ NXDN/ DMR)”...
- Page 34 Squelch Off <SQ_Off> Allows you to turn the transceiver squelch off, to better hear weak signals on the channel. Squelch Off Momentary <SQ_Off> Press and hold this key to momentarily turn the transceiver squelch off. Releasing this key turns the transceiver squelch back on. While squelch is off, you can better hear weak signals on the channel.
- Page 35 Talkgroup Reset <TG_Rst> Allows you to reset the Talkgroup ID of a channel. Task Request Confirmation <Task> Allows you to check a received Task Request message (up to 290 characters) and respond to the message in the Task Request function. The Task Request function manages tasks by using the Short Message function.
- Page 36 VOX Function Activates the VOX function. Refer to “VOICE OPERATED TRANSMISSION (VOX)” {p. 56} . Zeroize <Zero> Allows you to delete the Encryption keys stored in a Secure Cryptographic Module (SCM), configured in the built-in DES or configured with Enhanced Encryption. Zone Delete/ Add <Zn_D/A>...
-
Page 37: Function Details
FUNCTION DETAILS SCAN Scan is useful for monitoring signals on the transceiver channels. While scanning, the transceiver checks for a signal on each channel and only stops on a channel if a signal is present. To begin scanning, press the key programmed as [Scan]. indicator appears on the display. - Page 38 SCAN REVERT The Scan Revert channel is the channel selected when you press the PTT switch to transmit during scan. Your dealer can program one of the following Scan Revert channels: Selected: The last channel selected is assigned as the new revert channel. ●...
- Page 39 Priority Channel Editing If the Priority channel (Priority 1/ Priority 2) has been set as Operator Selectable by your dealer, you can reprogram the Priority channels. Note: A zone/ channel must be added to the scan list before the channel can be set as a Priority ●...
-
Page 40: Dtmf (Dual Tone Multi Frequency) Calls
DTMF (DUAL TONE MULTI FREQUENCY) CALLS Note: DTMF calls can be made only in Analog Conventional and NXDN Conventional Operation. ● MAKING A DTMF CALL Manual Dialing (Full key model only) Press and hold the PTT switch. Enter the desired digits using the DTMF keypad. The corresponding DTMF tones sound each time you press a key. -
Page 41: Trunking Calls
TRUNKING CALLS MAKING A TELEPHONE CALL (P25 AND NXDN TRUNKING) Autodial Autodial allows you to quickly call numbers that have been programmed onto your transceiver. Press the key programmed as [Autodial] to enter Autodial Mode. Alternatively, press the key programmed as [Menu] to enter Autodial Mode using the Menu Mode. - Page 42 Selecting a Number from the List Press the key programmed as [Autodial] to enter Autodial Mode. Alternatively, press the key programmed as [Menu] to enter Autodial Mode using the Menu Mode. The last called unit appears on the display. ● Press the [J] and [K] keys to select your desired list number.
-
Page 43: Emergency Calls
EMERGENCY CALLS If your transceiver has been programmed with the Emergency function, you can make emergency calls. Note: Only the Auxiliary (orange) key and the PF 1 (orange) key of the optional speaker/ ● microphone can be programmed with the Emergency function. Press and hold the key programmed as [Emergency]. -
Page 44: Scrambler (Analog/ Ltr)/ Encryption (P25/ Nxdn/ Dmr)
SCM*) and Enhanced Encryption * SCM (Secure Cryptographic Module) is a hardware cryptographic module developed by JVC KENWOOD to provide cryptographic securities for digital two way radios. The transceiver includes a built-in DES that allows you to set up to four Encryption keys. - Page 45 Select the new Encryption key using the [J] and [K] keys. Up to 32 Encryption keys can be used. One of these keys will be used during ● transmission. Press the [ ] or [ ] key to set the new Encryption key. Note: The selecting of encryption key is not available in P25 Trunking systems.
-
Page 46: Signaling
SIGNALING QUIET TALK (QT)/ DIGITAL QUIET TALK (DQT) Your dealer may have programmed QT or DQT signaling on your transceiver channels. A QT tone/ DQT code is a sub-audible tone/ code which allows you to ignore (not hear) calls from other parties who are using the same channel. When a channel is set up with a QT tone or DQT code, squelch will only open when a call containing a matching tone or code is received. - Page 47 OPTIONAL SIGNALING Your dealer may also program several types of optional signaling for your transceiver channels. 2-tone Signaling 2-tone Signaling opens the squelch only when your transceiver receives a call containing a matching 2-tone signal. Press the key programmed as [2-tone]. Alternatively, you can press the key programmed as [Menu] to enter 2-tone Mode ●...
-
Page 48: Clock
CLOCK Your transceiver can track the time with its built-in clock. If activated by your dealer, the time will be displayed when the transceiver power is turned ON. Note: Removing or leaving the battery pack uncharged for extended periods will cause the clock ●... -
Page 49: Color Scheme
COLOR SCHEME There are four available color schemes as follows. Full Color Full Color White Monochrome Black Monochrome White To select a Color Scheme: Press the key programmed as [Menu] to enter Color Scheme Mode using the Menu Mode. Press the [J] and [K] keys to select your desired color scheme. Press the [ ] or [ ] key to confirm your selection. -
Page 50: Battery Information Display
BATTERY INFORMATION DISPLAY You can check the detailed information, such as charging condition and temperature, of the Intelligent Battery installed on your transceiver. Press the key programmed as [Menu] to enter Battery Information Display Mode using the Menu Mode. The battery information display appears. ●... - Page 51 Menu Item Range Description Display 20 alphanumeric characters Displays the name and Battery Alias Alias and symbols, or 20 bytes of information entered for the ASCII characters rechargeable battery. Current Charge indicates the current remaining capacity of the rechargeable battery in percentage (%).
-
Page 52: Multi Language
MULTI LANGUAGE Your transceiver is equipped with multiple language support feature. You can change the language of the text display on the LCD screen and the language of the voice announcement. There are three languages available for selection; however, the languages selectable are dependent on the dealer setting. -
Page 53: Fleetsync: Alphanumeric 2-Way Paging Function
FleetSync: ALPHANUMERIC 2-WAY PAGING FUNCTION FleetSync is an Alphanumeric 2-way Paging Function, and is a protocol owned by JVC KENWOOD Corporation. FleetSync enables a variety of paging functions on your transceiver, some of which depend on dealer programming. Note: This function is available only in analog operation. - Page 54 STATUS MESSAGE You can send and receive 2-digit Status messages which may be decided in your talk group. Messages can contain up to 16 alphanumeric characters. Status messages range from 10 to 99 (80 ~ 99 are reserved for special messages). A maximum of 250 received messages can be stored in the stack memory of your transceiver.
- Page 55 While Caller ID list is displayed: – [H]: Caller ID > CH > Time Stamp [I]: Caller ID > Time Stamp > CH While Status Message list or Short Message list is displayed: – [H]: Message > Caller ID > CH > Time Stamp [I]: Message >...
-
Page 56: Voice Operated Transmission (Vox)
VOICE OPERATED TRANSMISSION (VOX) VOX can be activated or deactivated by your dealer. VOX operation allows you to transmit hands-free. Note: To operate VOX, you must use an optional headset. ◆ VOX Gain Level Sets the Mic input sensitivity of the VOX operation. Connect a headset to the transceiver. -
Page 57: Background Operations
BACKGROUND OPERATIONS TIME-OUT TIMER (TOT) The Time-out Timer can be activated only on Conventional channels and in NXDN Trunking system. It is used to prevent any caller from using a channel for an extended period of time. If you continuously transmit for a period of time that exceeds the programmed time, the transceiver will stop transmitting and an alert tone will sound. - Page 58 SIGNAL STRENGTH INDICATOR The signal strength indicator displays the strength of received calls. Strong signal Sufficient signal Weak signal Very weak signal Out of service range (Appears on NXDN Trunking and P25 Trunking channels only) COMPANDER The compander can be programmed only for specific analog channels. If it has been programmed by your dealer, transmitted signals are compressed before being sent and received signals are expanded when they arrive.
- Page 59 SITE TRUNKING (P25 Trunking)/ NETWORK FAILURE (NXDN Trunking) On Trunking channels, if set up by your dealer, the transceiver will indicate a network condition on the registered site. “Site Trunk” (P25)/ “Network Fail” (NXDN) appears on the display when the transceiver receives a network disabled message. CONTROL CHANNEL HUNT On P25 Trunking and NXDN Trunking channels, the transceiver must search for a control channel.
-
Page 60: Bluetooth
However, operations are not guaranteed in all headsets. Refer to the following URL for details on the Bluetooth devices operationally tested by ● KENWOOD: http://manual2.jvckenwood.com/com/help_ref/nx5000_series/compatible_model_list/CNMJSYnnzoitpv.html If you wish to use a Bluetooth device that is not operationally tested, please consult your dealer. - Page 61 Profile Description Automatic Injury Detection Automatic Injury Detection Service is a function that Service notifies the transceiver from the Bluetooth-enabled device when the Bluetooth-enabled device that supports Automatic Injury Detection Service is damaged. Up to two Bluetooth-enabled devices can be connected to the transceiver at the same time.
- Page 62 TURNING Bluetooth ON/ OFF Press the key programmed as [Bluetooth] to turn the Bluetooth function on or off. Alternatively, press the key programmed as [Menu] to enter Bluetooth Mode using the Menu Mode. Press the [J] and [K] keys to select “On” or “Off”. Press the [ ] or [ ] key to confirm your selection.
- Page 63 Press the [ ] key or the [J] and [K] keys to select “Find Device”. The transceiver starts to search for available Bluetooth devices. Up to 16 devices can be found and listed on the display. The search will end after approximately 30 or 40 seconds (depending on whether or ●...
- Page 64 When pairing is complete, your transceiver will connect to the Bluetooth headset. When the connection is established, you can perform hands-free call. The “ ” indicator appears on the display. ● Note: Once the headset has been paired, it can be used automatically with the transceiver the ●...
- Page 65 The transceiver transits to each mode when the FPU communication begins. To use the PC Interface Protocol, run the PC commands.
- Page 66 USEFUL FUNCTIONS There are some useful functions on your transceiver which allows you to display information of the Bluetooth devices registered to the transceiver and to switch the speaker audio output. Connecting/ Disconnecting/ Deleting a registered device using My Devices Press the key programmed as [Menu] to enter Bluetooth My Devices Mode using the Menu Mode.
- Page 67 To disconnect a device: Press the [ ] key or the [J] and [K] keys to select the device to disconnect. Press the [ ] or [ ] key to disconnect. Press the [ ] or [ ] key to confirm the disconnection. The “...
- Page 68 Press the [ ] or [ ] key to confirm. The selected device will be deleted. “BT No Device” appears when there is no other ● registered device. Note: To delete all the registered devices, press and hold the [ ] or [#] key in Step 2.
- Page 69 Model : The model number of a registered Bluetooth-enabled device that supports Device Information Service. Serial : The serial number of a registered Bluetooth-enabled device that supports Device Information Service. Hardware Ver. : The hardware version of a registered Bluetooth-enabled device that supports Device Information Service.
- Page 70 NOTIFICATION DISPLAY Display Cause The integrated circuit (IC) which enables the Bluetooth function is not working properly. (Display for 1 second) No device is found in the Bluetooth Find Device Mode. There is no response from the Bluetooth device on the request for pairing, Headset Profile (HSP) connection, Serial Port Profile (SPP) connection or Bluetooth Low Energy (Heart Rate Service, Automatic Injury Detection Service) connection.
-
Page 71: Microsd Card & Built-In Memory
Folder structure and file naming Voice files and GPS data files are stored in their respective folders. Up to 250 files can be stored in each folder. PRIVATE Folder KENWOOD File GPS_M SAVED 1. Rename AR_20140110_174530 20140110_174530_AR_N65519.WAV... - Page 72 Folder Type Description Stores voice files recorded using Auto Recording. Stores voice files recorded using Voice Memo. Voice files recorded using Auto Recording and Voice Memo can be stored SAVED in this folder manually. Refer to “To save a recording” {p. 76} . Stores GPS data files saved using GPS Data Storage (Auto).
- Page 73 microSD card recording time The estimated maximum recording time for Voice Memo and Auto Recording according to the capacity of the microSD card is as follows. microSD Card Capacity Estimated Recording Time (Max) 2 GB 35 hours 4 GB 70 hours 8 GB 140 hours 16 GB...
- Page 74 Formatting the microSD card Press the key programmed as [Format SD Card] to enter Format SD Card mode. “You will lose all data on the card.” appears on the display. Press the [ ] key. ● Select “Start” and press the [ ] key to format the card. When formatting is complete, the indicator lights up and “Complete”...
- Page 75 Note: Recording does not start when the key programmed as [Voice Memo] is pressed under ● the following conditions. Recognition of the microSD card by the transceiver is not complete. – Formatting of microSD card is in progress. – Deleting of voice files is in progress. –...
- Page 76 Playback You can play back the voice recordings recorded using Auto Recording and Voice Memo. Press the key programmed as [Playback] to enter Playback mode. Alternatively, press the key programmed as [Menu] to enter Playback mode using the Menu Mode. If a microSD card is not inserted in the transceiver, the voice recordings are listed on ●...
- Page 77 To delete a folder Press the [ ] key while the folder list is displayed. Then press the [ ] or [#] key. A confirmation message appears on the display. ● Press the [ ] or [ ] key to delete.
-
Page 78: Indicator List
INDICATOR LIST Indicator Description Displays the signal strength. Displays the battery power. The channel is using high transmit power. The channel is using medium transmit power. The channel is using low transmit power. In Digital mode (Digital Channel) In Analog mode (Analog Channel) In Digital mode (Mixed Channel) In Analog mode (Mixed Channel) The Bluetooth function is activated. - Page 79 Indicator Description The Noise Reduction function is activated. Blinks when Noise Reduction is functioning. Blinks when an incoming call matches your Optional Signaling. A message is stored in the memory. Blinks when a new message is received. All stored Task Requests have been read. Blinks when a new Task Request is received and unread.
- Page 80 © 2018...