Miele CS 1212-1 Operating And Installation Instructions
Ceramic hobs with induction
Hide thumbs
Also See for CS 1212-1:
- Operating and installation instructions (60 pages) ,
- Operating and installation instructions (60 pages)
Table of Contents
Advertisement
Quick Links
Advertisement
Table of Contents

Related Manuals for Miele CS 1212-1


Summary of Contents for Miele CS 1212-1
- Page 1 Operating and installation instructions Ceramic hobs with induction To avoid the risk of accidents or damage to the appliance it is essential to read these instructions before it is installed and used for the first time. en-GB M.-Nr. 09 055 450...
-
Page 2: Table Of Contents
Contents Warning and Safety instructions Caring for the environment Guide to the appliance Before using for the first time Induction Tips on saving energy Settings Operation Safety features Cleaning and care... - Page 3 Contents Problem solving guide Optional accessories Safety instructions for installation Safety distances Installation notes Building-in dimensions Installing several ProLine elements Installation Electrical connection After sales service Product data sheets...
-
Page 4: Warning And Safety Instructions
Warning and Safety instructions... - Page 5 Warning and Safety instructions Correct application ...
- Page 6 Warning and Safety instructions Safety with children en over 8 years of age may use the hob without super ...
- Page 7 Warning and Safety instructions Technical safety ...
- Page 8 Warning and Safety instructions ...
- Page 9 Warning and Safety instructions Correct use ...
- Page 10 Warning and Safety instructions ...
- Page 11 Warning and Safety instructions Do not use two pans on a cooking zone or e ...
- Page 12 Warning and Safety instructions Cleaning and care ...
-
Page 13: Caring For The Environment
Caring for the environment Disposal of the packing mater- Disposing of your old appli- ance... -
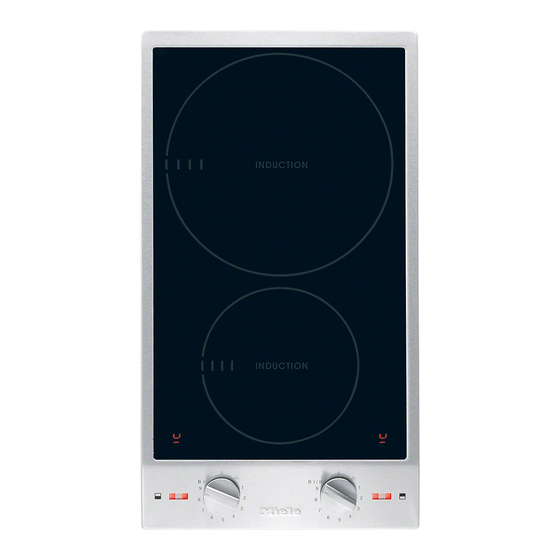
Page 14: Guide To The Appliance
Guide to the appliance CS 1212-1 / CS 1212-2... - Page 15 Guide to the appliance CS 1221-1...
- Page 16 Guide to the appliance CS 1222 Indicators ...
- Page 17 Guide to the appliance Control symbols Symbol Description 1 – 9 Display Symbol Description / Cooking zones CS 1212-1 / CS 1212-2 Cooking zone Ø in cm* Rating in watts for 230 V** ...
- Page 18 Guide to the appliance CS 1221-1 Ø in cm* Rating in watts for 230 V** Cooking zone CS 1222 Ø in cm* Rating in watts for 230 V** ...
- Page 19 Before using for the first time Switching on the hob for the first time Cleaning the hob for the first time ...
-
Page 20: Induction
Induction The induction principle and ... - Page 21 Induction Noises...
- Page 22 Induction Pans suitable not suit- able If an unsuitable pan is used, the and the ...
-
Page 23: Tips On Saving Energy
Tips on saving energy... -
Page 24: Settings
Settings Setting range ... -
Page 25: Operation
Operation Cooking zone controls Switching off turned past B I or B I/II t o 0. Switching on Residual heat indicator ... - Page 26 Operation Auto heat-up Continued cook- Heat-up time ing level [min:sec] Activating clockwise and hold until set within 5 seconds of activating Aut will appear in Deactivating S...
- Page 27 Operation Booster for a maximum of 10 minut duced power level and and ...
- Page 28 Operation To switch on the Booster To switch off the Booster / Twin- Booster S wise past 9 t o 9. play, the “B” Boost To switch on the TwinBooster, level 1 wise past 9 t o 9. play, the “B” Boost To switch on the TwinBooster, level 2 ...
- Page 29 Operation Setting the keeping warm function Keeping warm ...
-
Page 30: Safety Features
Safety features System lock Safety switch-off and appears in Activating appears Deactivating goes out... - Page 31 Safety features Overheating protection S and ...
-
Page 32: Cleaning And Care
Cleaning and care C Unsuitable cleaning agents... - Page 33 Cleaning and care Ceramic surface Cleaning the ceramic surface Spots S sugar, plastic or alu- minium foil immediately ...
- Page 34 Cleaning and care Stainless steel frame/control panel C printing Rotary controls C ...
-
Page 35: Problem Solving Guide
Problem solving guide Problem Cause and remedy The cooking zones do C not heat up. A smell and vapours are given off when the new appliance is being used. is flashing in a cook- ing zone display. ... - Page 36 Problem solving guide Problem Cause and remedy flashes alternately with in a cooking zone e than 3 minut display. The cooking zone has switched off automatically. S appears in the cook- ing zone display. S appears in the display for several seconds ...
-
Page 37: Optional Accessories
Optional accessories Ceramic and stainless steel hob cleaner 250 ml Microfibre cloth... -
Page 38: Safety Instructions For Installation
Safety instructions for installation ed with 100 °C heat-r ... -
Page 39: Safety Distances
Safety distances Safety distance above the Pro- Line element mm must be maintained. - Page 40 Safety distances Safety distances to the sides and back of the hob Minimum distance between the back 50 mm Minimum distance between the right left 40 mm CS 1212-2 50 mm 100 mm 150 mm 200 mm 250 mm...
- Page 41 Safety distances Minimum safety distances un- Interim shelf derneath the hob eave a gap of 10 mm at the back of shelf of 20 mm t oven 15 mm interim shelf 15 mm drawer 75 mm...
- Page 42 Safety distances Safety distance when installing the appliance near a wall with additional niche cladding 50 mm - 15 mm = minimum safety distance of 35 mm combustible erials 50 mm non-combustible erials 50 mm - dimension x...
-
Page 43: Installation Notes
Installation notes Sealing between the ProLine Tiled worktop Element and the worktop out lines ... -
Page 44: Building-In Dimensions
Building-in dimensions CS 1212-1 / CS 1212-2 mm... - Page 45 Building-in dimensions CS 1221-1 / CS 1222 2000 mm...
-
Page 46: Installing Several Proline Elements
Installing several ProLine elements oLine element width less 8 mm oLine element width less 8 mm... - Page 47 Installing several ProLine elements Calculating the worktop cut-out left by 8 mm on each side. act 16 mm fr 288 mm + 288 mm + 380 mm = 956 mm - 16 mm = 940 mm e 288 mm, 380 mm or 576 mm wide depending on Spacer bars Installation with a downdraft extractor...
-
Page 48: Installation
Installation Preparing the worktop Wooden worktops S osition the spring clamps spacer bars S e the spring clamps spacer bars with the 3.5 x 25 mm... - Page 49 Installation Natural stone worktops edges of the spring clamps the spacer bars Then fill gap bar Stick the tape osition the spring clamps spacer bars ...
- Page 50 Installation Installing several ProLine elements Installation with a downdraft extractor Fitting the ProLine element S S ≤ R4) can be car...
- Page 51 Installation Connecting the ProLine ele- ment C C Removing a ProLine element ...
-
Page 52: Electrical Connection
Electrical connection Total power rating Connection Residual current device... - Page 53 Electrical connection Disconnecting from the mains Replacing the power cable special connection cable, type H 05 VV Safety fuses C Automatic circuit breakers Built-in circuit breakers C Residual current device (RCD) S...
-
Page 54: After Sales Service
After sales service Contact in case of malfunction Data plate Warranty... -
Page 55: Product Data Sheets
Product data sheets Information for domestic electric hobs MIELE Model name/identifier 1. = Ø 100-160 mm 2. = Ø 160-230 mm 1. = 185,2 Wh/kg 2. = 168,9 Wh/kg 177,1 Wh/kg Information for domestic electric hobs MIELE Model name/identifier 1. = Ø 180-300 mm 1. = 170,3 Wh/kg... - Page 56 Product data sheets Information for domestic electric hobs MIELE Model name/identifier 1. = Ø 100-160 mm 2. = Ø 200 / 200x300 mm 1. = 185,2 Wh/kg 2. = 188,7 Wh/kg 187,0 Wh/kg...
- Page 59 Tel: +65 6735 1191 Fax. +971 4 3418 852 Fax: 011-46 900 001 Fax: +65 6735 1161 800-MIELE (64353) E-mail: customercare@miele.in E-Mail: info@miele.com.sg E-Mail: info@miele.ae Internet: www.miele.in Internet: www.miele.sg Website: www.miele.ae Manufacturer: Miele & Cie. KG, Carl-Miele-Straße 29, 33332 Gütersloh, Germany...
- Page 60 CS 1212-1 I / CS CS 1221-1 / CS 1222 I en-GB M.-Nr. 09 055 450 / 11...