Table of Contents
Advertisement
DIGITAL FULL COLOR MULTIFUNCTIONAL SYSTEM
DIGITAL FULL COLOR MULTIFUNCTIONAL SYSTEM
DIGITAL FULL COLOR MULTIFUNCTIONAL SYSTEM
Quick Start Guide
Quick Start Guide
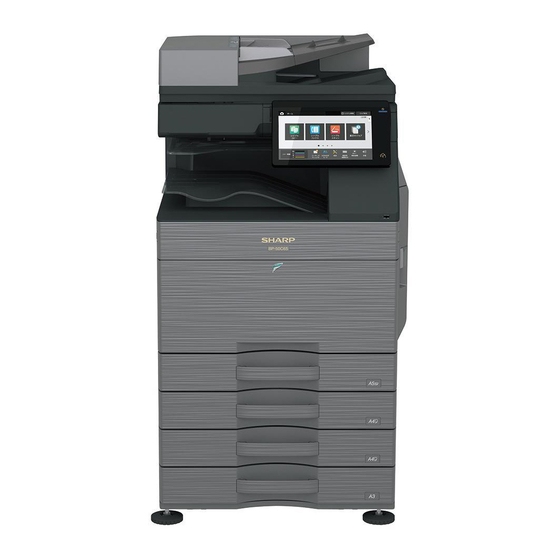
BP-50C26
BP-50C26
MODEL:
MODEL:
BP-50C31
BP-50C31
BP-50C36
BP-50C36
BP-50C45
BP-50C45
BP-50C55
BP-50C55
BP-50C65
BP-50C65
BEFORE USING THE MACHINE
Functions of the machine and procedures
for placing originals and loading paper
COPIER
Using the copy function
PRINTER
Using the printer function
FACSIMILE
Using the fax function
SCANNER
Using the scan function
DOCUMENT FILING
Storing jobs as files on the local
drive
SETTING MODE
Configuring settings to make the
machine easier to use
BP-70C31
BP-70C31
BP-70C36
BP-70C36
BP-70C45
BP-70C45
BP-70C55
BP-70C55
BP-70C65
BP-70C65
Advertisement
Table of Contents

Related Manuals for Sharp BP-50C26


Summary of Contents for Sharp BP-50C26
- Page 1 BP-50C26 BP-50C26 BP-70C31 BP-70C31 MODEL: MODEL: BP-50C31 BP-50C31 BP-70C36 BP-70C36 BP-50C36 BP-50C36 BP-70C45 BP-70C45 BP-50C45 BP-50C45 BP-70C55 BP-70C55 DIGITAL FULL COLOR MULTIFUNCTIONAL SYSTEM DIGITAL FULL COLOR MULTIFUNCTIONAL SYSTEM DIGITAL FULL COLOR MULTIFUNCTIONAL SYSTEM BP-50C55 BP-50C55 BP-70C65 BP-70C65 BP-50C65 BP-50C65 Quick Start Guide...
-
Page 2: How To Use Manuals
Switch to your preferred language before viewing and downloading the manual. In addition, the same "User's Manual", you can see download to your computer from the Web site. * Manual types may be updated. For more information, see our website. URL: https://global.sharp/restricted/products/copier/downloads/manuals/select.html... -
Page 3: Table Of Contents
TABLE OF CONTENTS HOW TO USE MANUALS ..........2 BEFORE USING THE MACHINE PART NAMES AND FUNCTIONS . - Page 4 SCANNER NETWORK SCANNER FUNCTION........34 SCANNING AN ORIGINAL .
-
Page 5: Before Using The Machine
Job separator (upper tray)* (19) Front cover Printed papers are delivered to this tray. (BP-50C26/50C31/50C36/50C45/70C31/70C36/70C45) Output tray* Open this cover to switch the main power switch to "On" or "Off" Output is delivered to this tray. to replace a toner cartridge. - Page 6 BEFORE USING THE MACHINE (10) (11) Facsimile expansion kit (12) (13) (10) (14) (15) (16)(17) (18) Motion sensor (10) USB port (A type) This sensor detects the presence of a person that approaches This is used to connect a USB device such as a USB memory the machine, and automatically wakes the machine from sleep device to the machine.
-
Page 7: Turning On/Off The Power
BEFORE USING THE MACHINE TURNING ON/OFF THE POWER This section describes how to turn on/off the machine's power and how to restart the machine. Operate two power switches: the main power switch inside the front cover, located in the lower left corner, and the [Power] button on the operation panel. -
Page 8: Operation Panel
BEFORE USING THE MACHINE OPERATION PANEL Pressing the [Home Screen] key on the operation panel displays the home screen on the touch panel. The home screen displays the keys for selecting modes or functions. User's Manual (h) (i) Information indicator Select functions that can be utilized in respective modes. -
Page 9: Motion Sensor
BEFORE USING THE MACHINE TO CHANGE THE ANGLE OF THE OPERATION PANEL You can change the angle of the operation panel. Adjust the angle for ease of viewing. MOTION SENSOR (BP-70C31/70C36/70C45/70C55/70C65) This sensor detects the presence of a person that approaches the machine, and automatically wakes the machine from sleep mode (Motion Sensor Mode Only). - Page 10 BEFORE USING THE MACHINE CHECKING THE STATUS OF A JOB / PRIORITY / CANCELING To display the Job Status screen, tap the [Job Status] key in the home screen, or tap the [Job Status] key that appears in the upper right corner of each mode screen. Check the job status Tap the tab of the mode you want to check.
-
Page 11: Placing Originals
BEFORE USING THE MACHINE PLACING ORIGINALS The automatic document feeder can be used to automatically scan many originals at once, and this saves you the trouble of manually feeding each original. For originals that cannot be scanned using the automatic document feeder, such as a book or a document with notes attached, use the document glass. -
Page 12: Adjusting The Volume
Paper Empty Logout Status User Control System Settings System Settings Home Screen Copy Settings Printer Sitemap Settings Settings Image Send Document Filing Sharp OSA Settings Settings Settings Authentication Common Network Settings Settings Settings Security Energy Save Settings System Control Image Quality Init. -
Page 13: Loading Paper
BEFORE USING THE MACHINE LOADING PAPER NAMES AND LOCATIONS OF TRAYS The names of the trays are as follows. (1) Tray 1 (4) Tray 4 (when a stand/3x550 sheet paper drawer is installed) (2) Tray 2 (when a stand/550/2x550/3x550/ 550&2100 sheet paper drawer is installed) (5) Tray 3 (when a stand/550&2100 sheet paper drawer is installed) (3) Tray 3 (when a stand/2x550/3x550 sheet paper... - Page 14 BEFORE USING THE MACHINE LOAD PAPER INTO THE TRAY 1 - 4 Pull out the paper tray. Gently pull the tray out until it stops. To load paper, go to step 3. To load a different size of paper, go to the next step. Adjust guide plates A and B to match the longitudinal and transversal dimensions of the paper to be loaded.
- Page 15 BEFORE USING THE MACHINE LOADING PAPER IN OTHER TRAYS Bypass tray Open the bypass tray. When loading paper larger than 8-1/2" x 11"R or A4R, pull out the extension guide. Pull the extension guide all the way out. Load the paper with the print side facing down.
- Page 16 BEFORE USING THE MACHINE Stand/550&2100 sheet paper drawer Pull out the paper tray. Gently pull the tray out until it stops. Tray 3 Tray 4 Place paper into the tray. Load the paper with the print side facing up. The stack must not be higher than the indicator line (maximum of 1200 sheets for tray 3, or maximum of 900 sheets for tray 4).
- Page 17 BEFORE USING THE MACHINE Large Capacity Tray If you find it necessary to change the paper size, consult the dealer or nearest SHARP Service Department. Open the top cover. Place the paper in the paper feed table. Insert the paper into the tray until it stops.
- Page 18 BEFORE USING THE MACHINE CHANGE THE SETTING OF THE PAPER TRAY To change the paper loaded in the tray, change the machine's tray settings from the [Tray Settings] key in the home screen. As an example, the steps for changing the paper in tray 1 from 8-1/2" x 11" plain paper to 5-1/2" x 8-1/2"R recycled paper are explained below.
-
Page 19: Saving Contacts In The Address Book
BEFORE USING THE MACHINE SAVING CONTACTS IN THE ADDRESS BOOK "Contacts" and "Group" can be stored in the address book. The procedure for adding a new contact to the address book by directly entering the name and address is explained here as an example. Tap the [Home Screen] key. -
Page 20: Accessing The Web Server In The Machine
BEFORE USING THE MACHINE ACCESSING THE WEB SERVER IN THE MACHINE When the machine is connected to a network, the machine's built-in Web server can be accessed from a Web browser on your computer. OPENING THE WEB PAGES Tap the [Settings] key. User's Manual Tap [Status] →... -
Page 21: User Authentication
BEFORE USING THE MACHINE USER AUTHENTICATION When user authentication is enabled in settings mode, you must log in in order to use the machine. User authentication is disabled in the factory default settings. When you have finished using the machine, log out. ABOUT AUTHENTICATION METHODS There are three user authentication methods: authentication by user number, authentication by login name / password, and authentication by quick authentication. -
Page 22: Functions That Can Be Used On The Machine
, Skew Adjustment, JPEG Compression Ratio, Automatically Detect Mono2/Grayscale are set automatically. Multi crop Image Crop * On the BP-50C26/50C31/50C36/50C45/50C55/50C65, the OCR expansion kit is required. Slow Scan Mode Dual Page Scan Use this function when you wish to scan thin originals using the The left and right sides of an original can be transmitted as two automatic document feeder. -
Page 23: Copier
COPIER This section explains the basic procedures for using the copier function. MAKING COPIES This section explains how to set a Copy Ratio. Tap the [Home Screen] key. Home screen appears. Tap the [Easy Copy] mode icon. Easy Copy mode screen appears. Copy mode has two modes: easy mode and normal mode. - Page 24 COPIER Tap the [Copy Ratio] key. The functions below can be enabled in easy mode. • Paper Select • 2-Sided Copy • Copy Ratio • Staple* , Staple / Punch* • Color Mode • Original • Exposure • N-Up • Card Shot •...
-
Page 25: Copying On Special Paper (Bypass Copy)
COPIER COPYING ON SPECIAL PAPER (Bypass Copy) This section explains how to load 8-1/2" x 11" heavy paper in the bypass tray. Load paper into the bypass tray. ► Bypass tray (page 15) Select settings in the touch panel. (1) Tap the [Heavy Paper 1], [Heavy Paper 2], [Heavy Paper 3] or [Heavy Paper 4] key. - Page 26 COPIER Tap the [Paper Select] Key. Select the Bypass Tray. Set the number of copies and then tap the [Color Start] key or [B/W Start] key. • In the factory default state, the machine detects whether the original is black & white or full color when you tap the [Color Start] key, and automatically switches between full color and black &...
-
Page 27: Printer
PRINTER This section explains the basic procedure for printing using the printer driver of the machine. The explanations of ® ® screens and procedures are primarily for Windows 10 in Windows environments, and macOS 11 in macOS environments. The window varies depending on the operating system version, the printer driver version, and the application. - Page 28 PRINTER Select print settings. (1) Click the [Main] tab. (2) Select the original size. To select settings on other tabs, click the desired tab and then select the settings. (3) Click the [OK] button. • Help can be displayed for a setting by clicking the setting and pressing the [F1] key.
-
Page 29: Printing In A Macos Environment
To install the printer driver and configure settings in a macOS environment, see the Software Setup Guide. On the BP-50C26/BP-50C31/BP-50C36/BP-50C45/BP-50C55/BP-50C65/BP-55C26, the PS3 expansion kit is required to use the machine as a printer in a macOS environment. - Page 30 PRINTER Select print settings. (1) Make sure that the correct printer is selected. (2) Select items from the menu and configure the settings as needed. (3) Click the [Print] button. PRINTING ON ENVELOPES The bypass tray or the tray 1 can be used for envelope printing. Select the envelope size in the settings of the application ("Page Setup"...
-
Page 31: Directly Printing A File In Usb Memory
*1 On the BP-50C26/BP-50C31/BP-50C36/BP-50C45/BP-50C55/BP-50C65/BP-55C26, the PS3 expansion kit is required. *2 On the BP-50C26/BP-50C31/BP-50C36/BP-50C45/BP-50C55/BP-50C65/BP-55C26, the Direct print expansion kit is required. Connect the USB memory device to the machine. When a screen for selecting the action External memory device (USB) is connected. -
Page 32: Facsimile
FACSIMILE This section explains the basic procedures for using the fax function of the machine. SENDING A FAX This section explains the basic procedure for sending a fax. In fax mode, color originals are sent as black and white images. Tap the [Home Screen] key. - Page 33 FACSIMILE Tap the key of the desired destination. Addresses of the current mode are selected from addresses whose checkboxes were selected when the tapped destination was registered. If no addresses were registered with the checkbox selected, tap the [Yes] key in the confirmation screen and select the desired addresses.
-
Page 34: Network Scanner Function
A TWAIN-compliant software application can PC Scan To process an image be used. in a specific application, use Data entry mode Scan to Desktop If you want to use a document solution linked FTP/Desktop to an application Sharp OSA... -
Page 35: Scanning An Original
SCANNER SCANNING AN ORIGINAL The basic operation for scanning is explained below. The procedure for sending a scanned file by E-mail to a destination stored in the address book is explained here. Tap the [Home Screen] key. Home screen appears. Tap the [Easy Scan] mode icon. - Page 36 SCANNER Tap the [All Destinations] key. A list of the selected destinations appears. Confirm the destination. If an incorrect destination appears in the list, tap the destination and then tap the [Delete] key. to change screens and select settings. Change settings as needed. The functions below can be enabled in easy mode.
-
Page 37: Document Filing
DOCUMENT FILING The document filing function is used to store the document or print image on the hard drive when performing a copy, print, or other job. You can print or perform other operations using the saved file at a later time. This section introduces several of the document filing functions. - Page 38 DOCUMENT FILING Tap the [Local Drive/USB] key. Tap the [Scan to Local Drive] key. Local Drive/USB Scan to Scan to Local Drive Colour Recent Auto Set Preview Start Start Jobs Tap the [Color Start] key or [B/W Start] key. To check a preview of a document, tap the [Preview] key. ►...
- Page 39 DOCUMENT FILING Scan to USB memory device Connect the USB memory device to the machine. Use a FAT32 or NTFS USB memory device with a capacity of no more than 32 GB. When a screen for selecting the action appears, tap [Scan to External Memory Device].
-
Page 40: Printing A Saved File
DOCUMENT FILING PRINTING A SAVED FILE You can retrieve a file stored by document filing and print or transmit the file. You can also print files saved in a USB memory device or a shared folder. The steps for printing the "Copy_20201010_112030" file saved in the main folder are explained below. Tap the [Home Screen] key. -
Page 41: Setting Mode
To exit setting mode, tap the [Cancel] key. System Settings ► SETTING MODE WHEN AN ADMINISTRATOR IS Home Screen Copy Settings Printer Sitemap Settings Settings LOGGED IN (page 42) Image Send Document Filing Sharp OSA Settings Settings Settings Authentication Common Network Settings Settings Settings Security Energy Save... - Page 42 SETTING MODE SETTING MODE WHEN AN ADMINISTRATOR IS LOGGED IN An administrator can configure settings that are more advanced than the settings available to a guest or user. When user authentication is enabled, settings may be allowed without entering the administrator password based on the rights of the logged in user.
- Page 43 Configure settings for image send, such as fax and Scan to E-mail. Document Filing Settings You can select Document Filing settings. Sharp OSA Settings You can select Sharp OSA settings. Authentication Settings Configure the user authentication method. Alternatively, configure the IC card. Common Settings You can configure machine settings such as date settings and tray settings.
- Page 44 SETTING MODE...
- Page 45 SHARP Service Department. • Aside from instances provided for by law, SHARP is not responsible for failures occurring during the use of the product or its options, or failures due to incorrect operation of the product and its options, or other failures, or for any damage that occurs due to use of the product.
- Page 46 bp70c65_qsg_01a_us...