Advertisement
Available languages
Available languages
Quick Links
Advertisement
Chapters

Related Manuals for Electrolux EIP8146


Summary of Contents for Electrolux EIP8146
- Page 1 User Manual เตาฝ ง คู ม ื อ การใช ง าน Bếp Hướng dẫn Sử dụng Get the most out of your appliance For quick access to manuals, how-to guides, support and more through our photo registration visit electrolux.com/register...
-
Page 2: Table Of Contents
10. ENERGY EFFICIENCY.................. 19 WE’RE THINKING OF YOU Thank you for purchasing an Electrolux appliance. You’ve chosen a product that brings with it decades of professional experience and innovation. Ingenious and stylish, it has been designed with you in mind. So whenever you use it, you can be safe in the knowledge that you’ll get great results every time. - Page 3 ENGLISH instructions in a safe and accessible location for future reference. 1.1 Children and vulnerable people safety This appliance can be used by children aged from 8 • years and above and persons with reduced physical, sensory or mental capabilities or lack of experience and knowledge if they have been given supervision or instruction concerning the use of the appliance in a safe way and understand the hazards involved.
-
Page 4: Safety Instructions
CAUTION: The cooking process has to be supervised. • A short term cooking process has to be supervised continuously. WARNING: Danger of fire: Do not store items on the • cooking surfaces. Metallic objects such as knives, forks, spoons and lids •... - Page 5 ENGLISH • Each appliance has cooling fans on Service Centre or an electrician to the bottom. change a damaged mains cable. • If the appliance is installed above a • The shock protection of live and drawer: insulated parts must be fastened in –...
- Page 6 • If the surface of the appliance is other purposes, for example room cracked, disconnect immediately the heating. appliance from the power supply. This 2.4 Care and cleaning to prevent an electrical shock. • Users with a pacemaker must keep a •...
-
Page 7: Installation
ENGLISH 3. INSTALLATION WARNING! Refer to Safety chapters. 3.1 Before the installation Before you install the hob, write down the information bellow from the rating plate. The rating plate is on the bottom of the hob. Serial number ......3.2 Built-in hobs Only use the built-in hobs after you assemble the hob into correct built-in units and work surfaces that align to the... -
Page 8: Product Description
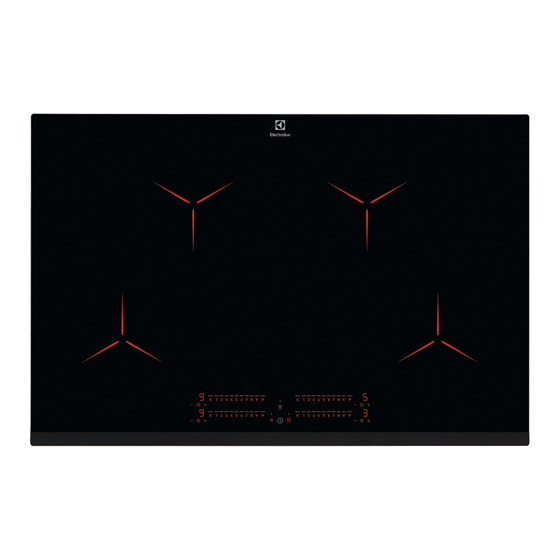
4. PRODUCT DESCRIPTION 4.1 Cooking surface layout Induction cooking zone Control panel 4.2 Control panel layout To see the control panel and the zone positions activate the appliance with Use the sensor fields to operate the appliance. The displays, indicators and sounds tell which functions operate. -
Page 9: Daily Use
ENGLISH Sen‐ Function Comment field Control bar To set a heat setting. PowerBoost To activate the function. Lock / Child Safety De‐ To lock / unlock the control panel. vice 4.3 OptiHeat Control (3 step The induction cooking zones produce the heat necessary for the cooking process Residual heat indicator) directly in the bottom of the cookware. - Page 10 5.3 Using the cooking zones 5.5 Power management function CAUTION! Do not place hot cookware • Cooking zones are grouped according on the control panel. There to the location and number of the is a risk of damage to the phases in the hob.
- Page 11 ENGLISH 5.7 Timer To deactivate the function: touch . The indicators light up. Use Count Down Timer to set on the display. Use this function to specify how long a The function has no effect cooking zone should operate during a on the operation of the single cooking session.
- Page 12 The For most of the hoods, the control bar appears. Set the heat setting remote system is originally within 50 seconds.You can operate the deactivated. Activate it hob. When you deactivate the hob with before you use the function.
-
Page 13: Hints And Tips
ENGLISH time the system deactivates the fan automatically and prevents you from an Auto‐ Boil‐ Frying accidental activation of the fan for the matic next 30 seconds. light To operate the hood directly Mode H6 on the hood panel deactivate speed 2 speed 3 the automatic mode of the... - Page 14 6.3 Öko Timer (Eco Timer) The cooking zone efficiency is related to the diameter of the cookware. The To save energy, the heater of the cookware with a diameter smaller than cooking zone deactivates before the the minimum receives only a part of the count down timer sounds.
-
Page 15: Care And Cleaning
(e.g. with the which work with this function refer to our hand, a cookware handle or a tall consumer website. The Electrolux cooker pot). See the picture. hoods that work with this function must The hood in the picture is only have the symbol exemplary. -
Page 16: Troubleshooting
7.2 Cleaning the hob water rings, fat stains, shiny metallic discoloration. Clean the hob with a • Remove immediately: melted plastic, moist cloth and a non-abrasive plastic foil, sugar and food with sugar, detergent. After cleaning, wipe the otherwise, the dirt can cause damage hob dry with a soft cloth. - Page 17 ENGLISH Problem Possible cause Remedy An acoustic signal sounds You put something on one Remove the object from and the hob deactivates. or more sensor fields. the sensor fields. An acoustic signal sounds when the hob is deactiva‐ ted. The hob deactivates. You put something on the Remove the object from the sensor field.
-
Page 18: Technical Data
Make sure, you operated the hob correctly. If not the 9. TECHNICAL DATA 9.1 Rating plate Model EIP8146 PNC 949 596 879 01 Typ 62 D4A 20 AA 220 - 240 V / 400 V 2N 50 - 60 Hz Induction 7.35 kW... -
Page 19: Energy Efficiency
10. ENERGY EFFICIENCY 10.1 Product information according to EU 66/2014 valid for EU market only Model identification EIP8146 Type of hob Built-In Hob Number of cooking zones Heating technology Induction Diameter of circular cook‐... -
Page 20: ข อ มู ล ด า นความปลอดภั ย
เราใส ใ จดู แ ลคุ ณ ขอบคุ ณ ที ่ ซ ื ้ อ เครื ่ อ งใช ไ ฟฟ า จาก Electrolux คุ ณ ได เ ลื อ กผลิ ต ภั ณ ฑ ท ี ่ เ กิ ด จากประสบการณ... - Page 21 ภาษาไทย ถู ก ต อ ง เก็ บ ชุ ด คำแนะนำเพื ่ อ ความปลอดภั ย ไว ใ นที ่ ท ี ่ เ รี ย กค น เพื ่ อ อ า งอิ ง ได อ ย า งสะดวก 1.1 ความปลอดภั ย ต อ เด็ ก และกลุ ม เสี ่ ย ง เครื...
-
Page 22: คำแนะนำด า นความปลอดภั ย
วั ต ถุ โ ลหะ เช น มี ด ส อ ม ช อ นและประตู ไ ม ค วรวางอยู บ นพื ้ น • ผิ ว เตาไฟฟ า เนื ่ อ งจากอาจเกิ ด ความร อ นสู ง อย า ใช เ ครื ่ อ งพ น ไอน้ ำ ร อ นเพื ่ อ ทำความสะอาดเครื ่ อ งใช... - Page 23 ภาษาไทย • ตรวจสอบว า เครื ่ อ งติ ด ตั ้ ง ได ถ ู ก ต อ ง สายไฟ • อย า ใส เ ครื ่ อ งใช บ นโต ะ อาหารและฝาหม อ หรื อ ปลั ๊ ก ไฟที ่ ห ลวมคลอนหรื อ ต อ ไม ถ ู ก ต อ ง ในพื...
-
Page 24: การติ ด ตั ้ ง
2.4 การดู แ ลและทำความสะอาด เหล า นี ้ ม ี ว ั ต ถุ ป ระสงค เ พื ่ อ ให ท นทานต อ สภาพทางกายภาพที ่ ร ุ น แรงในเครื ่ อ งใช ใ น • ทำความสะอาดเครื ่ อ งเป น ประจำเพื ่ อ... -
Page 25: รายละเอี ย ดผลิ ต ภั ณ ฑ
ภาษาไทย หากตั ว เครื ่ อ งติ ด ตั ้ ง เหนื อ ลิ ้ น ชั ก ส ว นระบายอากาศของเตาอาจ ทำให ข องที ่ เ ก็ บ ในลิ ้ น ชั ก เกิ ด ความร อ นระหว า งการปรุ ง อาหาร... -
Page 26: การใช ง านประจำวั น
พื ้ น ที ่ ‐ ฟ ง ก ช ั ่ น ความเห็ น เซ็ น เ‐ ซอร ON / OFF เป ด และป ด เตา Hob²Hood เพื ่ อ เป ด และป ด ใช ง านโหมดแมนวลของฟ ง ก ช ั ่ น... - Page 27 ภาษาไทย • คุ ณ ไม ไ ด ป ด ทำงานพื ้ น ที ่ ป รุ ง สุ ก หรื อ ปรั บ ค า ความร อ น หลั ง ผ า นไประยะหนึ ่ ง เตาจะป ด ทำงาน ความสั ม พั น ธ ร ะหว า งค า ความร อ นและเวลา หลั...
- Page 28 เมื ่ อ สิ ้ น สุ ด ระยะเวลาที ่ ก ำหนด เสี ย งสั ญ ญาณจะ กดเลื อ ก เพื ่ อ เป ด ใช ง านฟ ง ก ช ั ่ น นี ้ ส ำหรั บ...
- Page 29 ภาษาไทย การใช ง านฟ ง ก ช ั ่ น แบบอั ต โนมั ต ิ สว า ง กดเลื อ ก จนกว า เสี ย งสั ญ ญาณจะดั ง ใช ง านฟ ง ก ช ั ่ น แบบอั ต โนมั ต ิ โ ดยปรั บ โหมด และไฟสถานะดั...
-
Page 30: คำแนะนำและเคล็ ด ลั บ
กดเลื อ ก ขณะหั ว เตาทำงานอยู 5. กดที ่ ของตั ว ตั ้ ง เวลา เพื ่ อ เลื อ กโหมด นี ่ เ ป น การป ด การทำงานอั ต โนมั ต ิ ข องฟ ง ก ช ั ่ น นี ้... - Page 31 ภาษาไทย 6.4 ตั ว อย า งการปรุ ง สุ ก พื ้ น ที ่ ป รุ ง อาหารที ่ ม ี ค า ความร อ นระดั บ กลางจะ ใช พ ลั ง งานน อ ยกว า ครึ ่ ง หนึ ่ ง ความสั...
-
Page 32: การดู แ ลรั ก ษาและทำความสะอาด
เว็ บ ไซต ส ำหรั บ ผู บ ริ โ ภคของเรา ปล อ งดู ด ควั น Electrolux ที ่ ใ ช ไ ด ก ั บ ฟ ง ก ช ั ่ น นี ้ จ ะมี ส ั ญ ลั ก ษณ... - Page 33 ภาษาไทย ป ญ หา สาเหตุ ท ี ่ เ ป น ไปได วิ ธ ี แ ก ไ ข ฟ ว ส ข าด ตรวจสอบให แ น ใ จว า ฟ ว ส เ ป น ‐ สาเหตุ ข องป ญ หาในการ‐ ทำงานหรื...
-
Page 34: ข อ มู ล ทางเทคนิ ค
จะต อ งเป ด ใช ง านหั ว เตาให ถ ู ก ต อ ง หากไม ถ ู ก 9. ข อ มู ล ทางเทคนิ ค 9.1 แผ น ข อ มู ล รุ น EIP8146 PNC 949 596 879 01 ประเภท 62 D4A 20 AA 220 - 240 V / 400 V 2N 50 - 60 Hz เหนี... -
Page 35: การประหยั ด พลั ง งาน
10. การประหยั ด พลั ง งาน 10.1 ข อ มู ล ผลิ ต ภั ณ ฑ ภ ายใต EU 66/2014 ใช ก ั บ ตลาดใน EU เท า นั ้ น รหั ส รุ น EIP8146 ประเภทเตา หั ว เตาสำเร็ จ... - Page 36 11. ข อ มู ล เพื ่ อ การรั ก ษาสิ ่ ง แวดล อ ม เครื ่ อ งหมายสั ญ ลั ก ษณ รวมกั บ ขยะในครั ว รี ไ ซเคิ ล วั ส ดุ ท ี ่ ม ี ส ั ญ ลั ก ษณ...
-
Page 37: Thông Tin Về An Toàn
10. TIẾT KIỆM NĂNG LƯỢNG................53 CHÚNG TÔI LUÔN NGHĨ VỀ BẠN Cảm ơn bạn đã mua thiết bị Electrolux. Bạn đã chọn sản phẩm có chứa hàng thập niên kinh nghiệm chuyên môn và sự đổi mới. Tinh tế và sành điệu, thiết bị... - Page 38 ở nơi an toàn và dễ tiếp cận để tham khảo trong tương lai. 1.1 An toàn cho trẻ em và những người dễ bị tổn thương Thiết bị này có thể được sử dụng bởi trẻ em từ 8 tuổi •...
-
Page 39: Hướng Dẫn Về An Toàn
KHÔNG cố gắng dập lửa bằng nước, mà hãy tắt thiết • bị và sau đó dập lửa bằng nắp đậy hoặc chăn dập lửa. THẬN TRỌNG: Phải giám sát quy trình nấu ăn. Phải • giám sát liên tục quy trình nấu ăn ngắn hạn. CẢNH BÁO: Nguy hiểm gây cháy: Không cất giữ... - Page 40 • Tuân thủ hướng dẫn lắp đặt được • Hãy sử dụng kẹp giảm căng trên dây cung cấp kèm theo thiết bị. cáp điện. • Giữ khoảng cách tối thiểu với các thiết • Hãy chắc chắn rằng dây cáp điện bị...
- Page 41 • Đặt vùng nấu ăn ở chế độ "off" (tắt) xước tấm kính / tấm gốm kính. Luôn sau mỗi lần sử dụng. nâng các vật dụng lên khi quý vị phải • Không phụ thuộc vào chức năng cảm di chuyển chúng trên bề...
-
Page 42: Lắp Đặt
3. LẮP ĐẶT CẢNH BÁO! Tham khảo các chương về An Toàn. 3.1 Trước khi lắp đặt Trước khi quý vị lắp đặt ngăn giữ nóng, ghi ra những thông tin dưới đây từ biển thông số. Biển thông số nằm ở đáy của khoang lò. -
Page 43: Mô Tả Sản Phẩm
4. MÔ TẢ SẢN PHẨM 4.1 Bố cục bề mặt nấu ăn Vùng nấu ăn cảm ứng Bảng điều khiển 4.2 Bố trí bảng điều khiển Để nhìn thấy bảng điều khiển và vị trí vùng, hãy bật thiết bị bằng Sử... -
Page 44: Sử Dụng Hàng Ngày
Trườn Chức năng Nhận xét g cảm biến PowerBoost Để bật chức năng. Khóa / Bộ Phận An Toàn Để khóa / mở khóa bảng điều khiển. Cho Trẻ Em 4.3 OptiHeat Control (Đèn chỉ Các vùng nấu ăn cảm ứng tạo ra nhiệt cần thiết cho quá... - Page 45 • Chức năng chia công suất giữa các vùng nấu ăn được kết nối với cùng một pha. • Chức năng kích hoạt khi tổng mức tải điện của các vùng nấu ăn được kết nối với một pha vượt quá 3680 W. •...
- Page 46 5.8 Tạm dừng 1. Chạm vào để bật chức năng này hoặc thay đổi thời gian. Chức năng này đặt tất cả các vùng nấu Số trên đồng hồ hẹn giờ cùng với ăn hoạt động ở cài đặt nhiệt thấp nhất.
- Page 47 và đèn chỉ báo tắt. Thanh điều khiển Bật đèn xuất hiện. Tắt bếp. Quý vị có thể đặt bếp để tự động bật đèn mỗi khi quý vị bật bếp. Để làm điều đó, 5.11 OffSound Control (Tắt và hãy đặt chế...
-
Page 48: Các Mẹo Và Lời Khuyên
Thao tác này sẽ làm cho chức năng này bật quạt trong 30 giây tiếp theo. không tự động vận hành và cho phép quý vị thay đổi tốc độ quạt thủ công. - Page 49 6.4 Các ví dụ về ứng dụng nấu thụ điện năng. Điều này có nghĩa là vùng nấu ăn được cài đặt nhiệt trung bình sử ăn dụng dưới một nửa điện năng của nó. Mối quan hệ giữa cài đặt nhiệt của một Dữ...
-
Page 50: Bảo Trì Và Làm Sạch
Để tìm đầy đủ các máy hút mùi làm việc với chức năng này, hãy tham khảo trang web người tiêu dùng của chúng tôi. Máy hút mùi Electrolux hoạt động với chức năng này phải có biểu tượng 7. BẢO TRÌ VÀ LÀM SẠCH nếu không vết bẩn này có... - Page 51 8.1 Phải làm gì nếu... Vấn đề Nguyên nhân có thể Khắc phục Quý vị không thể bật hoặc Bếp không được kết nối với Kiểm tra xem bếp có được vận hành bếp. nguồn điện hoặc được kết kết nối với nguồn điện nối không đúng cách.
- Page 52 Vấn đề Nguyên nhân có thể Khắc phục Cài đặt nhiệt cao nhất Cài đặt nhiệt cao nhất có được thiết lập. công suất tương tự như chức năng. Vùng cảm biến trở nên Nồi quá lớn hoặc quý vị đặt Đặt nồi lớn ở...
-
Page 53: Thông Số Kỹ Thuật
9. THÔNG SỐ KỸ THUẬT 9.1 Nhãn máy Model EIP8146 PNC 949 596 879 01 Quy chuẩn 62 D4A 20 AA 220 - 240 V / 400 V 2N 50 - 60 Hz Cảm ứng 7.35 kW Sản xuất tại Đức Số... - Page 54 Mức tiêu thụ năng lượng Phía trước bên trái 181,8 Wh / kg của mỗi vùng nấu ăn (EC Phía sau bên trái 190,8 Wh / kg electric cooking) Phía trước bên phải 194,9 Wh / kg Phía sau bên phải 190,8 Wh / kg Mức tiêu thụ...
- Page 56 www.electrolux.com/shop...