
Related Manuals for Toro 71286


Summary of Contents for Toro 71286
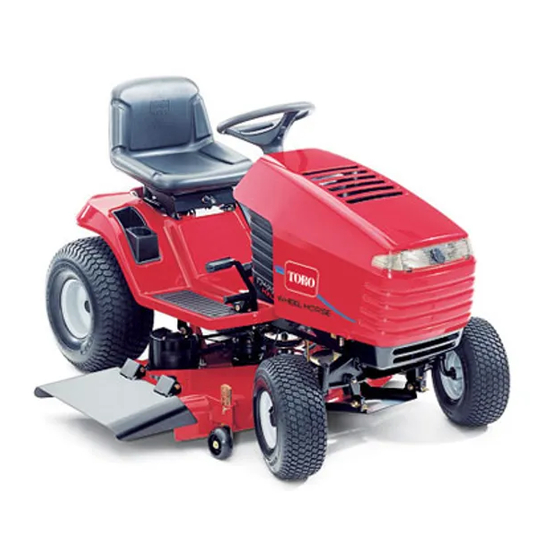
- Page 1 Form No. 3352-805 Wheel Horse XL 440H Lawn Tractor Model No. 71286—Serial No. 250000001 and Up Operator’s Manual Register your product at www.Toro.com. Original Instructions (EN)
-
Page 2: Table Of Contents
....... Dealer or Toro Customer Service and have the model and Safety and Instruction Decals . -
Page 3: Safety
• lack of awareness of the effect of ground Caution signals a hazard that may cause minor or moderate injury if you do not follow the recommended precautions. conditions, especially slopes; • incorrect hitching and load distribution. This manual uses 2 other words to highlight information. Important calls attention to special mechanical information and Note: emphasizes general information... - Page 4 • Stop the engine and disengage drive to attachment – do not stop or start suddenly when going up or downhill; – before refuelling; – engage clutch slowly, always keep machine in gear, – before removing the grass catcher; especially when travelling downhill; –...
-
Page 5: Toro Riding Mower Safety
Toro Riding Mower Safety The following paragraph contains safety information specific to Toro products or other safety information that you must know that is not included in the CEN standard. Use only Toro-approved attachments. Warranty may be voided if used with unapproved attachments. -
Page 7: Slope Chart
Slope Chart... -
Page 9: Safety And Instruction Decals
Safety and Instruction Decals Safety decals and instructions are easily visible to the operator and are located near any area of potential danger. Replace any decal that is damaged or lost. 92-5730 1. Choke 3. Continuous variable setting 2. Fast 4. - Page 10 99-2986 1. Crushing/dismemberment hazard of bystanders—do not turn the key while children are present; keep children a safe distance from the machine. 100-7449 1. Pull the lever out to push 3. Read the instructions the machine. before servicing or performing maintenance. 2.
- Page 11 104-4164 1. Contains lead; do not 4. No sparks, flame, or 6. Flush eyes immediately with 8. Minimum fill line discard. smoking water and get medical help 9. Instructions for activating the fast. 2. Recycle 5. Sulfuric acid can cause battery blindness or severe burns.
-
Page 12: Gasoline And Oil
Gasoline and Oil Recommended Gasoline Using Stabilizer/Conditioner Use unleaded regular gasoline suitable for automotive use Use a fuel stabilizer/conditioner in the tractor to provide the (85 pump octane minimum). You may use leaded regular following benefits: gasoline if unleaded regular is not available. •... -
Page 13: Operation
Operation Using the Parking Brake Always set the parking brake when you stop the tractor or Controls leave it unattended. Become familiar with all of the controls (Fig. 2) before you Setting the Parking Brake start the engine and operate the tractor. 1. -
Page 14: Positioning The Seat
Positioning the Seat Disengaging the Blades 1. Press the clutch/brake pedal to stop the tractor. The seat can move forward and backward. Position the seat where you have the best control of the tractor and are most 2. Push the blade control (PTO) to Disengaged (Fig. 5). comfortable. -
Page 15: Stopping The Engine
Note: An engine that has been running and is warm may Using the Safety Interlock not require step 4. System Understanding the Safety Interlock System The safety system is designed to prevent the engine from starting unless: • The clutch/brake pedal is depressed. •... -
Page 16: Testing The Safety Interlock System
3. Turn the KeyChoice key. Danger A red light on the front console (Fig. 11) turns on, indicating that the interlock is disabled. You could back over a child or bystander while the mower blades or other attachment is engaged and cause serious injury or death. -
Page 17: Pushing The Tractor Manually
4. Shift the blade control (PTO) into the Disengaged Driving the Tractor Forward or position, the ground speed pedal in Neutral, and set the Backward parking brake. Start the engine. While the engine is running, shift the blade control (PTO) into the Engaged The throttle control regulates the engine speed as measured position, push in the clutch, and put the ground speed in RPM (revolutions per minute). -
Page 18: Stopping The Tractor
• If you must stop the tractor while mowing, you may Stopping the Tractor leave a clump of grass clippings on your lawn. To avoid this, do the following: To stop the tractor, release the ground speed pedal, disengage the blades (PTO), and turn the ignition key to –... -
Page 19: Maintenance
Maintenance Recommended Maintenance Schedule Maintenance Service Maintenance Procedure Interval • Change the engine oil. After first 5 hours of use • Check the engine oil level. • Check the safety system. Each use • Check the battery electrolyte. • Check the brakes. Every 5 hours •... -
Page 20: Servicing The Engine Oil
Servicing the Engine Oil Check the oil level daily or after every 8 hours. Change the oil after the first 5 operating hours and every 50 operating hours thereafter. Note: Change the oil more frequently when operating conditions are extremely dusty or sandy. Oil Type: Detergent oil (API service SF, SG, SH, SJ, or 1868 higher) -
Page 21: Servicing The Air Cleaner
Changing the Oil Filter 5. Open the hood. 6. Clean around the air cleaner to prevent dirt from getting Replace the oil filter every 100 hours or every other oil into the engine and causing damage. Pull up on the air change. -
Page 22: Servicing The Spark Plug
Paper Element: 1. Lightly tap the element on a flat surface to remove dust and dirt. 2. Carefully clean the rubber seal on the paper element to prevent debris from entering the engine. 3. Inspect the element for tears, an oily film, and damage to the rubber seal. -
Page 23: Servicing The Brake
Servicing the Brake Important With the parking brake released, the rear wheels should rotate freely when you push the tractor. If The brake is on the right side of the rear axle, inside the you cannot set the 0.015 in. (0.38 mm) clearance and get rear tire (Fig. -
Page 24: Servicing The Battery
6. Disconnect the negative (black) ground cable from the battery post (Fig. 23). m-1872 Figure 22 1. Valve stem Servicing the Battery Always keep the battery clean and fully charged. Use a m-4965 paper towel to clean the battery and battery box. If the battery terminals are corroded, clean them with a solution Figure 23 of 4 parts water and 1 part baking soda. - Page 25 Checking the Electrolyte Level 4. Slowly pour distilled water into each battery cell until the electrolyte level is up to the Upper line (Fig. 24) on 1. Tip the seat forward to see the battery. the battery case. 2. Look at the side of the battery. The electrolyte must be Important Do not overfill the battery because up to the Upper line (Fig.
-
Page 26: Draining The Fuel Tank
5. Install the battery in the tractor and connect the battery Note: Now is the best time to install a new fuel filter cables; refer to Installing the Battery on page 24. because the fuel tank is empty. 9. Install the fuel line onto the filter. Slide the hose clamp Important Do not run the tractor with the battery close to the filter to secure the fuel line and filter. -
Page 27: Servicing The Fuse
Servicing the Headlights 1-1/4 in. max. (32 mm) Use a #1156, automotive-type bulb. Removing the Bulb 1. Disengage the blades (PTO). 2. Set the parking brake. 3. Stop the engine and wait for all moving parts to stop. m-4983 4. Remove the ignition key. Figure 27 5. -
Page 28: Cleaning And Storing The Tractor
11. Prepare the tractor for storage when non-use occurs over 30 days. Prepare tractor for storage as follows. A. Add a petroleum based stabilizer/conditioner to fuel in the tank. Follow the mixing instructions from the stabilizer manufacturer. (1 oz. per gallon). Do not use an alcohol based stabilizer (ethanol or methanol). -
Page 29: Wiring Diagram
Wiring Diagram... -
Page 30: Troubleshooting
Troubleshooting Problem Possible Causes Corrective Action The starter does not crank. 1. The blades (PTO) are 1. Shift the blade control (PTO) to engaged. Disengaged. 2. The parking brake is not on. 2. Set the parking brake. 3. The battery is dead. 3. - Page 31 Problem Possible Causes Corrective Action The engine loses power. 1. The engine load is excessive. 1. Shift into lower gear to reduce ground speed. 2. The air cleaner is dirty. 2. Clean the air cleaner element. 3. The oil level in the crankcase is 3.