Table of Contents
Advertisement
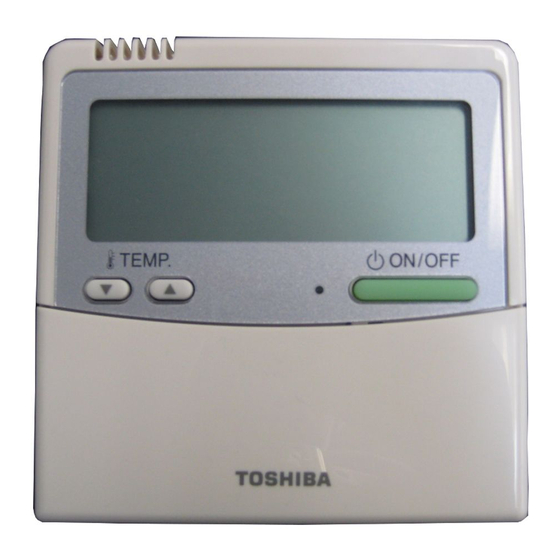
Model name:
RBC-AMTU31-E
TEMP.
• Read this manual before using the
RBC-AMTU31-E remote controller.
• Refer to the Owner's Manual supplied with the
indoor unit for any instructions other than
operations of the remote controller.
Multilingual installation manuals and owner's manual
ON / OFF
The manuals in the following languages can be downloaded at our
website.
Български / Česky / Dansk / Deutsch / Ελληνικά / English / Español
/ Eesti / Suomi / Français / Hrvatski / Magyar / Italiano / 한국어 /
Latviešu / Norsk / Nederlands / Polski / Português / Română /
Русский / Slovensky / Slovenščina / Svenska / Türkçe / 中文
https://www.toshiba-carrier.co.jp/global/manual/rbc-amtu31-e.htm
Owner's Manual
Wired remote controller
For commercial use
Advertisement
Table of Contents

Related Manuals for Toshiba RBC-AMTU31-E


Summary of Contents for Toshiba RBC-AMTU31-E
- Page 1 RBC-AMTU31-E TEMP. ON / OFF • Read this manual before using the RBC-AMTU31-E remote controller. • Refer to the Owner’s Manual supplied with the indoor unit for any instructions other than operations of the remote controller. Multilingual installation manuals and owner’s manual The manuals in the following languages can be downloaded at our website.
-
Page 2: Table Of Contents
Owner’s Manual Contents 1 Safety Precautions ........... . 2 2 Part names and functions of the remote controller . -
Page 3: Safety Precautions
Owner’s Manual Safety Precautions • Read these “Safety Precautions” carefully before using. • The precautions described below include important items regarding safety. Observe them without fail. Understand the following details (indications and symbols) before reading the body text, and follow the instructions. - Page 4 Owner’s Manual CAUTION Installation • Do not install the remote controller unit where there are high levels of moisture, oils, grease or vibration. Failure to heed this caution may cause trouble. • Do not install the remote controller unit direct sunlight or near a heat source. Failure to heed this caution may cause malfunctioning.
-
Page 5: Part Names And Functions Of The Remote Controller
Owner’s Manual Part names and functions of the remote controller This remote controller can control up to 16 indoor units. Display section All indicators are displayed in the display example below. Actually, only the selected options will be displayed. Display •... - Page 6 Owner’s Manual UNIT No. display Louver Number display (example: [01], [02], [03], [04]) Displays the number of the indoor unit selected. Also displays check code of indoor and outdoor Service display units. Displayed while the protective device works or a Power saving mode display trouble occurs.
-
Page 7: Operation Section
Owner’s Manual Operation section Once the settings have been configured, all you need to do is push the button from then on. UNIT LOUVER button button (Unit / Louver select button) Turns on the unit when pushed, and turns off when Selects a unit number (left) and louver number pushed again. - Page 8 Owner’s Manual button (TEST button) Use only for service. (During normal operation, do not use this button.) button (Filter reset button) Resets “ FILTER” indication after cleaning. button (Timer set button) Use to setup the timer. OPTION: Remote controller sensor Normally the temperature sensor of the indoor unit senses the temperature.
-
Page 9: Basic Operation
Owner’s Manual Basic operation When you use the air conditioner for the first time or change the settings, follow the procedures below. From next time, pushing the button starts running of the air conditioner with the chosen settings. Preparation Turn on the power switch •... -
Page 10: Changing The Set Temperature
Owner’s Manual Changing the set temperature Power save operation Push the buttons. Push to increase the temperature, and decrease the temperature. (The set temperature cannot be changed in the fan mode.) Displayed during Power save operation. NOTE TEMP. ON / OFF When cooling TIMER SET... -
Page 11: Timer Operation
Owner’s Manual Timer operation Select a timer type from the following three: (Max. 168 hours) OFF timer : Stops running after the specified period. Repeat-OFF timer : Stops running after the specified period every time you use the air conditioner. On timer : Starts running after the specified period. -
Page 12: Louver Direction
Owner’s Manual Louver direction Only types of unit having a wind direction adjustment function can be controlled. For precautions for use of the air conditioner, refer to the air conditioner owner’s manual. ◆ To set the louver direction ◆ To stop swinging SWING/FIX Push the button during running. -
Page 13: 4-Way Cassette Type, Compact 4-Way Cassette Type Only
Owner’s Manual ◆ Unit select 4-way cassette type, Compact 4-way cassette type only • When two or more indoor units are controlled with one remote controller, the louver direction can be set for each indoor unit by selecting them individually. UNIT LOUVER •... - Page 14 Owner’s Manual ◆ Setting the swing pattern 4-way cassette type Electrical control box SWING/FIX FIX for at least 4 Push and hold the seconds while the operation is stopped. blinks. Push the UNIT LOUVER button (left side of the Refrigerant button) to select a unit.
- Page 15 Owner’s Manual ▼ Cyclic swing Push the button. All four louvers swing at different times like waves. Push the button to finish the setting. ▼ Standard swing All four louvers swing simultaneously at the same angle. Swing ▼ Dual swing •...
- Page 16 Owner’s Manual ◆ Setting the louver lock button (right side of Push and hold the UNIT LOUVER the button) for at least 4 seconds while running is stopped. blinks. • When no unit number is displayed, all units are [0001] - [0005] selected.
- Page 17 Owner’s Manual NOTE Even in louver lock mode, the louver temporarily moves in the following cases: • When the air conditioner is stopped • When heating starts • When defrosting • When thermo. off. ◆ Releasing the louver lock Set [0000] in Step 4 of “Setting the louver lock”. mark disappears.
-
Page 18: Application Control
Owner’s Manual Application control Power saving mode Performing settings of the power saving mode The power saving mode saves energy by limiting the maximum current which will effect heating or cooling * When group control is performed in a complex capacity that the unit can generate. -
Page 19: 8°C Operation
Owner’s Manual 8°C operation Pre-heating operation can be set for cold regions where room temperature drops to below zero. Push buttons simultaneously for 4 seconds or more when the air conditioner is not working. After a while, the display part flashes as shown below. -
Page 20: Address Setting
Owner’s Manual Address setting [Procedure example] 1. Specify “CODE No.” [12] with buttons. (“CODE No.” [12]: Line address) Manual address setup 2. Change the line address from [3] to [2] with procedure buttons. 3. Push button. While the operation stops, change the setup. In this time, the setup finishes when the display (Stop the operation of the unit.) changes from flashing to lighting. -
Page 21: Resetting The Address
Owner’s Manual After check of the changed contents, push button. (Setup is determined.) When 1. Specify “CODE No.” [14] buttons. button is pushed, the display disappears (“CODE No.” [14]: Group address) and the status becomes the usual stop 2. Change the “SET DATA” from [0001] to [0002] status. -
Page 22: To Recognize The Position Of The Corresponding Indoor Unit Though The Indoor "Unit No." Is Known
Owner’s Manual To recognize the position of After confirmation, push button to return the mode to the usual mode. the corresponding indoor unit When button is pushed, the display disappears though the indoor “UNIT No.” and the status becomes the usual stop status. (When button is pushed the operation from the is known... -
Page 23: Dn Setting
Owner’s Manual DN setting Setting indoor unit DN codes buttons to change the setting being displayed to the desired setting. (I.DN) Push button. How to set an indoor unit DN code from After making the above change, push the wired remote controller (left side of the button) to check the new setting. -
Page 24: Setting Outdoor Unit Dn Codes (O.dn)
Owner’s Manual Setting outdoor unit DN codes (O.DN) Only types of unit having the relevant function can be controlled. How to set an outdoor unit DN code from the wired remote controller 2, 6 Push UNIT LOUVER (right side of the button) buttons simultaneously for 4 seconds or more. -
Page 25: Test Run
Owner’s Manual Test run Execute a test run Wired remote controller 2, 4 Operate the unit with the wired remote controller as usual. For the procedure of the operation, refer to the attached Owner’s Manual. A forced test run can be executed in the following procedure even if the operation stops by thermostat- OFF. -
Page 26: Service Monitor Function
Owner’s Manual Service monitor function This function is available to call the service monitor mode from the remote controller during a test run to acquire temperatures of sensors of the remote controller, indoor unit, and outdoor unit. Push buttons simultaneously for at least 4 seconds to call the service monitor mode. The service monitor indicator lights up and the header indoor unit number is displayed first. -
Page 27: Troubleshooting
Owner’s Manual Troubleshooting Confirmation and check Confirmation of check code When a problem occurred in the air conditioner, the When a problem occurred on the air conditioner, the check code and indoor “UNIT No.” appear on the check code can be confirmed with the following display part of the remote controller. -
Page 28: Maintenance
Owner’s Manual Maintenance To clean the remote controller, wipe it with a dry soft cloth. Do not wash with water, which may cause a malfunction. WARNING For daily maintenance including Air Filter cleaning, make sure to ask the qualified service person particularly for the following types of indoor unit as the maintenance requires high-place work;... - Page 29 Owner’s Manual 28-EN...
- Page 30 Owner’s Manual ..........................................................................................................................................................................................................................................................................................................................................................................................................................................................................................................................................................................................................................................................29-EN...
- Page 31 Owner’s Manual ..........................................................................................................................................................................................................................................................................................................................................................................................................................................................................................................................................................................................................................................................30-EN...
- Page 32 DEB9509002...