Yamaha QL5 Manual
Hide thumbs
Also See for QL5:
- Service manual (367 pages) ,
- Reference manual (294 pages) ,
- Owner's manual (58 pages)
Table of Contents
Advertisement
Quick Links
Advertisement
Table of Contents

Related Manuals for Yamaha QL5


Summary of Contents for Yamaha QL5
- Page 1 QL5/QL1 JK Circuit Board Component side (部品側) 2NA-WY63490...
- Page 2 QL5/QL1 LCDC (LCDCOM) Circuit Board Component side (部品側) ENC (PNCOM) Circuit Board Component side (部品側) Pattern side (パターン側) LCDC: 2NA-WY93730 2NA-ZF60470 ENC:...
- Page 3 QL5/QL1 PNL (PNCOM) Circuit Board Component side (部品側) Pattern side (パターン側) 2NA-ZF60470...
- Page 4 QL5/QL1 PN16M Circuit Board PN16S Circuit Board (QL5) F’ 2NA-ZF60450...
- Page 5 QL5/QL1 Scale: 90/100 F’ Component side (部品側) 2NA-ZF60450...
- Page 6 QL5/QL1 PN16M Circuit Board PN16S Circuit Board (QL5) to CRYSTAL DISPLAY to CRYSTAL DISPLAY to CRYSTAL DISPLAY to CRYSTAL DISPLAY (液晶ディ スプレイ) (液晶ディ スプレイ) (液晶ディ スプレイ) (液晶ディ スプレイ) PN16S: CH1/2 PN16S: CH3/4 PN16S: CH5/6 PN16S: CH7/8...
- Page 7 (液晶ディ スプレイ) (液晶ディ スプレイ) (液晶ディ スプレイ) (液晶ディ スプレイ) PN16S: CH9/10 PN16S: CH11/12 PN16S: CH13/14 PN16S: CH15/16 PN16M: CH25/26 (QL5) PN16M: CH27/28 (QL5) PN16M: CH29/30 (QL5) PN16M: CH31/32 (QL5) CH9/10 (QL1) CH11/12 (QL1) CH13/14 (QL1) CH15/16 (QL1)
- Page 8 QL5/QL1 PNR (PNCOM) Circuit Board Component side (部品側) 2NA-ZF60470...
- Page 9 QL5/QL1 PNR (PNCOM) Circuit Board Pattern side (パターン側) 2NA-ZF60470...
- Page 10 QL5/QL1 FD1M (FDCOM) Circuit Board FD2 (FDCOM) Circuit Board (QL5) H’ FD1M, FD2: 2NA-ZK68030...
- Page 11 QL5/QL1 Scale: 90/100 H’ Component side (部品側) FD1M, FD2: 2NA-ZK68030...
- Page 12 QL5/QL1 FD1M (FDCOM) Circuit Board FD2 (FDCOM) Circuit Board (QL5) I’ FD1M, FD2: 2NA-ZK68030...
- Page 13 QL5/QL1 Scale: 90/100 I’ Pattern side (パターン側) FD1M, FD2: 2NA-ZK68030...
- Page 14 QL5/QL1 FD1S (FDCOM) Circuit Board Component side (部品側) Pattern side (パターン側) 2NA-ZK68030...
- Page 15 QL5/QL1 PN2 (PNCOM) Circuit Board Component side (部品側) to PN16M-CN506 Pattern side (パターン側) USB (LCDCOM) Circuit Board Component side (部品側) PN2: 2NA-ZF60470 USB: 2NA-WY93730...
- Page 16 Parameters: • The oscillator output impedance should be 150 Ω. QL5: Input the analog signal from INPUT (XLR) of CH 1-16 • Measure the noise level with a 12.7 kHz, –6 dB/octave low and measure the signal output from OUTPUT of CH 1-16.
- Page 17 Parameters: Short INPUT of the even number channels to be QL5: Input the analog signal from INPUT (XLR) of CH 17-32 measured with 150 Ω. and measure the signal output from OUTPUT of CH 17-32. Output Level Permissible Range Assign OMNI IN CH 17-32 to OMNI OUT 1-16.
-
Page 18: Digital Out
1 kHz +22 dBu 0.02 % or below Input Frequency Output Level (L) Permissible Range 3 Noise level EIN (QL5: INPUT 17–32 / QL1: INPUT 9–16) 1 kHz +3 dBu –56 dBu or below Parameters: Short the CH IN to be measured with 150 Ω. - Page 19 QL5/QL1 A. 48 KHz + 4.1667 % (50 kHz) 4. Fader Inspection Parameters: When checking the WORD CLOCK IN, set the Parameters: Use the "SEISAN1.QL5A" fi le for the "scene data oscillator frequency to 50 kHz. for fader inspection". Set the Sample Rate column on the Device Confi g screen as follows.
- Page 20 Judgment criteria 1: 6. Lamp Voltage Measurement Confi rm that the EFFECT sound is output. QL5: Measure the voltage between pins No.3 and No.4 at 2 places on the rear panel. Judgment criteria 2: QL1: Measure the voltage between pins No.3 and No.4 at 1 Confi...
- Page 21 2-1. QL5: INPUT 1-16 → OMNI OUT 1-16 ・ノイズ測定は12.7 kHz、‒6 dB/OCTのLPFで補正し QL1: INPUT 1-8 → OMNI OUT 1-8 ます。 条件 QL5: CH1-16 の INPUT (XLR) からアナログ信号 (実効値ではなく平均値での測定とします。 ) を入力し、CH1‒16 出力から出力される信号 Audio Precision 製オーディオアナライザ System Two を計測します。 や 2700 series を 使 用 する 場 合 は Detector Reading ...
- Page 22 条件 1つの奇数チャンネルのOMNI OUTのみをONにし を て出力させ、それ以外のOMNI OUTはOFFにして、 確認します。 奇数チャンネルと左右に隣接する偶数チャンネル のノイズレベルを測定します。 2-2. QL5: INPUT 17-32 → OMNI OUT 1-16 測定の偶数チャンネルは入力を150 Ωでショート QL1: INPUT 9-16 → OMNI OUT 1-8 します。 条件 QL5: CH 17-32 の INPUT (XLR) からアナログ信 出力レベル 許容範囲 入力周波数 号を入力し、CH 17‒32 出力から出力される (奇数チャンネル) (偶数チャンネル) 信号を計測します。 1 kHz +23 dBu ‒57 dBu 以下 ...
- Page 23 1 kHz 0 dBu 0.15 %以下 3-2. WORD CLOCK IN の PLL 動作範囲 条件 System Twoを使用します。 ③残留ノイズ(PHONES L,R) Lch測定時は 条件 STEREOをOFFにします。 QL5: OMNI OUT 15 (L) で検査します。 PHONES レベル 許容範囲 QL1: OMNI OUT 7 (L) で検査します。 ‒79 dBu 以下 Rch測定時は ‒88 dBu 以下 QL5: OMNI OUT 16 (R) で検査します。...
- Page 24 QL5/QL1 A. 48 kHz +4.1667 %(50 kHz) 4. フェーダー検査 条件 WORD CLOCK INの検査時は、発信器の周波数 条件 「 フ ェ ー ダ ー 検 査 用 シ ー ン デ ー タ 」 は 、 設定を50 kHzにします。 「SEISAN1.QL5A」ファイルを使用します。 Device Config画面内のSample Rate欄を設定しま す。 検査 Sample Rate:48 k シーン1〜シーン4をそれぞれリコールして、フェーダー Pull-up/down:+4.1667 % を動作させ、以下の確認を行います。...
- Page 25 QL5/QL1 判定基準1 6. ランプ電圧の測定 EFFECT音が出ていることを確認します。 QL5: リアパネル2ヶ所の3ピンと4ピン間の電圧を測定し ます。 判定基準2 QL1: リアパネル1ヶ所の3ピンと4ピン間の電圧を測定し ノイズが含まれていないことを確認します。 ます。 LAMP DIMMER MAX、MIN時の電圧を測定します。 以下同様にシーン6 からシーン36 をリコールし検聴して ください。 許容範囲 12.0 V±1.0 V 0 V±0.5 V シーンNo. とEFFECT TYPE は次のとおりです。 シーン No. Rack No. EFFECT TYPE Reverb 7. ファン動作確認 Symphonic 電源投入後、ディスプレイにファン動作エラー表示がで HQ Pitch ていないことを確認します。 Dynamic Filter...
-
Page 26: Required Items
: 1 pc. • Service check for PC application Load the latest program shown in the following table into QL5/QL1 itself and PC before executing the service check. For the updating procedure, refer to the “UPDATING FIRMWARE” section on page 154. -
Page 27: Tcp-Keepalive
QL5/QL1 1-2. PC settings • Setting Ethernet Windows 7: [Control panel] g [Network and Internet] g [Network and Sharing Center] g [Change adapter settings] g [Local area connection] g [Property] g Select Internet Protocol (TCP/IP) g [Property] Check IP Address and Subnet Mask in the Network setting of the QL SETUP screen. Set IP Address that is not identical with QL IP Address in the same subnet. - Page 28 QL5/QL1 1-3. Connection Connection diagram for checking QL5/QL1 DSP32 (QL5) DSP16 (QL1) SLOT[1] [SLOT2] DNT5 DNT1 JIG mode Rio3224-D (Test jig) OUTPUT Set the DIP switch and the UNIT ID switch. INPUT OUTPUT WORD CLOCK OUT WORD CLOCK IN...
-
Page 29: Usb Storage
QL5/QL1 ● List of check items Item Check name Outline of check item Judgment INFORMATION Check the version and other items of the fi rmware. Auto CPU MRAM Check the data bus and address bus of CPU MRAM. Auto CPU SDRAM Check the data bus and address bus of CPU SDRAM. -
Page 30: Service Check
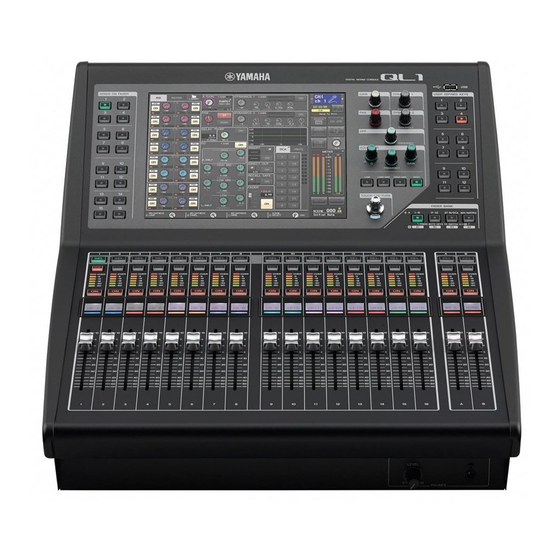
• Switch on the power supply while pressing the QL USER DEFINED KEYS [1], [2] and [3] at the same time. Power Switch * This illustration shows the QL5. • Start up the PC application after starting the QL diagnosis and waiting for about 30 seconds. - Page 31 QL5/QL1 1-0. INFORMATION 1-2. CPU SDRAM test Contents Checks such items as if the version of the fi rmware is Contents Checks the address data bus line and data bus line of correct. SDRAM on CPU circuit board. Example of executing screen...
- Page 32 QL5/QL1 1-4. RTC test 1-6. DSP6 test Contents Obtains and sets Real Time Clock. 1-7. DSP7 test Contents Checks the condition of the address bus line and data Example of executing screen bus line by writing/reading each register of DSP6/ DSP7.
- Page 33 QL5/QL1 DSP7 test items and display provided during execution. 1-9. SLOT Test 1: CPU Interface (Data Bus) ..........OK Contents Checks the power voltage supplied to each interface 2: CPU Interface (Chip Select) ..........OK and SLOT of MY SLOT. 3: CPU Interface (Address Bus) ..........OK 2SLOT check 4: E-RAM Interface (Data Bus) ..........OK...
- Page 34 QL5/QL1 1-10. WORD CLOCK Test 1-11. AES/EBU(OUT) test Contents Checks WORD CLOCK OUT → IN automatically Contents Checks by the sound with the speaker connected. by counting it at PLLPU. Refer to the 128 page for a connection method. (Fs=44.1/48 kHz) Checks PLL LOCK by reading the...
-
Page 35: Network Test
QL5/QL1 1-13. GPI Test 1-16. USB STORAGE test Contents Checks with OUT and IN connected with a jig. Contents Checks if a USB memory (USB storage) connected to the USB port is recognized. Example of executing screen Example of executing screen 1-14. - Page 36 QL5/QL1 2) H character display 1-18. LCD Test Contents LCD display test Check for distortion in vertical and horizontal directions and Among patterns of the LCD screen display, the with the frame (whether or not ”H”s are clearly seen in it).
-
Page 37: Recorder Test
QL5/QL1 5) – 9) Have the entire screen covered in white, red, green blue LCD display and black each time (the example below shows the screen in green) and check that there is no dot that is black or in any other color. - Page 38 QL5/QL1 1-21. DNT Brooklyn2 Test 2. Tests not requiring PC application Contents Determines whether the correct Brooklyn2 module is 2-0. CN NAME LCD Display Test installed for each model and also checks whether the After starting, at the same time as the check mode is activated,...
- Page 39 • Check to make sure that SEL/ON LEDs arranged on each Encoder Made to correspond to CH METER fader are all turned off. GAIN CH30/QL5(CH14/QL1) to -6 CH30/QL5(CH14/QL1) to -12 It is possible to re-check by pressing whichever one switch. CH31/QL5(CH15/QL1) to -18 DYNAMICS 1...
- Page 40 QL5/QL1 サービス検査プログラム 1. 準備 1-1. 必要機材 ・ 被検査物 QL5/QL1 本体 ・ DOS/V パソコン :1 台 (P-200MHz 以上、Windows2000、XP、Ethernet ポート) ・ MY16-EX Card :2 枚 (SLOT の検査を行わない場合は必要ありません。 ) ・ Ethernet(CAT5e)ストレートケーブル :3 本 ・ CANNON(AES/EBU)ケーブル :1 本 ・ BNC(Word Clock)ケーブル ...
- Page 41 QL5/QL1 1-2. パソコン設定 • Ethernet 設定 Windows 7: [コントロールパネル]→[ネットワーク接続]→[ローカルエリア接続]→[プロパティ]→ インターネットプロトコル(TCP/IP)を選択 →[プロパティ] QL の SETUP 画面内の NETWORK 設定にて IP Address、Subnet Mask を調べ、IP アドレスには同一サブネッ トで QL の IP Address と一致しないものを、サブネットマスク、デフォルトゲートウェイには QL と同一のも のを設定します。 ・ ネットワーク設定 192 . 168 . IP アドレス 255 . 255 . 255 . サブネットマスク...
- Page 42 QL5/QL1 1-3. 接続 • 検 査接続図 QL5/QL1 DSP32 (QL5) DSP16 (QL1) SLOT[1] * SW104 is set to JIG MY16-EX jig SLOT[2] DNT5 (UTP CAT.5 straight cable) DNT1 * LAN: コネクターはNeutrik社製EtherCon CAT5e ・Rio3224-D * LAN と適合するRJ-45コネクターをお使いくだ (UTP CAT.5 straight cable) さい。 PRIMARY PRIMARY * ジグモード Rio3224-D(検査治具) * LAN Dante Dante (UTP CAT.5 straight cable) SECONDARY SECONDARY XLR Cable OUTPUT ディップスイッチとUNIT IDスイッチ の設定...
- Page 43 QL5/QL1 ● 検査項目一覧 項目 検査名称 検査項目の概要 判定 INFORMATION ファームウェアのバージョンなどのチェック 自動 CPU MRAM CPU MRAMのData Bus,Address Busのチェック 自動 CPU SDRAM CPU SDRAMのData Bus,Address Busのチェック 自動 BATT バックアップ用電池の電圧を判定 自動 Real Time Clockの取得、設定 自動 PLLPU PLLPUのレジスタをW/Rし判定 自動 DSP6 各DSP6のレジスタをW/Rし判定。SIO接続判定 自動 DSP7 各DSP7のレジスタをW/Rし判定。SIO接続判定 自動 CPUとSHARC間通信/FLAGラインチェック SHARC 自動 SHARC SDRAMチェック SLOT1 SLOTの各信号と電源電圧の判定 自動 SLOT2 WCLK OUTのFsをWCLK INでカウント。 1-10 WORD CLOCK 半自動...
- Page 44 QL5/QL1 2. サービス検査 QLのサービス検査について、テストプログラムの内容、実行画面例などを示します。 実行画面例は検査する項目のみを記述してあります (実際の表示はグレーアウトの項目があります) 。 検査に必要な冶具がない場合、該当する検査項目のチェックを外して実施してください。 • 検査の開始方法 1) QL起動方法 ・ QLのUSER DEFINED KEYSの [1] と [2] と [3] を同時に押しながら、電源スイッチを入れます。 • A視野 電源スイ ッ チ ※このイラストは QL5 です。 ・ PCアプリは、QLのダイアグが起動して 30秒ほど待ってから起動してください。 ※フェーダーを検査する場合は160ページの 「フェーダーキャリブレーション」 の手順でNG判定になっているフェーダーが なくなるまでキャリブレーションを実施しておきます。 2) PCアプリ起動方法 PCアプリからテストプログラムに入ります。 Windows 上でDiagQL5̲service.exe 又はDiagQL1̲service.exe を起動すると以下の起動画面が表示されます。 ※ 「サービス検査用PCアプリの操作説明」 は188ページを参照してください。...
- Page 45 QL5/QL1 1-0. INFORMATION 1-2. CPU SDRAM test 内容 ファームウェアのバージョンが適切であるか等の 内容 CPUQLシート上のSDRAMのアドレスバス線と 確認をします。 データバス線の検査をします。 実行画面例 実行画面例 NGの場合の表示説明 出力結果 NG: SDRAM ADDRESSBUS Ax ア ド レスバスNGの場合 プロパティ ウインドウへ下記の通り表示します。 NGと なったAddress Bus No. Field Value(例) NG: SDRAM DATA BUS Dx データバスNGの場合 Boot Version BOOT Version V1.00 Program Version MAIN Version V1.00 NGと なったData Bus No. MAC Address MAC Address 00.A0.DE.25.16.25 DM9000 MAC Address...
- Page 46 QL5/QL1 1-4. RTC test 1-6. DSP6 test 内容 Real Time Clockの設定 ・ 取得を行います。 1-7. DSP7 test 内容 各DSP6, DSP7のRegisterをWrite/Readし て ア ド 実行画面例 レスバス線とデータバス線の良否を判定する。 各DSP6, DSP7のDRAM, SDRAMにRegister経 由 でWrite/Readして比較判定する。 各DSP間 (SHARC含む) のSIO結線を信号の送受 信で判定する。 実行画面例 自動検査 (AUTO) を行います。始めにPCに設定されてい る時間を設定して1秒待ち、次に取得した時刻の差が1 〜3秒以内の場合はOKと判断します。 設定や取得ができない場合、または時刻の差が1秒以下 や3秒を超えている場合はNGと判断します。 1-5. PLLPU test 内容 PLLPUのRegisterをWrite/Readし て ア ド レ ス バ...
- Page 47 QL5/QL1 DSP7のテスト項目と実行中の表示 1-9. SLOT Test 1: CPU Interface (Data Bus) .......... OK 内容 MY SLOTの各インターフェースおよび、SLOT 2: CPU Interface (Chip Select) ........OK に供給される電源電圧の検査を行います。 3: CPU Interface (Address Bus) ........OK 2SLOT検査になります。 4: E-RAM Interface (Data Bus) ........OK 実行画面例 (SLOT1の場合) 5: E-RAM Interface (Address Bus) ........ OK 6: SIO Connection (DSP7 → DSP6) ......OK 7: SIO Connection (DSP6 → DSP7) ......OK 8: SIO Connection (DSP7 → DSP7) ......OK 9: DSP7 LSI Check (DSP7 ACC) ......... OK DSP6, DSP7共通、NGの場合の表示説明 1) CPU Interface/DRAM、E-RAM Interface ...
- Page 48 QL5/QL1 1-10. WORD CLOCK Test 1-11. AES/EBU(OUT) test 内容 WORD CLOCK OUT → INをPLLPUでカウント 内容 スピーカーと接続して音で確認します。 して自動判定します。 接続方法は、142 ページを参照してください。 (Fs=44.1/48kHz) 。PLLのLOCKチェックは、Fs 実行画面例 変更後クロックが安定するのを待って (約200ms 後) 、UNLOCK信号をReadし判定します。 実行画面例 スピーカーから1 KHzのサイン波が聞こえることを確認 し、聞こえればOKを聞こえなければNGをダイアログか ら入力します。 PLLのLOCK検査用各種FsはFPGAのInternal Clockで発 生させます。 Fs=44.1 kHz, 48 kHz UNLOCKチェックのとき、WORD CLOCKケーブルを外 すように下記のメッセージが表示されるので、BNCケー ブルを外します。 1-12. MIDI test 内容 MIDI端子に出力したデータと折り返して受信した データが同一であるか判定を行います。 接続方法は、142 ページを参照してください。 実行画面例...
- Page 49 QL5/QL1 1-13. GPI Test 1-16. USB STORAGE test 内容 OUTとINを治具で繋いでチェックします。 内容 USBポ ー ト に 接 続 さ れ たUSBメ モ リ ー (USB STRAGE)を認識するかどうか検査します。 実行画面例 実行画面例 1-14. NETWORK Test 内容 PCと通信できていることによりOK判断とします。 1-17. LAMP test 内容 LAMPの点灯を目視確認し、判定します。 実行画面例 実行画面例 1-15. DM9000 test このダイアログが現れたら LAMPが点灯しているこ 内容 DSP32/16基板上のDM9000と、Dante基板上の内蔵 とを確認してYESを選択してください。 スイッチとリンクができているかチェックします。 実行画面例 ...
- Page 50 QL5/QL1 1-18. LCD Test 2) H文字表示 内容 LCDの表示検査。 縦横の歪みと枠の歪み (Hがきちんと中に見えている LCD画面の表示が1) のパターンが3秒、2) から9) か) をチェックします。 のパターンが5秒ごとに繰り返されるのでこれを 目視確認します。 タッチパネルを押している間は、現在の画面が保 持されます。 確認を終えたら、テストプログラムのダイアログ で [OK] 又は [NG] の結果を選択します。 実行画面例 3) 色にじみとゆれ表示 周辺をO、中にXの文字を表示します。文字がゆれて いないか、Oが正しく収まっているか、色ずれないか をチェックします。文字及び背景は白黒灰の色を微 妙に変えて表示されます。 チェック結果を下記のダイアログで入力します。...
-
Page 51: Touch Panel Test
QL5/QL1 5) 白、6) 赤、7) 緑、8) 青、9) 黒のそれぞれ塗りつぶし、 ( 下 LCD 表示 記は緑の例) 黒くなっていたり色が着いたりするドットがないか をチェックします。 このテストとは別に完成品では初期化後B [ ] 押 し で 電 源 立 ち 上 げ て M E N U か ら T O U C H SCREEN CALIBRATIONを選んで格子の4隅を順 番に指で押さえて表示される十字のカーソルが押... - Page 52 QL5/QL1 1-21. DNT Brooklyn2 Test 2. PCアプリを必要としない検査 内容 モデル毎の正しいBrooklyn2モジュールが取り付 2-0. CH NAME LCD 表示検査 けてあるかを判断、又Brooklyn2のオーディオ信 立ち上げ後、検査モードに入ると同時に全 MiniLCD の 号、Ethernet チェックを行い良否を判断します。 バックライトが点灯し、検査パターンが表示されます。 実行画面例 任意のスイッチを1つ押すたびに検査パターンが切り替 わるので、 目視によって異常がないかを確認していきます。 以下に、検査パターンごとの確認すべき内容を示します。 全ドット点灯 全ドットが点灯しているかを確認する。 一番外側のドットが枠型に点灯しているかを確 枠型点灯 認する。 全ドット消灯 全ドットが消灯しているかを確認する。 左から順番通りの番号が表示されているかを確 CH番号表示 認する。 また、通常動作もしくは音出し検査時に下記コントラス ト逆品がないかチェックします。 フ ロ ン ト パ ッ ド か ら ぎ り ぎ り に 見 え る 高 さ で NAME ...
- Page 53 CH31/QL5(CH15/QL1) の -18 どこか1個のスイッチを押すことで、再度検査を実行で DYNAMICS 1 CH32/QL5(CH16/QL1) の -6 きます。 DYNAMICS 2 CH32/QL5(CH16/QL1) の -12 EQUALIZER-Q CH30/QL5(CH14/QL1) の -30 EQUALIZER-Freq CH31/QL5(CH15/QL1) の -30 EQUALIZER-GAIN CH32/QL5(CH16/QL1) の -30 TOUCH AND TURN CH30/QL5(CH14/QL1) の -60 なお DANTE にリセットがかかって SW の反応が遅れる ことがあります。 DANTE モジュールのばらつきによって十数秒に一回こ れを繰り返してしまうので、この症状を起こすものは通 常モードで SETUP 画面から DANTE SETUP を開いて SECONDARY PORT を REDUNDANT にしてから電源 入れ直して DIAG に入れば症状が起きなくなります。 なお通常動作ではこの問題は起こりません。 2-4. エンコーダー入力検査...
-
Page 54: Updating Firmware
QL5/QL1 UPDATING FIRMWARE * Make sure that the power should never be turned off during updating. 1) Prepare a USB memory and the environment (PC with USB connector) with which the data can be written to and read from the USB memory. - Page 55 QL5/QL1 INITIALIZATION To reset settings to the factory shipment state, execute “forced initialization” by turning on the power switch while holding down the A [SEL] and B [SEL] keys simultaneously. QL also has 2 types of initialization mode. They are “INITIALIZE ALL MEMORIES” and “INITIALIZE CURRENT MEMORIES”.
- Page 56 QL5/QL1 イニシャライズ 工場出荷時の状態にするためには、 A[SEL]と B[SEL]キーを同時に押しながら電源を立ち上げ強制初期化を実行します。 ま た QL に は ユ ー ザ ー に も 公 開 し て い る 2 種 類 の 初 期 化 モ ー ド、 「INITIALIZE ALL MEMORIES」 「INITIALIZE CURRENT MEMORIES」があるのでサービスなどでは必要に応じて使い分けることも可能です。 B[SEL]キーを押しながら電源を立ち上げると表示される特殊モード画面から実行可能です。 上記 3 種類によって初期化される対象のメモリーをまとめると下記の通りになります。...
-
Page 57: Touch Screen Calibration
QL5/QL1 TOUCH SCREEN CALIBRATION 1) While holding down the B [SEL] key, turn on the power switch, and the Special Mode Screen will appear, where INITIALIZE, TRIM, CALIBRATION, etc. are executed. 2) Among MODE SELECT buttons, touch [TOUCH SCREEN CALIBRATION], and the touch screen window will appear. Then touch the [START] button. - Page 58 QL5/QL1 タッチスクリーンのキャリブレーション 1) B[SEL]キーを押しながら電源を立ちげると INITIALIZE, TRIM, CALIBRATION などを行う「特殊モード画面」が 表示されます。 2) MODE SELECT ボタンのなかから、[TOUCH SCREEN CALIBRATION] をタッチすると、タッチスクリーンのウィン ドウが表示されますので、[START] ボタンをタッチします。 ※ 表示されないときは、 FADER BANK [B1]/[B2] キーを押して [TOUCH SCREEN CALIBRATION] を選択し、 [B4] キー を押してスタートします。 3) 確認のダイアログが表示されるので、[OK] ボタンをタッチする。 4) 画面内に十字カーソルが計 3 回表示されるので、その位置に合わせてタッチする。 ※ 正確に調整するには、通常操作する位置および姿勢で十字カーソルをタッチすること。...
-
Page 59: Fader Calibration
QL5/QL1 FADER CALIBRATION While holding down the B [SEL] key, turn on the power • When SEL-LED is lit switch, and the [Special Mode Screen] will appear, where It is possible that positioning at any of 4 places in steps 5) to 8) INITIALIZE, TRIM, CALIBRATION, etc. - Page 60 QL5/QL1 フェーダーキャリブレーション 1) B[SEL] キ ー を 押 し な が ら 電 源 を 立 ち げ る と • SEL-LED が点灯している場合 INITIALIZE, TRIM, CALIBRATION な ど を 行 う 前記手順 5 〜 8 の4箇所のいずれかの位置合わせに失敗 「特殊モード画面」が表示されます。 している。 画面には、 「RESTART」ボタンと「APPLY」ボタンが 2) MODE SELECT ボ タ ン の な か か ら、 「FADER ...
- Page 61 When simultaneously holding down the 32 [SEL] key and Among MODE SELECT buttons, touch [LED COLOR the B [SEL] key (for QL5), or the 16 [SEL] key and the CALIBRATION] and the LED COLOR CALIBRATION B [SEL] key (for QL1) when performing this operation, window appears.
- Page 62 Additionally, when simultaneously holding down the 32 [SEL] key and the B [SEL] key (for QL5), or the 16 [SEL] key and If color scattering is visible, use the TOUCH AND TURN the B [SEL] key (for QL1) when performing this operation, encoder to adjust the RGB ADJUSTMENT values.
- Page 63 QL5/QL1 カラーバーと CH NAME LCD のキャリブレーション B[SEL]キーを押しながら電源を入れると INITIALIZE, 5) 最後に[APPLY]を押して、 調整した値を保存します。 この時、 ( QL5 の場合) 32 [SEL] キーと B [SEL] キー、 TRIM, CALIBRATION などを行う「特殊モード画面」 (QL1 の場合)16 [ SEL]キーと B [ SEL]キー、を が表示されます。MODE SELECT ボタンのなかから、 「LED COLOR CALIBRATION」をタッチすると、LED 同時に押してこの処理に入っていた場合は RESET ALL で呼び出されるファクトリ領域にも LED キャ...
- Page 64 後、続けて、CH NAME LCD バックライトとコントラ 色を CH COLOR の中から選んでタッチすると、本 体のカラーバーが対応した点灯色に変ります。 ストの調整を行ってください。 なお、 ( QL5 の場合) 32 [SEL] キーと B [SEL] キー、 ( QL1 の場合)16 [ SEL]キーと B [ SEL]キー、を同時に押 2) 色のばらつきが見られる場合、 TOUCH AND TURN エンコーダーを使って RGB ADJUSTMENT の値を してこの処理に入っていた場合は RESET ALL で CH ...
- Page 65 QL5/QL1 SCREEN SHOT (スクリーンショット) Touch the SETUP characters at the upper part of the 1) [SETUP]画面の上部 SETUP 文字部分を7回タッ [SETUP] screen 7 times, and the [Capture Mode] message チすると、 「Capture Mode.」と画面下にメッセージ appears at the bottom of the screen and the capture mode が出て、キャプチャーモードになります。...
-
Page 66: Updating Dante Module (Brooklyn2)
QL5/QL1 UPDATING DANTE MODULE (Brooklyn2) Equipment and material Selecting Firmware 1 unit, Windows XP with Ethernet port, Windows Select the fi rmware to be updated. Press the [BROWSE] Vista or Windows 7 button and the file selection message will appear. Select Cable: Ethernet (CATSe) straight cable 1 pc. - Page 67 QL5/QL1 Executing updating • Updating Procedure When the [START] button is pressed, a pop-up to confi rm If an error message is indicated in the status column, do not updating will appear. turn off the power switch of QL but execute the updating While updating, use care so that no network disconnection procedure again.
-
Page 68: Dante モジュール(Brooklyn2)のアップデート
QL5/QL1 DANTE モジュール(Brooklyn2)のアップデート 1) 機材 3) ファームウェアの選択 パソコン:Ethernet ポートを搭載した Windows XP、 アップデート対象となるファームウェアを選択し Vista、7 いずれかのパソコン 1 台 ます。 [Browse]ボタンを押すことでファイル選択 ケーブル:Ethernet(CAT5e)ストレートケーブル 1 本 ダイアログが表示されます。アップデータ(QL̲ Updata) 内 brooklyn2¥ に あ る FWUpdate̲???̲ 2) アプリケーション vxxxx̲swxxx.dnt を選択します (xxxx, xxx はバージョ... - Page 69 QL5/QL1 5) アップデート実施 ● アップデート失敗時 [Start]ボタンを押すことでアップデート確認のポッ Status 欄に Error 表示があった場合、QL の電源オフは プアップが表示されます。 しないで、アップデートの手順を再度実行します。 アップデート中はネットワーク断線や QL 電源断の 無いよう注意します。 [OK]ボタンを押すとアップデートが開始されます。 アップデート中は以下の表示となります(Status 欄 に Updating(1/1) を表示) 。 6) アップデート完了 アップデートが完了すると確認のポップアップが表 示されます。 [OK]ボタンを押すと以下の画面表示となります (Status 欄に Update Done を表示) 。...
- Page 70 QL5/QL1 DANTE SOUND OUTPUT CHECK Connect Dante of the QL unit and PC with the Ether cable. Connect MIDI IN of the QL unit and USB port of PC with UX16. Loading AllData (SEISAN1.CLF) for sound output check. Activate Cubase (Sound output check of DSP6 on desk-top).
- Page 71 QL5/QL1 Run [Import from Audio CD] under [Media] in the menu to display the Import from Audio CD dialog box. Select the tracks to be imported. A blue X appears next to the selected tracks (to select multiple tracks, hold the [Ctrl] key down and select the tracks).
- Page 72 QL5/QL1 DANTE 音出し検査 1) QL 本体の Dante (Primary) と PC を Ether ケーブルで接続します。 2) QL 本体の MIDI IN と PC の USB ポートを UX16 で接続します。 3) 音出し検査用の AllData (SEISAN1.CLF) をロードします。 4) Cubase(デスクトップの DSP6 音出しチェック)を起動します。 5) Dante Virtual Sound(デスクトップにショートカットあり)を起 動し、Setting タブの電源マークのスイッチを ON にします。...
- Page 73 QL5/QL1 メニューの [メディア] − [オーディオ CD の読み込み] を実行、オーディオ CD の読み込みダイアログを表示 します。 読み込む対象のトラックを選択します。選択されたト ラックはトラック左に青い×印を表示します(複数選 択する場合は[Ctrl]キーを押しながら各トラックを 選択します) 。 [コピー]ボタン押下でハードディスクの Audio フォルダ以下に CD 音源が .wav 形式で取り込ま れます。終了したら[OK]ボタンを押します。 新規に読み込んだデータ(右図ではトラック 01- 01)はプールウィンドウで確認可能です(プール が表示されていなければ[Ctrl]+[P]で表示) 。 プールからオーディオトラックにドラッグ&ド ロップすることで割り当てます。 読み込んだ音源が 8 分を下回る場合、8 分を超 えるよう適宜オーディオトラックに割り当て実 施します。既存トラックのコピー&ペースト、もしくはプールからドラッグ&ドロップで割り当てることができます。 (音出しテストの長さが 8 分につき、8 分未満だと後半で音が出なくなります)...
-
Page 74: Starting Sequence
QL5/QL1 STARTING SEQUENCE ● Start mode (Flow) Normal mode Forced Factory Preset mode Maintenance mode Diag mode B SEL key Press USER DEFINED keys 1, 2 A SEL + B SEL key and 3 simultaneously or 3 keys of B SEL + 32(16)CH SEL key other than those simultaneously. - Page 75 QL5/QL1 From previous page→ Normal mode Forced Factory Preset mode Maintenance mode Diag mode Checksum, battery check result judged <SysKernel> (2.5V or lower, or checksum error) Maintenance (Boot menu) screen displayed (OK) (NG) <LCD Display> ERROR pop-up displayed (2.5V < battery residual level ≦ 2.8V) CAUTION pop-up displayed after start-up Initialization of model parameters <SysKernel>...
- Page 76 QL5/QL1 Flow of hardware check at start-up Shown below is the workflow for checking hardware such as MRAM, battery voltage, etc. when they are started immediately after start-up of the unit. Start-up Character string stored in the specific areas (at 2 locations) in MRAM is obtained.
- Page 77 QL5/QL1 When the screen changes to the initialization menu screen, if there were more than one NG factors, the error pop-up is displayed according to the priority as described below. (Such factors are all in the log internally but there is no way to show the log at present.) Note that only the highest priority error pop-up is displayed.
- Page 78 QL5/QL1 起動シーケンス ● 起動モード (フロー) 通常モー ド 強制Factory Presetモー ド メ ンテナンスモー ド Diagモー ド B SELキー USER DEFINED KEYS 1+2+3キー同時押下 A SEL + B SEL キー または または B SEL + 32(16)CH SELキー 上記以外のいずれか3ヶのキー同時押下 電源ON Boot Loader起動 ポートの初期化 USB Memory有無 QL Firmware(PGM ・ C-MD1.bin)ファイル有無の確認 (無し) (PGMファイル有り) 又は (C-MD1.binファイル有り) Firmware Update確認表示 (UPDATEキャンセル) Firmware Update実行 Main Programのチェックサム確認 「CheckSum Error!!」 と表示して停止 Main Program起動 <>内はタスク名 ポートの初期化 ・・・ PLL動作開始、 各デバイスのリセット端子をリセット側に設定...
- Page 79 QL5/QL1 前ページから→ 通常モー ド 強制Factory Presetモー ド メ ンテナンスモー ド Diagモー ド チェックサム、 バッテリーチェック結果判定<SysKernel> (2.5V以下、 も し く はチェ ッ クサムエラー) メ ンテナンス(起動メ ニュー)画面を表示 <LCD Display> (OK) (NG) ERRORポ ッ プアッ プ表示 (2.5V < バッ テ リ ー残量 ≦ 2.8V) 起動後にCAUTIONポ ッ プアッ プ表示 モデルパラ メ ータの初期化 <SysKernel>...
- Page 80 QL5/QL1 起動時ハードウェアチェックフロー 起動直後の MRAM、バッテリー電圧チェック等の起動時ハードウェアチェックフローを示します。 起動 MRAM 内の特定の領域 (2 箇所) に格納されている文字列を取得 既定された 文字列と一致 MRAM 領域のチェックサムを計算 電源断時に計算した チェックサムと一致 メモリ初期化実行 MRAM NG フラグ = TRUE 有効な MacAddress MacAddress NG フラグ = TRUE NG Fader が 存在しない Fader NG フラグ = TRUE 各種フラグが 全て FALSE メンテナンス画面表示 ※1 各種エラー Popup 表示 Exit ボタン押下 ※2 通常起動 バッテリー電圧>2.5V LowBattery! Popup 表示...
- Page 81 QL5/QL1 ※ 1 初期化メニュー画面表示に切り替わる際、NG 要因が複数であった場合は下記の優先度でエラー Popup 表示する。 (内部的には要因を全てログに残しているが現状そのログを表示する手段がない) エラー Popup は一番優先度の高いものしか出ないので、複数要因が同時に発生している場合は一つずつ要因を修正して 再起動する必要がある点に注意。 MacAddress NG > MemoryError フラグ > LowBattery フラグ 各エラー Popup の内容は下記の通り。 MacAddress NG 時 Illegal MAC Address! Cannot Use Ethernet. MemoryError 時 Memory Error! All Memories Initialized. LowBattery 時 Low Battery! なお、初期化メニュー画面表示に移行する際は、通常 Initialize All M emories の項目が選択された状態でメニュー画面に 移行するが、Fader NG 時は自動的に FaderCalibration の項目が選択された状態で移行する。 ...
-
Page 82: Memory Initialization
QL5/QL1 MEMORY INITIALIZATION ● Details of initialization contents Initialization applicability Flash ROM Channel Name Initialization method Library data Touch Pane Fader Channel Color Scene data Backlight User Bitmap Model (EQ, Effect, Calibration Calibration Calibration (Scene 1-300) Calibration data address name GEQ, etc.) - Page 83 QL5/QL1 メモリ初期化 ● 初期化内容詳細 初期化対象 Flash ROM Channel Scene Cannel 初期化方法 Libraryデータ Touch Panel Fader Name データ Color User Bitmap (EQ, Eff ect, Calibration Caliblation Backlight モデル名 (Scene Calibration データ アドレス GEQ etc) データ データ Calibration 1-300) データ データ B SELキ ー を 押 し な が ら 起 動...
- Page 84 3. Begin the test. 2. Checks appear in all of the detailed test 1. Select QL5 SERVICE. items. 3. Begin the test. 1. Confi rm that either DiagQL5_service.exe or DiagQL1_service.exe is selected in the tree window. * If they are not selected, select either DiagQL5_service.exe or DiagQL1_service.exe.
-
Page 85: Title Bar
QL5/QL1 Object to be inspected is displayed. inspected. Inspection succeeded. Select an object to be inspected. Information such as version is displayed. Inspection was NG. [Execution and Termination of inspection] [F1]START : Start test. [F2]PAUSE : Pause test. [F3]STOP : Stop test. - Page 86 QL5/QL1 e Menu bar The menu list is shown. The details of the menu items are described in following tables. Menu Tool bar Description Save output Saves OUTPUT contents into a fi le File Save log Saves log contents into a fi le...
-
Page 87: List Window
QL5/QL1 y List window Items included in the step selected with “Tree window” are displayed as a list. If test is started with [Test] – [Start] menu, only tests for items with a check mark are executed. If “Details” is selected for display, “Result” and “Procedure” are displayed. - Page 88 QL5/QL1 サービス検査用 PC アプリの操作説明 サービス検査テストプログラムでは、1-0. からの検査で、DiagQL5̲service.exe 又は DiagQL1̲service.exe アプリを使 用して検査を行います。 DiagQL5̲service.exe 又は DiagQL1̲service.exe アプリの起動方法 Windows 上で DiagQL5̲service.exe 又は DiagQL1̲service.exe を起動すると、以下の総合検査画面が表示されます。 ※画面は、[DiagQL5̲service.exe] の画面です。 2. ALL ONを押して全てに チェックを入れる。 3. 検査を開始 2. 詳細の検査項目にも 全てチェックが入っ 1. QL5 SERVICEを選択 ていること。 3. 検査を開始 1. ツリーウィンドウで、 [DiagQL5̲service.exe]又は[DiagQL1̲service.exe]が選択されていることを確認します。 ※選択されていない場合には、 [DiagQL5̲service.exe]又は[DiagQL1̲service.exe]を選択します。 2. リストウィンドウで、検査対象の全てにチェック印がある事を確認します。 ※検査対象の全てにチェック印が無い場合には、ツールバー上の[All on]ボタンをクリックします。...
- Page 89 QL5/QL1 検査対象が表示される。 ・□にチェック印をつけると検査対象となる。 ・個別に選択して、単体検査ができる。 ・個別に選択して、ダブルクリックすると 詳細な検査項目が表示される。 検査OK 検査対象を選択する。 バージョン等の情報が 表示される。 検査NG 検査結果の詳細を表示する。 q タイトルバー アプリケーションのタイトルが表示されます。 w タイトルボタン ウインドウ操作を行うボタンが表示されます。 ボタンは左から「最小化」 、 「最大化」 、 「閉じる」です。...
- Page 90 QL5/QL1 e メニューバー メニュー一覧が表示されます。 メニュー詳細は以下の通りです。 メニュー ツールバー 説明 Save output アウトプットの内容をファイルに保存 File Save log ログの内容をファイルに保存 Exit アプリケーションを終了 Execute 単一検査の実行 Start 検査の開始 Pause 検査の一旦停止 Stop 検査の停止 Clear result 選択項目の結果をクリア NG Stop NG 発生で検査停止 Test All on 全ての項目にチェックマークをつける All off 全ての項目のチェックマークをはずす Selected on 選択した項目にチェックマークをつける...
- Page 91 QL5/QL1 y リストウインドウ 「ツリーウインドウ」で選択された階層内に含まれる項目一覧が表示されます。 [テスト]-[開始]メニューでテストを開始した場合、チェックマークが付いている項目のみが実行されます。 表示に「詳細」を選択した場合は「結果」と「プロシージャ」が表示されます。 テスト結果により文字色を変更することが出来ます。 文字色の変更は[表示]-[オプション]メニューで設定します。 u プロパティウインドウ テストにより取得した文字列の一覧を表示します。 このウインドウは表示/非表示の切り替え、及びフローティング/ドッキングの切り替えを行うことが出来ます。 表示/非表示の切り替えは[表示]-[オプション]メニューで切り替えることが出来ます。 フローティング/ドッキングはウインドウをドラッグして行います。 i アウトプットウインドウ 実機との通信内容等の文字列が表示されます。 フォントの種類及び文字色の変更は[表示]-[オプション]メニューで設定する。 このウインドウは表示/非表示の切り替え、及びフローティング/ドッキングの切り替えを行うことが出来ます。 表示/非表示の切り替えは[表示]-[オプション]メニューで切り替えることが出来ます。 フローティング/ドッキングはウインドウをドラッグして行います。 o ファンクションキー F1 〜 F12 キーへ割り当てられたコマンドが表示されます。 このウインドウは表示/非表示の切り替え、及びフローティング/ドッキングの切り替えを行うことが出来ます。 表示/非表示の切り替えは[表示]-[オプション]メニューで切り替えることが出来ます。 フローティング/ドッキングはウインドウをドラッグして行います。 !0 ステータスバー 選択コマンドの説明及びトグルキーの状態を表示します。 このウインドウは表示/非表示の切り替えを行うことが出来ます。 表示/非表示の切り替えは[表示]-[オプション]メニューで切り替えることが出来ます。 通信エラー 各検査で通信応答が無い場合は、アウトプットウインドウへ「Port Setting error.」と表示します。 原因として、下記の事が考えられます。 • Ethernet ケーブルが接続されていない。 • Network 端子および周辺回路の故障。...
-
Page 92: Parts List
CONTENTS (目次) OVERALL ASSEMBLY L (総組立L)(QL5) ........2 OVERALL ASSEMBLY S (総組立 S)(QL1) ........4 BOTTOM L ASSEMBLY (ボトム L Ass y)(QL5) ....... 6 BOTTOM S ASSEMBLY (ボトム S Ass y)(QL1) ......12 CONTROL PANEL L ASSEMBLY (コンパネL Ass y)(QL5) ..18 CONTROL PANEL S ASSEMBLY (コンパネ S Ass y)(QL1) ..23 AC L ASSEMBLY (AC L Ass y)(QL5) .......... - Page 93 QL5/QL1 ■ OVERALL ASSEMBLY L (総組立L) (QL5) CONTROL PANEL L ASSEMBLY: See page 18. (コンパネ L Ass y) SIDE PAD ASSEMBLY L (サイドパッド Ass y L) 150b 150d 150a 150c SIDE PAD ASSEMBLY R (サイドパッド Ass’y R ) 170a 170c 170b •...
- Page 94 BRA H05VV-F 3X1.00 電 源 コ ー ド P ZH99270 0 DUST COVER QL5 ダ ス ト カ バ ー Q L 5 SERVICE PARTS KIT サ ー ビ ス パ ー ツ キ ッ ト CL5 (ZD74300) WZ987700 SERVICE STAY L LEFT サ...
- Page 95 QL5/QL1 ■ OVERALL ASSEMBLY S (総組立S) (QL1) (コンパネ ) (サイドパッド L) 140b 140d (サイドパッド R) 140a 140c 160a 160c 160b • WIRING (配線図) (ボトム ) 160d...
- Page 96 140c WE962000 BIND HEAD TAPPING SCREW-B 4.0X8 MFZN2B3 B タ イ ト + B I N D 140d YAMAHA LOGO PLATE M ヤ マ ハ ロ ゴ プ レ ー ト M (ZJ40930) ZH56870 0 MACHINE SCREW M5.0X18 MFZN2B3 六 角 孔 付 ボ ル ト...
- Page 97 QL5/QL1 ■ BOTTOM L ASSEMBLY (ボトム L Ass'y) (QL5) REAR L ASSEMBLY: See page 9. (リア L Ass y)...
- Page 98 QL5/QL1 JK SHEET ASSEMBLY: See page 9. (JK シート Ass y) 1000 AC L ASSEMBLY: See page 28. ( AC L Ass y )
- Page 99 QL5/QL1 < Rear view / 背面 > • BOTTOM L ASSEMBLY (ボトム L Ass'y) <Assembly Outline View / 組み上がり外観図 >...
- Page 100 QL5/QL1 • JK SHEET ASSEMBLY (JK シート Ass'y) 470a Solder (半田付け) 470b • REAR L ASSEMBLY (リア L Ass'y)...