
Related Manuals for Sony TMR-RF940R


Summary of Contents for Sony TMR-RF940R
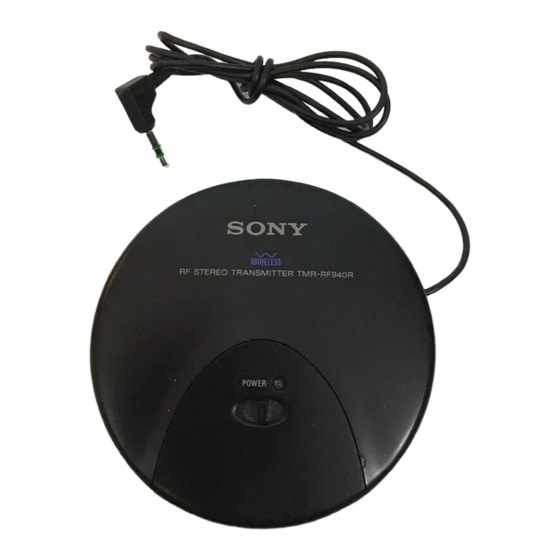
- Page 1 TMR-RF940R SERVICE MANUAL AEP Model TMR-RF940R is transmitter unit in MDR-RF940RK. SPECIFICATIONS TRANSMITTER MICROFILM...
-
Page 2: Section 1 General
Notes on chip component replacement • Never reuse a disconnected chip component. • Notice that the minus side of a tantalum capacitor may be dam- aged by heat. Flexible Circuit Board Repairing • Keep the temperature of the soldering iron around 270 ˚C during repairing. - Page 3 SECTION 2 DISASSEMBLY Note: Follow the disassembly procedure in the numerical order given. CABINET (UPPER) ASS’Y 2 two claws 4 two claws 3 cabinet (upper) ass’y 4 two claws 5 TX board 1 two screws (P2.6 × 10) – 3 – –...
-
Page 6: Electrical Parts List
SECTION 5 SECTION 4 EXPLEDED VIEW ELECTRICAL PARTS LIST NOTE: NOTE: • -XX and -X mean standardized parts, so they • Items marked “*” are not stocked since they • Due to standardization, replacements in the F: nonflammable When indicating parts by reference may have some difference from the original are seldom required for routine service. -
Page 7: Metal Chip
Ref. No. Part No. Description Remark Ref. No. Part No. Description Remark < JACK > 1-216-061-00 METAL CHIP 3.3K 1/10W 1-216-097-00 METAL CHIP 100K 1/10W 1-568-907-31 JACK,DC (POLARITY UNIFEID TYPE) 1-216-061-00 METAL CHIP 3.3K 1/10W (DC IN 4.5V) 1-216-033-00 METAL CHIP 1/10W <... - Page 8 TMR-RF940R Ref. No. Part No. Description Remark 1-216-073-00 METAL CHIP 1/10W 1-216-073-00 METAL CHIP 1/10W 1-216-295-00 CONDUCTOR, CHIP (2012) 1-216-017-00 METAL CHIP 1/10W 1-216-001-00 METAL CHIP 1/10W 1-216-001-00 METAL CHIP 1/10W 1-216-077-00 METAL CHIP 1/10W 1-216-003-11 METAL CHIP 1/10W 1-216-073-00 METAL CHIP...
- Page 9 TMR-RF940R AEP Model SERVICE MANUAL Ver. 1.0 1998. 05 SUPPLEMENT-1 File this supplement with the service manual. Subject: 1. Modification 2. Electrical Adjustments...
-
Page 10: Schematic Diagram
1. MODIFICATION You can use any of the following capacitors. Part No. • Countermeasure for distortion and white noise. Improvement of TMR-RF940R (TX board) Increase the capacity 22 µF/4 V 1-124-430-∏ 1-126-263-∏ of C21. 22 µF/6.3 V 1-115-863-∏ 1-123-618-∏ 1-124-222-∏ 1-126-153-∏... -
Page 11: Electrical Adjustments
2. ELECTRICAL ADJUSTMENTS Note: • Perform countermeasure for distortion before adjustments. Adjust and confirm the unit by following procedure shown below after this countermeasure. • Please adjust the transmitter and the headphone together. Procedure for Measurements and Adjustments Lastly, we would like to explain the procedure for adjusting this model. As this model adopts a Stereo Modulation method called “FM- FM”, it is difficult to perform the adjustments with common measurement equipments. - Page 12 Confirm the main carrier frequency (CH1, CH2) (See “a” in the figure 3) The correct value is as follows. CH1: 433.6 MHz ± 200 kHz CH2: 434.2 MHz ± 200 kHz Confirm the sub carrier frequency (See “b” in the figure 3) The correct value is 42 kHz ±...
- Page 13 3) Observe the waveform on the spectrum analyzer and turn RV21 to adjust the modulation degree of a sub spectrum “A” in the figure 4 to be narrowest as shown below. 4) At this time, measure AC voltage of IC21 Pin 1 on the TX board with AC voltmeter and define the value as “V ”...
- Page 14 2) Measure the AC voltage at the test point TP2 of MDR-RF940R RX board with AC voltmeter. Spec.: 13 ± 1.5 mVrms If not, turn RV51 of TMR-RF940R (channel 1) or RV52 (channel 2) for obtaining the value. SCHEMATIC DIAGRAM PRINTED WIRING BOARD •...