
Related Manuals for Sharp MX-C507F


Summary of Contents for Sharp MX-C507F
- Page 1 DIGITAL FULL COLOR MULTIFUNCTIONAL SYSTEM MX-C507F/MX-C407F User's Guide Machine type(s): 7528 Model(s): 1A9, 5A9...
-
Page 2: Table Of Contents
Contents Contents Safety information..................6 Conventions................................6 Product statements.............................6 Learning about the printer................9 Selecting a location for the printer........................9 Printer configurations............................10 Attaching cables..............................11 Using the control panel.............................13 Understanding the status of the power button and indicator light............14 Using the home screen.............................14 Printing the Menu Settings Page........................15 Installing the printer software.........................15 Setting up and using the home screen applications......16 Customizing the home screen........................16... - Page 3 Contents Supported flash drives and file types......................28 Configuring confidential jobs.........................29 Printing confidential and other held jobs....................29 Printing a font sample list..........................30 Canceling a print job............................30 Copying......................31 Making copies..............................31 Copying photos..............................31 Copying on letterhead............................31 Copying on both sides of the paper......................31 Reducing or enlarging copies........................32 Collating copies..............................32 Placing separator sheets between copies....................32...
- Page 4 Contents Scanning to a flash drive..........................51 Scanning to a fax server..........................52 Sending scanned documents to a computer.....................52 Understanding the printer menus............53 Menu map................................53 Device...................................54 Print..................................65 Paper..................................74 Copy..................................76 Fax..................................80 E-mail..................................84 FTP..................................90 USB Drive................................94 Network/Ports..............................99 Security................................110 Reports.................................117 Help..................................119 Troubleshooting..............................119 Securing the printer..................120 Locating the security slot..........................120 Erasing printer memory..........................120 Erasing printer hard disk memory.......................120...
- Page 5 Contents Clearing jams.....................133 Avoiding jams..............................133 Identifying jam locations..........................134 Paper jam in trays............................135 Paper jam behind door E..........................136 Paper jam in the multipurpose feeder......................136 Paper jam in the standard bin........................137 Paper jam in door A............................138 Troubleshooting..................143 Network connection problems........................143 Hardware options problems.........................145 Issues with supplies............................145 Paper feed problems............................146 Printing problems.............................150...
-
Page 6: Safety Information
Safety information Safety information Conventions Note: A note identifies information that could help you. Warning: A warning identifies something that could damage the product hardware or software. CAUTION: A caution indicates a potentially hazardous situation that could injure you. Different types of caution statements include: CAUTION—POTENTIAL INJURY: Indicates a risk of injury. - Page 7 Safety information CAUTION—POTENTIAL INJURY: Do not cut, twist, bind, crush, or place heavy objects on the power cord. Do not subject the power cord to abrasion or stress. Do not pinch the power cord between objects such as furniture and walls. If any of these things happen, a risk of fire or electrical shock results. Inspect the power cord regularly for signs of such problems.
- Page 8 Safety information CAUTION—TIPPING HAZARD: To reduce the risk of equipment instability, load each tray separately. Keep all other trays closed until needed. CAUTION—HOT SURFACE: The inside of the printer might be hot. To reduce the risk of injury from a hot component, allow the surface to cool before touching it.
-
Page 9: Learning About The Printer
Learning about the printer Learning about the printer Selecting a location for the printer When selecting a location for the printer, leave enough room to open trays, covers, and doors and to install hardware options. • Set up the printer near an electrical outlet. CAUTION—POTENTIAL INJURY: To avoid the risk of fire or electrical shock, connect the power cord to an appropriately rated and properly grounded electrical outlet that is near the product and easily accessible. -
Page 10: Printer Configurations
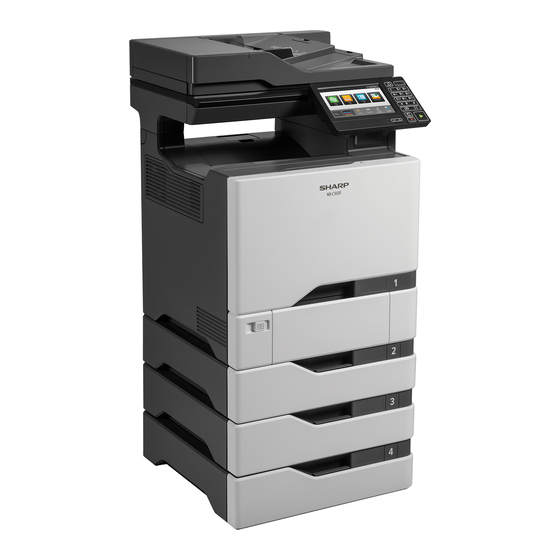
Learning about the printer 291.7 mm (11.5 in.) Right side 508 mm (20 in.) Front 508 mm (20 in.) Left side 76.2 mm (3 in.) Rear 101.6 mm (4 in.) Printer configurations CAUTION—TIPPING HAZARD: Installing one or more options on your printer or MFP may require a caster base, furniture, or other feature to prevent instability causing possible injury. -
Page 11: Attaching Cables
Learning about the printer Automatic document feeder (ADF) ADF tray ADF bin Control panel 650‑sheet duo tray Optional 550‑sheet trays Standard bin Attaching cables CAUTION—SHOCK HAZARD: To avoid the risk of electrical shock, do not set up this product or make any electrical or cabling connections, such as the power cord, fax feature, or telephone, during a lightning storm. - Page 12 Learning about the printer CAUTION—POTENTIAL INJURY: To avoid the risk of fire or electrical shock, connect the power cord to an appropriately rated and properly grounded electrical outlet that is near the product and easily accessible. CAUTION—POTENTIAL INJURY: To avoid the risk of fire or electrical shock, use only the power cord provided with this product or the manufacturer's authorized replacement.
-
Page 13: Using The Control Panel
Learning about the printer Using the control panel Use the • Display View the printer messages and supply status. • Set up and operate the printer. Home button Go to the home screen. • Power button Turn on or turn off the printer. Note: To turn off the printer, press and hold the power button for five seconds. -
Page 14: Understanding The Status Of The Power Button And Indicator Light
Learning about the printer Understanding the status of the power button and indicator light Indicator light Printer status The printer is off or in Hibernate mode. Blue The printer is ready or processing data. The printer requires user intervention. Power button light Printer status The printer is off, ready, or processing data. -
Page 15: Printing The Menu Settings Page
Learning about the printer Touch Status/Supplies • Show a printer warning or error message whenever the printer requires intervention to continue processing. • View more information on the printer warning or message, and on how to clear it. Note: You can also access this setting by touching the top section of the home screen. -
Page 16: Setting Up And Using The Home Screen Applications
Setting up and using the home screen applications Setting up and using the home screen applications Customizing the home screen From the control panel, touch Settings > Device > Visible Home Screen Icons. Select the icons that you want to appear on the home screen. Apply the changes. -
Page 17: Using Shortcut Center
Setting up and using the home screen applications • When scanning multiple cards, make sure that the scan resolution does not exceed 150 dpi for color and 300 dpi for black and white. Apply the changes. Note: You need a printer hard disk to scan multiple cards. Using Shortcut Center From the home screen, touch Shortcut Center, and then select a printer function. -
Page 18: Managing Contacts
Setting up and using the home screen applications Select an Address protocol type, and then do one of the following: • For HTTP and HTTPS, type the URL that you want to bookmark. • For HTTPS, make sure to use the host name instead of the IP address. For example, type myWebsite.com/sample.pdf instead of typing 123.123.123.123/sample.pdf. - Page 19 Setting up and using the home screen applications From the Contacts section, add a contact. Note: You can assign the contact to one or more groups. If necessary, specify a login method to allow application access. Apply the changes. Adding groups Open a web browser, and then type the printer IP address in the address field.
- Page 20 Setting up and using the home screen applications Do either of the following: • From the Contacts section, select a contact that you want to delete. • From the Contact Groups section, select a group name that you want to delete.
-
Page 21: Loading Paper And Specialty Media
Loading paper and specialty media Loading paper and specialty media Setting the size and type of the specialty media The trays automatically detect the size of plain paper. For specialty media like labels, card stock, or envelopes, do the following: From the home screen, navigate to: Settings >... - Page 22 Loading paper and specialty media Flex, fan, and align the paper edges before loading. Load the paper stack with the printable side faceup. Notes: • For one‑sided printing, load letterhead faceup with the header toward the front of the tray. •...
-
Page 23: Loading The Multipurpose Feeder
Loading paper and specialty media Loading the multipurpose feeder Open the multipurpose feeder. Adjust the guide to match the size of the paper you are loading. Flex, fan, and align the paper edges before loading. -
Page 24: Linking Trays
Loading paper and specialty media Load the paper. • Load paper and card stock with the printable side facedown and the top edge entering the printer first. • Load envelopes with the flap side up and against the right side of the paper guide. Load European envelopes with the flap entering the printer first. - Page 25 Loading paper and specialty media Save the settings. Click Settings > Device > Maintenance > Configuration Menu > Tray Configuration. Set Tray Linking to Automatic. Save the settings. To unlink trays, make sure that no trays have the same paper size and paper type settings. Warning—Potential Damage: The temperature of the fuser varies according to the specified paper type.
-
Page 26: Printing
Printing Printing Printing from a computer Note: For labels, card stock, and envelopes, set the paper size and type in the printer before printing the document. From the document that you are trying to print, open the Print dialog. If necessary, adjust the settings. Print the document. -
Page 27: Printing From A Flash Drive
Printing Notes: • Make sure that the Apple device and the printer are connected to the same network. If the network has multiple wireless hubs, then make sure that both devices are connected to the same subnet. • This application is supported only in some Apple devices. From your mobile device, select a document from your file manager or launch a compatible application. -
Page 28: Supported Flash Drives And File Types
Printing Notes: • If you insert the flash drive when an error message appears, then the printer ignores the flash drive. • If you insert the flash drive while the printer is processing other print jobs, then Busy appears on the display. -
Page 29: Configuring Confidential Jobs
Printing • .pdf • .xps Images: • .dcx • .gif • .jpeg or .jpg • .bmp • .pcx • .tiff or .tif • .png Configuring confidential jobs From the control panel, navigate to: Settings > Security > Confidential Print Setup Configure the settings. -
Page 30: Printing A Font Sample List
Printing Select Use Print and Hold, and then assign a user name. Select the print job type (Confidential, Repeat, Reserve, or Verify). If the print job is confidential, then enter a four‑digit PIN. Click OK or Print. From the printer home screen, release the print job. •... -
Page 31: Copying
Copying Copying Making copies Load an original document into the ADF tray or on the scanner glass. Note: To avoid a cropped image, make sure that the original document and output have the same paper size. From the home screen, touch Copy, and then specify the number of copies. If necessary, adjust the copy settings. -
Page 32: Reducing Or Enlarging Copies
Copying Reducing or enlarging copies Load an original document into the ADF tray or on the scanner glass. From the home screen, navigate to: Copy > Scale > specify a scale value Note: Changing the size of the original document or output after setting Scale restores the scale value to Auto. -
Page 33: E-Mailing
E-mailing E-mailing Configuring the SMTP server for e‑mail From the control panel From the control panel, touch Settings > E‑mail > E‑mail Setup. Configure the settings. From the Embedded Web Server Open a web browser, and then type the printer IP address in the address field. Notes: •... - Page 34 E-mailing Create a shortcut.
-
Page 35: Faxing
Faxing Faxing Setting up the printer to fax Notes: • The following connection methods are applicable only in some countries or regions. • During the initial printer setup, clear the fax function check box and any other function you plan to set up later, and then touch Continue. - Page 36 Faxing From the Fax Server E‑mail Settings section, configure the settings. Note: To use the SMTP server setting for e‑mail, enable Use E‑mail SMTP Server. Click Save. Choosing a fax connection Setting up fax using a standard telephone line CAUTION—SHOCK HAZARD: To avoid the risk of electrical shock, do not set up this product or make any electrical or cabling connections, such as the power cord, fax feature, or telephone, during a lightning storm.
- Page 37 Faxing Setup 1: Printer is connected to a dedicated fax line Connect one end of the telephone cable to the line port of the printer. Connect the other end of the cable to an active analog wall jack. Notes: • You can set the printer to receive faxes automatically (Auto Answer On) or manually (Auto Answer Off).
- Page 38 Faxing Connected to the same telephone wall jack Connect one end of the telephone cable to the line port of the printer. Connect the other end of the cable to an active analog wall jack. Connect the answering machine to the telephone port of the printer.
- Page 39 Faxing Connected to different wall jacks Connect one end of the telephone cable to the line port of the printer. Connect the other end of the cable to an active analog wall jack. Notes: • If you have only one telephone number on your line, then set the printer to receive faxes automatically. •...
- Page 40 Faxing Setup 3: Printer is sharing the line with a telephone subscribed to voice mail service Connect one end of the telephone cable to the line port of the printer. Connect the other end of the cable to an active analog wall jack. Connect the telephone to the telephone port of the printer.
- Page 41 Faxing Setting up fax using digital subscriber line CAUTION—SHOCK HAZARD: To avoid the risk of electrical shock, do not set up this product or make any electrical or cabling connections, such as the power cord, fax feature, or telephone, during a lightning storm.
- Page 42 Faxing Connect the other end of the cable to the telephone port on the DSL filter. Note: To connect a telephone to the printer, remove any installed adapter plug from the telephone port of the printer, and then connect the telephone. Setting up fax using VoIP telephone service CAUTION—SHOCK HAZARD: To avoid the risk of electrical shock, do not set up this product or make any electrical or cabling connections, such as the power cord, fax feature, or telephone, during a...
- Page 43 Faxing Connect one end of the telephone cable to the line port of the printer. Connect the other end of the cable to the port labeled Phone Line 1 or Phone Port on the VoIP adapter. Note: The port labeled Phone Line 2 or Fax Port is not always active. VoIP providers may charge extra cost for the activation of the second telephone port.
- Page 44 Faxing Setup 1: Printer is connected directly to a cable modem Connect one end of the telephone cable to the line port of the printer. Connect the other end of the cable to the port labeled Phone Line 1 or Phone Port on the cable modem. Connect your analog telephone to the telephone port of the printer.
- Page 45 Faxing Setup 2: Printer is connected to a wall jack; cable modem is installed elsewhere in the facility Connect one end of the telephone cable to the line port of the printer. Connect the other end of the cable to an active analog telephone wall jack. Connect your analog telephone to the telephone port of the printer.
- Page 46 Faxing CAUTION—POTENTIAL INJURY: To reduce the risk of fire, use only a 26 AWG or larger telecommunications (RJ-11) cord when connecting this product to the public switched telephone network. For users in Australia, the cord must be approved by the Australian Communications and Media Authority.
- Page 47 Faxing Connecting the printer to a non‑RJ11 wall jack Connect one end of the telephone cable to the line port of the printer. Connect the other end of the cable to the RJ11 adapter, and then connect the adapter to the wall jack. If you want to connect another device with a non‑RJ11 connector to the same wall jack, then connect it directly to the telephone adapter.
- Page 48 Faxing Connecting the printer to a wall jack in Germany The German wall jack has two kinds of ports. The N ports are for fax machines, modems, and answering machines. The F port is for telephones. Connect the printer to any of the N ports. Connect one end of the telephone cable to the line port of the printer.
-
Page 49: Sending A Fax
Faxing Setting the fax date and time From the home screen, touch Settings > Device > Preferences > Date and Time > Configure. Configure the settings. Sending a fax Using the control panel Load the original document into the ADF tray or on the scanner glass. From the home screen, touch Fax, and then enter the needed information. -
Page 50: Changing The Fax Resolution
Faxing Changing the fax resolution Load an original document into the ADF tray or on the scanner glass. From the home screen, touch Fax, and then enter the needed information. Touch Resolution, and then adjust the setting. Send the fax. Adjusting the fax darkness Load an original document into the ADF tray or on the scanner glass. -
Page 51: Scanning
Scanning Scanning Scanning to an FTP server Load the original document into the ADF tray or on the scanner glass. From the home screen, touch FTP, and then enter the needed information. If necessary, configure other FTP settings. Send the FTP job. Creating an FTP shortcut From the home screen, touch FTP. -
Page 52: Scanning To A Fax Server
Scanning Scanning to a fax server Load an original document into the ADF tray or on the scanner glass. From the home screen, touch Scan Center, and then from the list of destinations, select Fax. Select a fax destination. Note: To create a fax destination, touch Create Fax. Scan the document. -
Page 53: Understanding The Printer Menus
Understanding the printer menus Understanding the printer menus Menu map Device • • Preferences Accessibility • • Eco‑Mode Restore Factory Defaults • • Remote Operator Panel Maintenance • • Notifications Visible Home Screen Icons • • Power Management About this Printer Print •... -
Page 54: Device
Understanding the printer menus Help • • Print All Guides Information Guide • • Color Quality Guide Media Guide • • Connection Guide Moving Guide • • Copy Guide Print Quality Guide • • E‑mail Guide Scan Guide • • Fax Guide Supplies Guide Troubleshooting... - Page 55 Understanding the printer menus Menu item Description Screen Brightness Adjust the brightness of the display. 20–100% (90*) Flash Drive Access Enable access to the flash drive. Enabled* Disabled Allow Background Removal Specify whether background removal is allowed. Allow Custom Job scans Specify whether the Custom Job Scanning setting appears for copy, scan, and fax.
- Page 56 Understanding the printer menus Menu item Description Copy Configure the copy settings of the printer. Sides (1 sided to 1 sided*) Pages per Side (Off*) Darkness (5*) Note: An asterisk (*) next to a value indicates the factory default setting. Remote Operator Panel Menu item Description...
- Page 57 Understanding the printer menus Menu item Description E‑mail Alerts Setup Configure the e‑mail settings of the printer. E‑mail Setup Primary SMTP Gateway Primary SMTP Gateway Port (25*) Secondary SMTP Gateway Secondary SMTP Gateway Port (25*) SMTP Timeout (30 seconds*) Reply Address Always use SMTP default Reply Address (Off*) Use SSL/TLS (Disabled*)
- Page 58 Understanding the printer menus Power Management Menu item Description Sleep Mode Profile Set the printer to stay in Ready mode or return to Sleep mode after printing. Print from Sleep Mode Stay awake after printing Enter Sleep Mode after printing* Timeouts Set the idle time before the printer begins operating in Sleep mode.
- Page 59 Understanding the printer menus Menu item Description Prolong Screen Timeout Let the user remain in the same location and reset the Screen Timeout timer when it expires instead of returning to the home screen. Off* Note: An asterisk (*) next to a value indicates the factory default setting. Restore Factory Defaults Menu item Description...
- Page 60 Understanding the printer menus Menu item Description Tray Configuration Show the Tray Insert message. Show Tray Insert Message Only for unknown sizes* Always Tray Configuration Determine the default loading orientation for the A5 size paper in all paper sources. A5 Loading Short Edge Long Edge* Tray Configuration...
- Page 61 Understanding the printer menus Menu item Description Printer Emulations Reset the emulator after a print job. Emulator Security Reset Emulator After Job Off* Printer Emulations Disable access to printer message during emulation. Emulator Security Disable Printer Message Access Fax Configuration Set fax to enter Sleep mode whenever the printer determines that it should.
- Page 62 Understanding the printer menus Menu item Description Device Operations Set the printer to operate in a special mode, in which it attempts to continue offering as much functionality as possible, despite Safe Mode known issues. Off* For example, when set to On, and the duplex motor is nonfunctional, the printer performs one‑sided printing of the documents even if the job is two‑sided printing.
- Page 63 Understanding the printer menus Menu item Description Toner patch sensor setup Print a diagnostic page that contains information on toner patch sensor calibration. Print TPS information page Scanner Configuration Print a Quick Test target page. Scanner Manual Registration Note: Make sure that the margin spacing on the target page Print Quick Test is uniform all the way around the target.
- Page 64 Understanding the printer menus Menu item Description Out of Service Erase Clear all information on non‑volatile memory and information on the hard disk. Sanitize all information on nonvolatile memory Erase all printer and network settings Note: Sanitize all information on hard disk appears only when a hard disk is installed.
-
Page 65: Print
Understanding the printer menus Print Layout Menu item Description Sides Specify whether to print on one side or both sides of the paper. 1‑Sided* 2‑Sided Flip Style Determine which side of the paper is bound when performing two‑sided printing. Long Edge* Short Edge Blank Pages Print blank pages that are included in a print job. - Page 66 Understanding the printer menus Menu item Description Pages per Side Orientation Specify the orientation of multiple page images when using the Pages per Side menu. Auto* Landscape Portrait Pages per Side Border Print a border around each page image when using the Pages per Side menu. None* Solid Copies...
- Page 67 Understanding the printer menus Menu item Description Resource Save Determine what the printer does with downloaded resources, such as fonts and macros, when it receives a job that requires more than the Off* available memory. Notes: • When set to Off, the printer retains downloaded resources only until memory is needed.
- Page 68 Understanding the printer menus Advanced Imaging Menu item Description Color Balance Adjust the amount of toner that is used for each color. Cyan ‑5 to 5 (0*) Magenta ‑5 to 5 (0*) Yellow ‑5 to 5 (0*) Black ‑5 to 5 (0*) Reset Defaults Color Correction Modify the color settings used to print documents.
- Page 69 Understanding the printer menus Menu item Description Log Action at End of Frequency Specify how the printer responds when the frequency threshold expires. None* Note: The value defined in Accounting Log Frequency determines when this E‑mail Current Log action is triggered. E‑mail &...
- Page 70 Understanding the printer menus Menu item Description Minimum Line Width Set the minimum stroke width. 1–30 (2*) Notes: • Jobs printed in 1200 dpi use the value directly. • Jobs printed in 4800 CQ use half the value. Note: An asterisk (*) next to a value indicates the factory default setting. Menu item Description Scale To Fit...
- Page 71 Understanding the printer menus Menu item Description Font Priority Establish the font search order. Resident* Notes: Flash/Disk • Resident sets the printer to search its memory for the requested font before searching the flash memory or printer hard disk. • Flash/Disk sets the printer to search the flash memory or printer hard disk for the requested font before searching the printer memory.
- Page 72 Understanding the printer menus Menu item Description Lines per Page Specify the number of lines of text for each page printed through the PCL® data stream. 1–255 Notes: • This menu item activates vertical escapement that causes the selected number of requested lines to print between the default margins of the page.
- Page 73 Understanding the printer menus Menu item Description Font Size Set the font size to use when printing HTML documents. 1–255 (12*) Scale Scale HTML documents for printing. 1–400% (100*) Orientation Set the page orientation for HTML documents. Portrait* Landscape Margin Size Set the page margin for HTML documents.
-
Page 74: Paper
Understanding the printer menus Paper Tray Configuration Menu item Description Default Source Set the paper source for all print jobs. Tray [x] (1*) Multipurpose Feeder Manual Paper Manual Envelope Paper Size/Type Specify the paper size or paper type loaded in each paper source. Tray [x] Multipurpose Feeder Manual Paper... - Page 75 Understanding the printer menus Menu item Description Portrait Height Set the portrait height of the universal paper. 3–52 inches (14*) 76.2–1321 mm (356*) Feed Direction Set the printer to pick paper from the short edge or long edge direction. Short Edge* Long Edge Note: Long Edge appears only when the longest edge is shorter than the maximum width supported.
-
Page 76: Copy
Understanding the printer menus Media Types Menu item Description Plain Specify the texture, weight, and orientation of the paper. Card Stock Recycled Glossy Labels Vinyl Labels Bond Envelope Letterhead Preprinted Colored Paper Light Heavy Rough/Cotton Custom Type [X] Copy Copy Defaults Menu item Description Content Type... - Page 77 Understanding the printer menus Menu item Description Separator Sheets Specify whether to insert blank separator sheets when printing. None* Between Copies Between Jobs Between Pages Separator Sheet Source Specify the paper source for the separator sheet. Tray [x] (1*) Multipurpose Feeder Color Set the printer to generate color output from a scan job.
- Page 78 Understanding the printer menus Menu item Description Header/Footer Specify the header or footer information on the scanned image. Left Header Middle Header Right Header Left Footer Middle Footer Right Footer Overlay Specify the overlay text to print on each copy. Confidential Copy Draft...
- Page 79 Understanding the printer menus Menu item Description Auto Center Align the content at the center of the page. Off* Mirror Image Create a mirror image of the original document. Off* Negative Image Create a negative image of the original document. Off* Shadow Detail Adjust the shadow detail in the original document.
-
Page 80: Fax
Understanding the printer menus Fax Defaults Fax Mode Menu item Description Fax Mode Select a fax mode. Fax* Fax Server Disabled Note: An asterisk (*) next to a value indicates the factory default setting. Fax Setup Menu item Description General Fax Settings Configure the general fax settings. - Page 81 Understanding the printer menus Menu item Description Fax Send Settings Configure the fax send settings. Resolution (Standard*) Note: Custom Job Scanning and Scan Preview appear only Original Size (Mixed Sizes*) when a hard disk is installed. Orientation (Portrait*) Sides (Off*) Content Type (Text*) Content Source (Color Laser*) Darkness (5*)
- Page 82 Understanding the printer menus Menu item Description Fax Receive Settings Configure the fax receive settings. Rings to Answer (3*) Auto Reduction (Off*) Paper Source (Auto*) Sides (Off*) Separator Sheets (None*) Separator Sheet Source(Tray 1*) Output Bin(Standard Bin*) Fax Footer (Off*) Fax Footer Time Stamp (Receive*) Holding Faxes Held Fax Mode (Off*)
- Page 83 Understanding the printer menus Menu item Description Speaker Settings Set the speaker mode and volume for incoming or outgoing fax. Speaker Mode (Always Off*) Speaker Volume (Low*) Ringer Volume (Off*) Note: An asterisk (*) next to a value indicates the factory default setting. Fax Server Setup Menu item Description...
-
Page 84: E-Mail
Understanding the printer menus Menu item Description Fax Server Scan Settings Configure the fax server scan settings. Image Format (PDF (.pdf)*) Content Type (Text*) Content Source (Color Laser*) Fax Resolution (Standard*) Sides (Off*) Darkness (5*) Orientation (Portrait*) Original Size (Mixed Sizes*) Use Multi‑Page TIFF (On*) Note: An asterisk (*) next to a value indicates the factory default setting. - Page 85 Understanding the printer menus Menu item Description SMTP Server Authentication Set the authentication type for the SMTP server. No authentication required* Login / Plain NTLM CRAM‑MD5 Digest‑MD5 Kerberos 5 Device‑Initiated E‑mail Specify whether credentials are required for device‑initiated e‑mail. None* Use Device SMTP Credentials User‑Initiated E‑mail Specify whether credentials are required for user‑initiated e‑mail.
- Page 86 Understanding the printer menus Menu item Description PDF Settings Configure the PDF settings of the scanned document. PDF Version (1.5*) Notes: Archival Version (A‑1a*) • Archival Version and Archival (PDF/A) are supported only when PDF Version is Highly Compressed (Off*) set to 1.4.
- Page 87 Understanding the printer menus Menu item Description Sides Specify the orientation of the original document when scanning on both sides of the document. Off* Short Edge Long Edge Note: An asterisk (*) next to a value indicates the factory default setting. Advanced Imaging Menu item Description...
- Page 88 Understanding the printer menus Menu item Description Shadow Detail Adjust the shadow detail in the scanned image. ‑4 to 4 (0*) Scan Edge to Edge Scan the original document from edge to edge. Off* Sharpness Adjust the sharpness in the scanned image. 1–5 (3*) Temperature Generate a bluer or redder output of the original document.
- Page 89 Understanding the printer menus Menu item Description TIFF Compression Specify the compression type for TIFF files. JPEG LZW* Text Default Set the text quality in the content being scanned. 5–95 (75*) Text/Photo Default Set the text and photo quality in the content being scanned. 5–95 (75*) Photo Default Set the photo quality of the content being scanned.
-
Page 90: Ftp
Understanding the printer menus Web Link Setup Menu item Description Server Specify the credentials of the server that is hosting the images that are included in the e-mail. Login Password Path File Name Web Link FTP Defaults Menu item Description Format Specify the file format for the scanned image. - Page 91 Understanding the printer menus Menu item Description Color Set the printer to capture file content in color or in mono. Black and White Gray Color* Auto Resolution Set the resolution of the scanned image. 75 dpi 150 dpi* 200 dpi 300 dpi 400 dpi 600 dpi...
- Page 92 Understanding the printer menus Menu item Description Auto Color Detect Configure the auto color detection setting. Color Sensitivity (5*) Area Sensitivity (5*) FTP Bit Depth (1 bit*) JPEG Quality Set the JPEG quality of the scanned image. Best for content* 5–95 Contrast Specify the contrast for the scanned image.
- Page 93 Understanding the printer menus Admin Controls Menu item Description Text Default Set the quality of text on the scanned image. 5–95 (75*) Text/Photo Default Set the quality of text and photo on the scanned image. 5–95 (75*) Photo Default Set the quality of photo on the scanned image. 5–95 (50*) Use Multi‑Page TIFF Enable scanning of multiple TIFF images in one TIFF file.
-
Page 94: Usb Drive
Understanding the printer menus USB Drive Flash Drive Scan Menu item Description Format Specify the file format for the scanned image. JPEG (.jpg) PDF (.pdf)* TIFF (.tif) XPS (.xps) PDF Settings Configure the PDF settings of the scanned image. PDF Version (1.5*) Notes: Archival Version (A‑1a*) •... - Page 95 Understanding the printer menus Menu item Description Darkness Adjust the darkness of the scanned image. 1–9 (5*) Orientation Specify the orientation of the original document. Portrait* Landscape Original Size Set the paper size of the original document. Mixed Sizes* Sides Specify the orientation of the original document when scanning on both sides of the document.
- Page 96 Understanding the printer menus Menu item Description Background Removal Remove the background color or image noise from the original document. Background Detection (Content‑based*) Level (0*) Notes: • Content-based removes the background color from the original document. • Fixed removes image noise from a photo. Mirror Image Create a mirror image of the original document.
- Page 97 Understanding the printer menus Menu item Description TIFF Compression Specify the compression type for TIFF files. LZW* JPEG Custom Job Scanning Set the printer to scan the first set of original documents using the specified settings, and then scan the next set with the same or different settings. Off* Note: This menu item appears only when a hard disk is installed.
- Page 98 Understanding the printer menus Menu item Description Pages per Side Print multiple page images on one side of a sheet of paper. Off* 2 pages per side 3 pages per side 4 pages per side 6 pages per side 9 pages per side 12 pages per side 16 pages per side Pages per Side Ordering...
-
Page 99: Network/Ports
Understanding the printer menus Network/Ports Network Overview Menu item Description Active Adapter Specify the type of the network connection. Auto* Note: Wireless is available only in printers connected to a wireless network. Standard Network Wireless Network Status Show the connectivity status of the printer network. Display Network Status on Show the network status on the display. - Page 100 Understanding the printer menus Menu item Description Setup On Printer Panel Configure the wireless connection using the control panel. Choose Network Add Wi‑Fi Network Network Name Network Mode (Infrastructure*) Wireless Security Mode (Disabled*) Wi‑Fi Protected Setup Establish a Wi‑Fi network and enable network security. Start Push Button Method Start PIN Method Enable Wi‑Fi Direct...
- Page 101 Understanding the printer menus Menu item Description PS SmartSwitch Set the printer to switch automatically to PostScript emulation when a print job requires it, regardless of the default printer language. Note: When this setting is disabled, the printer does not examine incoming data and uses the default printer language specified in the Setup menu.
- Page 102 Understanding the printer menus Menu item Description PS SmartSwitch Set the printer to switch automatically to PostScript emulation when a print job requires it, regardless of the default printer language. Note: When this setting is disabled, the printer does not examine incoming data and uses the default printer language specified in the Setup menu.
- Page 103 Understanding the printer menus Menu item Description Domain Search Order Specify a list of domain names to locate the printer and its resources that reside in different domains on the network. Enable DDNS Update the Dynamic DNS settings. Off* DDNS TTL Specify the current DDNS settings.
- Page 104 Understanding the printer menus SNMP Note: This menu appears only in network printers or printers that are attached to print servers. Menu item Description SNMP Versions 1 and 2c Configure Simple Network Management Protocol (SNMP) versions 1 and 2c to install print drivers and applications. Enabled Allow SNMP Set Enable PPM MIB...
- Page 105 Understanding the printer menus Menu item Description Enable IPSec Enable Internet Protocol Security (IPSec). Base Configuration Set the IPSec base configuration. Default* Compatibility Secure DH (Diffie‑Hellman) Group Proposal Set the IPSec base configuration. modp2048 (14)* Note: This menu item appears only when Base Configuration is set modp3072 (15) to Compatibility.
- Page 106 Understanding the printer menus Menu item Description Active Let the printer join networks that require authentication before allowing access. Off* Note: An asterisk (*) next to a value indicates the factory default setting. LPD Configuration Note: This menu appears only in network printers or printers that are attached to print servers. Menu item Description LPD Timeout...
- Page 107 Understanding the printer menus Menu item Description Local Domains Specify domain names for HTTP and FTP servers. HTTP Proxy IP Address Configure the HTTP and FTP server settings. FTP Proxy IP Address HTTP Default IP Port HTTPS Device Certificate FTP Default IP Port Timeout for HTTP/FTP Specify the amount of time before the server connection stops.
- Page 108 Understanding the printer menus Menu item Description Job Buffering Temporarily store jobs on the hard disk before printing. Off* Note: This menu item appears only when a hard disk is installed. Mac Binary PS Set the printer to process Macintosh binary PostScript print jobs. Auto* Notes: •...
- Page 109 Understanding the printer menus Menu item Description Options Allow the registered user and other users on the same subnet to send jobs to the printer locally. Enable Local Discovery Options Verify authenticity of the peer certificate to connect to your Google account.
-
Page 110: Security
Understanding the printer menus Security Login Methods Manage Permissions Menu item Description Function Access Control access to the printer functions. Access Address Book in Apps Note: Some menu items appear only when a hard disk is installed. Modify Address Book Manage Shortcuts Create Profiles Manage Bookmarks... - Page 111 Understanding the printer menus Menu item Description Administrative Menus Control access to the printer menu settings. Security Menu Network/Ports Menu Paper Menu Reports Menu Function Configuration Menus Supplies Menu Option Card Menu SE Menu Device Menu Device Management Control access to the printer management options. Remote Management Firmware Updates Apps Configuration...
- Page 112 Understanding the printer menus Menu item Description Control Panel Specify the default login method to access the control panel. User Name/Password User Name Password Browser Specify the default login method to access the browser. User Name/Password User Name Password Schedule USB Devices Menu item Description Schedules...
- Page 113 Understanding the printer menus Menu item Description Remote Syslog Facility Specify a facility code that the printer uses when sending log events to a remote server. 0 ‑ Kernel Messages 1 ‑ User‑Level Messages 2 ‑ Mail System 3 ‑ System Daemons 4 ‑...
- Page 114 Understanding the printer menus Menu item Description E‑mail Log Cleared Alert Send e‑mail notification to the administrator when a log entry is deleted. Off* E‑mail Log Wrapped Alert Send e‑mail notification to the administrator when the log becomes full and begins to overwrite the oldest entries.
- Page 115 Understanding the printer menus Login Restrictions Menu item Description Login failures Specify the number of failed login attempts before the user gets locked out. 1–10 (3*) Failure time frame Specify the time frame between failed login attempts before the user gets locked out. 1–60 minutes (5*) Lockout time Specify the lockout duration.
- Page 116 Understanding the printer menus Menu item Description Reserve Job Expiration Set the expiration time that the printer stores print jobs for printing later. Off* 1 Hour 4 Hours 24 Hours 1 Week Require All Jobs to be Held Set the printer to hold all print jobs. Off* Keep duplicate documents Set the printer to print other documents with the same file name without overwriting...
-
Page 117: Reports
Understanding the printer menus Solutions LDAP Settings Menu item Description Follow LDAP Referrals Search the different servers in the domain for the logged-in user account. Off* LDAP Certificate Verification Enable verification of LDAP certificates. Miscellaneous Menu item Description Protected Features Show all the features that Function Access Control (FAC) protects regardless of the security permission that the user has. - Page 118 Understanding the printer menus Device Menu item Description Device Information Print a report that contains information about the printer. Device Statistics Print a report about printer usage and supply status. Profile List Print a list of profiles that are stored in the printer. Asset Report Print a report that contains the printer serial number and model name.
-
Page 119: Help
Understanding the printer menus Network Menu item Description Network Setup Page Print a page that shows the configured network and wireless settings on the printer. Note: This menu item appears only in network printers or printers connected to print servers. Wi‑Fi Direct Connected Clients Print a page that shows the list of devices that are connected to the printer using Wi‑Fi Direct. -
Page 120: Securing The Printer
Securing the printer Securing the printer Locating the security slot The printer is equipped with a security lock feature. Attach a security lock compatible with most laptop computers in the location shown to secure the printer in place. Erasing printer memory To erase volatile memory or buffered data in your printer, turn off the printer. -
Page 121: Encrypting The Printer Hard Disk
Securing the printer Note: This process can take from several minutes to more than an hour, making the printer unavailable for other tasks. Encrypting the printer hard disk This process erases all contents in the hard disk. If necessary, back up important data from the printer before starting the encryption. - Page 122 Securing the printer • The printer is removed from your premises for service. • The printer is sold to another organization. Disposing of a printer hard disk • Degaussing—Flushes the hard disk with a magnetic field that erases stored data •...
-
Page 123: Maintaining The Printer
Maintaining the printer Maintaining the printer Warning—Potential Damage: Failure to maintain optimum printer performance, or to replace parts and supplies, may cause damage to your printer. Adjusting the speaker volume Adjusting the default internal speaker volume From the control panel, navigate to: Settings >... - Page 124 Maintaining the printer Connecting the printer to a wireless network using Wi‑Fi Protected Setup (WPS) Before you begin, make sure that: • The access point (wireless router) is WPS‑certified or WPS‑compatible. For more information, see the documentation that came with your access point. •...
-
Page 125: Cleaning Printer Parts
Maintaining the printer Deactivating the Wi‑Fi network From the home screen, touch Settings > Network/Ports > Network Overview > Active Adapter > Standard Network. Follow the instructions on the display. Cleaning printer parts Cleaning the printer CAUTION—SHOCK HAZARD: To avoid the risk of electrical shock when cleaning the exterior of the printer, unplug the power cord from the electrical outlet and disconnect all cables from the printer before proceeding. - Page 126 Maintaining the printer Using a damp, soft, lint-free cloth, wipe the following areas: • ADF glass • ADF glass pad • Scanner glass...
-
Page 127: Ordering Parts And Supplies
Maintaining the printer • Scanner glass pad Close the scanner cover. Ordering parts and supplies To order parts and supplies, contact the place where you purchased the printer. Note: All life estimates for printer supplies assume printing on letter‑ or A4‑size plain paper. Checking the status of parts and supplies From the home screen, touch Status/Supplies. -
Page 128: Replacing Parts And Supplies
Maintaining the printer Notes: • View the printer IP address on the printer home screen. The IP address appears as four sets of numbers separated by periods, such as 123.123.123.123. • If you are using a proxy server, then temporarily disable it to load the web page correctly. Click Settings >... - Page 129 Maintaining the printer Remove the toner cartridge. Unpack the new toner cartridge. Insert the new toner cartridge. Close door B.
- Page 130 Maintaining the printer Replacing the waste toner bottle Open door B. Remove the waste toner bottle. Unpack the new waste toner bottle.
-
Page 131: Moving The Printer
Maintaining the printer Insert the new waste toner bottle. Close door B. Moving the printer Moving the printer to another location CAUTION—POTENTIAL INJURY: If the printer weight is greater than 20 kg (44 lb), then it may require two or more people to lift it safely. CAUTION—POTENTIAL INJURY: To avoid the risk of fire or electrical shock, use only the power cord provided with this product or the manufacturer's authorized replacement. -
Page 132: Saving Energy And Paper
Maintaining the printer Shipping the printer When shipping the printer, use the original packaging or contact the place where you purchased the printer. Saving energy and paper Configuring the power save mode settings Sleep mode From the home screen, touch Settings > Device > Power Management > Timeouts > Sleep Mode. Specify the amount of time that the printer stays idle before it enters Sleep Mode. -
Page 133: Clearing Jams
Clearing jams Clearing jams Avoiding jams Load paper properly • Make sure that the paper lies flat in the tray. Correct loading of paper Incorrect loading of paper • Do not load or remove a tray while the printer is printing. •... -
Page 134: Identifying Jam Locations
Clearing jams • Flex, fan, and align the paper edges before loading. • Do not use paper that has been cut or trimmed by hand. • Do not mix paper sizes, weights, or types in the same tray. • Make sure that the paper size and type are set correctly on the computer or printer control panel. •... -
Page 135: Paper Jam In Trays
Clearing jams Paper jam in trays Pull out the tray. Warning—Potential Damage: A sensor inside the optional tray is easily damaged by static electricity. Touch a metal surface before removing the jammed paper in the tray. Remove the jammed paper. Note: Make sure that all paper fragments are removed. -
Page 136: Paper Jam Behind Door E
Clearing jams Paper jam behind door E Open door E. Remove the jammed paper. Note: Make sure that all paper fragments are removed. Close door E. Paper jam in the multipurpose feeder Remove paper from the multipurpose feeder. Pull out the tray. Remove the jammed paper. -
Page 137: Paper Jam In The Standard Bin
Clearing jams Insert the tray. Paper jam in the standard bin Remove the jammed paper. Note: Make sure that all paper fragments are removed. Open doors A and D, and then remove any paper fragments. CAUTION—HOT SURFACE: The inside of the printer might be hot. To reduce the risk of injury from a hot component, allow the surface to cool before touching it. -
Page 138: Paper Jam In Door A
Clearing jams Close doors D and A. Paper jam in door A Paper jam in the fuser Open door A. CAUTION—HOT SURFACE: The inside of the printer might be hot. To reduce the risk of injury from a hot component, allow the surface to cool before touching it. - Page 139 Clearing jams Remove the jammed paper. Note: Make sure that all paper fragments are removed.
- Page 140 Clearing jams Open the fuser access door. Remove the jammed paper. Note: Make sure that all paper fragments are removed. Close door A. Paper jam in the duplex unit Open door A. CAUTION—HOT SURFACE: The inside of the printer might be hot. To reduce the risk of injury from a hot component, allow the surface to cool before touching it.
- Page 141 Clearing jams Open the duplex cover. Remove the jammed paper. Note: Make sure that all paper fragments are removed.
- Page 142 Clearing jams Close the duplex cover and door A.
-
Page 143: Troubleshooting
Troubleshooting Troubleshooting Network connection problems Cannot open Embedded Web Server Action Step 1 Go to step 2. Turn on the printer. Check if the printer is on. Is the printer on? Step 2 Go to step 3. Type the correct printer IP address in Make sure that the printer IP address is correct. - Page 144 Troubleshooting Action Step 6 Go to step 7. Contact your administrator. Check if the web proxy servers are disabled. Are the web proxy servers disabled? Step 7 The problem is Contact your dealer. solved. Access the Embedded Web Server. Did the Embedded Web Server open? Unable to read flash drive Action Step 1...
-
Page 145: Hardware Options Problems
Troubleshooting Checking the printer connectivity From the home screen, touch Settings > Reports > Network > Network Setup Page. Check the first section of the network setup page, and confirm that the status is connected. If the status is not connected, then the LAN drop may be inactive, or the network cable may be unplugged or malfunctioning. -
Page 146: Paper Feed Problems
Troubleshooting To accept any and all of these risks and to proceed with the use of non-genuine supplies or parts in your printer, from the control panel, press and hold X and # simultaneously for 15 seconds. If you do not want to accept these risks, then remove the third-party supply or part from your printer and install a genuine supply or part from the printer manufacturer. - Page 147 Troubleshooting Action Step 2 The problem is Go to step 3. solved. From the document that you are trying to print, open the Print dialog, and then select Collate. Print the document. Are the pages collated correctly? Step 3 The problem is Contact your dealer.
- Page 148 Troubleshooting Action Step 3 Go to step 4. The problem is solved. Print on the other side of the paper. Remove paper, flip it over, and then reload paper. Print the document. Is the paper curled? Step 4 Contact your dealer. The problem is solved.
- Page 149 Troubleshooting Paper frequently jams Action Step 1 Go to step 2. The problem is solved. Pull out the tray. Check if paper is loaded correctly. Notes: • Make sure that the paper guides are positioned correctly. • Make sure that the stack height is below the maximum paper fill indicator.
-
Page 150: Printing Problems
Troubleshooting Printing problems Confidential and other held documents do not print Action Step 1 The problem is Go to step 2. solved. From the control panel, check if the documents appear in the Held Jobs list. Note: If the documents are not listed, then print the documents using the Print and Hold options. - Page 151 Troubleshooting Slow printing Action Step 1 Go to step 2. The problem is solved. Make sure that the printer cable is securely connected to the printer and to the computer, print server, option, or other network device. Is the printer printing slow? Step 2 Go to step 3.
- Page 152 Troubleshooting Action Step 6 Go to step 7. The problem is solved. Make sure that the printer settings for texture and weight match the paper being loaded. From the home screen, touch Settings > Paper > Media Configuration > Media Types. Note: Rough paper texture and heavy paper weight may print more slowly.
- Page 153 Troubleshooting Action Step 3 The problem is Go to step 4. solved. Check if the ports are working and if the cables are securely connected to the computer and the printer. For more information, see the setup documentation that came with the printer.
- Page 154 Troubleshooting Action Step 3 The problem is Contact your dealer. solved. Check if the trays are linked. For more information, see “Linking trays” on page Print the document. Is the document printed from the correct tray? The printer is not responding Action Step 1 The problem is...
- Page 155 Troubleshooting Action Step 7 The problem is Contact your dealer. solved. Turn off the printer, wait for about 10 seconds, and then turn on the printer. Is the printer responding? Print quality is poor Blank or white pages Contact your dealer. Dark print Note: Before solving the problem, print the Print Quality Test Pages.
- Page 156 Troubleshooting Action Step 2 Go to step 3. The problem is solved. Depending on your operating system, reduce toner darkness from the Printing Preferences or Print dialog. Note: You can also change the setting on the printer control panel. Navigate to Settings > Print > Quality > Toner Darkness.
- Page 157 Troubleshooting Ghost images Note: Before solving the problem, print the Print Quality Test Pages. From the control panel, navigate to Settings > Troubleshooting > Print Quality Test Pages. For non-touch-screen printer models, press navigate through the settings. Action Step 1 Go to step 2.
- Page 158 Troubleshooting Gray or colored background Note: Before solving the problem, print the Print Quality Test Pages. From the control panel, navigate to Settings > Troubleshooting > Print Quality Test Pages. For non-touch-screen printer models, press navigate through the settings. Action Contact your dealer.
- Page 159 Troubleshooting Action Step 2 The problem is Contact your dealer. solved. Depending on your operating system, specify the paper size from the Printing Preferences or Print dialog. Notes: • Make sure that the setting matches the paper loaded. • You can also change the setting from the printer control panel.
- Page 160 Troubleshooting Action Step 3 Go to step 4. The problem is solved. Turn off Color Saver. From the control panel, navigate to: Settings > Print > Quality > Color Saver Print the document. Is the print light? Step 4 Go to step 5. The problem is solved.
- Page 161 Troubleshooting Missing colors Contact your dealer. Mottled print and dots Note: Before solving the problem, print the Print Quality Test Pages. From the control panel, navigate to Settings > Troubleshooting > Print Quality Test Pages. For non-touch-screen printer models, press navigate through the settings.
- Page 162 Troubleshooting Action Step 4 Contact your dealer. The problem is solved. Load paper from a fresh package. Note: Paper absorbs moisture due to high humidity. Store paper in its original wrapper until you are ready to use it. Print the document. Is the print mottled? Print crooked or skewed Note: Before solving the problem, print the Print Quality Test Pages.
- Page 163 Troubleshooting Solid color or black images Contact your dealer. Text or images cut off Note: Before solving the problem, print the Print Quality Test Pages. From the control panel, navigate to Settings > Troubleshooting > Print Quality Test Pages. For non-touch-screen printer models, press navigate through the settings.
- Page 164 Troubleshooting Toner easily rubs off Note: Before solving the problem, print the Print Quality Test Pages. From the control panel, navigate to Settings > Troubleshooting > Print Quality Test Pages. For non-touch-screen printer models, press navigate through the settings. Action Step 1 Go to step 2.
- Page 165 Troubleshooting Uneven print density Contact your dealer. Horizontal dark lines Notes: • Before solving the problem, print the Print Quality Test Pages. From the control panel, navigate to Settings > Troubleshooting > Print Quality Test Pages. For non-touch-screen printer models, press to navigate through the settings.
- Page 166 Troubleshooting Action Step 2 Contact your dealer. The problem is solved. Load paper from a fresh package. Note: Paper absorbs moisture due to high humidity. Store paper in its original wrapper until you use it. Print the document. Do dark lines appear on prints? Vertical dark lines Note: Before solving the problem, print the Print Quality Test Pages.
- Page 167 Troubleshooting Action Step 1 Go to step 2. Go to step 3. Using a blank sheet of paper, make a two‑sided copy using the ADF. Do vertical dark lines or streaks appear on prints? Step 2 Go to step 3. The problem is solved.
- Page 168 Troubleshooting Action Step 4 Contact your dealer. The problem is solved. Load paper from a fresh package. Note: Paper absorbs moisture due to high humidity. Store paper in its original wrapper until you use it. Print the document. Do vertical dark lines or streaks appear on prints? Horizontal white lines Notes: •...
- Page 169 Troubleshooting Vertical white lines Note: Before solving the problem, print the Print Quality Test Pages. From the control panel, navigate to Settings > Troubleshooting > Print Quality Test Pages. For non-touch-screen printer models, press navigate through the settings. Action Step 1 Go to step 2.
-
Page 170: Color Quality Problems
Troubleshooting Color quality problems Adjusting toner darkness From the home screen, touch Settings > Print > Quality. Adjust the toner darkness. Apply the changes. Modifying the colors in printed output From the home screen, touch Settings > Print > Quality > Advanced Imaging > Color Correction. In the Color Correction menu, touch Manual >... - Page 171 Troubleshooting What is CMYK color? CMYK color is a method of describing colors by indicating the amount of cyan, magenta, yellow, and black used to reproduce a particular color. Cyan, magenta, yellow, and black inks or toners can be printed in various amounts to produce a large range of colors observed in nature.
-
Page 172: Faxing Problems
Troubleshooting The print appears tinted Action Step 1 Go to step 2. The problem is solved. Perform Color Adjust. From the home screen, touch Settings > Print > Quality > Advanced Imaging > Color Adjust. Print the document. Does the print appear tinted? Step 2 Contact your dealer. - Page 173 Troubleshooting Action Step 4 The problem is Go to step 5. solved. Check the telephone wall jack. Connect the analog telephone directly to the wall jack. Listen for a dial tone. If you do not hear a dial tone, then use a different telephone cable.
- Page 174 Troubleshooting Can receive but not send faxes Action Step 1 The problem is Go to step 2. solved. Load the original document properly into the ADF tray or on the scanner glass. Can you send faxes? Step 2 The problem is Contact your dealer.
-
Page 175: Scanning Problems
Troubleshooting Poor fax print quality Action Step 1 The problem is Go to step 2. solved. Make sure that there are no print quality defects. From the control panel, touch Settings > Troubleshooting > Print Quality Test Pages. Correct any print quality defects. For more information, see “Print quality is poor”... - Page 176 Troubleshooting Partial copies of document or photo Action Step 1 The problem is Go to step 2. solved. Make sure that the document or photo is loaded facedown on the upper left corner of the scanner glass. Copy the document or photo. Is the document or photo copied correctly? Step 2 The problem is...
- Page 177 Troubleshooting Scan job was not successful Action Step 1 The problem is Go to step 2. solved. Check the cable connections. Make sure that the Ethernet or USB cable is securely connected to the computer and the printer. Resend the scan job. Is the scan job successful? Step 2 The problem is...
- Page 178 Troubleshooting Scanner does not respond Action Step 1 The problem is Go to step 2. solved. Check if the power cord is connected properly to the printer and the electrical outlet. CAUTION—POTENTIAL INJURY: To avoid the risk of fire or electrical shock, connect the power cord to an appropriately rated and properly grounded electrical outlet that is near the product and easily accessible.
-
Page 179: Contacting Your Dealer
Troubleshooting Place the Print Quick Test page on the ADF tray. Touch Front ADF Registration or Rear ADF Registration. Notes: • To align Front ADF Registration, place the test page faceup, short edge first into the ADF. • To align Rear ADF Registration, place the test page facedown, short edge first into the ADF. In the Copy Quick Test menu, touch Start. -
Page 180: Notices
Supplies Standard supplies for this product that can be replaced by the user include toner cartridges. Be sure to use only SHARP-specified products for the toner cartridges. - Page 181 Notices For best copying results, be sure to use only Sharp Genuine Supplies which are designed, engineered, and tested to maximize the life and performance of Sharp products. Look for the Genuine Supplies label on the toner package. GENUINE SUPPLIES Hot surface notice 此符號表示該表面或元件會發熱。...
- Page 182 Notices Waste from Electrical and Electronic Equipment (WEEE) directive The WEEE logo signifies specific recycling programs and procedures for electronic products in countries of the European Union. We encourage the recycling of our products. If you have further questions about recycling options, contact your local sales office.
- Page 183 Notices waste dry cell batteries to a company who has the waste dry cell batteries recycle logo and provides the recycle service in order to have the appropriate process for the waste dry cell batteries. BSMI battery notice Taiwan RoHS information 限用物質含有情況標示 適用於印表機、雷射印表機、多功能複合機或多功能印表機。...
- Page 184 Notices 單元 限用物質及其化學符號 鉛 汞 鎘 六價鉻 多溴聯苯 多溴二苯醚 (Pb) (Hg) (Cd) (PBB) (PBDE) 備考 1.〝 〞係指該項限用物質之百分比含量未超出百分比含量基準值。 備考 2.〝 〞係指該項限用物質為排除項目。 Static sensitivity notice This symbol identifies static-sensitive parts. Do not touch the areas near these symbols without first touching a metal surface in an area away from the symbol. To prevent damage from electrostatic discharge when performing maintenance tasks such as clearing paper jams or replacing supplies, touch any exposed metal frame of the printer before accessing or touching interior areas of the printer even if the symbol is not present.
- Page 185 Notices Printer / cartridge / imaging unit short-term -40 to 43.3°C (-40 to 110°F) shipping Supplies shelf life is approximately 2 years. This is based on storage in a standard office environment at 22°C (72°F) and 45% humidity. Wet-bulb temperature is determined by the air temperature and the relative humidity. Información de la energía de México Consumo de energía en operación: 600 (7528-1A9);...
- Page 186 Notices Mode Description Power consumption (Watts) Ready The product is waiting for a print job. High-power usage: 51 (7528-1A9); 46.8 (7528-5A9) Low-power usage: 42.7 (7528-1A9); 40.6 (7528-5A9) Sleep Mode The product is in a high‑level energy‑saving mode. 1.67 Hibernate The product is in a low‑level energy‑saving mode. The product is plugged into an electrical outlet, but the power switch is turned off.
- Page 187 Notices Total energy usage It is sometimes helpful to estimate the total product energy usage. Since power consumption claims are provided in power units of Watts, the power consumption should be multiplied by the time the product spends in each mode in order to calculate energy usage. The total product energy usage is the sum of each mode's energy usage.
- Page 188 Notices incoming call. In most but not all areas, the sum of RENs should not exceed five (5.0). To be certain of the number of devices that may be connected to a line, as determined by the total RENs, contact your local telephone company.
- Page 189 Notices peuvent être connectés n’est pas directement limité, mais la somme des REN de ces appareils ne doit pas dépasser cinq. Le numéro REN est indiqué sur l'étiquette produit. Cet équipement utilise des prises de téléphone CA11A. Notice to users of the New Zealand telephone network The following are special conditions for the Facsimile User Instructions.
- Page 190 Notices Lexmark International, Inc. LEX-M03-002 A11-0160001JP Verwendung dieses Produkts in Deutschland Für dieses Produkt muss ein deutscher Billing Tone Filter zur Zählzeichenübertragung (Teilenummer 80D1888) für jede Leitung installiert werden, über die in Deutschland Zeitsteuertakte übertragen werden. Zeitsteuertakte sind in analogen Leitungen in Deutschland möglicherweise nicht vorhanden. Der Teilnehmer kann die Bereitstellung von Zeitsteuertakten veranlassen oder beim deutschen Netzanbieter telefonisch deren Deaktivierung beantragen.
- Page 191 Notices Circuit boards Power supply Power cords Connectors Mechanical assemblies— shafts, rollers Mechanical assemblies— motors Mechanical assemblies— other Scanner assembly, for multifunction device only LCD/LED display X This table is based on SJ/T 11364 regulations. O: Indicates that the content of the toxic and hazardous substance in all the homogenous materials of the part is below the concentration limit requirement as described in GB/T 26572.
- Page 192 Notices interference to radio communications. Operation of this equipment in a residential area is likely to cause harmful interference, in which case the user will be required to correct the interference at his own expense. The manufacturer is not responsible for any radio or television interference caused by using other than recommended cables or by unauthorized changes or modifications to this equipment.
- Page 193 Notices Japanese VCCI notice Korean KC statement Notice to users of Class A products in Brazil Este produto não é apropriado para uso em ambientes domésticos, pois poderá causar interferências eletromagnéticas que obrigam o usuário a tomar medidas necessárias para minimizar estas interferências. European Community (EC) directives conformity This product is in conformity with the protection requirements of EC Council directives 2014/30/EU, 2014/35/EU, and 2011/65/EU on the approximation and harmonization of the laws of the Member States relating to...
- Page 194 Notices This is a product that complies with the emission requirements of EN55022 and EN55032 Class A limits and immunity requirements of EN55024. This product is not intended to be used in residential/domestic environments. This is a Class A product. In a domestic environment, this product may cause radio interference, in which case the user may be required to take adequate measures.
-
Page 195: Index
Index Index from the printer control contacting your dealer 179 panel 30 contacts adapter plug 45 cannot open Embedded Web adding 18 adding a shortcut Server 143 deleting 19 copy 32 cannot scan from a editing 19 adding contacts 18 computer 175 control panel adding groups 19... - Page 196 Index digital telephone service fax destination shortcut Hibernate mode fax setup 43 creating 49 configuring 132 distinctive ring service, fax fax log holding faxes 50 enabling 48 viewing 50 home screen documents fax resolution customizing 16 scanning to a fax server 52 changing 50 home screen icons documents, printing...
- Page 197 Index Quality 67 Remote Operator Panel 56 making copies 31 paper Restore Factory Defaults 59 manual color correction 170 Universal size setting 21 Restrict external network menu paper jam behind door E 136 access 108 802.1x 10⁵ paper jam clearing Schedule USB Devices 112 About this Printer 64 standard bin 137...
- Page 198 Index print quality printer configurations 10 received faxes cleaning the scanner 125 printer display holding 50 Print Quality Test Pages 119 adjusting the brightness 132 reducing copies 32 print quality troubleshooting printer hard disk repeat print jobs 29 blank pages 155 encrypting 121 printing 29 crooked print 162...
- Page 199 Index sending a fax text or images cut off 163 skewed print 162 using the computer 49 toner cartridge solid color or black images 163 using the control panel 49 replacing 128 uneven print density 165 sending an e‑mail 33 toner cartridges vertical dark lines 166 setting the paper size 21...
- Page 200 Index wireless network connecting the printer to 123 Wi‑Fi Protected Setup 124 wireless networking 123 Wi‑Fi Direct 124 printing from a mobile device 27 Wi‑Fi network deactivating 125 Wi‑Fi Protected Setup wireless network 124...