Table of Contents
Advertisement
Available languages
Available languages
Quick Links
お問い合わせ
ソニー株式会社
B & I 営業本部
北海道
営業所 (011)231-8121
名古屋
営業所 (052)201-6871
東 北
営業所 (022)257-7830
北 陸
営業所 (0762)40-8110
関 東
営業所 (048)645-6880
京 滋
営業所 (075)691-7860
新 潟
出張所 (025)270-3253
大 阪
営業所 ( 06 )531-4111
千 葉
営業所 (043)297-8531
神 戸
営業所 (078)322-0851
東 京
営業所 (03)5448-6740
中 国
営業所 (082)241-9211
東京システム営業所 (03)5448-6740
四 国
営業所 (0878)31-3003
多 摩
営業所 (0425)75-0201
九 州
営業所 (092)741-2761
松 本
出張所 (0263)25-4551
システム営業1部/2部 (03)5448-5446
横 浜
営業所 (045)243-6711
静 岡
営業所 (054)284-3601
ソニー株式会社
〒141-0001 東京都品川区北品川6-7-35
Printed in Japan
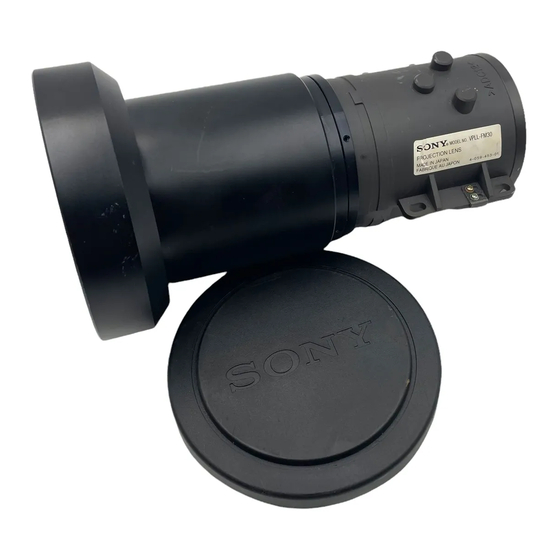
Projection Lens
プロジェクションレンズ
取付説明書
2ページ
Installation Manual
Page 15
Manual de instalación
Manuel d'installation
Page 27
Manuale d'installazione
Installationshandbuch
Seite 39
Àµ ˜ È
お買い上げいただきありがとうございます。
安全のための注意事項を守らないと、
警告
火災や人身事故になることがあります。
この取付説明書には、事故を防ぐための重要な注意事項と製品の取り扱いかたを示
してあります。この取付説明書をよくお読みのうえ、製品を安全にお使いください。
VPLL-FM30
© 1997 by Sony Corporation
3-860-353-02(1)
Página 51
Pagina 63
75"
Advertisement
Chapters
Table of Contents

Related Manuals for Sony VPLL-FM30


Summary of Contents for Sony VPLL-FM30
- Page 1 営業所 (048)645-6880 京 滋 営業所 (075)691-7860 新 潟 出張所 (025)270-3253 大 阪 営業所 ( 06 )531-4111 この取付説明書には、事故を防ぐための重要な注意事項と製品の取り扱いかたを示 千 葉 営業所 (043)297-8531 神 戸 営業所 (078)322-0851 してあります。この取付説明書をよくお読みのうえ、製品を安全にお使いください。 東 京 営業所 (03)5448-6740 中 国 営業所 (082)241-9211 東京システム営業所 (03)5448-6740 四 国 営業所 (0878)31-3003 多 摩 営業所 (0425)75-0201 九 州 営業所 (092)741-2761 松 本 出張所 (0263)25-4551 システム営業1部/2部 (03)5448-5446 VPLL-FM30 横 浜 営業所 (045)243-6711 静 岡 営業所 (054)284-3601 ソニー株式会社 〒141-0001 東京都品川区北品川6-7-35 © 1997 by Sony Corporation Printed in Japan...
- Page 2 日本語 安全のために お客様へ 警告表示の意味 注意を促す記号 この説明書は、 サービス専用です。 この取付説明書および製品では、 お客様が、 この説明書に記載されたレンズ交換や設置などを行う と 次のような表示をしています。 表 注意 火災 感電や火災、 人身事故につながる こ とがあ り ます。 お客様自身では、 示の内容をよく理解してから本文 をお読みく ださい。 絶対に行わないでく ださい。 感電 この説明書は、 サービス ト レーニングを受けた技術者のみご使用く 警告 ださい。 この表示の注意事項を守らない 行為を禁止する記号 と、 火災や感電などにより死亡や 大けがなど人身事故につながるこ サービス技術者へ とがあります。...
-
Page 3: Table Of Contents
目次 日 安全のために ......................................本 概要 ..........................................語 レンズ交換のしかた ....................................VPL-V500QJ/W400QJ などのレンズ交換の手順 ........................VPL-V800QJ などのレンズ交換の手順 ............................レンズ交換の際のご注意 ................................. 主な仕様 ........................................設置寸法 ........................................VPL-V500QJ/W400QJ などの床置きの場合 ..........................VPL-V500QJ/W400QJ などの天井つりの場合 ........................VPL-V800QJ などの床置きの場合 ............................... VPL-V800QJ などの天井つりの場合 ............................ - Page 4 下記の注意を守らないと、 警告 火災や感電 死亡 大けが により や につながることがあります。 火災 感電 感電にご注意を • 部品交換の場合は感電の危険があるので電源プラグを抜いてください。 • 内部には高電圧の部分があり、 通電時においては感電の危険がありますの プラグをコン で充分にご注意ください。 セントから抜く 部品の取り付けや配線の引き回しは元どおりに レンズ交換のために、 動かしたハーネスや開放したクランパーなどは、 その ままでは、 発熱部品や高電圧部品および可動部分などに触れる危険がありま 強制 すので、 必ず元どおりにハーネスを引き回し、 クランパーで元どおりに固定 してください。 サービス後は安全点検を サービスのために取りはずしたネジ、 部品、 配線が元どおりになっているこ と、 また異物が入っていないことを確認してください。 またサービスした箇 強制 所の周辺の部品および線材の損傷してしまったところがないかなどを点検し てください。 •...
- Page 5 レンズをのぞかない 投影中にプロジェクターのレンズをのぞくと強い光が目に入り、 目に悪影響 を与えることがあります。 禁止 レンズ交換時には安全性を確保する レンズ交換作業は、 作業台に置いて行い、 天井つり状態では行わないでくだ さい。 強制...
-
Page 6: Vpl-V500Qj/W400Qj などのレンズ交換の手順
概要 レンズ交換のしかた このVPLL-FM30は、 ソニーLCDプロ ジェ ク ターVPL-V500QJ、 VPL-W400QJ VPL-V500QJ/W400QJ などのレンズ交換の手順 およびVPL-V800QJなどの短焦点 (固定) 交換レンズです。 プロジェクターの電源を切る。 プラス ドライ バーを使用して上部カバーの4本 (3×8) のネジを取 り はずす。 上部カバーからC基板に接続されているコネク ター (1か所) をは ずし、上部カバーをはずす。 コネクター (1か所) - Page 7 C 基板を固定しているネジ2本(3× 8) および、 4 か所のクラン シール ドケースの上ぶたをはずす。 パーをはずす。 配 線 止めをは ずし基 板に接 続され ているコネクター( VPL- C基板を上側に垂直に上げ、 C基板下部のQ基板/B基板と接続 V500QJは7か所、 VPL-W400QJは8か所) および、 3か所のLCD されているコネクター3 か所をはずす。 パネルのフ レキシブルケーブルを端子から取り はずす。 C基板 シールド ケース 上ぶた クランパー フレキシブル ケーブル(3か所) コネクター クランパー 配線止め (各1か所) コネクター コネクター...
- Page 8 レンズ交換のしかた 交換レンズのラベル側を上にして、 本体側と交換レンズ側の白い 手順 5 で取り はずした C 基板を下部の 3か所のコネクターをはめ ペイ ン トマーク ( ) を合わせ、本体に組み込む。 て、取り付ける。 4本 (4×12) のネジで交換レンズを固定する。 クラ ンパー4か所をとめ、 2 本のネジ (3×8) で基板を固定する。 LCDパネルのフ レキシブルケーブル3か所をしっかり とはめ込む。 フ レ キ シ ブ ル ケーブル (3か所) ご注意 基板を元に戻す前に、 結線類が基板と本体の間に挟ま らないよ う にし てく...
- Page 9 はずしたコネクター (VPL-V500QJは7か所、 VPL-W400QJは8か 線材をはさ まないよう に上部カバーを元どおりかぶせ、 4 本のネジ 所) を端子につなぎ直し、配線止めをはめる。 (3×8)で固定する。 シール ドケースの上ぶたをかぶせる。 手順3ではずした、 上部カバーから出ているコネクターを文字があ プロジェク ターを設置する。 る面を上にして C 基板上の端子につなぎ直す。 ◆設置寸法については 86〜97 ページをご覧く ださい。 ご注意 設置寸法に記載されている ( a ) は最大±2.5%の範囲でずれる可能性 があり ます。 これらを微調整する必要が生じる場合があり ますので、 天 井つりの設置をする際は、 特にご注意く ださい。...
-
Page 10: Vpl-V800Qj などのレンズ交換の手順
レンズ交換のしかた VPL-V800QJ などのレンズ交換の手順 本体後面の左右のネジをマイ ナス ドライバーで左右どち らかに90 コン ト ロールパネルの左右両端にある黒いノ ブを押し込み、本体 度回転させる。 上部カバーを上にはずす。 本体後面のカバー がはずれる状態になり ます。 – – – – レンズフー ドの2 か所の蝶ネジをゆるめる。 本体上面の図の位置を片側ずつ手のひらで強く 押しながら、 後面 のカバーを上に持ち上げてロ ックをはずし手前に引き下げる。 配線止めをはずしレンズから出ているコネク ター1か所をはずす。 本体後面のカバーがはずれます。 配線止め... - Page 11 レンズを固定している 4本のネジ (4×12) をはずし、 レンズフー 交換レンズ側と本体側の白いペイ ン トマーク ( ) を合わせて、 ドと レンズを取り はずす。 交換レンズを組み込む。 4本のネジ (4×12) をしめ、交換レンズをしっかり と固定する。 レンズフー ドの蝶ネジをしめ、 フー ドを固定する。 交換レンズのラベル側を上にして、手順6で取り はずしたレンズ フー ドをはめ込む。...
- Page 12 をはめる際に本体とカバーの間にコネクターをはさ まないよう にしてく ◆設置寸法については 98〜107 ページをご覧く ださい。 ださい。 ご注意 ・設置寸法に記載されている ( a ) は最大±2.5%の範囲でずれる可能 後面カバーの下側の左右を図のよ う に合わせ、 しっかり と本体に 性があり ます。 これらを微調整する必要が生じる場合がありますの はめ込む。 コ ン ト ロールパネルの左右両端にある黒いノ ブを押し込 で、 天井つりの設置をする際は、 特にご注意く ださい。 む。 ・VPLL-FM30を取り付けた場合は、 フ ォーカス調整をマニュアルで行 う必要があります。 レンズ鏡筒を回してフォーカスを調整してく ださ い。...
-
Page 13: レンズ交換の際のご注意
レンズ交換の際のご注意 • 取り はずしたレンズまたは取り付ける レンズを置く と きは、 しっかり した 水平な台の上に静かに横にして置いてく ださい。 レンズ面は傷つきや すいので取り扱いには充分注意してく ださい。 • レンズ面には手を触れないよ う にしてく ださい。... -
Page 14: 主な仕様
主な仕様 短焦点レンズ(固定) F=3.5 f=37 mm マニュアルフォーカス 投影画面サイ ズ 40〜300イ ンチ (VPL-W400QJ 16:9スク リ ーンの場合) 40〜240イ ンチ (VPL-W400QJ 4:3スク リ ー ンの場合) 40〜290イ ンチ (VPL-V500QJ/V800QJ の 場合) 投影距離 VPL-V500QJ/V800QJ 100イ ンチ 2790 mm 200イ ンチ 5640 mm VPL-W400QJ ( 16 : 9) 100イ ンチ 2700 mm 200イ ンチ 5470 mm VPL-W400QJ (... - Page 15 English Contents Precautions ....................................16 Overview ..................................... 16 Replacing the lens ..................................17 Replacing the lens on the models such as VPL-V500Q/QM, W400Q/QM ..............17 Replacing the lens on the models such as VPL-V800Q/QM ..................21 Notes on lens replacement ............................. 24 Specifications .....................................
-
Page 16: Precautions
Precautions Overview To the user: The VPLL-FM30 lens is a fixed short focus lens designed for use with the models such as Sony VPL-V500Q/QM, the VPL- This manual is intended only for authorized service personnel. W400Q/QM, or the models such as VPL-V800Q/QM LCD Do not replace or install the lens on your own;... -
Page 17: Replacing The Lens
Replacing the lens Replacing the lens on the models such as VPL-V500Q/QM, W400Q/QM Turn off the MAIN POWER switch of the projector. Remove the shield case lid. Remove the cable harness and remove all the plugs from their connectors in the circuit board (7 plugs in the VPL- Remove the four screws (3 x 8 mm) on the top panel with V500Q/QM;... - Page 18 Replacing the lens Remove the two screws (3 x 8mm) and the four clamps With the VPLL-FM30 replacement lens label facing that hold circuit board C in place. upwards, align the painted white mark ( ) on the lens with the white mark (...
- Page 19 Note Replace all of the plugs in their respective connectors (7 When replacing the circuit board, be careful not to pinch any plugs for the VPL-V500Q/QM; 8 plugs for the VPL- cables between the boards and the projector chassis. W400Q/QM) and attach the cable harnesses. Replace the shield case lid.
- Page 20 Replacing the lens Replace the top panel taking care not to pinch any of the cables. Secure it with the four screws (3 x 8 mm). Install the projector in its intended place of use. For details on installation, see pages 86 to 97. Note You should expect a tolerance of up to ±...
-
Page 21: Replacing The Lens On The Models Such As Vpl-V800Q/Qm
Replacing the lens on the models such as VPL-V800Q/QM Turn the screws on each side of the control panel clockwise Press the black knobs on each side of the control panel or counterclockwise by 90 degrees with a screwdriver. and remove the top cover. This loosens the rear cover. - Page 22 Replacing the lens Remove the four screws (4 x 12 mm) that hold the lens in Align the painted white mark ( ) on the replacement place, and remove the lens hood and the lens. lens with the white mark ( ) on the projector and attach the lens.
- Page 23 • When you install the VPLL-FM30, you need to do focus adjustment manually. Turn the lens-barrel to adjust the focus.
-
Page 24: Notes On Lens Replacement
Replacing the lens Notes on Lens Replacement • Lenses scratch easily. When handling lenses, always place them gently on a stable, level surface in a horizontal position. • Avoid touching the lens surface. -
Page 25: Specifications
Specifications Fixed short focus lens F=3.5 f= 37mm Manual focus Projection picture size 40 to 300 inches (when using 16:9 screen with VPL-W400Q/QM) 40 to 240 inches (when using 4:3 screen with VPL-W400Q/QM) 40 to 290 inches (when using VPL-V500Q/QM/V800Q/QM) Throwing distance VPL-V500Q/QM/V800Q/QM 100 inches: 2790 mm... - Page 27 Français Table des matières Précautions ....................................28 Aperçu ......................................28 Remplacement de l’objectif ............................... 29 Remplacement de l’objectif sur les modèles comme le VPL-V500Q/QM, W400Q/QM ..........29 Remplacement de l’objectif sur les modèles comme le VPL-V800Q/QM ..............33 Remarques sur le remplacement de l’objectif ....................... 36 Spécifications .....................................
-
Page 28: Précautions
Précautions Aperçu Pour l'utilisateur: L’objectif VPLL-FM30 est un objectif à courte focale longue Le présent mode d'emploi est exclusivement destiné au fixe conçu pour êre utilisé sur les modèles comme les personnel d'entretien agréé. Ne remplacez et n'installez pas projecteurs à cristaux liquides Sony VPL-V500Q/QM, VPL- l'objectif vous-même;... -
Page 29: Remplacement De L'objectif
Remplacement de l’objectif Remplacement de l’objectif sur les modèles comme le VPL-V500Q/QM, W400Q/QM Coupez l’interrupteur MAIN POWER du projecteur. Enlevez le couvercle du boîtier blindé. Retirez le faisceau de câbles et enlevez toutes les fiches de leurs connecteurs dans la carte de circuits (7 fiches dans Enlevez les quatre vis 3 x 8 mm sur le panneau supérieur le VPL-V500Q/QM;... - Page 30 Remplacement de l’objectif Enlevez les deux vis 3 x 8mm et les quatre attaches L’étiquette de l’objectif de remplacement VPLL-FM30 maintenant la carte de circuits C en place. étant tournée vers le haut, alignez le repère blanc ( ) de l’objectif sur le repère blanc (...
- Page 31 Remarque Replacez toutes les fiches dans leurs connecteurs respectifs Lors du remplacement de la carte de circuits, veillez à ne pas (7 fiches pour le VPL-V500Q/QM; 8 fiches pour le VPL- coincer les câbles entre les cartes et le châssis du projecteur. W400Q/QM) et fixez les faisceaux de câbles.
- Page 32 Remplacement de l’objectif Replacez le panneau supérieur en veillant à ne pas coincer les câbles. Fixez-le avec les quatre vis 3 x 8mm. Installez le projecteur à son emplacement d’utilisation. Pour plus de détails sur l’installation, voir les pages 86 à Remarque Vous devez tenir compte d’une tolérance de ±...
-
Page 33: Remplacement De L'objectif Sur Les Modèles Comme Le Vpl-V800Q/Qm
Remplacement de l’objectif sur les modèles comme le VPL-V800Q/QM Tournez les vis de chaque côté du panneau de commande Appuyez sur les boutons noirs de chaque côté du panneau dans le sens des aiguilles d’une montre ou dans le sens de commande et enlevez le couvercle supérieur. - Page 34 Remplacement de l’objectif Enlevez les quatre vis (4 x 12 mm) maintenant l’objectif Alignez le repère blanc ( ) de l’objectif de remplacement en place et enlevez le capot d’objectif et l’objectif. sur le repère blanc ( ) du projecteur et fixez l’objectif. Serrez les quatre vis (4 x 12 mm) pour fixer correctement l’objectif de remplacement.
- Page 35 • Lorsque vous installez le VPLL-FM30, vous devez régler manuellement la mise au point. Pour régler la mise au point, tournez le barillet de l’objectif.
-
Page 36: Remarques Sur Le Remplacement De L'objectif
Remplacement de l’objectif Remarques sur le remplacement de l’objectif • Les objectifs se griffent aisément. Lors de la manipulation des objectifs, placez-les toujours sur une surface stable de niveau en position horizontale. • Evitez de toucher la surface de l’objectif. -
Page 37: Spécifications
Spécifications Objectif à mise au F=3,5 f= 37mm point courte (fixe) Mise au point manuelle Format de l’image 40 à 300 pouces (Lors de projetée l’utilisation de l’écran 16:9 avec le VPL-W400Q/QM) 40 à 240 pouces (Lors de l’utilisation de l’écran 4:3 avec le VPL-W400Q/QM) 40 à... - Page 39 Deutsch Inhaltsverzeichnis Sicherheltsmaßnahmen ................................40 Übersicht ..................................... 40 Auswechseln des Objektivs ..............................41 Auswechseln des Objektivs bei den Modellen wie zum Beispiel VPL-V500QM/W400QM ........41 Auswechseln des Objektivs bei den Modellen wie zum Beispiel VPL-V800QM ............45 Hinweise zum Auswechseln des Objektivs ........................48 Technische Daten ..................................
-
Page 40: Sicherheltsmaßnahmen
Sicherheltsmaßnahmen Übersicht Für den Benutzer: Das Objektiv VPLL-FM30 ist ein Objektiv mit festgelegter, Diese Anleitung richtet sich nur an autorisiertes kurzer Brennweite, das für den Einsatz mit den Kundendienstpersonal. Tauschen Sie das Objektiv nicht Flüssigkristallprojektoren wie zum Beispiel VPL-V500QM, selbst aus, und setzen Sie es auch nicht selbst ein. -
Page 41: Auswechseln Des Objektivs
Auswechseln des Objektivs Auswechseln des Objektivs bei den Modellen wie zum Beispiel VPL-V500QM/W400QM Schalten Sie den Projektor am Schalter MAIN POWER aus. Entfernen Sie den Deckel des abgeschirmten Gehäuses. Entfernen Sie den Kabelbaum, und ziehen Sie alle Stecker aus den Buchsen in der Leiterplatte (7 Stecker beim VPL- Entfernen Sie die vier 3 x 8-mm-Schrauben an der oberen V500QM, 8 beim VPL-W400QM). - Page 42 Auswechseln des Objektivs Lösen Sie die zwei 3 x 8-mm-Schrauben und die vier Richten Sie die weiße Markierung ( ) an dem VPLL- Klemmen, mit denen die Leiterplatte C befestigt ist. FM30-Ersatzobjektiv an der weißen Markierung ( ) am Projektor aus, und setzen Sie das Objektiv ein. Der Heben Sie die Leiterplatte C an, und lösen Sie die drei Anschlüsse von den Leiterplatten Q und B darunter.
- Page 43 Hinweis Stecken Sie alle Stecker wieder in die richtigen Buchsen Achten Sie darauf, daß die Kabel nicht zwischen der (7 Stecker beim VPL-V500QM, 8 beim VPL-W400QM), Leiterplatte und dem Projektorgehäuse eingeklemmt werden, und befestigen Sie den Kabelbaum. wenn Sie die Leiterplatten wieder anbringen. Schließen Sie den Deckel des abgeschirmten Gehäuses.
- Page 44 Auswechseln des Objektivs Bringen Sie die obere Abdeckung wieder an, und achten Sie darauf, die Kabel nicht einzuklemmen. Befestigen Sie die Abdeckung mit den vier 3 x 8-mm-Schrauben. Installieren Sie den Projektor am dafür vorgesehenen Ort. Näheres zur Installation finden Sie auf Seite 86 bis 97. Hinweis Bei den Abmessungen, die unter (a) im Abschnitt “Installationsdiagramm”...
-
Page 45: Auswechseln Des Objektivs Bei Den Modellen Wie Zum Beispiel Vpl-V800Qm
Auswechseln des Objektivs bei den Modellen wie zum Beispiel VPL-V800QM Drehen Sie die Schrauben an beiden Seiten des Drücken Sie auf die schwarzen Knöpfe an beiden Seiten Bedienfelds mit einem Schraubenzieher um 90 Grad in des Bedienfelds, und nehmen Sie die obere Abdeckung beliebiger Richtung. - Page 46 Auswechseln des Objektivs Lösen Sie die vier 4 x 12-mm-Schrauben, mit denen das Richten Sie die weiße Markierung ( ) am Ersatzobjektiv Objektiv befestigt ist, und entfernen Sie die Gegenlichtblende an der weißen Markierung ( ) am Projektor aus, und und das Objektiv.
- Page 47 Drücken Sie die schwarzen Knöpfe an beiden Seiten des besonders beim Installieren des Projektors an der Decke. Bedienfelds nach innen. • Wenn die VPLL-FM30 installiert ist, müssen Sie den Fokus von Hand einstellen. Drehen Sie zum Einstellen des Fokus den Objektivtubus.
-
Page 48: Hinweise Zum Auswechseln Des Objektivs
Auswechseln des Objektivs H i n w e i s e z u m A u s w e c h s e l n d e s Objektivs • Objektive zerkratzen leicht. Achten Sie beim Umgang mit Objektiven immer darauf, sie vorsichtig horizontal auf eine stabile, ebene Oberfläche zu legen. -
Page 49: Technische Daten
Technische Daten Objektiv mit festgelegter, F=3,5 f= 37 mm kurzer Brennweite Manueller Fokus Größe des projizierten Bildes 40 bis 300 Zoll (Bei Verwendung des 16:9 Projektionsschirms von VPL-W400QM) 40 bis 240 Zoll (Bei Verwendung des 4:3 Projektionsschirms von VPL-W400QM) 40 bis 290 Zoll (Bei Verwendung des Projektors, VPL-V500QM/ V800QM) Projektionsentfernung... - Page 51 Español Indice Precauciones ....................................52 Descripción general ................................... 52 Sustitución del objetivo ................................53 Sustitución del objetivo en los modelos como el VPL-V500Q/QM,W400Q/QM............53 Sustitución del objetivo en los modelos como el VPL-V800Q/QM................57 Notas sobre la sustitución de objetivos ........................60 Especificaciones ..................................
-
Page 52: Precauciones
Precauciones Descripción general Al usuario: El objetivo VPLL-FM30 es un objetivo de corta distancia focal Este manual está destinado únicamente a personal de servicio fijo diseñado para su empleo con modelos como los proyectores técnico autorizado. El usuario, por sí sólo, no debe sustituir ni Sony VPL-V500Q/QM, VPL-W400Q/QM o VPL-V800Q/QM instalar el objetivo;... -
Page 53: Sustitución Del Objetivo
Sustitución del objetivo Sustitución del objetivo en los modelos como el VPL-V500Q/QM, W400Q/QM Apague el interruptor MAIN POWER del proyector. Retire la tapa de la carcasa de protección. Retire la instalación de cables y todas los enchufes de sus conectores en la tarjeta de circuitos (7 enchufes en VPL- Retire los cuatro tornillos de 3 x 8 mm en el panel superior V500Q/QM;... - Page 54 Sustitución del objetivo Retire los dos tornillos de 3 x 8 mm y las cuatro abrazaderas Con la etiqueta del objetivo de sustitución VPLL-FM30 que fijan la tarjeta de circuitos C en su posición. hacia arriba, alinee la marca blanca (...
- Page 55 Nota Vuelva a colocar todas las clavijas en sus enchufes Al volver a colocar la tarjeta de circuitos, tenga cuidado de no respectivaos (7 clavijas en el VPL-V500Q/QM; 8 clavijas atrapar los cables entre las tarjetas y el chasis del proyector. en el VPL-W400Q/QM) y fije las instalaciones de cables.
- Page 56 Sustitución del objetivo Vuelva a colocar el panel superior con cuidado de no atrapar ninguno de los cables. Fíjelo con los cuatro tornillos de 3 x 8 mm. Instale el proyector en el lugar en que va a utilizarlo. Para más detalles sobre la instalación, consulte las páginas 86 a 97.
-
Page 57: Sustitución Del Objetivo En Los Modelos Como El Vpl-V800Q/Qm
Sustitución del objetivo en los modelos como el VPL-V800Q/QM Gire los tornillos situados a cada lado del panel de control Presione las perillas negras a cada lado del panel de control 90 grados en el sentido de las agujas del reloj o en sentido y retire la tapa superior. - Page 58 Sustitución del objetivo Retire los cuatro tornillos de 4 x 12 mm que fijan el Alínee la marca blanca ( ) del objetivo de sustitución objetivo en su posición, y retírelo junto con su tapa. con la marca blanca ( ) del proyector y ajuste el objetivo.
- Page 59 No se olvide de tener esto en cuenta a la hora de control. instalar el proyector, sobre todo, si lo está instalando en el techo. • Al instalar el modelo VPLL-FM30, es necesario realizar el ajuste de enfoque manualmente. Gire el tubo de montaje del objetivo para realizar el enfoque.
-
Page 60: Notas Sobre La Sustitución De Objetivos
Sustitución del objetivo Notas sobre la sustitución de objetivos • Los objetivos se arañan con facilidad. Cuando los maneje, colóquelos siempre con suavidad sobre una superficie estable y nivelada en posición horizontal. • Evite tocar la superficie de los objetivos. -
Page 61: Especificaciones
Especificaciones Objetivo de corta distancia F=3,5 f= 37mm focal fijo Enfoque manual Tamaño de la imagen 40 a 300 pulgadas (Al proyectada utilizar la pantalla de 16:9 con el VPL-W400Q/QM) 40 a 240 pulgadas (Al utilizar la pantalla de 4:3 con el VPL- W400Q/QM) 40 a 290 pulgadas (Al utilizar el VPL-V500Q/QM/V800Q/QM) - Page 63 Italiano Indice Precauzioni ....................................64 Cenni generali .................................... 64 Sostituzione dell'obiettivo ................................. 65 Sostituzione dell'obiettivo sui modelli come i proiettori VPL-V500QM/W400QM ............65 Sostituzione dell'obiettivo sul modello come il proiettore VPL-V800QM ..............69 Note sulla sostituzione dell'obiettivo ..........................72 Caratteristiche tecniche ................................73 Schema dell'installazione ................................
-
Page 64: Precauzioni
Precauzioni Cenni generali Informazioni per l'utente: L’obiettivo VPLL-FM30 è un obiettivo fisso dalla lunghezza Questo manuale è indirizzato solo a personale qualificato focale breve progettato per l'utilizzo con modelli come i autorizzato. proiettori a cristalli liquidi della Sony VPL-V500QM, VPL- Non sostituire o installare l'obiettivo da soli;... -
Page 65: Sostituzione Dell'obiettivo
Sostituzione dell'obiettivo Sostituzione dell'obiettivo sui modelli come i proiettori VPL-V500QM/W400QM Spegnere l'interruttore MAIN POWER del proiettore. Rimuovere la custodia di protezione. Rimuovere il cavo preassemblato e tutte le spine dalle rispettive prese nella scheda del circuito (7 spine nel VPL- Rimuovere le quattro viti da 3 x 8 mm sul pannello V500QM;... - Page 66 Sostituzione dell'obiettivo Rimuovere le due viti da 3 x 8mm ed i quattro morsetti Con le etichette di sostituzione dell'obiettivo del VPLL- che assicurano la scheda del circuito C. FM30 rivolte verso l'alto, allineare il segno bianco sull'obiettivo ( ) con il segno bianco sul proiettore ( Sollevare la scheda del circuito C e rimuovere le tre prese collegate alle schede dei circuiti Q e B di sotto.
- Page 67 Nota Sostituire tutte le spine nelle rispettive prese (7 spine per Quando si sostituiscono la scheda del circuito, prestare il VPL-V500QM; 8 per il VPL-W400QM) e collegare il attenzione a non stringere i cavi tra le schede e il telaio del cavo preassemblato.
- Page 68 Sostituzione dell'obiettivo Sostituire il pannello superiore prestando attenzione a non stringere i cavi. Assicurarlo con le quattro viti da 3 x 8mm. Installare il proiettore nel luogo in cui si intende utilizzarlo. Per dettagli sull’installazione, vedere le pagine da 86 a Nota La tolleranza può...
-
Page 69: Sostituzione Dell'obiettivo Sul Modello Come Il Proiettore Vpl-V800Qm
Sostituzione dell’obiettivo sul modello come il proiettore VPL-V800QM Girare le viti su entrambi i lati del pannello di controllo in Premere le manopole nere su ciascun lato del pannello di senso orario o antiorario di 90 gradi, aiutandosi con un controllo, quindi rimuovere il coperchio superiore. - Page 70 Sostituzione dell’obiettivo Rimuovere le quattro viti da 4 x 12mm che assicurano Allineare il segno bianco ( ) sull’obiettivo sostitutivo l’obiettivo, quindi rimuovere il copriobiettivo e l’obiettivo con il segno bianco sul proiettore, quindi applicare stesso. l’obiettivo. Stringere le quattro viti da 4 x 12mm per assicurare fermamente l’obiettivo sostitutivo.
- Page 71 • Quando si installa il VPLL-FM30, è necessario regolare la messa a fuoco manualmente. Ruotare il cilindro dell’obiettivo per regolare la messa a fuoco.
-
Page 72: Note Sulla Sostituzione Dell'obiettivo
Sostituzione dell’obiettivo Note sulla sostituzione dell'obiettivo • Gli obiettivi si graffiano facilmente. Nel maneggiare gli obiettivi, assicurarsi sempre di installarli delicatamente su una superficie stabile e uniforme, in posizione orizzontale. • Evitare di toccare la superficie dell’obiettivo. -
Page 73: Caratteristiche Tecniche
Caratteristiche tecniche Obiettivo fisso messa a F=3,5 f= 37mm fuoco breve Messa a fuoco manuale. Dimensione dell'immagine da 40 a 300" proiettata (Quando si utilizza uno schermo 16:9 col VPL- W400QM) da 40 a 240 "(Quando si utilizza uno schermo 4:3 col VPL-W400QM) da 40 a 290"... -
Page 75: Installationsdiagramm
設置寸法 / Installation Diagram / Schéma d’installation / Installationsdiagramm / VPL-V500QJ/W400QJ などの床置きの場合 / Installing the models such as VPL-V500Q /QM, W400Q/QM on the floor / Installation des modèles comme le VPL-V500Q/QM, W400Q/ QM au sol / Installation der Modelle wie zum Beispiel VPL-V500QM/W400QM am Boden / 壁... - Page 76 Diagrama de instalación / Schema dell’installazione / ®Œªfl¥Á Instalación de los modelos como el VPL-V500Q/QM, W400Q/QM en el suelo / Installazione dei modelli come i VPL-V500QM/W400QM al pavimento / VPL-V500QM/W400QMµ»÷ ”⁄µÿ Ê スク リ ーンから レンズの中心までの距離 Distance between the screen and the center of the lens Distance entre l’écran et le centre de l’objectif Abstand zwischen dem Projektionsschirm und der Mitte des Objektivs Distancia entre la pantalla y el centro del objetivo...
- Page 77 設置寸法 / Installation Diagram / Schéma d’installation / Installationsdiagramm VPL-V500QJの設置寸法 / Installation measurements of the VPL-V500Q/QM/Mesures d’installation pour le VPL-V500Q/QM / Abmessungen für die Installation des VPL-V500QM / Medidas de instalación para el VPL-V500Q/QM / Misure di installazione del VPL-V500QM / VPL-V500QM µƒ fl¥...
- Page 78 Diagramma de instalación / Schema dell’installazione / ®Œª fl¥Á VPL-W400QJの設置寸法 / Installation measurements of the VPL-W400Q/QM / Mesures d’installation pour le VPL-W400Q/ QM / Abmessungen für die Installation des VPL-W400QM / Medidas de instalación para el VPL-W400Q/QM / Misure di installazione del VPL-W400QM / VPL-W400QM µƒ...
- Page 79 設置寸法 / Installation Diagram / Schéma d’installation / Installationsdiagramm 単位 : mm (インチ) / Unit : mm (inches) / Unité : mm (pouces) / Einheit : mm (Zoll) / Unidades : mm (pulgadas) / Unità : mm (pollici) / µ•Œª£ mm (”¢¥Á) 4:3スクリーンサイズ...
- Page 80 ®Œª fl¥Á Diagramma de instalación / Schema dell’installazione / VPL-V500QJ/W400QJ などの天井つりの場合 / Installing the models such as VPL-V500Q/ QM, W400Q/QM on the ceiling / Installation des modèles comme le VPL-V500Q/QM, W400Q/QM au plafond / Installation der Modelle wie zum Beispiel VPL-V500QM/W400QM an der Decke / 天井...
- Page 81 設置寸法 / Installation Diagram / Schéma d’installation / Installationsdiagramm Instalación de los modelos como el VPL-V500Q/QM, W400Q/QM en el techo / Installazione dei modelli come i VPL-V500QM/W400QM al soffitto / µı VPL-V500QM/W400QMµ» a: スク リ ーンから レンズの中心までの距離 Distance between the screen and the center of the lens Distance entre l’écran et le centre de l’objectif Abstand zwischen dem Projektionsschirm und der Mitte des Objektivs Distancia entre la pantalla y el centro del objetivo...
- Page 82 ®Œªfl¥Á Diagramma de instalación / Schema dell’installazione / VPL-V500QJの設置寸法 / Installation measurements of the VPL-V500Q/QM / Mesures d’installation pour le VPL-V500Q/QM / Abmessungen für die Installation des VPL-V500QM / Medidas de instalación para el VPL-V500Q/QM / Misure di installazione del VPL-500QM / VPL-V500QM µƒ fl¥...
- Page 83 設置寸法 / Installation Diagram / Schéma d’installation / Installationsdiagramm VPL-W400QJの設置寸法 / Installation measurements of the VPL-W400Q/QM / Mesures d’installation pour le VPL- W400Q/QM / Abmessungen für die Installation des VPL-W400QM / Medias de instalación para el VPL-W400Q/QM / Misure di installazione del VPL-W400QM / VPL-W400QM µƒ fl¥...
- Page 84 Diagramma de instalación / Schema dell’installazione / ®Œª fl¥Á 単位 : mm (インチ) / Unit : mm (inches) / Unité : mm (pouces) / Einheit : mm (Zoll) / Unidades : mm (pulgadas) / Unità : mm (pollici) / µ•Œª£ mm (”¢¥Á) 4:3スクリーンサイズ(インチ)...
- Page 85 設置寸法 / Installation Diagram / Schéma d’installation / Installationsdiagramm プロジェクターサスペンションサポートPSS-500の設置寸法 プロジェクターのレンズの中心とスク リ ーンの中心が合う よう に設置してく ださい。 Installation measurements of the PSS-500 projector suspention support Align the center of the lens with the center of the screen. Mesures d’installation pour le support de suspension pour projecteur PSS-500 Alignez le centre de l’objectif sur le centre de l’écran.
-
Page 86: 設置寸法
Diagramma de instalación / Schema dell’installazione / ®Œª fl¥Á 216.6 125 (4 83.5 (3 41.5 (1 125 (4 スクリーン中心 105.6 Center of the Screen 天井用マウントブラケット Centre de l’écran レンズの中心 Upper ceiling mount bracket Mitte des Projektionsschirms Center of lens Support de montage de plafond supérieur Centro de la pantalla Centre de I’objectif Deckenmontagehalterung... - Page 87 設置寸法 / Installation Diagram / Schéma d’installation / Installationsdiagramm VPL-V800QJ などの床置きの場合 / Installing the models such as VPL-V800Q/QM on the floor / Installation des modèles comme le VPL-V800Q/QM au sol / Installation der Modelle wie zum Beispiel VPL-V800QM am Boden / 単位 : mm (インチ) 壁...
- Page 88 Diagramma de instalación / Schema dell’installazione / ®Œª fl¥Á Instalación de los modelos como el VPL-V800Q/QM en el suelo / Installazione del modello come il VPL-V800QM al pavimento / VPL-V800QMµ»÷ ”⁄µÿ Ê スク リ ーンから レンズの中心までの距離 Distance between the screen and the center of the lens Distance entre l’écran et le centre de l’objectif Abstand zwischen dem Projektionsschirm und der Mitte des Objektivs Distancia entre la pantalla y el centro del objetivo...
- Page 89 設置寸法 / Installation Diagram / Schéma d’installation / Installationsdiagramm 単位 : mm (インチ) / Unit : mm (inches) / Unité : mm (pouces) / Einheit : mm (Zoll) / Unidades : mm (pulgadas) / Unità : mm (pollici) / µ•Œª£ mm (”¢¥Á) スクリーンサイズ(インチ)...
- Page 90 Diagramma de instalación / Schema dell’installazione / ®Œª fl¥Á 設置寸法の計算式 / To calculate the installation measurement / Pour calculer les mesures d’installation / So berechnen Sie die Abstände für die Installation / Para calcular la medida de instalación / Per calcolare le misure di installazione / º À„ fl¥Á...
-
Page 91: Vpl-V500Qj/W400Qj などの天井つりの場合
設置寸法 / Installation Diagram / Schéma d’installation / Installationsdiagramm VPL-V800QJ などの天井つりの場合 / Installing the models such as VPL-V800Q/QM on the ceiling / Installation des modèles comme le VPL-V800Q/QM au plafond / Installation der Modelle wie zum Beispiel VPL-V800QM an der Decke / プロジェクターサスペンションサポート PSS-800(別売り)... - Page 92 Diagramma de instalación / Schema dell’installazione / ®Œª fl¥Á Instalación de los modelos como el VPL-V800Q/QM en el techo / Installazione del modello come il VPL-V800QM al soffitto / µı VPL-V800QMµ» a: スク リ ーンから レンズの中心までの距離 e: スク リ ーン有効画面上端からスク リ ーン中心までの距離 Distance between the center of lens and the screen Distance from the top edge of available projected picture to the center Distance entre le c entre de l’objectif et l’écran...
- Page 93 設置寸法 / Installation Diagram / Schéma d’installation / Installationsdiagramm 単位 : mm (インチ) / Unit : mm (inches) / Unité : mm (pouces) / Einheit : mm (Zoll) / Unidades : mm (pulgadas) / Unità : mm (pollici) / µ•Œª£ mm (”¢¥Á) スクリーンサイズ(インチ)...
- Page 94 Diagramma de instalación / Schema dell’installazione / ®Œª fl¥Á 単位 : mm (インチ) / Unit : mm (inches) / Unité : mm (pouces) / Einheit : mm (Zoll) / Unidades : mm (pulgadas) / Unità : mm (pollici) / µ•Œª£ mm (”¢¥Á) スクリーンサイズ(インチ)...
- Page 95 設置寸法 / Installation Diagram / Schéma d’installation / Installationsdiagramm の設置寸法 プロジェクターサスペンションサポートPSS-800 プロジェクターのレンズの中心とスク リ ーンの中心が合う よう に設置してく ださい。 Installation measurements of the PSS-800 projector suspention support Align the center of the lens with the center of the screen. Mesures d’installation pour le support de suspension pour projecteur PSS-800 Alignez le centre de l’objectif sur le centre de l’écran.
- Page 96 Diagramma de instalación / Schema dell’installazione / ®Œª fl¥Á ベースボックス Base box キャビネット前面 Socle Front of the cabinet Basisgehäuse Caja Avant du meuble Vorderseite des Gehäuses Base Parte frontal de la caja Ú Æ y c Parte anteriore dell’apparecchio ª˙ø«« Ê 178.1 71 (2 183 (7...
- Page 97 お問い合わせ ソニー株式会社 国内営業本部 北 海 道 営業所 (011)231-8121 名 古 屋 営業所 (052)201-6871 東 北 営業所 (022)257-7830 北 陸 営業所 (0762)40-8110 関 東 営業所 (048)645-6880 京 滋 営業所 (075)691-7860 新 潟 出張所 (025)270-3253 大 阪 営業所 ( 06 )531-4111 千 葉 営業所 (043)297-8531 神 戸 営業所 (078)322-0851 東...