LG LP1419IVSM Owner's Manual
Hide thumbs
Also See for LP1419IVSM:
- User manual ,
- Owner's manual (56 pages) ,
- Owner's manual (31 pages)
Table of Contents
Advertisement
Advertisement
Table of Contents

Related Manuals for LG LP1419IVSM


Summary of Contents for LG LP1419IVSM
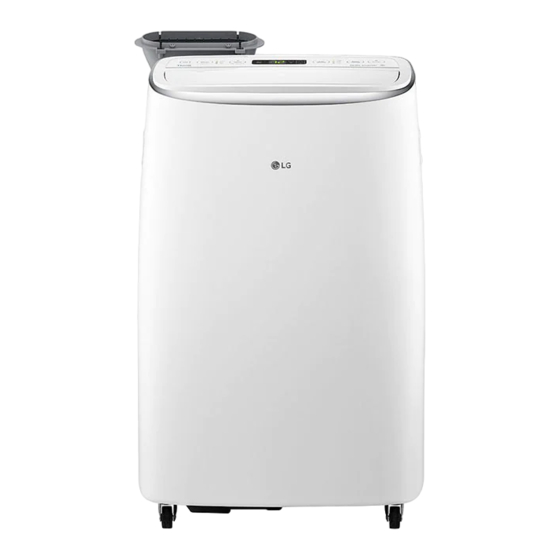
- Page 1 OWNER’S MANUAL AIR CONDITIONER Read this owner’s manual thoroughly before operating the appliance and keep it handy for reference at all times. TYPE: PORTABLE AIR CONDITIONER (INVERTER) LP1419IVSM www.lg.com Copyright © 2019 - 2020 LG Electronics Inc. All Rights Reserved.
-
Page 2: Table Of Contents
TABLE OF CONTENTS SAFETY INSTRUCTIONS 22 SMART FUNCTIONS IMPORTANT SAFETY INSTRUCTIONS LG ThinQ Application Smart Diagnosis 11 PRODUCT OVERVIEW 25 MAINTENANCE Key Parts and Components Emptying the Water Collection Tank 12 INSTALLATION Cleaning the Case Cleaning the Air Filter 12 Electrical Data... -
Page 3: Safety Instructions
SAFETY INSTRUCTIONS SAFETY INSTRUCTIONS READ ALL INSTRUCTIONS BEFORE USE Your safety and the safety of others are very important. We have provided many important safety messages in this manual and on your appliance. Always read and follow all safety messages. This is the safety alert symbol. - Page 4 Do not tamper with controls. If you detect a strange sound, a chemical or burning smell, or smoke coming from the appliance, unplug it immediately, and contact an LG Electronics Customer Information Center. straight out from the outlet. Do not grasp the power cord or touch the appliance controls with wet hands.
- Page 5 If water enters the product, turn off the power at the main circuit, then unplug the product and call for service. If the product has been submerged, contact the LG Electronics Customer Information Center for instructions before resuming use. Unplug the product when unused for long periods.
- Page 6 SAFETY INSTRUCTIONS CAUTION To reduce the risk of minor or moderate injury to persons, malfunction, or damage to the product or property when using this product, follow basic precautions, including the following: INSTALLATION Take care when installing the product that exhaust or condensation does not damage nearby property.
-
Page 7: Important Safety Instructions
IMPORTANT SAFETY INSTRUCTIONS IMPORTANT SAFETY INSTRUCTIONS WARNING Checks to the area Prior to beginning work on systems containing flammable refrigerants, safety checks are necessary to ensure that the risk of ignition is minimised. For repair to the refrigerating system, the following precautions shall be complied with prior to conducting work on the system. - Page 8 IMPORTANT SAFETY INSTRUCTIONS Initial safety checks shall include: – Capacitors are discharged: this shall be done in a safe manner to avoid possibility of sparking. – No live electrical components and wiring are exposed while charging, recovering or purging the system. –...
- Page 9 IMPORTANT SAFETY INSTRUCTIONS The refrigerant charge shall be recovered into the correct recovery cylinders. The system shall be “flushed” with OFN to render the unit safe. This process may need to be repeated several times. Compressed air or oxygen shall not be used for this task. Flushing shall be achieved by breaking the vacuum in the system with OFN and continuing to fill until the working pressure is achieved, then venting to atmosphere, and finally pulling down to a vacuum.
- Page 10 IMPORTANT SAFETY INSTRUCTIONS Recovery When removing refrigerant from a system, either for servicing or decommissioning, it is recommended good practice that all refrigerants are removed safely. When transferring refrigerant into cylinders, ensure that only appropriate refrigerant recovery cylinders are employed. Ensure that the correct number of cylinders for holding the total system charge are available. All cylinders to be used are designated for the recovered refrigerant and labelled for that refrigerant (i.e.
-
Page 11: Product Overview
PRODUCT OVERVIEW PRODUCT OVERVIEW Key Parts and Components temperature, and REMOTE CONTROLLER using the bottom drain port. -
Page 12: Installation
INSTALLATION INSTALLATION WARNING Electrical Data This appliance should be installed in Power cord may include a current interrupter accordance with the National Electrical device. TEST and RESET buttons are provided Code. on the plug case. The device should be tested on Use of extension cords could cause serious TEST button injury or death. - Page 13 INSTALLATION Wireless Remote Control Before Installation the Air Conditioner Inserting Batteries If the display screen of the remote control begins to fade, replace the batteries. Insert AAA (1.5 Vcc) batteries before using the remote control. Remove the cover on the back of the remote control.
- Page 14 INSTALLATION Basic Installation Materials Supplied Shape Parts Name Shape Parts Name Mounting plate insu- Hose lation (2 pcs) Window gap insula- Base mounting plate tion (1 pcs) 23” (58.4 cm, 1 pcs) Fixing clips Extension mounting plate 16” (40.6 cm, 1 pcs) (2 pcs) Extension mounting Security brackets...
-
Page 15: Window Vent Panel And Extensions
INSTALLATION WINDOW VENT PANEL AND EXTENSIONS The window installation kit allows you to install the air conditioner in most vertical-sliding windows 23"(58.4 cm) to 60"(152.4 cm) wide, or horizontal-sliding windows from 23"(58.4 cm) to 60"(152.4 cm) high. Panel Fig. (23"(58.4 cm)) (16"(40.6 cm)) (23"(58.4 cm)) Window open 23"(58.4 cm) √... - Page 16 INSTALLATION INSTALLATION (VERTICAL) 1 Inserting Panel Assembly Fit the chassis fixing clips at both ends of the After adjusting the length of the mounting plate to the chassis mounting plate. height, insert the clip into the window sill. <Small Windows> Secure the mounting plate screws in the mounting holes on both sides of the mounting plate.
- Page 17 INSTALLATION 3 Attaching Foam Weather Seals Cut the mounting plate insulation to the chassis Move the mounting plate to the end of the chassis, close the length and insert it on both sides of the mounting plate. window and secure it with the security bracket. Cut the window gap insulation to the window length and insert it into the window gap.
-
Page 18: Installation (Horizontal)
INSTALLATION (HORIZONTAL) 1 Attaching Foam Weather Seals Cut the mounting plate insulation to the chassis length and insert it on both sides of the mounting plate. (Attaching the foam weather seals to the panel assembly rather than the window sash and frame makes for easier cleanup when removing the panel assembly.) •... - Page 19 4 Connecting Vent Hose Align the tabs on the diffuser end of the vent hose to the slots in the panel assembly opening. Insert the diffuser and push it in the Lock direction to assemble with the mounting plate. • If disconnected, reconnect the other end of the vent hose to the product by inserting the vent hose into the product with the mounting ring facing out.
-
Page 20: Operation
OPERATION Control Panel and Remote Control Remote Control Auto Swing Power ( Sleep Mode Press to turn the air conditioner ON or OFF This mode keeps operating noise to a minimum and turns the air conditioner off after a set time. The timer can be set from Operation Mode 1 to 7 hours. -
Page 21: Removing Condensation Buildup
NOTE Delay ON/OFF Timer Delay ON - When the air conditioner is off, Auto Restart: In case of turning off the air set it to automatically turn on from 1 to 24 conditioner due to power failure, your unit will hours later, at its previous mode and fan resume its last operation several minutes after settings. -
Page 22: Smart Functions
• The appliance supports 2.4 GHz Wi-Fi networks from the LG ThinQ application and register it again. only. To check your network frequency, contact your • The application is subject to change for appliance Internet service provider or refer to your wireless improvement purposes without notice to users. - Page 23 The operation of this equipment Installing the LG ThinQ Application is subject to the following two Search for the LG ThinQ application from the Google conditions: Play Store or Apple App Store on a smartphone. Follow instructions to download and install the application.
-
Page 24: Smart Diagnosis Tm
Use this feature to help you diagnose and solve problems with your appliance. • Launch the LG ThinQ application and select the Smart Diagnosis feature in the menu. Follow the instructions for audible diagnosis provided in the LG NOTE ThinQ application. -
Page 25: Maintenance
MAINTENANCE Cleaning the Air Filter The air filters should be cleaned every two weeks; depending on indoor air quality, more WARNING frequent cleaning may be needed. A dirty air filter will decrease airflow and reduce efficiency. Before cleaning or performing maintenance, disconnect the power supply and wait until 1. -
Page 26: Troubleshooting
TROUBLESHOOTING Before Calling for Service The appliance is equipped with an automatic error-monitoring system to detect and diagnose problems at an early stage. If the appliance does not function properly or does not function at all, check the following before you call for service. Normal Sounds You May Hear High-pitched Sound High efficient inverter compressor may occur high-pitched sound during operation. - Page 27 Problem Possible Cause Solutions Make sure the air conditioner plug The air conditioner is unplugged. is pushed completely into the outlet. Check the house fuse/circuit The fuse is blown/circuit breaker breaker box and replace the fuse or is tripped. reset the breaker. If power failure occurs, turn the mode control to off.
- Page 28 Set temperature too low. Increase set temperature. Can't connect the Air conditioner is turned off. Turn the air conditioner on. LG ThinQ App. to the air conditioner. Wireless router is turned off. Turn the router on. Move the router closer to the air...
- Page 29 NOTE • Some functions may not be supported, depending on the model. Model Voltage Frequency Power Current Power Current Nor. 1 370 W/ Nor. 12 A/ LP1419IVSM 115 V ~ 60 Hz Max. 1 380 W Max. 12.4 A...
- Page 30 LG ELECTRONICS MEXICO, S.A. DE C.V. Sor Juana lnés de la Cruz No. 555 Col. San Lorenzo Industrial Tlalnepantla de Baz, Estado de México C.P. 54033 Tel. 55-5321-1900 Página web http://www.lg.com.mx...