Philips WelcomeEye Connect User Manual
Hide thumbs
Also See for WelcomeEye Connect:
- Instructions manual (24 pages) ,
- Quick start manual (29 pages)
Table of Contents
Advertisement
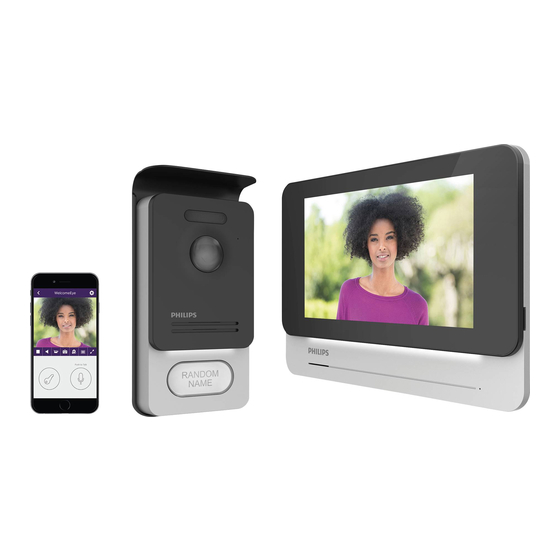
WelcomeEye Connect
DES9900VDP - 531002
WelcomeEye Touch
DES9700VDP - 531001
FR -Notice téléchargeable sur philips.com
GB - Downloadable instructions at phillips.com
D - Anleitung kann auf philips.com heruntergeladen werden
NL - De handleiding kan gedownload worden op philips.com
PL - Instrukcja do pobrania na philips.com
IT- Il manuale è disponibile anche su www.philips.com.
ES - Manual que puede descargar en philips.com
PT - Manual de instruções disponível no site philips.com
05/2020
V4
Scan me
to find out about our products
Flashez-moi
pour découvrir nos produits
Advertisement
Table of Contents

Related Manuals for Philips WelcomeEye Connect


Summary of Contents for Philips WelcomeEye Connect
- Page 1 FR -Notice téléchargeable sur philips.com GB - Downloadable instructions at phillips.com D - Anleitung kann auf philips.com heruntergeladen werden NL - De handleiding kan gedownload worden op philips.com PL - Instrukcja do pobrania na philips.com IT- Il manuale è disponibile anche su www.philips.com.
-
Page 2: Table Of Contents
SMARTPHONE APPLICATION ............. p.15 9 TECHNICAL CHARACTERISTICS ..........p.21 10 ACCESSORIES ...................p.23 11 FAQ .......................p.23 12 TECHNICAL ASSISTANCE - WARRANTY ........p.27 13 SAFETY PRECAUTIONS ..............p.27 14 FCC/CE WARNING ................p.28 15 DECLARATION OF CONFORMITY ..........p.28 WelcomeEye Connect / Touch / 05/20... -
Page 3: Safety Instructions
2 user badges (grey) 1 admin badge (yellow) 1 - (red) 1 +(blue) 5. Plug-in power supply (depending on the production date, a plug-in power supply or DIN rail can be included in the product) WelcomeEye Connect / Touch / 05/20... -
Page 4: Nomenclature
SD card Loudspeaker Microphone DES 9900 VDP Wifi 2.4GHz 550mA Avidsen 19 avenue Marcel Dassault 37200 TOURS FRANCE DES 9901 VDP Power supply terminal block Terminal block for connection to the intercom panel and accessories WelcomeEye Connect / Touch / 05/20... - Page 5 - When someone presses the call button, the inside monitor rings and the video is displayed. 110mA - To change the nameplate label, remove the front cover and unclip the plastic cap behind RFID 125kHz the label. IP44 WelcomeEye Connect / Touch / 05/20...
-
Page 6: Product Installation
- We recommend running the cables through a protective sheath to protect them against breakage and bad weather. - For the WelcomeEye Connect version, to make the most of your monitor’s Wi-Fi function, we advise you to check that your Wi-Fi network is accessible from where it is installed. -
Page 7: Configuring The Intercom
To open the gate motor, hold the badge in front of the RFID scan area for 3 seconds. Two short beeps confirm the opening of the gate. 6) Replacing a badge RFID badges do not have predefined functions. It is the programming step that sets the WelcomeEye Connect / Touch / 05/20... -
Page 8: Installing The Main Or Additional Monitor
7 - Position the monitor on the wall bracket. 8 - Depending on the configuration selected, and when wiring is completed, the interface may have to be configured. Warning: during this step, do not connect the power supply to the 230V AC. WelcomeEye Connect / Touch / 05/20... -
Page 9: Installing The Main Or Additional Intercom Panel
(see section 2. Configuring the intercom). 8 – Insert the screws and refit the two caps concealing the retaining screws. Note: screw through the black covers on the back of the intercom panel – do not remove them. WelcomeEye Connect / Touch / 05/20... -
Page 10: Installing A Camera (Optional)
A. Monitoring function and response to a call B. Intercom function C. Settings D. Photo album E. Video album : indicates that silent mode is active : indicates that the monitor ringtone is deactivated WelcomeEye Connect / Touch / 05/20... -
Page 11: Monitoring Function And Response To A Call
C. Settings The settings menu consists of three pages for the WelcomeEye Connect and two pages for the WelcomeEye Touch. To switch from one page to the next, simply slide the screen to the right or left. - Page 12 Time when the ringtone will be deactivated. c: Time when the ringtone will be reactivated. 5. Answering system function (only on WelcomeEye Connect, valid if video mode has been selected) This function allows you to record a voice message which will be played if the call is not answered.
- Page 13 8: Image settings Image brightness, contrast and colour settings. 9: Wi-Fi network management (only on WelcomeEye Connect) a: Activation (On) or deactivation (Off) of the Wi-Fi network. b: Configuration of the time between the visitor ringing the bell and when the notification is sent to the smartphone.
-
Page 14: Photo Album
Menu only accessible if a micro SD card is inserted. To access recorded videos. The figure in the red circle indicates the number of unplayed videos. The viewing and deletion procedure is identical to the photo album. GB13 WelcomeEye Connect / Touch / 05/20... - Page 15 - When there is a recorded message (visitor screenshot or message), a red circle with a figure indicates the number of unread messages on the home screen. - For the WelcomeEye Connect version, an answering system function is available. If the answering system function is activated, the recorded message of the answering system is played on the intercom panel.
-
Page 16: Smartphone Application
- Lightly touch the screen to exit the standby mode. 8. SMARTPHONE APPLICATION Connect a monitor to the Wi-Fi network 1. Download the Philips WelcomeEye application onto your smartphone. From the Apple store or Play store 2. From the monitor, go to... - Page 17 5. Android : Click on new device and then next 6. The UID of your monitor should appear. Click on it. Choose the box to which you wish to connect your monitor, enter its password and click on next. GB16 WelcomeEye Connect / Touch / 05/20...
- Page 18 Exit the application and go to the Wi-Fi settings of the smartphone. Log in to the Wi-Fi starting with ‘UIDcg…..’. Return to the application and click on next. Enter the name of your network and its password, then click on next. : Show password GB17 WelcomeEye Connect / Touch / 05/20...
- Page 19 Your videophone is now connected to the Wi-Fi network and your smartphone can receive calls. Add a smartphone to a connected videophone 1. Download the Philips WelcomeEye application onto your smartphone from the Apple App Store or Google Play Store Warning: deactivate the smart Wi-Fi network mode on the smartphone if it is activated.
- Page 20 6. Your smartphone can now receive calls from your videophone. Interface function Contains the different devices and enables switching to monitoring mode. Adding a device Click on the picture to enter monitoring mode. GB19 WelcomeEye Connect / Touch / 05/20...
- Page 21 Open the electric strike plate or gate (default password: 1 2 3 4). Note: the number of doors must be set to 2 to control the opening of the gate Press and hold to talk to the visitor. To delete the recordings Contains the recordings. GB20 WelcomeEye Connect / Touch / 05/20...
-
Page 22: Technical Characteristics
- Resolution 800 x 480 - Class 10 micro SD card up to 32GB (not supplied) - Wi-Fi 2.4 GHz IEEE 8111 b/g/n (WelcomeEye Connect only) - Radio power emitted: 18 dB maximum - Current consumption: 550mA (Connect), 470mA (Touch) - Power consumption: 13.2W (Connect), 11.3W (Touch) - Page 23 - RFID (125kHz) - IP44 - Operating temperature: -20°C / +50°C - Dimensions: 168(h) x 82(l) x 38(d) mm WelcomeEye application (for WelcomeEye Connect only): - Android v4.4 or above - iOS 7 or above - PUSH notification WelcomeEye AddComfort: (additional monitor) ref.: 531003...
-
Page 24: Accessories
Refer complete WelcomeEye Comfort/Compact instructions available www.philips.com website for more information. ** Refer to the complete WelcomeEye Connect/Touch instructions available on the www.philips.com website for more information. 11. FAQ Failure Cause Solution • The monitor does not • The monitor is not •... - Page 25 • Re-enter the settings on the back intercom panel is too of the intercom panel • The volume from the • The microphone • Verify and rectify intercom panel is too hole of the intercom panel is blocked GB24 WelcomeEye Connect / Touch / 05/20...
- Page 26 • Normal operation the internal memory memory can no • Cannot retrieve the longer be accessed photos from the internal memory on the micro SD card GB25 WelcomeEye Connect / Touch / 05/20...
- Page 27 To check whether or not the product is faulty, we recommend connecting it over a short distance (3m of wiring). If the symptoms persist, the product is faulty. If not, check the installation and cable used. GB26 WelcomeEye Connect / Touch / 05/20...
-
Page 28: Technical Assistance - Warranty
Important : Please keep this warranty card with your proof of purchase. Philips and Philips’ shield emblem are registered trademarks of Koninklijke Philips N.V. and are used under licence. This product has been manufactured by and is sold under the responsibility of CFI Extel SAS, and CFI Extel SAS is the sole guarantor of this product. -
Page 29: Fcc/Ce Warning
15. DECLARATION OF CONFORMITY The undersigned, CFI-Extel, declares that the WelcomeEye radioelectric equipment complies with the 2014/53/EU directive. The full text of the EU declaration of conformity is available at the following address: www.cfi-extel.com. GB28 WelcomeEye Connect / Touch / 05/20... - Page 30 GB - Alternating Current Wechselstrom Koninklijke Philips N.V. NL - Gelijkstroom I marchi Philips sono marchi registrati di proprietà di Koninklijke Philips PL - Prąd zmienny N.V. IT - Corrente alternata Las marcas registradas de Philips son marcas registradas de Koninklijke...