Advertisement
Quick Links
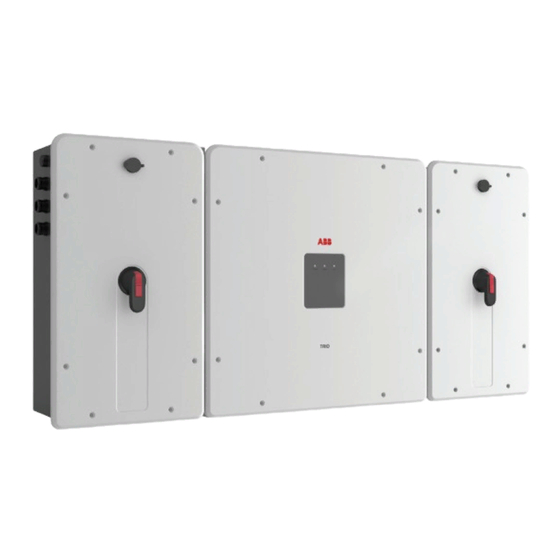
ABB solar inverters
Quick installation guide
TRIO-TM-60.0-US-480
EN
BCM.V2Z01.0
Before starting installation, download the product manual from www.abb.
com/solarinverters. Choose the correct country, string inverters, three phase,
choose the product and proceed to the "download" section.
Read and follow all safety and installation instructions to avoid disabling any
safety features or making the warranty invalid.
3.
The inverter model must be chosen by a specialized technician who has a good knowledge of the installation conditions, the devices that will be installed
externally to the inverter, and whether it will eventually be integrated into an existing system.
The 60kW TRIO module is the same for all inverters, however different AC and DC wiring boxes will have been ordered depending on the site design:
- DC wiring box models: DCWB-1; DCWB-2; DCWB-3.
- AC wiring box models: ACWB Standard; ACWB-A; ACWB-B;
The mounting bracket is sold separately and is available for vertical (model name: WALL MOUNTING BRACKET;TRIO-50/60-US) or horizontal mounting
(model name: HORIZONTAL MOUNTING BRACKET;TRIO50/60-US)
Main components
01
28
Stabilization fork
Mounting bracket
02
DC wiring box
29
Conducting springs
03
Power module
30
Key lock
04
Quick disconnect connector cover
32
Ground brackets
05
AC wiring box
33
WiFi antenna connector
06
Handles (sold separately)
34
Signal conduit opening for 3/4" (Pg21 size)
07
35
Metal locking fork
AFD reset button
08
36
Front cover
AC disconnect switch
09
Communication and control board
37
Ground bracket attachment points
10
Positive (+) side string fuses
39
2" AC conduit opening
11
Ground cable attachment points (GEC)
40
EGCterminal block
12
AC filter board
50
Ground cable
13
DC input terminal block
51
Cooling section
14
DC disconnect switch
52
WiFi antenna
15
53
DC surge protection device
Signal conduit opening for 1/2" (PG13.5 size)
17
55
AC output terminal block
parallel MPPT connection points
18
AC surge protection device
56
input connectors MPPT1
19
2" DC conduit opening
57
input connectors MPPT2
20
Protective Earth (PE) connection point
58
input connectors MPPT3
21
Anti-condensation valve
59
external ethernet connector (RJ45)
22
Negative (-) side string fuses
60
Signal cable gland (PG21 size)
23
Quick disconnect connectors
61
EGC cable gland (PG21 size)
24
62
Spacers for vertical installation
External ground cable attachment points
26
63
Heatsink
EGC conduit opening for 3/4" (PG21 size)
27
Rear pins attached to inverter back side
64
Plastic protection
Wiring Box DC
Wiring Box DC
Right side view
DCWB-1
52
13
14
09
40
04+41
27
30
08
27+24
11
14
23
21
37
+IN
-IN
USE 75 °C OR 90°C COPPER ORALUMINIUMWIRE ONLY. Refer to the instruction manual for
CAUTION
suitable wire size (AWG) and for tightening torque to be applied to the wiring terminals.
ATTENTION
à appliquer aux bornes de câblage.
manuel d'instructions pour la taille des ls approprié (AWG) et pour couples de serrage
UTILISEZ SEULEMENT CÂBLES EN CUIVRE OU ALUMINIUM 75 °C OU 90 °C. Consultez le
19
19
19
Wiring Box AC
Wiring Box AC
Right side view
ACWB standard
32
04
17
64
12
20
27
27+24
08
37
63
39
27
02
01
07
08
30
14
03
07
29
Wiring Box DC
Wiring Box DC
DCWB-2
40
52
10
09
55
15
22
04+41
40
52
10
33
33
53
53
53
53
35
53
34
34
34
34
27+24
27+24
32
32
62
62
19
56
19
57
19
58
Wiring Box AC
Wiring Box AC
ACWB-A
32
04
17
64
18
12
20
32
04
36
30
30
27+24
27+24
11
11
21
21
23
23
62
62
63
63
39
39
1.
The installer must read this document in its entirety before installing or commissioning this equipment.
For more detailed information regarding proper installation and use of this product, refer to the product manual located at www.abb.com/solarinverters. The
labels on the inverter carry the markings, main technical data and identification of the equipment and manufacturer. The technical data shown in this quick
installation guide does not replace that shown on the labels attached to the equipment.
Symbols used in the guide and on the products
These are nationally recognized test laboratory marks
showing certification to UL 1741 and CSA-C22 No. 107.1-01
Hazardous voltage
General warning - Important safety information
Hot surfaces
System earth conductor (main grounding protective
earth, PE) and Equipment Grounding Conductor (EGC)
Bonding Conductor
- This device complies with Part 15 of the FCC Rules. Operation is subject to the following two conditions:
(1) this device may not cause harmful interference, and (2) this device must accept any interference received, including interference that may cause undesired operation.
2.
Installation site and position
- Consult technical data to confirm the environmental specifications will be met
- Installation of the unit in a location exposed to direct sunlight is acceptable.
- Do not install in closed spaces where air does not freely circulate.
- Always ensure that the flow of air around the inverter is not blocked, so as to prevent overheating.
- Do not install the equipment near flammable substances (minimum distance: 10 ft).
- Do not install the equipment on wooden walls or other flammable substances.
- Do not install in inhabited rooms or where the prolonged presence of people or animals is expected, because of the
inverter's acustic noise level during operation. The sounds level is heavily influenced by its location (for example, the
surface around the inverter, the environment, etc.) and grid quality.
- Install on a wall or strong structure capable of bearing weight
- Install vertically or horizontally (i.e. with the inverter on its back), with a maximum inclination as indicated in the figure
- Maintain minimum clearance from objects blocking air circulation and spacing between inverter as indicated in
the figures
- Ensure sufficient working area in front of the inverter for wiring box access
- If possible, install at eye-level so that the LEDs can be easily seen
- Install at a height that takes account of the weight of the equipment
- Position multiple inverters side-by-side, maintaining minimum clearances (measured from the outermost edge of
the inverter)
- Multiple inverters can also be placed in a staggered arrangement. Minimum clearances for staggered
arrangements include width of inverter plus additional allowances for inverters arranged above or below
- All installatioins over 6500' (2,000 meters) must be assessed by ABB Technical Sales to determine the proper
datasheet derating
- The inverter can be commissioned and monitored using the wireless communication channel. The WLAN board
of the inverter uses radio waves to transmit and receive data, it is therefore important to find a new position for
the router considering the different materials which the radio signal will have to pass through:
Material
Open field
Wood / Glass
Stone / Plywood
Reinforced concrete
Metal
Do not block access to the external AC and DC disconnects.
Please refer to the warranty terms and conditions and avoid voiding the warranty with improper
installation.
Vertical installation bracket
NO
4.
Components included in all DC wiring box models
Configurable relay connectors
Control and communications signal connectors
M6 hex nut to clamp ground cables to the wiring
boxes (one for DCWB and one for ACWB)
27
M6x16 hex screw (For GEC on ACWB)
28
Serrated lock M6 washer for securing the ground
24
terminal to the ACWB
Wireless antenna
Keys for the front cover of AC and DC wiring boxes
ABB
solar
XXXXXXX
XXXXXXX
inverters
XXXXXXX
XXXXXXX
XXXXX
XXXXX
Quick installation guide (QIG)
In addition
to what
The
technical
is explained
documentation
in this
and
the
and
the
interface
guide,
and
management
safety
installation
software
product
for the
information
provided
in the
are
available
installation
at the
website.
manual
mus
read
t be
and
followed.
Bar for parallel input channels configuration + M5x12
OK
06
screws equipped with cut and flat washer.
Not available on DCWB-1 (single input channel model)
05
Components included with DCWB-3 model only
Two-hole gasket for signal cable glands
OK
Airtight connector for ethernet cable connection
5.
Vertical mount
30
1. The bracket
is supplied in two separate parts, assemble them using the four
01
36
M5x14 countersunk screws. (FIG. 1)
08
2. Position the bracket
01
plate. Insert the 2 cage nuts into the their seats
3. It is the installer's responsibility to choose an appropriate number and distri-
37
bution of attachment points. The choice must be based on the type of wall,
NO
32
frame or other support, the type of anchors to be used, and their ability to
37
support 4 times the inverter's weight (4 x 260 lbs=1040 lbs for all models).
Attach the bracket to the wall with at least 10 attachment srews. Depend-
ing on the type of anchor chosen, drill the required 10 holes
DCWB-3
the bracket. Put at least four screws in the upper side and at least four in
OK
the lower side, with the remainder (up to 20 total) in either location. (FIG. 1)
09
55
15
22
04+41
33
4. Attach the bracket to the wall or frame (FIG. 1)
59
59
5. Install spacers
in the two lower rear attachment pins
24
35
sion module. This will prevent backwards tilt when the conversion module
60
is hung on the bracket. (FIG. 2)
60
6. Lift the power module up to the bracket using the (optional) handles
27+24
(optional) M12 eyebolts, or another appropriate lifting device. (FIG. 2)
32
61
7. Side the heads of two upper rear attachment pins
62
the bracket and confirm that the alignement slots
aligned with the line on the sides of the conversion module; this indicates
that they have been correctly positioned.(FIG. 2)
8. Remove handle or eye bolts (if used)
1A
2A
3A
9. Remove the quick disconnect connector covers as follows :
1B
2B
3B
1C
2C
3C
- Pull the metal locking fork outwards
1D
2D
3D
- Pull off the quick disconnect cover
1E
2E
3E
- Save both parts. They will be needed in a later step.
ACWB-B
10. Set the wiring box disconnect switches to "0".
64
18
12
20
11. Unscrew the 8 screws holding the front covers
30
AC wiring box
in place.
05
27+24
12. Open the key locks and remove the covers of each wiring box. (FIG. 4)
11
13. Install spacers
in the lower rear attachment pin
21
24
will prevent backwards tilt when the wiring box is hung on the bracket. (FIG. 4)
36
23
14. Remove the quick disconnect connector covers from both wiring boxes
62
(See step 9 of this procedure) (FIG. 4). Caps should be kept in the
special slot within each wiring box. Proceed as follows:
-
couple a power module connector cover (green in the figure) with
A
one from a wiring box (in blue in the figure).
-
Slip the plastic locking fork
B
box cover, over the two covers. Be sure the fork is plastic, not metal.
-
Keep the parts available in a safe place.They could be used during
C
maintenance operation.
- Repeat the same operation for the other wiring box. (FIG. 5)
IMPORTANT SAFETY INSTRUCTIONS
SAVE THESE INSTRUCTIONS -- KEEP IN A SAFE PLACE!
ø
+
OK
NO
75° MAX
OK
15° MAX
NO
NO
OK
OK
OK
OK
OK
OK
Relative signal reduction
0% (strength of approximately 50 meters)
From 0 to 10%
From 10 to 40%
From 60 to 90%
NO
NO
Up to 100 %
OK
NO
OK
OK
75° MAX
Horizontal installation bracket
OK
OK
15° MAX
75° MAX
NO
Components included in the mounting bracket kit
Quantity
OK
2
15° MAX
NO
2
2
OK
OK
NO
1
6
1
4
NO
OK
1
OK
OK
OK
1 + 3
Quantity
3
34
PG 21 + cap
OK
NO
NO
2
OK
FIG 1
OK
OK
perfectly level on the wall and use it as a drilling tem-
B
on the bracket. (FIG. 1)
01
NO
to mount
A
OK
FIG 2
of the conver-
27
A
or the
06
into the slots
on
27
A
on the bracket are
27
(FIG. 3)
A
24
(FIG. 3)
B
FIG 4
of the DCWB
02
and
08
08
02
of each wiring box. This
27
41
, which was used to secure the wiring
41
OK
NO
Phase
75° MAX
Direct and alternating currents, respectively
-
Positive and negative of the input voltage (DC)
OK
Stored energy discharge time
15° MAX
10
Consult product manual
NO
NO
OK
OK
OK
OK
OK
NO
NO
OK
OK
OK
NO
6"
6"
12"
75° MAX
20"
OK
16"
8"
15° MAX
NO
NO
OK
OK
Quantity
Quantity
(vertical kit)
(horizontal kit)
1
0
Bracket
01
for vertical wall mounting
0
1
Bracket
01
for horizontal mounting
OK
countersunk M5 x 14 hex screws for
4
10
assembling the attachment bracket
M6x16 hex screw (4 for ground
OK
6
6
OK
brackets and 2 for caged nuts)
Stabilization forks to attach the
2
2
conversion module to the wiring box
M6 cage nuts
2
2
M6 hex nut to clamp ground cables to
2
2
the conversion module
NO
NO
Back spacers
for wall alignment
OK
24
4
0
(vertical installation)
01
Ground cables for wiring box/power
2
2
module connection
OK
OK
Ground brackets
for wiring box-
32
2
2
power module connection
6"
M6 flat washer (4 for ground
6
6
brackets and 2 for cage nuts)
Serrated lock M6 washer for ground
8
8
connection bracket
Conducting springs
6
6
16"
A
6"
6"
12"
A
A
A
A
B
A
A
A
A
B
A
20"
16"
8"
FIG 3
27
A
B
A
A
A
B
A
A
A
A
B
A
FIG 5
A
24
08
04
04
B
41
41
C
OK
OK
OK
12
20
D
D
D
Advertisement

Related Manuals for ABB TRIO-TM-60.0-US-480


Summary of Contents for ABB TRIO-TM-60.0-US-480
- Page 1 Quick installation guide For more detailed information regarding proper installation and use of this product, refer to the product manual located at www.abb.com/solarinverters. The labels on the inverter carry the markings, main technical data and identification of the equipment and manufacturer. The technical data shown in this quick TRIO-TM-60.0-US-480...
- Page 2 - Volt/Watt settings: P(V). Under this mode, the level of active power exported by the inverter is a function of the operating grid voltage, also known as a Volt/Watt curve. the access point created by the inverter. The list of available networks will show a network named ABB-XX-XX-XX-XX-XX-XX, where “X” is an hexadecimal The 4 points of the default curve, where you can set the % of Vnom values and related % of Pmax, can be modified using the internal Webserver.