
Related Manuals for Sony PROFORMA PROFORMAWM46


Summary of Contents for Sony PROFORMA PROFORMAWM46
- Page 1 Wall Mount PROFORMAWM46 Installation Guide ❙ ❙ English Instructions…Page 2 Spanish Instructions…Page 12 French Instructions…Page 22...
-
Page 2: English Instructions
English Instructions Thank you for purchasing the ProForma WM-46 Wall Mount. It’s an easy, fast and effective way to mount flat panel televisions of screen sizes up to 46 inches (viewable area, measured diagonally). Maximum television weight is 80 lbs. - Page 3 On Safety wARNINg TO CusTOMeRs Sufficient expertise is required for installing this product. If you do not understand this Installation Guide, or are RISK OF DEATH OR INJURY unable to perform any part of the installation procedure, do not attempt to install this product yourself, and instead consult a qualified installer.
- Page 4 On Safety Preparation (cOnTInuED) Before installation be sure to have Do not install the TV over or under an air conditioner. If the TV is exposed to water leaks or air current from an air conditioner the following tools and materials. for a long time, it may cause a fire, an electric shock or a malfunction of the TV.
-
Page 5: What's Included
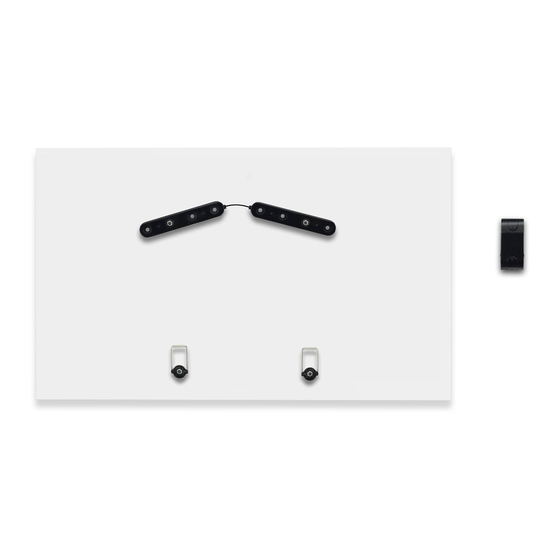
What’s Included Wall Hook Quantity: 1 TV Harness 400mm 300mm 200mm 100mm 100mm 200mm 300mm 400mm Kickstands Kickstands Quantity: 2 Quantity: 2 Quantity: 1 Spacers Self-Adhesive Pads M4 x 22mm M5 x 22mm Quantity: 2 Quantity: 2 Quantity: 4 Quantity: 4 M5 x 35mm M6 x 20mm M6 x 24mm... - Page 6 Installation STEP 1: STEP 2 choose the location and mark the stud (continued) A. choose the location, keeping in mind the D. Locate the “VESA” mount screw holes on the following restrictions. back of the television. These will form a rectangle or square that measures 100, 200, 300 or 400 mm a.
- Page 7 Installation (cOnTInuED) STEP 2 STEP 4 (continued) (continued) television meets the wall stud. If necessary, use G. use your electric drill to screw in the lag bolts to a carpenter’s level to confirm that your mark is firmly attach the wall hook to the wall. For wood stud properly aligned with the stud.
- Page 8 Installation (cOnTInuED) STEP 5 STEP 5 STEP 5 STEP 6: Attach spacers or self-adhesive pads (continued) (continued) (continued) c. Your Wall Mount is supplied with several sets of A. If you want the television to sit parallel to the wall, machine screws (E, F, G, H, I, J, K, L and M).
- Page 9 Installation (cOnTInuED) STEP 6 STEP 7: Hang television on wall hook (continued) CAUTION! Do not use a power drill to attach the A. The spacers feature kickstands that have two spacers to the television. positions: extended away from the back of the television and folded flat close to the television.
-
Page 10: Normal Position
Installation (cOnTInuED) STEP 8: using the spacer kickstands The spacers include metal kickstands to make it easier to connect and disconnect cables from the back of the television. A. To use the kickstands, carefully reach behind the television and extend the metal kickstands toward the wall. -
Page 11: Warranty Information
Warranty Information liMiTed WARRAnTY For service assistance or resolution of a service The manufacturer of this product warrants this problem, or for product information or operation, product (“Product”) against defects in material or workmanship for a period of one (1) year from the date call: of purchase. -
Page 12: Spanish Instructions
Spanish Instructions Thank you for purchasing the ProForma WM-46 Wall Mount. It’s an easy, fast and effective way to mount flat panel televisions of screen sizes up to 46 inches (viewable area, measured diagonally). Maximum television weight is 80 lbs. - Page 13 On Safety wARNINg TO CusTOMeRs Sufficient expertise is required for installing this product. If you do not understand this Installation Guide, or are RISK OF DEATH OR INJURY unable to perform any part of the installation procedure, do not attempt to install this product yourself, and instead consult a qualified installer.
- Page 14 On Safety Preparation (cOnTInuED) Before installation be sure to have Do not install the TV over or under an air conditioner. If the TV is exposed to water leaks or air current from an air conditioner the following tools and materials. for a long time, it may cause a fire, an electric shock or a malfunction of the TV.
- Page 15 What’s Included Wall Hook Quantity: 1 TV Harness 400mm 300mm 200mm 100mm 100mm 200mm 300mm 400mm Kickstands Kickstands Quantity: 2 Quantity: 2 Quantity: 1 Spacers Self-Adhesive Pads M4 x 22mm M5 x 22mm Quantity: 2 Quantity: 2 Quantity: 4 Quantity: 4 M5 x 35mm M6 x 20mm M6 x 24mm...
- Page 16 Installation STEP 1: STEP 2 choose the location and mark the stud (continued) A. choose the location, keeping in mind the D. Locate the “VESA” mount screw holes on the following restrictions. back of the television. These will form a rectangle or square that measures 100, 200, 300 or 400 mm a.
- Page 17 Installation (cOnTInuED) STEP 2 STEP 4 (continued) (continued) television meets the wall stud. If necessary, use G. use your electric drill to screw in the lag bolts to a carpenter’s level to confirm that your mark is firmly attach the wall hook to the wall. For wood stud properly aligned with the stud.
- Page 18 Installation (cOnTInuED) STEP 5 STEP 5 STEP 5 STEP 6: Attach spacers or self-adhesive pads (continued) (continued) (continued) c. Your Wall Mount is supplied with several sets of A. If you want the television to sit parallel to the wall, machine screws (E, F, G, H, I, J, K, L and M).
- Page 19 Installation (cOnTInuED) STEP 6 STEP 7: Hang television on wall hook (continued) CAUTION! Do not use a power drill to attach the A. The spacers feature kickstands that have two spacers to the television. positions: extended away from the back of the television and folded flat close to the television.
- Page 20 Installation (cOnTInuED) STEP 8: using the spacer kickstands The spacers include metal kickstands to make it easier to connect and disconnect cables from the back of the television. A. To use the kickstands, carefully reach behind the television and extend the metal kickstands toward the wall.
- Page 21 Warranty Information liMiTed WARRAnTY For service assistance or resolution of a service The manufacturer of this product warrants this problem, or for product information or operation, product (“Product”) against defects in material or workmanship for a period of one (1) year from the date call: of purchase.
-
Page 22: French Instructions
French Instructions Thank you for purchasing the ProForma WM-46 Wall Mount. It’s an easy, fast and effective way to mount flat panel televisions of screen sizes up to 46 inches (viewable area, measured diagonally). Maximum television weight is 80 lbs. - Page 23 On Safety wARNINg TO CusTOMeRs Sufficient expertise is required for installing this product. If you do not understand this Installation Guide, or are RISK OF DEATH OR INJURY unable to perform any part of the installation procedure, do not attempt to install this product yourself, and instead consult a qualified installer.
- Page 24 On Safety Preparation (cOnTInuED) Before installation be sure to have Do not install the TV over or under an air conditioner. If the TV is exposed to water leaks or air current from an air conditioner the following tools and materials. for a long time, it may cause a fire, an electric shock or a malfunction of the TV.
- Page 25 What’s Included Wall Hook Quantity: 1 TV Harness 400mm 300mm 200mm 100mm 100mm 200mm 300mm 400mm Kickstands Kickstands Quantity: 2 Quantity: 2 Quantity: 1 Spacers Self-Adhesive Pads M4 x 22mm M5 x 22mm Quantity: 2 Quantity: 2 Quantity: 4 Quantity: 4 M5 x 35mm M6 x 20mm M6 x 24mm...
- Page 26 Installation STEP 1: STEP 2 choose the location and mark the stud (continued) A. choose the location, keeping in mind the D. Locate the “VESA” mount screw holes on the following restrictions. back of the television. These will form a rectangle or square that measures 100, 200, 300 or 400 mm a.
- Page 27 Installation (cOnTInuED) STEP 2 STEP 4 (continued) (continued) television meets the wall stud. If necessary, use G. use your electric drill to screw in the lag bolts to a carpenter’s level to confirm that your mark is firmly attach the wall hook to the wall. For wood stud properly aligned with the stud.
- Page 28 Installation (cOnTInuED) STEP 5 STEP 5 STEP 5 STEP 6: Attach spacers or self-adhesive pads (continued) (continued) (continued) c. Your Wall Mount is supplied with several sets of A. If you want the television to sit parallel to the wall, machine screws (E, F, G, H, I, J, K, L and M).
- Page 29 Installation (cOnTInuED) STEP 6 STEP 7: Hang television on wall hook (continued) CAUTION! Do not use a power drill to attach the A. The spacers feature kickstands that have two spacers to the television. positions: extended away from the back of the television and folded flat close to the television.
- Page 30 Installation (cOnTInuED) STEP 8: using the spacer kickstands The spacers include metal kickstands to make it easier to connect and disconnect cables from the back of the television. A. To use the kickstands, carefully reach behind the television and extend the metal kickstands toward the wall.
- Page 31 Warranty Information liMiTed WARRAnTY For service assistance or resolution of a service The manufacturer of this product warrants this problem, or for product information or operation, product (“Product”) against defects in material or workmanship for a period of one (1) year from the date call: of purchase.
- Page 32 Sony Electronics Inc. ©2011 Sony Electronics Inc. All rights reserved. Reproduction in whole or in part without written permission is prohibited. Features and specifications subject to change without 16530 Via Esprillo notice. Sony, the Sony logo and the Sony make.believe logo are trademarks of Sony.