Yamaha TSX-130 Owner's Manual
Yamaha desktop audio system owner's manual
Hide thumbs
Also See for TSX-130:
- Service manual (87 pages) ,
- Owner's manual (68 pages) ,
- Owner's manual (32 pages)
Table of Contents
Advertisement
Advertisement
Table of Contents

Related Manuals for Yamaha TSX-130


Summary of Contents for Yamaha TSX-130
- Page 1 DESKTOP AUDIO SYSTEM SYSTEME AUDIO DESKTOP TSX-130 OWNER’S MANUAL MODE D’EMPLOI...
-
Page 2: Important Safety Instructions
Yamaha and the Electronic Industries Association’s Consumer Electronics Group want you to get the most out of your equipment by playing it at a safe level. One that lets the sound come through loud and clear without annoying blaring or distortion –... - Page 3 This product, when installed as indicated in the instructions contained in this manual, meets FCC requirements. Modifications not expressly approved by Yamaha may void your authority, granted by the FCC, to use the product. 2 IMPORTANT: When connecting this product to accessories and/or another product use only high quality shielded cables.
- Page 4 Yamaha will not be held responsible for any damage resulting from use of this unit with a voltage other than specified.
-
Page 5: Table Of Contents
NOTES ON DISCS AND USB DEVICES ...19 Disc information ... 19 Handling a disc ... 19 About MP3 or WMA files ... 19 GLOSSARY...20 SPECIFICATIONS...20 Indoor FM antenna (1.4 m (55-1/8”)) Owner’s manual DESKTOP AUDIO SYSTEM SYSTEME AUDIO DESKTOP TSX-130 OWNER’S MANUAL MODE D’EMPLOI... -
Page 6: Preparation
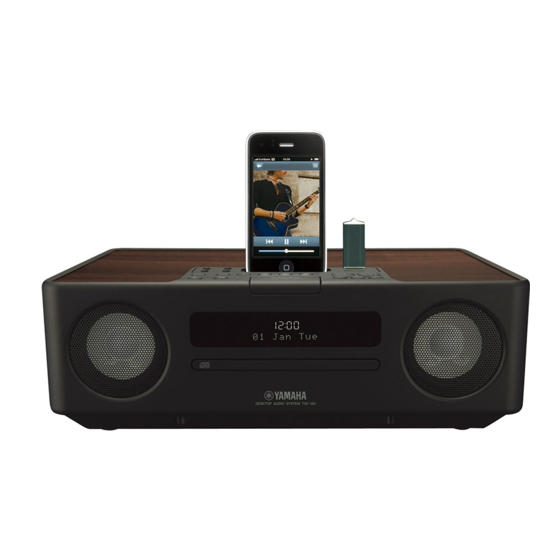
PREPARATION PREPARATIONS BEFORE USING THIS UNIT 1 Source buttons: USB, CD, FM, iPod (☞ P. 9) 2 ON/OFF: System on/off (☞ P. 4) 3 VOLUME: Volume control buttons (☞ P. 9) 4 Audio control buttons (☞ P. 9) 5 iPod dock (☞ P. 10) 6 USB port (☞... -
Page 7: Before Using The Remote Control
■ Before using the remote control ■ Using the remote control Within 6 m (20’) ■ Replacing the battery in the remote control Change the battery when the operation range of the remote control decreases. Use a straight pin to remove the cover. -
Page 8: Turning On/Off The System
PREPARATIONS BEFORE USING THIS UNIT Turning on/off the system Connect the power cable to the wall outlet. Press ON/OFF to turn on the system. When the system is on: “Hello” appears, then clock and other information are displayed. Example: iPod playback mode display When the system is off: “Good-bye”... -
Page 9: Operation
OPERATION USING USEFUL FUNCTIONS Using the alarm functions The unit has the dual alarm function. Each alarm time always appears on the right/left sides of the clock on the front panel display. When the alarm is set to on, the alarm indicator and time light up. - Page 10 USING USEFUL FUNCTIONS 2 Select the beep sound. 5 kinds of beep sounds are stored on the unit. The BEEP screen is skipped automatically if you select MUSIC/BEEP+MUSIC in step 1. You can preview the currently displayed beep sound by pressing SNOOZE/SLEEP when you select the beep sound.
- Page 11 ■ Using the snooze function When the beep sound, music, or both are played back, you can set the snooze function. Set the snooze function. The function differs depending on the alarm type you set in TYPE (☞ P. 5). BEEP: The beep sound stops by pressing SNOOZE/ SLEEP, and resumes after 5 minutes.
-
Page 12: Setting Sleeping Mode
USING USEFUL FUNCTIONS Setting sleeping mode You can set the time to turn off the system automatically. Select the sleep time. Press repeatedly. When the sleep function is on, the SLEEP indicator lights You can also operate this function with SLEEP on the remote control. -
Page 13: Basic Operation
:Press one of the Source buttons to select the desired source. :Press to control the volume. :Press to turn off the sound. Press again to resume the volume. Even when the system is off, you can start playback of the desired source by pressing one of the Source buttons, without pressing ON/OFF. -
Page 14: Listening To Music
Listening to your iPod™ Notes • The unit is compatible with iPod touch, iPod (Click Wheel including iPod classic), iPod nano and iPod mini. • You can remove your iPod whenever you want. • Some features may not be available depending on the model or the software version of your iPod. - Page 15 ■ Switching the playback information display Switch the display in iPod playback mode. Press repeatedly. You can change the information display as follows. Song number and elapsed time (default setting) ↓ Song number and remaining time ↓ Song name ↓ Artist name ↓...
-
Page 16: Listening To A Cd
LISTENING TO MUSIC Listening to a CD ■ Playing back normally Open the disc tray and insert your disc. Close the disc tray. Select CD. Playback starts. ■ Playing back in random sequence/ repeatedly After the above steps 1 to 3, you can enjoy random and repeat mode. -
Page 17: Listening To A Usb Device
(such as USB chargers or USB hubs), PCs, card readers, an external HDD, etc. • Yamaha will not be held responsible for any damage to or data loss on the USB device occurring while the device is connected to this unit. -
Page 18: Listening To Fm Radio Stations
LISTENING TO FM RADIO STATIONS Connecting antennas Indoor FM antenna (supplied) Notes • The antenna should be stretched out. • If radio reception is poor, change the height, direction, or placement of the antenna. • If you use an outdoor antenna instead of the supplied FM antenna, reception will be better. -
Page 19: Selecting Preset Radio Stations (Preset Tuning)
Select the preset number you want to store to. Note To cancel the manual preset, press MEMORY again. Complete the manual preset. • You can preset up to 30 FM stations. • You can delete a preset station by pressing FUNCTION → →... -
Page 20: Additional Information
In case of a problem with the unit, check the following list first. If you cannot solve your problem with the suggested solutions or if your problem is not listed below, turn off and unplug the unit, and consult the nearest authorized Yamaha dealer or service center. -
Page 21: Ipod
iPod™ Problem “iPod Connect Error” There is a problem with appears on the front panel communication between the unit and display. your iPod. The iPod does not charge The iPod is set in the iPod dock improperly. “iPod Not Connected” appears on the front panel display after you set the iPod. -
Page 22: Usb Playback
TROUBLESHOOTING USB playback Problem MP3/WMA file in the USB device does not play. “USB Over Current” appears on the front panel display. Radio reception Problem The preset selecting function does not work. Too much noise during stereo broadcast. Even with an outdoor antenna, radio wave reception is weak. -
Page 23: Notes On Discs And Usb Devices
NOTES ON DISCS AND USB DEVICES Disc information This unit is designed for use with audio CD, CD-R*, and CD-RW*. Also, this unit can play back 8 cm (3 inch) compact discs. * ISO 9660 This unit can play back discs bearing any of the logo marks above. -
Page 24: Glossary
■ MP3 (MPEG Audio Layer-3) One of the audio compression methods used by MPEG. It employs an irreversible compression method, which achieves a high compression rate by thinning out the data of hardly audible part to human ears. It is said to be capable of compressing the data quantity by about 1/11 (128 kbps) while maintaining a similar audio quality to a music CD. - Page 25 Printed in Malaysia WQ45710-1...