Panasonic CZ-256ESMC3 Quick Reference
Intelligent controller
Hide thumbs
Also See for CZ-256ESMC3:
- Technical data manual (180 pages) ,
- Operating instructions manual (230 pages)
Table of Contents
Advertisement
Quick Links
ENGLISH
Before operating the unit, read these operating instructions thoroughly and keep them for future reference.
FRANÇAIS
Avant d'utiliser l'appareil, lisez ce mode d'emploi dans son intégralité et conservez-le pour toute référence ultérieure.
Antes de operar la unidad, lea atentamente estas instrucciones de funcionamiento y guárdelas para futuras consultas.
ESPAÑOL
DEUTSCH
Bevor Sie das Gerät in Betrieb nehmen, lesen Sie bitte diese Bedienungsanleitung aufmerksam durch und bewahren Sie sie für die
künftige Verwendung auf.
Prima di utilizzare l'unità, leggere a fondo queste istruzioni per l'uso e conservarle per riferimento futuro.
ITALIANO
NEDERLANDS
Lees deze gebruikershandleiding aandachtig voordat u het apparaat gebruikt en bewaar ze voor toekomstig gebruik.
PORTUGUÊS
Antes de utilizar o aparelho, leia completamente este manual de instruções e guarde-o para futuras referências.
TÜRKÇE
Üniteyi çalıştırmadan önce bu çalıştırma talimatlarını baştan sona okuyun ve ileride başvurmak üzere saklayın.
POLSKI
Przed uruchomieniem urządzenia należy dokładnie przeczytać instrukcję obsługi i zachować ją do wykorzystania w przyszłości.
РУССКИЙ
П еред использованием этого устройства внимательно прочитайте настоящую инструкцию по эксплуатации и сохраните ее для
дальнейших справок.
УКРАЇНСЬКА
Уважно прочитайте цей посібник з експлуатації перед тим, як увімкнути пристрій, та збережіть його на майбутнє.
Panasonic Corporation
1006 Kadoma, Kadoma City, Osaka, Japan
85464609354010
Model No.
Contents
Safety precautions ........................................................................... 2
Specifications ................................................................................... 3
Operating precautions ..................................................................... 4
Installation precautions ................................................................... 4
Part names ........................................................................................ 4
Operations on this unit .................................................................... 5
Basic operation of the touch panel ............................................... 5
Buttons and boxes ....................................................................... 5
How to read the screens .............................................................. 7
Checking the settings on the indoor unit ....................................... 8
Changing the settings on the indoor unit .................................... 10
Settings after completing installation .......................................... 12
Setting the language and time zone ............................................. 14
Setting the date and time ............................................................... 16
Confirming system configuration ................................................. 17
Basic settings on the indoor unit .................................................. 18
Changing the name of the area group .......................................... 21
Changing the name of the distribution group ............................. 23
Basic settings for the pulse meter ................................................ 25
Set the distribution mode .............................................................. 27
Basic settings for distribution calculation ................................... 28
Panasonic Corporation
http://www.panasonic.com
Quick Reference
Intelligent Controller
CZ-256ESMC3
Installation Instructions
Separately Attached.
CV6233334134
F0916-0
Advertisement
Table of Contents

Related Manuals for Panasonic CZ-256ESMC3


Summary of Contents for Panasonic CZ-256ESMC3
-
Page 1: Table Of Contents
Quick Reference Intelligent Controller CZ-256ESMC3 Model No. Contents Safety precautions ................2 Specifications ................... 3 Operating precautions ..............4 Installation precautions ..............4 Part names ..................4 Operations on this unit ..............5 Basic operation of the touch panel ..........5 Buttons and boxes ............... -
Page 2: Safety Precautions
Read the Operating Instructions carefully for safe use. This manual describes the Operating Instructions of the intelligent controller. Read this manual as well as operating instructions supplied with indoor units and outdoor units. Be sure to read the “Safety precautions” (below) before using. Find detailed instructions in the “Instructions”... -
Page 3: Specifications
Encryption (with security software) etc., cannot be used. y Panasonic accepts no responsibility for any loss of data. The maximum number of connectable units is shown below. y When using only this unit: 128 indoor units and 60 outdoor units y When connecting a Communication Adaptor: 256 indoor units and 120 outdoor units The number of indoor units includes the Interface Adaptor. -
Page 4: Operating Precautions
Operating precautions Do not use in the following locations Do not apply strong shocks y Where flammable gases, etc. may leak (This may cause malfunction) y Near the ocean or other areas with a lot of salt Do not use heaters near the controller y In areas where sulphurous gases occur such as natural spa (This may cause deformation or discolouration) areas Do not use hard or pointy objects... -
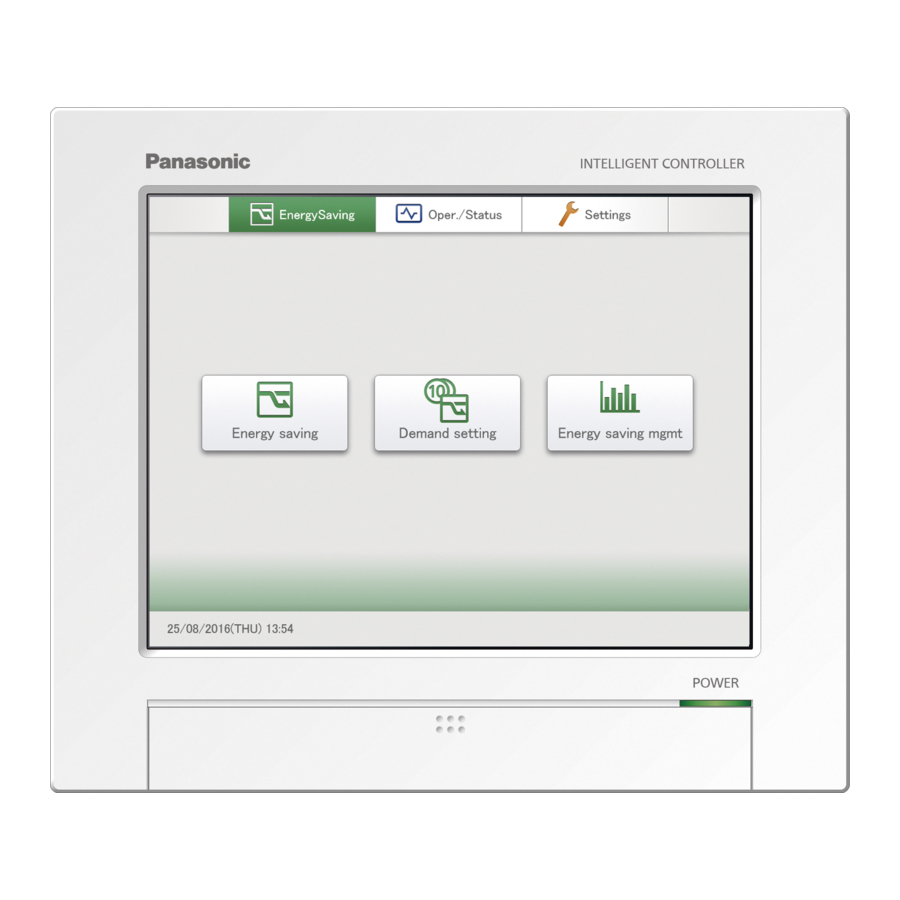
Page 5: Operations On This Unit
Operations on this unit Operations on this unit are performed by following menus. The screens used for operations all follow a common pattern, with the screens being easy to read and easy to use. Basic operation of the touch panel This section describes the basic operations on the touch panel. - Page 6 Operations on this unit Check boxes These are mainly used to switch on or off item selection and functions. Display example Status Explanation Unselected In this state the item is not selected. Selected In this state the item is selected. (In this example, the automatic stop feature will operate.) A check mark appears when you touch it.
-
Page 7: How To Read The Screens
How to read the screens There are some items and icons common to the operations and settings screens. The follow explains the items and icons. Name Explanation Submenu name This displays the submenu name. Operations/Settings This displays the operations/settings screen name. screen name Date and time The current date and time is displayed. -
Page 8: Checking The Settings On The Indoor Unit
Checking the settings on the indoor unit You can check the setting status of all indoor units connected to this unit in a list. You can also change the display to show by area. Touch [Operation/Status] in “Oper./ Select the area to display Status”. - Page 9 “I/D unit list” screen [Select all]/[Clear all] buttons [Select all] Select all indoor units. [Clear all] Cancel selection of all indoor units. Change list order. Display The display follows the order set in “I/D unit settings”. Address The display follows the address order set in “I/D unit settings”.
-
Page 10: Changing The Settings On The Indoor Unit
Changing the settings on the indoor unit You can select indoor units to change settings, for example, start or stop them, or change their set temperature, etc.. Change settings in the “Settings” dialogue. You can also select multiple indoor units and operate them using the same settings. Touch [Operation/Status] in “Oper./ Touch [Operation]. - Page 11 Item Explanation Touch [Transmit]. Set temp. Set the temperature. The settings are registered and the “Settings” dialogue Touch [Set temp.]. closes. Set the temperature with To cancel the settings, touch [Cancel]. (± in 1 °C steps) <Setting ranges> y In cooling or drying mode: Between 18 °C and 30 °C y In heating mode: Between 16 °C and 30 °C*...
-
Page 12: Settings After Completing Installation
Settings after completing installation Basic settings flow Set the language and time zone on Name the distribution groups. this unit. → C hanging the name of the distribution group ([Distribution group settings]) P.23 → S etting the language and time zone ([Language/ Timezone settings]) P.14 Register distribution groups to be Set the time and date on this unit. measured in the pulse meter. - Page 13 Operation Distribution rate Quantity used, Step Category step Setting Screen menu names conditioning display only charges display operations Time Load Time Load only Distribution modes (time/load) Distribution mode settings Power distribution calculation Distribution mode settings ...
-
Page 14: Setting The Language And Time Zone
Setting the language and time zone Set the language to be used when setting and operating this unit. The languages available on this unit are English (US), English (UK), German, Italian, French, Spanish, and Portuguese. Set the time zone to suit the language to be used. Touch [IntelContrlr maint] in “Settings”. - Page 15 Select the time zone to display. You can select [UTC-12] to [UTC-1], [UTC], and [UTC+1] to [UTC+14]. Find the difference between the time in the installation location of the intelligent controller and Coordinated Universal Time (UTC). If the former is 1 hour ahead of the latter, for example, select [UTC+1].
-
Page 16: Setting The Date And Time
Setting the date and time Manually set the date and time. Touch [IntelContrlr maint] in “Settings”. Setting the date and time. The “IntelContrlr maint” screen is displayed. Item Explanation Set the date. Month to set “Day”, “Month”, and “Year”. Touch [Date settings]. Year The “Date setting”... -
Page 17: Confirming System Configuration
Confirming system configuration Confirm the current configuration of the air conditioning system. Touch [System Settings] in “Settings”. Touch [Begin config]. The current status of the system is rechecked and the The “System settings” screen is displayed. results are then confirmed. To cancel confirmation of the configuration, touch [Cancel]. Touch [Check configuration]. The “Check configuration” screen is displayed. Touch [Check configuration]. Confirmation of the configuration starts. If there are changes to the configuration of the air conditioning system after confirming the configuration, the message “Config. has been chngd. Confirm configuration?”... -
Page 18: Basic Settings On The Indoor Unit
Basic settings on the indoor unit Set details about indoor units (indoor unit addresses, groups belonged to, etc.). Touch [System Settings] in “Settings”. Touch [Setng]. The “System settings” screen is displayed. The “Edit unit settings” dialogue is displayed. Touch [I/D unit settings]. Change the settings. - Page 19 Put a check mark in the “Register” Item Explanation CNTR addr. Set the central addresses (1 to 64). column. Touch the text box and enter with the touchscreen numeric keypad. Select the indoor units you want to manage. This procedure is not necessary if central addresses have Note been automatically set. (→ “Automatically setting central y The central address is shared with other...
- Page 20 Basic settings on the indoor unit Automatically setting central addresses Put a check mark in the “Register” column. Select the indoor units you want to manage. Touch [CNTR adr AutSet]. Note y The central address is shared with other centralised controllers (system controllers, etc.).
-
Page 21: Changing The Name Of The Area Group
Changing the name of the area group Edit the name of the area group. Touch [System Settings] in “Settings”. Touch [Setng]. The “System settings” screen is displayed. The “Edit area group settgs” dialogue is displayed. Touch [Area group name settings]. Change the settings. - Page 22 Changing the name of the area group Touch [Register]. The “Edit area group settgs” dialogue closes. To cancel the settings, touch [Cancel]. Put a check mark in the “Valid” column. Put a check mark in the area group to use. Touch [Register].
-
Page 23: Changing The Name Of The Distribution Group
Changing the name of the distribution group Edit the name of the distribution group. Touch [System Settings] in “Settings”. Touch [Setng]. The “System settings” screen is displayed. The “Edit distribution group sttngs” dialogue is displayed. Touch [Distribution group settings]. Change the settings. The “Distribution group settings”... - Page 24 Changing the name of the distribution group Touch [Register]. Touch [Register]. The “Edit distribution group sttngs” dialogue closes. To cancel the settings, touch [Cancel]. To cancel the settings, touch [Cancel]. Put a check mark in the “Valid” column. Put a check mark in the distribution group to use in distribution calculations.
-
Page 25: Basic Settings For The Pulse Meter
Basic settings for the pulse meter Make allocations between pulse meters and distribution groups. Touch [System Settings] in “Settings”. Touch [Setng]. The “System settings” screen is displayed. The “Edit pulse meter sttgs” dialogue is displayed. Touch [Pulse meter settings]. Change the settings. The “Pulse meter settings”... - Page 26 Basic settings for the pulse meter Item Explanation Touch [Register]. Distrib. Grp. Configure a distribution group to be measured. The “Distrib. Grp.” dialogue is displayed when To cancel the settings, touch [Cancel]. you touch this. Select the distribution group to be measured and touch [Select]. Touch [Register]. The “Edit pulse meter sttgs”...
-
Page 27: Set The Distribution Mode
Set the distribution mode Set the mode used for distributing when calculating charges. There are two methods for distribution. Time distribution: This method calculates distribution ratios based on the operating times of the indoor units (thermostat ON cumulative time and thermostat OFF cumulative time). Load distribution: This method calculates distribution ratios based on the electricity/gas usage (including standby power) of the indoor units and outdoor units. -
Page 28: Basic Settings For Distribution Calculation
Basic settings for distribution calculation Set specified days, cut-off days, particular time slots (regular hour ranges) and days of the week for calculating distributions. Touch [System Settings] in “Settings”. Change the settings. The “System settings” screen is displayed. Item Explanation SpecifiedDay- Set specified days (days where the whole day Calendar... - Page 29 Registering specified days Registering cut-off days Touch the date for the specified day. Touch to select the registered month. Touch [CMth] to Touch to move the days forward, touch return to the current month. move the days back. The colour of the date column changes when you touch this.
- Page 30 Basic settings for distribution calculation Set the target time slots for distribution calculation Touch [RglrHourRnge stngs]. Touch [Set]. The “Regular hour range settings” dialogue is displayed. The set time is displayed in the cell. To delete the set time slot, select the time slot to delete and touch [Clear].
- Page 31 No puede utilizarse encriptación (con software de seguridad) etc. y Panasonic n’est en aucun cas responsable des données perdues. y Panasonic no acepta ninguna responsabilidad por cualquier pérdida de datos. *1: Le nombre maximum d’unités connectables est indiqué ci-dessous.
- Page 32 Panasonic übernimmt keinerlei Haftung für Datenverluste irgendwelcher Art. sicurezza) o funzioni analoghe. y Panasonic non accetta alcuna responsabilità per l'eventuale perdita di dati. *1: Insgesamt an diese Bedieneinheit anschließbare Anzahl von Geräten: y An die Bedieneinheit alleine: Innengeräte: 128, Außengeräte: 60 *1: Il numero massimo di unità...
- Page 33 Encriptação (com o software de segurança) etc., não pode ser utilizada. gegevens. y A Panasonic não se responsabiliza por quaisquer perdas de dados. *1: Het maximum aantal aansluitbare eenheden wordt hieronder weergegeven. *1: O número máximo de unidades conectáveis é mostrado abaixo.
- Page 34 Oryginalnym tekstem instrukcji jest język angielski. Tekst w innych językach jest przekładem tekstu oryginalnego. Teknik Özellikler Dane techniczne Model Numarası: CZ-256ESMC3 Nr modelu: CZ-256ESMC3 Boyutlar [Y × G × D]: 240 × 280 × (20 + 65) mm Wymiary (wys.× szer.× gł): 240 × 280 × (20 + 65) mm Ağırlık: 2.7 kg Masa: 2,7 kg Sıcaklık/Nem aralığı:...
- Page 35 языки являются переводом оригинальной инструкции. перекладами з мови оригіналу. Характеристики Технічні характеристики Номер модели: CZ-256ESMC3 № моделі: CZ-256ESMC3 Габариты [В × Ш × Г ]: 240 × 280 × (20 + 65) mm Розміри [В × Ш × Г]: 240 × 280 × (20 + 65) mm Вес: 2,7 kg...
- Page 36 FITNESS FOR A PARTICULAR PURPOSE. Please refer to the detailed terms and conditions thereof shown in the attached License List (License List Disc). At least three (3) years from delivery of this product, Panasonic will give to any third party who contacts us at the contact information provided below, for a charge no more than our cost of physically performing source code distribution, a complete machine-readable copy of the corresponding source code covered under GPL V2.0, LGPL V2.1 or the...