
Related Manuals for Motorola TLK 150


Summary of Contents for Motorola TLK 150
- Page 1 TLK 150 User Guide JANUARY 2020 *MN006371A01* MN006371A01-AA © 2020 Motorola Solutions, Inc. All rights reserved...
-
Page 2: Table Of Contents
MN006371A01-AA Contents Contents Chapter 1: Read Me First....................5 1.1 Notice to Users........................5 1.2 Notations Used in This Manual....................5 1.3 Software Version........................5 Chapter 2: Radio Care....................6 Chapter 3: Radio Overview..................7 Chapter 4: Getting Started..................8 4.1 Installing the SIM Card......................8 4.2 Turning the Radio On or Off.................... - Page 3 14.3 Exiting Emergency Mode.....................27 Chapter 15: Area Talkgroup..................29 Chapter 16: Ambient Listening................30 Chapter 17: Authorized Accessories List............... 31 Limited Warranty.......................33 MOTOROLA SOLUTIONS COMMUNICATION PRODUCTS............. 33 I. WHAT THIS WARRANTY COVERS AND FOR HOW LONG:..........33 II. GENERAL PROVISIONS......................33...
- Page 4 MN006371A01-AA Contents III. STATE LAW RIGHTS:......................33 IV. HOW TO GET WARRANTY SERVICE..................34 V. WHAT THIS WARRANTY DOES NOT COVER..............34 VI. PATENT AND SOFTWARE PROVISIONS................34 VII. GOVERNING LAW........................35 Legal and Compliance Statements................36 Disclaimer............................ 36 Computer Software Copyrights....................36 Copyrights and Trademarks......................36 Important Safety Information.......................
-
Page 5: Chapter 1: Read Me First
This device must accept any interference received, including interference that may cause undesired operation. CAUTION: Changes or modifications made to this device, not expressly approved by Motorola Solutions, could void the authority of the user to operate this equipment. Notations Used in This Manual Throughout the text in this publication, you notice the use of Warning, Caution, and Notice. -
Page 6: Chapter 2: Radio Care
MN006371A01-AA Chapter 2: Radio Care Chapter 2 Radio Care This section describes the basic handling precaution of the radio. Table 1: IP Specification IP Specification Description IP54 Allows your radio to withstand adverse field conditions such as being ex- posed to water or dust. CAUTION: Do not disassemble your radio. -
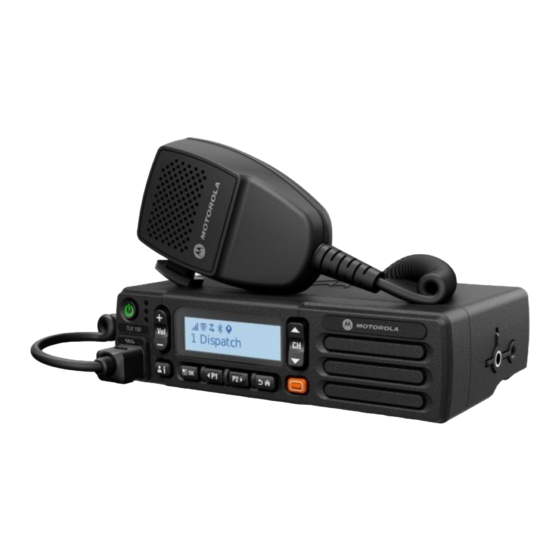
Page 7: Chapter 3: Radio Overview
MN006371A01-AA Radio Overview Chapter 3 Radio Overview This chapter explains the overview of your radio. Buttons Descriptions Power button Turn the radio on and off. Volume Up button Increase the volume level. Volume Down button Decrease the volume level. Channel button Scroll to next channel/talkgroup in the list. -
Page 8: Chapter 4: Getting Started
MN006371A01-AA Chapter 4: Getting Started Chapter 4 Getting Started This chapter provides instructions to prepare your radio for use. Installing the SIM Card Procedure: 1 Locate the SIM card tray on the rear of the radio. 2 Unscrew the SIM card tray and pull out the tray. 3 Place the SIM card on the slot of the tray and push the tray back to the radio. -
Page 9: Adjusting The Volume
MN006371A01-AA Chapter 4: Getting Started Adjusting the Volume Procedure: • Perform one of the following actions: To increase or decrease the volume of the radio, press the Volume button. To mute the radio, long press the Volume Down bottom until the display shows x. -
Page 10: Chapter 5: Status Indicators
MN006371A01-AA Chapter 5: Status Indicators Chapter 5 Status Indicators This chapter explains the Icons and LED indicators used in the radio. Display Icons Your radio shows the radio status, text entries, and menu entries. The following icons appear on the status bar at the top of the radio display. The icons are arranged left most in order of appearance or usage, and are channel-specific. -
Page 11: Led Indications
MN006371A01-AA Chapter 5: Status Indicators LED Indications The LED Indicator shows the operational status of your radio. Table 3: LED Indications Indication Operational Mode Solid green • Radio is powering on • Radio is transmitting • Instant Personal Alert Tx •... -
Page 12: Chapter 6: Selecting Talkgroup
MN006371A01-AA Chapter 6: Selecting Talkgroup Chapter 6 Selecting Talkgroup Procedure: • Press the Channel button. If selecting talkgroup is successfully, your radio switches to your preferred talkgroup. If selecting talkgroup is unsuccessful, your radio plays a negative indicator tone sound. -
Page 13: Chapter 7: Calls
MN006371A01-AA Calls Chapter 7 Calls There are several ways that you can make a call with your radio depending on the types of calls and system available on your radio. When a call is interrupted, you hear a continuous Talk Prohibit Tone. Releasing the PTT button allows you to receive the call. - Page 14 MN006371A01-AA Chapter 7: Calls • Your radio unmutes and the incoming call sounds through the speaker. • The display shows the subscriber ID and call status. NOTICE: For Broadcast Call, user is not allowerd to Talkback. The display shows Talkback Prohibit and Talkback Prohibit tone sounds when PTT button is pressed.
-
Page 15: Chapter 8: Supervisory Override
MN006371A01-AA Supervisory Override Chapter 8 Supervisory Override Supervisory Override allows a supervisor to interrupt during an ongoing Group or Private Call and immediately start a supervisory call. If the user is receiving or transmitting a Group Call or Private Call and the server is interrupted by a supervisory call, your radio unmutes to the supervisory call and display the alias of the supervisor. -
Page 16: Chapter 9: Checking Radio Information
MN006371A01-AA Chapter 9: Checking Radio Information Chapter 9 Checking Radio Information Prerequisites: Turn on your radio. Procedure: 1 To check the radio information, long press the Contact/Info button. 2 To scroll through the list, pressP1 and P2 button. Your radio displays the following radio information depending the configuration set by the dealer. Contact your dealer for more information. -
Page 17: Chapter 10: Bluetooth
2.5 mW (4 dBm) at the 10 m range. This is an unobstructed path between your radio and your BT-enabled device. For high degree of reliability, Motorola Solutions recommends to not seperate the radio and the BT-enabled device. -
Page 18: Clearing Bluetooth Pairing
MN006371A01-AA Chapter 10: Bluetooth If your radio is connected to the BT device, your radio shows Connected and sounds voice announcement. If your BT device is disconnected from your radio, your radio sounds a tone and attempt to reconnect to the same BT device within a reconnect Time Out. 10.3 Clearing Bluetooth Pairing Procedure:... -
Page 19: Chapter 11: Contact List
MN006371A01-AA Contact List Chapter 11 Contact List Contact List provides an address book capabilities on your radio. Each entry corresponds to an alias or ID that you use to initiate a call. The entries are alphabetically sorted. A contact name shall be no more than 30 alphanumeric characters. If the contact has set their status to Do Not Disturb (DND), the contact will then be hidden from the contact list. -
Page 20: Chapter 12: Menu
MN006371A01-AA Chapter 12: Menu Chapter 12 Menu You are able to access the menu through the Menu/OK button. The following are the available features in the Menu. Table 5: List of Features Feature Description All Alert Tone Allows you to enable and disable All Alert Tone. Display Brightness Allows you to adjust the display brightness on your radio. -
Page 21: Turning The All Alert Tones Off
MN006371A01-AA Chapter 12: Menu Turning the All Alert Tones Off Procedure: • From the menu, to disable alert tones, select All Alert Tones → x. All Alert Tones is off and the Voice Announcement sounds. 12.2 Adjusting Display Brightness Procedure: 1 From the menu, select Brightness. -
Page 22: Turning The Dnd Off
MN006371A01-AA Chapter 12: Menu Turning the DND Off Procedure: • From the menu, to disable DND, select DND → x. If DND is off, Voice Announcement sounds. 12.5 Turning the Scan On or Off Turning the Scan On Procedure: • From the menu, to enable scan, select Scan →... -
Page 23: Turning The Wi-Fi On Or Off
MN006371A01-AA Chapter 12: Menu 12.7 Turning the Wi-Fi On or Off Turning the Wi-Fi On Procedure: • From the menu, to enable Wi-Fi, select Wi-Fi → Wi-Fi is on and the Voice Announcement sounds. Turning the Wi-Fi Off Procedure: • From the menu, to disable Wi-Fi, select Wi-Fi →... -
Page 24: Chapter 13: Instant Personal Alert
MN006371A01-AA Chapter 13: Instant Personal Alert Chapter 13 Instant Personal Alert Instant Personal Alert (IPA) is a callback request notification that you can only be sent or receive in your contact list. The IPA are stored in the IPA Status List to allow you to view and to reply in a later time. When multiple IPAs are received, the latest IPA will appear at the top of the list. -
Page 25: Clearing Ipa Status List
MN006371A01-AA Chapter 13: Instant Personal Alert 13.4 Clearing IPA Status List Procedure: • Perform one of the following actions: From the contact list or IPA list, press and hold the PTT button on the contact that you want to clear. In the IPA Status List, press and hold the Menu/OK button on the contact that you want to clear. -
Page 26: Chapter 14: Emergency Operation
MN006371A01-AA Chapter 14: Emergency Operation Chapter 14 Emergency Operation An Emergency Alarm is used to indicate a critical situation. You are able to initiate an Emergency at any time even when there is activity on the current channel. NOTICE: One channel supports only one Emergency mode. Your radio supports the following Emergency modes: Table 6: Emergency Modes Emergency Mode... -
Page 27: Sending Emergency
MN006371A01-AA Chapter 14: Emergency Operation 14.1 Sending Emergency Depending on how your radio is programmed, you can send the following Emergency. Sending Emergency Alarms Procedure: Press the programmed Emergency On button. If the alarm is sent successfully, your radio shows the following indications: •... - Page 28 MN006371A01-AA Chapter 14: Emergency Operation • All retries to send the alarm have been exhausted. Procedure: 1 To manually exit emergency mode, perform one of the following actions: • Long press the programmable Emergency Off button. • Turn off your radio. NOTICE: When your radio is powered off, it exits the emergency mode.
-
Page 29: Chapter 15: Area Talkgroup
MN006371A01-AA Area Talkgroup Chapter 15 Area Talkgroup When you enter a georgraphic area, you are able to view and hear the notifications for the talkgroup area in that geofence. The Area Talkgroup is added to the Area Talkgroup List in alpabertical order. Once you are added to the Area Talkgroup list, you can receive group call even if your talkgroup scanning is off. -
Page 30: Chapter 16: Ambient Listening
MN006371A01-AA Chapter 16: Ambient Listening Chapter 16 Ambient Listening This feature allows the authorized user to listen to the ambient audio of a specific radio during idle mode. When an authorized user starts ambient listening on a specific radio, the radio plays a tone, displays the ambient listening icon and the alias of the authorized user. -
Page 31: Chapter 17: Authorized Accessories List
MN006371A01-AA Authorized Accessories List Chapter 17 Authorized Accessories List Table 7: Audio Part Number Description AC000240A01 Wideband External Speaker GMMN4065 Visor Microphone (Omni-Direction) PMMN4127_ Wideband Compact Microphone PMMN4129_ Bluetooth RSM Table 8: Antenna Part Number Description AN000359A01 GNSS Dash Mount Antenna AN000358A01 LTE Antenna Table 9: Cables... - Page 32 MN006371A01-AA Chapter 17: Authorized Accessories List Part Number Description PMLN5620_ Connector Extender (20 pieces) RLN4836AR External PTT with Emergency Footswitch RLN4856_ Remote Mount Footswitch PTT RLN4857_ Push Button with Remote PTT...
-
Page 33: Limited Warranty
Motorola Solutions cannot be responsible in any way for any ancillary equipment not furnished by Motorola Solutions which is attached to or used in connection with the Product, or for operation of the Product with any ancillary equipment, and all such equipment is expressly excluded from this warranty. -
Page 34: Iv. How To Get Warranty Service
1 Motorola Solutions will be notified promptly in writing by such purchaser of any notice of such claim, 2 Motorola Solutions will have sole control of the defense of such suit and all negotiations for its... -
Page 35: Vii. Governing Law
MN006371A01-AA Limited Warranty 3 Should the Product or parts become, or in Motorola Solutions opinion be likely to become, the subject of a claim of infringement of a United States patent, that such purchaser will permit Motorola Solutions, at its option and expense, either to procure for such purchaser the right to continue using the Product or parts or to replace or modify the same so that it becomes non-infringing or to grant such purchaser a credit for the Product or parts as depreciated and accept its return. -
Page 36: Legal And Compliance Statements
Accordingly, any copyrighted Motorola Solutions computer programs contained in the Motorola Solutions products described in this manual may not be copied, reproduced, modified, reverse-engineered, or distributed in any manner without the express written permission of Motorola Solutions. -
Page 37: Important Safety Information
5.2 GHz High Power Data Communication System base Station or Relay Station. For a list of Motorola Solutions-approved antennas and other accessories, visit the following website: http://www.motorolasolutions.com Any modification to this device, not expressly authorized by Motorola Solutions, may void the user's authority to operate this device.