Table of Contents
Advertisement
SWITCHER PROCESSOR PACK
MVS-8000X-C
MVS-7000X-C
MULTI FORMAT SWITCHER PROCESSOR
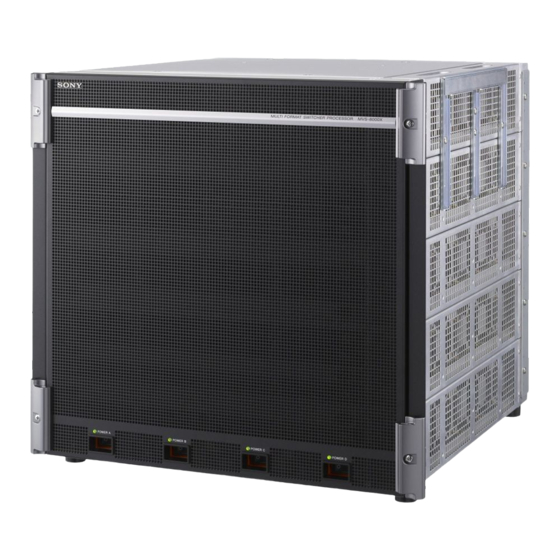
MVS-8000X
MVS-7000X
HK-PSU05
MKS-7171X
MKS-7471X
MKS-8170X
MKS-8440X
BZS-7200X
BZS-7510X
BZS-7540X
BZS-7561X
BZS-8560X
INSTALLATION MANUAL
1st Edition (Revised 2)
MKS-7210X
MKS-8110X
MKS-8180X
MKS-8450X
BZS-7420X
BZS-7520X
BZS-7541X
BZS-8200X
MKS-7470X
MKS-8160X
MKS-8210X
BZS-7500X
BZS-7530X
BZS-7560X
BZS-8420X
Advertisement
Table of Contents

Related Manuals for Sony MVS-8000X-C


Summary of Contents for Sony MVS-8000X-C
- Page 1 SWITCHER PROCESSOR PACK MVS-8000X-C MVS-7000X-C MULTI FORMAT SWITCHER PROCESSOR MVS-8000X MVS-7000X HK-PSU05 MKS-7171X MKS-7210X MKS-7470X MKS-7471X MKS-8110X MKS-8160X MKS-8170X MKS-8180X MKS-8210X MKS-8440X MKS-8450X BZS-7200X BZS-7420X BZS-7500X BZS-7510X BZS-7520X BZS-7530X BZS-7540X BZS-7541X BZS-7560X BZS-7561X BZS-8200X BZS-8420X BZS-8560X INSTALLATION MANUAL 1st Edition (Revised 2)
- Page 2 ! 警告 このマニュアルは,サービス専用です。 お客様が,このマニュアルに記載された設置や保守,点検,修理などを行うと感電や火災, 人身事故につながることがあります。 危険をさけるため,サービストレーニングを受けた技術者のみご使用ください。 ! WARNING This manual is intended for qualifi ed service personnel only. To reduce the risk of electric shock, fi re or injury, do not perform any servicing other than that contained in the operating instructions unless you are qualifi ed to do so. Refer all servicing to qualifi...
- Page 3 Attention-when the product is installed in Rack: For kundene I Norge 1. Prevention against overloading of branch circuit Dette utstyret kan kobles til et IT-strømfordelingssystem. When this product is installed in a rack and is supplied power from an outlet on the rack, please make sure FORSIKTIG that the rack does not overload the supply circuit.
-
Page 5: Table Of Contents
Table of Contents Manual Structure Purpose of this manual ..............2 Related manuals ................2 Contents ..................2 1. Installation 1-1. Operating Environment ........... 1-1 1-2. Power Supply ..............1-1 1-2-1. Power Specifi cations ..........1-1 1-2-2. Recommended Power Cord ........1-2 1-3. -
Page 6: Manual Structure
This manual describes the information that is required to connect the MVS-8000X/ MVS-7000X/MVE-9000/MKS-8700/CCP-8000 to the MVS-8000 system, and to start up the system. If this manual is required, please contact your local Sony Sales Offi ce/Service Cen- ter. . Maintenance Manual (Available on request) This manual describes the detailed service information. -
Page 7: Installation
Section 1 Installation 1-1. Operating Environment 1-2. Power Supply +5 dC to +40 dC Operating guaranteed temperature : 1-2-1. Power Specifi cations Performance guaranteed temperature : +10 dC to +35 dC Operating humidity : 10 % to 90 % A switching regulator is used for the power supply of this (relative humidity) unit. -
Page 8: Recommended Power Cord
Connector/Plug conforming to the proper ratings (Volt- age, Ampere). If you have questions on the use of the above Power Cord/ Appliance Connector/Plug, please contact your local Sony Sales Offi ce/Service Center. . Never use an injured power cord. . Plugging the power cord in the AC inlet, push as far as it will go. -
Page 9: Installation Space (External Dimensions)
1-3. Installation Space (External dimensions) 1-3-1. MVS-8000X 129.5 115.5 115.5 410.8 45.2 420.4 Unit : mm MVS-8000X/7000X... -
Page 10: Mvs-7000X
1-3-2. MVS-7000X 410.8 129.5 115.5 115.5 45.2 420.4 Unit: mm MVS-8000X/7000X... -
Page 11: Installing The Options
1-4. Installing the Options MVS-7000X Option List The MVS-8000X-C/MVS-7000X-C is shipped from the Name of option Board confi guration factory with the necessary option boards (refer to the Plug-in board Connector following table) already installed in accordance with the (Front) board (Rear) specifi... -
Page 12: Installing The Plug-In Boards
1-4-1. Installing the Plug-in Boards Installation Procedure 1. Turn off the main power of this unit (MVS-8000X) and disconnect the AC power cord from the wall outlet. 2. Loosen the four screws (with drop-safe) and remove Be sure to turn off the POWER switch before starting the front panel to the arrow. - Page 13 4. While the eject levers are opened as shown in the illus- MVS-8000X Option List tration, insert the plug-in board into the board guide rail. Name of option Name of board Slot on the front side MKS-8160X OUT-35A board While the eject levers are opened as shown in the illus- MKS-8170X XPT-32 board tration, insert the plug-in board into the board guide rail.
-
Page 14: Installing The Connector Board
5. Close the both eject levers at a time, when the eject 1-4-2. Installing the Connector Board lever claws reach the A position (1). And push the eject levers (2) until the unlock buttons Service Tool pop out. Lever unlock jig : Part No. 4-193-124-01 This figure shows MVS-8000X 1. - Page 15 2. While the rear levers are opened, remove the blank panel. 4. Push the rear levers inward until a click sound is made and they are locked. . Store the removed blank panel in a safe place. This figure shows MVS-8000X .
-
Page 16: Installing The Hk-Psu05
1-4-3. Installing the HK-PSU05 4. Push the unlock button, and open the eject lever. 5. Insert the HU-PSU05 into the slot, and push until the eject lever claws catch the chassis. The HK-PSU05 is used after it is installed in the MVS- 8000X or the MVS-7000X. -
Page 17: Rack Mounting
1-5. Rack Mounting Rack Mounting Procedure The MVS-8000X/MVS-7000X is mounted in the 19-inch 1. Loosen the four screws (+B4 x 8) and remove the four standard rack. feet. Precautions for Rack Mounting . To prevent the rack from falling or moving, fi x the rack on a fl... - Page 18 Attach the bracket to the support angle by inserting the 8. Align the groove of the rack tool at the side of the specifi ed four screws and loosely tightening. equipment with the rail, and slide the equipment to the 5.
-
Page 19: Mvs-7000X
1-5-2. MVS-7000X Rack Mounting Procedure 1. Loosen the four screws (+B4 x 8) and remove the four To mount the MVS-7000X in the rack, use the specifi ed feet. rack mount kit and follow the procedure described below. Specifi ed rack mount kit: RMM-10 If other than the specifi... - Page 20 6. Tighten the screws (B4 x 6: two screws each on the 4. Loosen the screws on the rear of the right and left adapters and adjust the length of the adapter according right and left) for adjusting the length of the adapter to the depth of the rack.
-
Page 21: Matching Connectors
Use the following connectors, cables or equivalents when connecting cables to the unit. Model name Panel indication Connector name Matching connector and cable Name Sony part No. MKS-8160X OUTPUTS 25 to 44 BNC, 75 Ω Belden 1694 coaxial cable MKS-8170X... -
Page 22: Mvs-7000X
Use the following connectors, cables or equivalents when connecting cables to the unit. Model name Panel indication Connector name Matching connector and cable Name Sony part No. MKS-8160X OUTPUTS 25 to 44 BNC, 75 Ω Belden 1694 coaxial cable MKS-7171X... -
Page 23: Input/Output Signals Of Connectors
1-7. Input/Output Signals of Connectors A and B of the same number constitute a pair of relay contacts. The input/output signals of the connectors at the rear panel are as follows. (*1) <Relay> GPI OUT x B GPI 1, 2 : (D-sub 25-pin, Female) GPI OUT x A * GPI 2 is not supported... - Page 24 REMOTE 1 to 4 : RS-422A (D-sub 9-pin, Female) FM DEVICE 1, 2 : USB Type A (4-pin) (*5) <DEVICE> from External Devices (*3) (External view) (External view) Pin No. Signal Name Function Pin No. Signal Name Function VBUS USB Vcc Frame ground USB_ Transmitted data (_)
-
Page 25: Checks On Completion Of Installation
1-8. Checks on Completion of Installation 1-8-1. Description of On-board Switches and LEDs The number shown in the parentheses ( ) indicated the address on the circuit board. 1. CA-82 board D3604 SG-272 D3603 D3602 D3601 D200 D101 D100 S500 SIO-26 S300 D202... - Page 26 D203 (A-1) : 1.2 V-1 D402 (F-1) : CA RESET A +1.2 V-1 power supply status indication. The board reset status indication. Lights when the follow- Lights when the +1.2 V power is supplied. ing occurs. . When S401/S402 is pressed. .
- Page 27 D2201 to D2204 (E-8) : NEP1 STAT D2701 to D2703, D2802, D2901 to D2903, D3002 Internal status indication of external communication IC (A-2, B-2) : 1000 P0 to P7 (NEP1). Ethernet communication status indication for internal Blinks in order D2201 to D2203 when start up normally, communications.
- Page 28 D4101 to D4103 (D-2) : DB0 ETHER S2302 (J-7) : NEP2 SET Ethernet communication status indication for maintenance. Sets the start-up mode of NEP2. . D4101 (100) : Lights when linked by 100base- In the default settings when shipped from the factory, bit 8 is set to ON and others are set to OFF.
- Page 29 D13 (N-2) : GbE2 < LED on the SIO-26 board > Lights when linked Ethernet 2 on CPU-DP module. Not used on this board. D200 (A-3) : Communication error indication Lights when the communication error is occurred through D14 (N-2) : SGMII1 the Editor port or the Serial Tally port.
- Page 30 2. CA-82A board D3604 SG-272 D3603 D3602 D3601 D200 D101 D100 S500 SIO-26 S300 D202 D201 D200 D801 CPU-DP Module S901 S904 S902 S903 S501 S402 Side A (Component Side) < LED > D204 (A-1) : 3.3 V-1 +3.3 V-1 power supply status indication. Lights when the +3.3 V power is supplied.
- Page 31 D306 (B-1) : 2.5 V-1 D917 to D920 (P-1), ND901 (N-1), ND902 (P-1) : +2.5 V-1 power supply status indication. CPU STATUS Lights when the +2.5 V power is supplied. CPU software status indication. D308 (A-1) : 1.8 V D1101 (E-1) : REF EXT +1.8 V power supply status indication.
- Page 32 D3605 (B-1) : POWER S902 (G-1) : GROUP ID Power supply status indication. Sets the GROUP ID for connecting LAN. Do not change Lights in green when all power supply on the board are the setting. normally. If the power supply has abnormality, turns off. In the default settings when shipped from the factory, bit 1 is set to ON and others are set to OFF.
- Page 33 D12 (N-2) : GbE1 < LED on the SIO-26 board > Lights when linked Ethernet 1 on CPU-DP module. On this board, corresponds to Network A connection. D200 (A-3) : Communication error indication Lights when the communication error is occurred through D13 (N-2) : GbE2 the Editor port or the Serial Tally port.
- Page 34 3. MIX-53 Board D501 CPU-DP Module S902 Side A (Component Side) D705 D713 D716 D708 D702 D710 D301, D302, D303 (F-1) : +1.0 V-1, -2, -3 < LED > +1.0 V power supply status indication. Lights when the +1.0 V power is supplied. D719 (B-1) : POWER Power supply status indication.
- Page 35 D309 (C-1) : +3.3 V D1401 (E-1) : CAD2 +3.3 V power supply status indication. Indicates the confi guration error of the FPGA. Lights when the +3.3 V power is supplied. If this LED lit, the FPGA (IC21) can possibly be working incorrectly.
- Page 36 D1411 (E-1) : SDI3 Indicates the confi guration error of the FPGA. If this LED lit, the FPGA (IC4) can possibly be working incorrectly. D1412 (E-1) : SDI2 Indicates the confi guration error of the FPGA. If this LED lit, the FPGA (IC3) can possibly be working incorrectly.
- Page 37 4. OUT-35 Board D401 D402 D3108 D3508 D3102 D3502 D3505 D3105 S501 Side A (Component Side) D305 (C-1) : +1.8 V < LED > +1.8 V power supply status indication. D203 (C-1) : +12 V Lights when the +1.8 V power is supplied. +12 V power supply status indication.
- Page 38 D401 (B-8) : CC1_UNLOCK D2720 (D-1) : ALL_MGT_PWR All analog power supplies (+1.0 V to +1.2V) status indica- Indicates lock/unlock of the clock conditioner for OUT, MSD, CCR. tion. Lights when the all power (+1.0 V-AVCC1 to 8, +1.2 If this LED lit, the clock conditioner can possibly be V-APLL1 to 8, +1.2 V-AVTTR, C, L) are supplied.
- Page 39 5. OUT-35A Board D401 D402 S501 Side A (Component Side) D305 (C-1) : +1.8 V < LED > +1.8 V power supply status indication. D203 (C-1) : +12 V Lights when the +1.8 V power is supplied. +12 V power supply status indication. Lights when the +12 V power is supplied.
- Page 40 D401 (B-8) : CC1_UNLOCK D2720 (D-1) : ALL_MGT_PWR All analog power supplies (+1.0 V to +1.2V) status indica- Indicates lock/unlock of the clock conditioner for OUT, MSD, CCR. tion. Lights when the all power (+1.0 V-AVCC1 to 8, +1.2 If this LED lit, the clock conditioner can possibly be V-APLL1 to 8, +1.2 V-AVTTR, C, L) are supplied.
- Page 41 6. XPT-31, XPT-31A Boards CPU-DP Module S1102 D1301 D1302 S501 S701 D1101 D1110 D1118 Side A (Component Side) D1113 D1121 D1107 D1115 < LED > D1101 (E-1) : CONF ERR Indicates the confi guration error of the IC601. D203 (D-1) : 12 V If this LED lit, the IC601 can possibly be working incor- +12 V power supply status indication.
- Page 42 D1107 to D1122 (N-1, P-1) : CPU status LED CPU status indication. D1301 (M-1) : INET LINK Ethernet communication status indication for internal communications. Lights when linked. D1302 (M-1) : INET ACT Ethernet communication status indication for internal communications. Blinks when data receiving/transmitting. <...
- Page 43 7. XPT-32 Board D401 S602 Side A (Component Side) < LED > D305 (K-1) : 1.8 V +1.8 V power supply status indication. Lights when the +1.8 V power is supplied. D203 (J-1) : 12 V +12 V power supply status indication. Lights when the +12 V power is supplied.
- Page 44 D617 (E-1) : CONF ERR Indicates the confi guration error of the FPGA. If this LED lit, the IC401 or IC801 can possibly be work- ing incorrectly. D618 (C-1) : STATUS For future expansion. D619 (C-1) : BECON For future expansion. D620 (B-1) : POWER Power supply status indication.
- Page 45 8. FC-112 board DD206 Side A (Component Side) < LED > D307 (C-1) : +3.3 V +3.3 V power supply status indication. D802 (B-1) : POWER Lights when the +3.3 V power is supplied. Power supply status indication. Lights in green when all power supply on the board are D305, D306 (C-1) : +2.5 V-1, -2 normally.
- Page 46 D301, D302 (D-1) : +1.0 V-1, -2 D1304 (E-1) : SDI2 +1.0 V power supply status indication. Indicates the confi guration error of the FPGA. Lights when the +1.0 V power is supplied. If this LED lit, the FPGA (IC3) can possibly be working incorrectly.
- Page 47 9. MY-118 board D3616 D3608 D3619 D3611 D3613 D3605 Side A (Component Side) D504 (K-1) : +3.3 V < LED > +3.3 V power supply status indication. Lights when the +3.3 V power is supplied. D3602 (B-1) : POWER Power supply status indication. D503 (K-1) : +2.5 V Lights in green when all power supply on the board are +2.5 V power supply status indication.
- Page 48 D500 (L-1) : +1.0 V < LED on the CPU-DP Module > +1.0 V power supply status indication. Lights when the +1.0 V power is supplied. Refer to < LED on the CPU-DP Module > in “1. CA-82 board”. D3603 (G-1) : PLL UNLOCK Indicates lock/unlock of the PLL (Phase Locked Loop) in the FPGA.
- Page 49 10. DVP-53 Board CPU-DP Module Side A (Component Side) D705 D713 D716 D708 D702 D710 D301 (K-1) : +1.0 V < LED > +1.0 V power supply status indication. Lights when the +1.0 V power is supplied. D719 (B-1) : POWER Power supply status indication.
- Page 50 D308 (J-1) : +3.3 V D903 (L-1) : INET DME LINK +3.3 V power supply status indication. For test LED. Lights when the +3.3 V power is supplied. D904 (L-1) : INET DME ACT D407 (J-1) : +1.2 V For test LED. +1.2 V power supply status indication.
- Page 51 D1508 (K-1) : VMIX Indicates the confi guration error of the FPGA. If this LED lit, the FPGA (IC12) can possibly be working incorrectly. < Switch > S501 (G-1) : RST Reset the DVP board. Pressing this switch initializes the DVP board.
-
Page 52: System Connection
1-9. System Connection Confi gure the MVS-8000X series system connections referring to the connection example as shown below. 1. Connection example of the MVS-8000X system The following connection can also be made for the MVS-7000X system. Cable with BNC-type Audio Mixer connectors Cross cable MVS-8000X Multi Format Switcher... -
Page 53: Flow Of Video Signals
2. Flow of Video Signals The fi gure below shows the fl ow of video signals in a MVS-8000X system. The following fl ow of video signals also applies to the MVS-7000X system. Key signal Video signal Video input signal Video output signal AC power supply V K IN... -
Page 55: Service Overview
Section 2 Service Overview 2-1. Troubleshooting The main power of the MVS-8000X/MVS-7000X The monitor picture is not displayed correctly. cannot be turned on. (Indicator does not light green.) A picture is not displayed on the monitor screen even though the main power of the MVS-8000X/MVS-7000X The main power of the is turned on. -
Page 56: Cleaning
Cleaning of the fan every month is recommended. Contact (1) Remove the front panel. (Refer to Section 1-4-1.) your local Sony Sales Offi ce/Service Center for informa- (2) Remove the dust accumulated on the fi lter with a tion on cleaning the fan. - Page 57 (操作,保守等) と異なる目的で本マニュアルを使用する ことを禁止します。 The material contained in this manual consists of information that is the property of Sony Corporation. Sony Corporation expressly prohibits the duplication of any portion of this manual or the use thereof for any purpose other than the operation or maintenance of the equipment described in this manual without the express written permission of Sony Corporation.
- Page 58 MVS-7000X (SY) Printed in Japan Sony Corporation MVS-8000X (SY) E 2011. 5 08 4-189-509-03 ©2010...